Today I took a break from working on the Telecaster to do a spot of repair work. Just before we went on honeymoon the nut on my mandolin split quite dramatically, not to mention unexpectedly, mid-practice session. There was no prior warning, and I suspect that there was some internal weakness in the plastic nut fitted to the mandolin, which after 10 years of regular and extended practice sessions, finally failed.
The result was a complete split from the bottom of the g-string slot (no sniggering at the back) through the full thickness of the nut, as pictured below.
 Although it would only take a minute to glue the nut back together, I was concerned that any such repair would only be short term, and so I decided to make a replacement nut. This would also have the benefit of being an upgrade from plastic to unbleached bone (my nut material of choice).
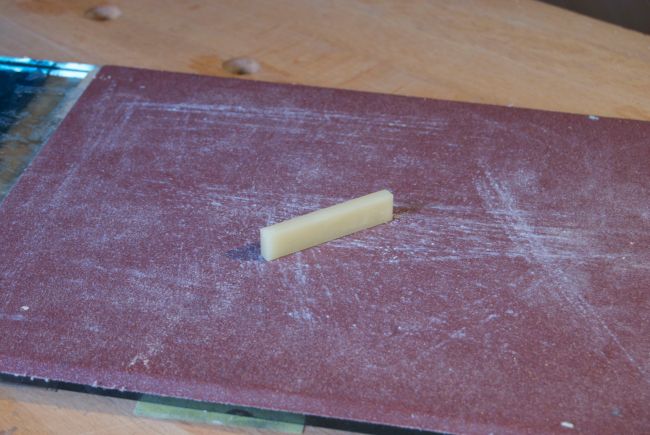
My bone blank was twice as long as needed, but before I trimmed it to length I ensured that the bottom of the nut (which makes contact with the nut slot in the neck) was perfectly flat, and square to the face which would fit against the end of the fretboard. To do this I sanded the base of the nut, and then the front face, on a sheet of 80 grit paper mounted on a sheet of 10mm thick float glass.
 Having sanded the nut, I then cut it to length, and then marked off the placement of the string slots on the top edge. Because I was happy with the string spacing on the old plastic nut, I used that as a template for the string locations, marking them in pencil before cutting guide slots using a 0.01″ nut saw.
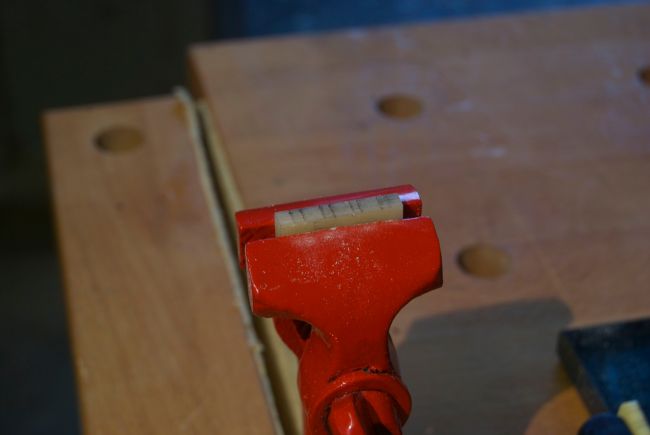 The slots were then widened using the appropriately gauged nut files, test fitting the nut a few times to check the string action was neither too high (which would lead to rapid fatigue when playing fast passages) or too low (which would result in fret buzz). As a rule, when cutting a nut slot I angle the slot so that it is lower at the back of the nut than the front. This has the benefit of ensuring that string intonation is determined by the front face of the nut, and that string buzz caused by the string rattling in the slot, is minimised.
Before the final fitting, I cleaned stray traces of glue and lacquer from the bottom of the mandolin’s nut slot with a 1mm chisel, and then lightly radiused the corners of the nut for playing comfort, using first 220 grit paper and then 1200 grit micro mesh.