For the first “getting to know” feature of 2016 I am very privileged to be able to interview good friend, and writer of the Daily Skep blog, James McConnell. There are some incredible woodwork blogs out there, but in the 9 months that the Daily Skep has been live it has rapidly become my favourite, thanks to the way in which James constantly relates the practical to his search for meaning behind the process, in an ongoing dialogue with himself as to what it means to create. Some days I read the Daily Skep and am inspired to create and write more myself, some days I read the Daily Skep and feel like such an amateur hack in comparison that it would be best if I never wrote again. But regardless of which response I feel, James’ writing never fails to be thought provoking and inspiring.
So without further ado, let’s get to know James McConnell.
James McConnell, writer and curator of the Daily Skep blog.
1. You have built guitar amps, refurbished guitars, even screen printed. Where does your drive to make originate? What is it about making that compels you?
I come from crafty and resourceful stock. My grandmother and my mother were both experts with a sewing machine. My grandfather was a journeyman electrician and my father worked in a print shop. I grew up in a home with my parents and one set of grandparents. We didn’t always have a lot of resources but there was always something being made around me and as early as I can remember I was a part of that.
I can recall with equal clarity my grandmother showing me traditional quilt patterns and my grandfather showing me how to solder and rebuild an electric motor. Creativity was always encouraged and I had plenty of room to explore.
As I mentioned, my father worked in a commercial print shop that made labels. If you own a vintage Black and Decker product that was still made in the United States you’ve seen his handiwork on the side. He didn’t run the presses or create the artwork, but he was the linchpin between the two as he transferred the artwork to the printing plates that went in the presses. He was like me in that he always wanted to know more about things and to understand the details of process.
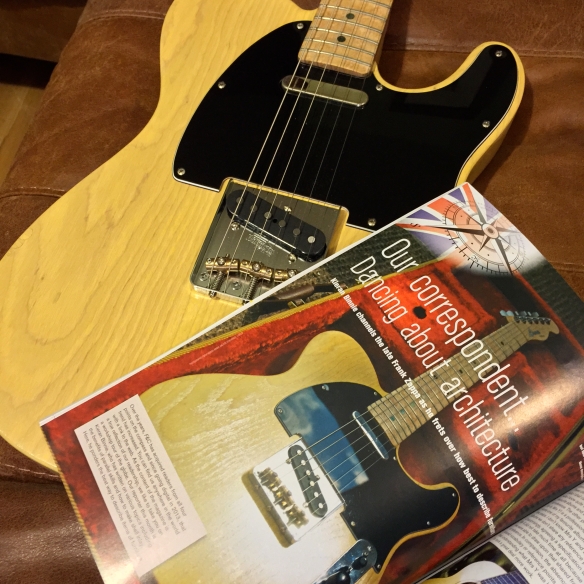
I guess I just get interested in the details of the things around me and how they came to be. I can still remember as a teenager having a conversation with my cousin Michael (@puisheen on Instagram) who is now somewhat of an expert on vintage Fender offset guitars (Jazzmasters, Jaguars, etc) about how hard it would be to build a telecaster. We talked back and forth about the things we didn’t understand and I can remember clearly saying something to the effect of “well, someone knows how to do it, so I guess it can be done!” That’s generally my attitude about the things in which I take an interest. The information is out there. The expertise is available. I just need to figure it out. I’ve since built two or three telecasters, a stratocaster, an SG and a Jazzmaster and probably a few more.
My hands are bored unless they’re making something. It’s just as natural to me as anything and I try to pass that along to my children as well by doing crafts and projects with them.
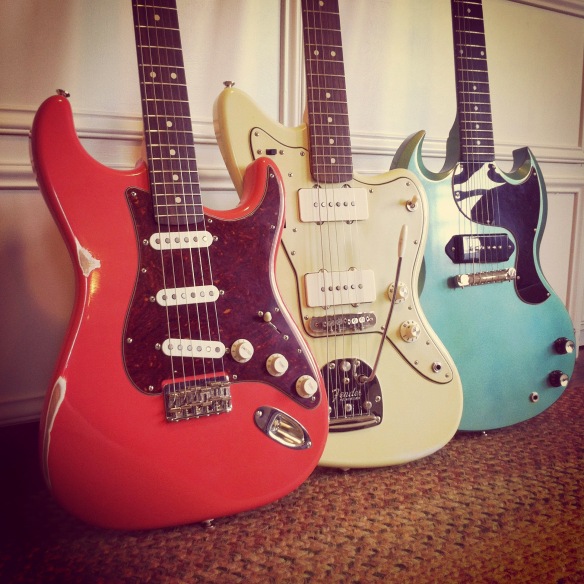
A selection of James’ guitar builds
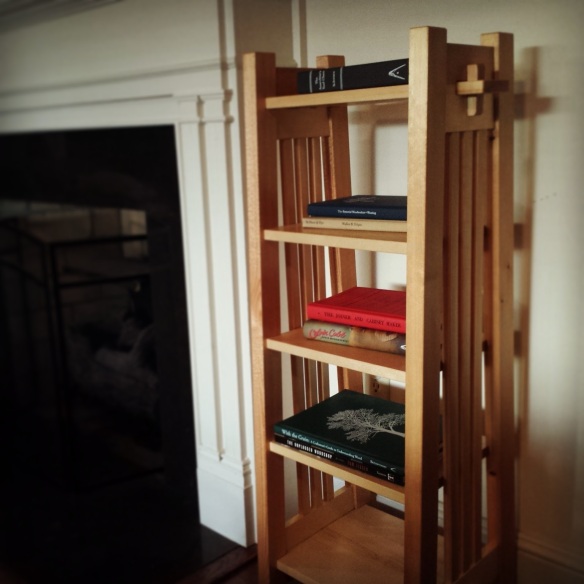
2. Your woodwork is currently hand tool only, but you’ve written about giving up your table saw and power tools. What prompted your transition to a pure hand tool practice?
I should add the caveat that it’s hand tool mostly. I still have a drill press and a rickety old bandsaw, but they see very limited use, and generally only when I need to work in a “production” mode. I have a few ancillary tools like a trim router that I use for specialized applications. There is also a cordless drill in my life, but that also rarely makes it to my bench.
I used to take a lot of trips to Appalachia to help rebuild homes for people, making them safer, warmer and drier. When I was doing that sort of work I always carried my table saw, circular saws, drills, etc in the back of the truck because they allowed me to do the work at hand. The goal for me there wasn’t personal fulfillment, but literally making sure someone’s roof didn’t leak or their foundation didn’t collapse, and getting that work done in a limited time frame. The tools were suited to the job.
That said, I gave up my table saw when I burned up the motor last year. I was dimensioning some stock and it just gave up the ghost. At that point some people would say to themselves, “well, I guess I need to go buy a better table saw” but I asked a different question: “did I need to go buy a better table saw at all?” I had just read The Anarchist’s Tool Chest and it had really challenged me to think about what kind of work I wanted to do and how I wanted to do it. Instead of dumping hundreds (or thousands) of dollars into a new table saw I placed a few strategic orders with Lee Valley and Lie Nielsen and I haven’t looked back.
I’m in the middle of building myself a proper hand tool workbench at the moment. That is the most rigorous work I’ve encountered in recent memory and 95% of that work has been done with hand tools. I haven’t once felt the need to pull out the circular saw and I think that is, at least in part, because I have changed my understanding of “why” I work with wood in the first place. I’m not a cabinet shop. I’m generally in no rush. My work doesn’t put food on the table. My goal presently is to understand the nature of wood and enjoy working with it. I find that a much more manageable goal without a screaming router or whirring table saw.
The other added benefit is that most of the time I am in the workshop, my daughters are also in there with me playing and “working” alongside me. This gives me the opportunity to be present with them in a way that machines precluded.
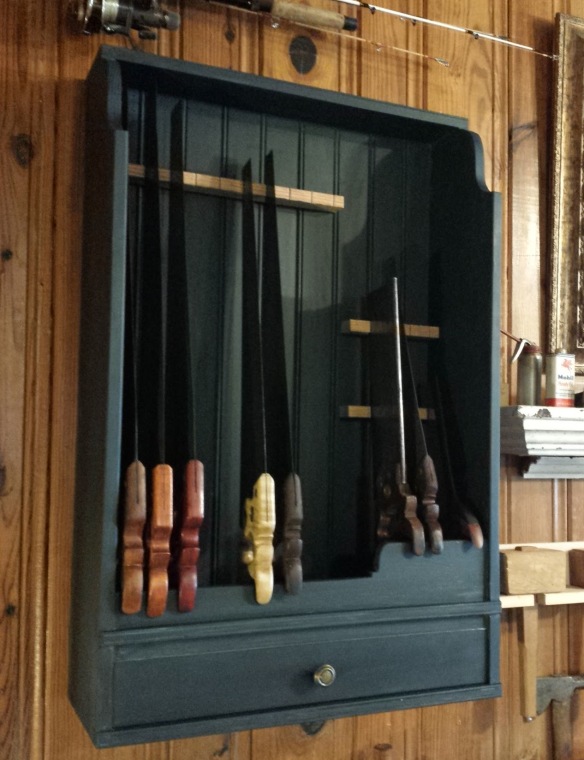
James’ recent saw till build.
3. On the Daily Skep you write as much about the “why” of building as the “how”. What is it about the ideas behind the processes that fascinates you?
The question of “how” is essential but pedestrian. With some amount of effort and a little inquisitiveness, anyone can learn how to do any given operation. The question of “why” is far more existential and compelling to me.
If you were to ask about me, for example “can he build a chair?” any number of people could look at my technical skill and answer that question. Same goes for “should” he build a chair, “how” does he build a chair, and any number of other interrogatives. They’re all external. The question “why,” on the other hand is deeply internal. Only the craftsperson can answer that question. “Why” would I build a chair? Perhaps it is because I appreciate the harmonic unity of a certain form and I want to explore that. Maybe I want to give it to someone as a gift, or maybe I simply prefer sitting elevated to sitting on the ground. Even in those answers there is always another question “why”?
The question of “how” leads to a different place than the question of “why.” Reductio ad absurdum, “how” leads to the industrial revolution; “why” leads to art.
To answer the question another way, let me tell you a story about the first time my father took me to his place of work and I finally saw what he did for a living. At his workstation, my father was a master of precision. He worked in thousandths of an inch. When computers were introduced into his work he worked in ten thousandths of an inch. His tools were magnifying glasses and super precise Starrett steel rules. As I watched him take the work handed to him by artists and transform it into the press plates that would print thousands of labels, I suddenly understood the importance of process. It became embedded in me that without his completely unheralded work, none of the other work would make sense. I saw “how” he did his work, but understanding “why” his work was important was revolutionary for me.
That’s the sort of question that interests me, and really the question that led me to hand tool work in the end. I have no particular feelings about “how” other people choose to work wood, but I choose “mostly” hand tools because it gets to the heart of “why” and allows me to be more intimately connected to the minutia of the process of creating.
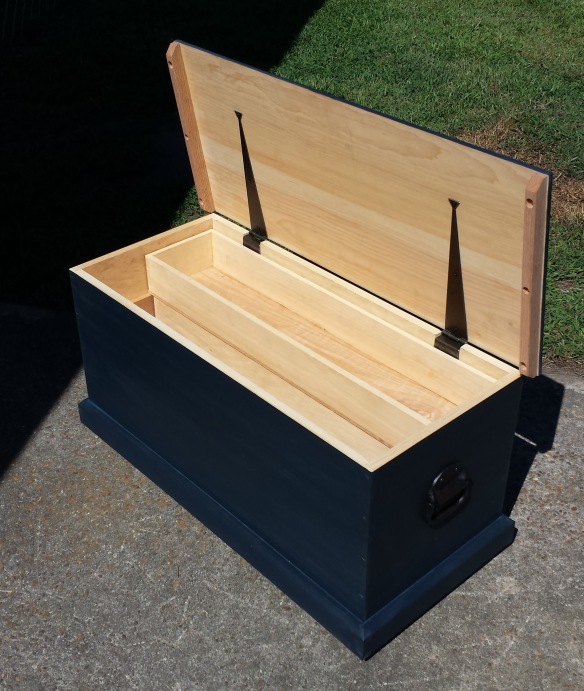
Baby Anarchist’s Tool Chest
4. You’ve written extensively about rehabilitating old tools, including making some quite bold adjustments to your Disston mitre saw. Do you view refurbishing old tools as matter of convenience, or is there a more ideological reason (for instance as a means to connect with previous generations of craftsmen)?
In my toolbox you will still find the very same WEN soldering gun my grandfather used daily at work. It still has his initials etched into it alongside his employee number 1026. By all accounts it is a fine tool. It was a tool he relied on to pay the bills and so it was the best he could afford. When I was deep into vacuum tubes (valves) and was building amplifiers I used that gun almost exclusively. There was perhaps an element of sentimentality about that, but for me, it was also the right tool for the job. It allowed me to work efficiently and accurately.
So, it’s sort of a mixed bag. One part sentimentality mixed with one part practicality. When I see a tool that is in need of rehabilitation I do think about the hands that have held it before, but I’m also eminently practical about the whole matter. I pass tools up all the time because sadly they’re past the point of saving. It’s a judgement call and there’s a lot of latitude there, but unless I pick up a tool and see that it can reasonably be put back to use, I walk on by. You can’t save them all.
All of my full size and panel saws are vintage Disstons, and each one has it’s place in my till because it serves a purpose. Everything from an aggressive 5 ppi D-20 to a much finer D-23. I’ve got a wonderful all around D-16 rip saw, and it’s counterpoint in a D-8 crosscut. Each one was brought back from the rust pile either by myself or by a local guy named Chris Black who has a knack for resurrecting those old beauties. Perhaps my favorite is an early Disston no.7 Panel sized saw that I restored last fall. I had to make a new handle for that one, but it was well worth the effort as it has easily become one of my favorite saws.
That’s the long way around to say that I could be sentimental about those saws, but in reality they serve a practical purpose. I believe in saving the best of the past and carrying it into the future.
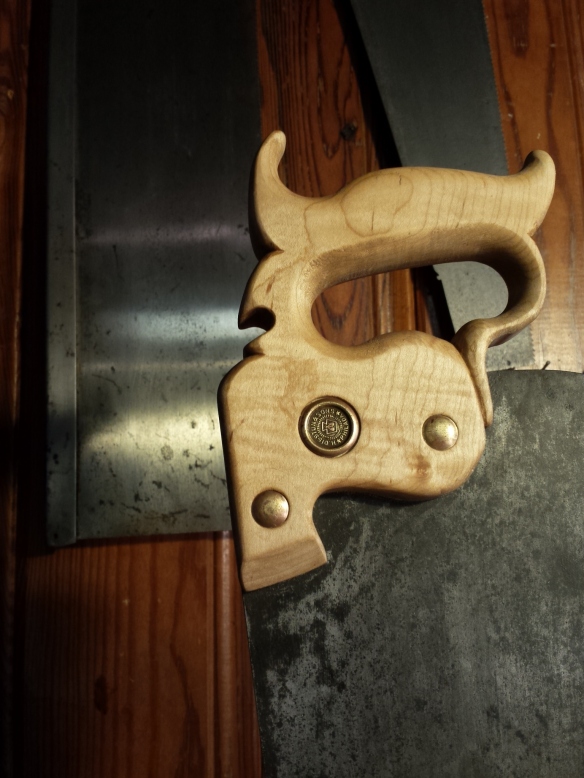
A rehandled saw, by James
5. Your original mission statement for the Daily Skep was for a community focused dialogue about handtool woodwork. You’re also a prominent member of the Instagram woodwork community. Tell me about your experience within the online woodwork community, what have been the benefits of community membership, and where do you see (or would like to see) the community going next?
Instagram is an interesting platform to me. People have criticized it for being a tool that people use to take “perfect” pictures that make their lives look better than they may be in reality. For me, Instagram isn’t about chronicling a “perfect” life, but about catching those “perfect” moments in what is otherwise sometimes a crazy, messy and chaotic existence. I very rarely stage pictures, but when I am working on something and the light just hits it in a certain way, or I walk by my bench and something catches my eye, Instagram is a great way of documenting that moment.
When I first stumbled across the online woodworking community it was actually through Instagram. One day I was randomly thumbing through photos and I came across one or two woodworking related pictures that really caught my attention. As more and more woodworking photos popped up in my feed I started to connect the dots between Instagram accounts maintained by people that I had seen doing instructional work on YouTube. From there I also stumbled across the blog kept by Anne Briggs Bohnett, and yours at Over the Wireless and things just started to connect. It wasn’t long before those connections became conversations and those conversations led to opportunities to connect even more.
I started The Daily Skep with that very vision, to be as you said, a place of community focused dialogue about the process and practice of hand tool woodworking. In the beginning it felt more like a monologue, but thankfully in the last few months that vision has finally started to materialize with lots of great comments and conversation with all sorts of readers. I would love to make it even more collaborative and feature guest bloggers and instruction as time goes on.
I seek that sort of collaboration because, for me, the primary benefit of the online woodworking community has been the interaction with others who are passionate about the same things I am. Woodworking, especially for amateurs, can sometimes be a very isolating pursuit. You tend to spend a lot of time on your own. The online woodworking community offers an alternative to that isolation insofar as it represents a shared story with all sorts of people you would never expect and it is full of challenge and encouragement and surprise. Everyday as I thumb through my Instagram feed I am blown away by the talent, creativity and courage that I see and when I read through the blogs I keep up with I learn more than I ever could have on my own. Wherever the community goes next, I hope that those qualities remain central to whatever it becomes.

6. And finally, you worked as content editor on the first edition of Mortise & Tenon magazine. Tell me how you got involved in that publication.Do you have more woodwork editing lined up (and if not, are you looking for more editing work)?
Content editing entails working with the raw transcriptions to bring them into shape and working alongside authors to revise, review and re-write articles. My work was concerned primarily with questions of flow and coherency and helping to develop the early work into what you will read in the magazine. It’s slightly more process oriented work, but any publication of this nature really requires a team of editors (and many readings) to bring out the best in the work.
The way I got involved in the first place was really just a story of being in the right place at the right time with the right set of skills. In undergrad I was on the senior editorial staff of our campus newspaper for three years and I had other experience as a writing tutor. I had mentioned that to Joshua in passing during in conversation, but honestly I didn’t think much more about it until he contacted me about coming on board with M&T. I edited one interview as an example of my work, and from there we hit it off famously. There were a lot of late nights and early mornings involved, but I truly believe the work will speak for itself. It was a pleasure and an honor working with Joshua and Megan, and I’m looking forward to getting started on the next issue.
Other than that I don’t currently have anything else lined up in terms of editing, but I am always available for freelance work and would be happy for the opportunity if something else came along.