Back to the Boot Bench… Part 5

_DPP7293

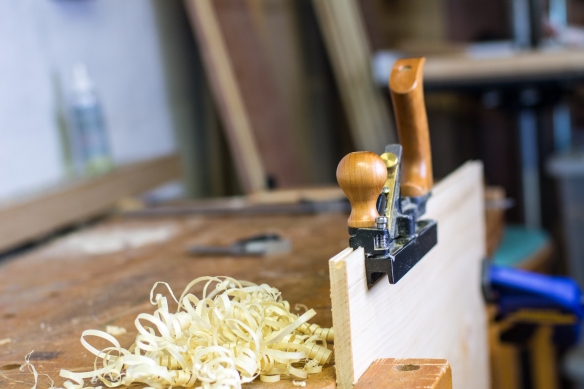
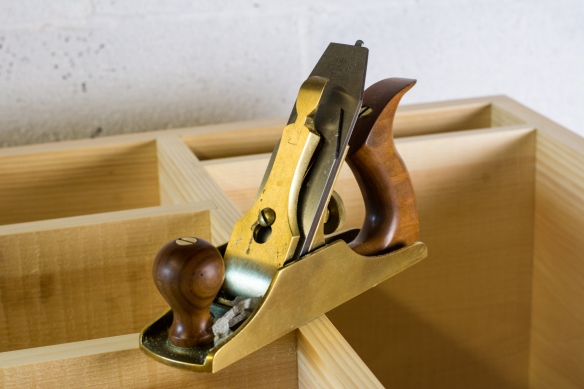
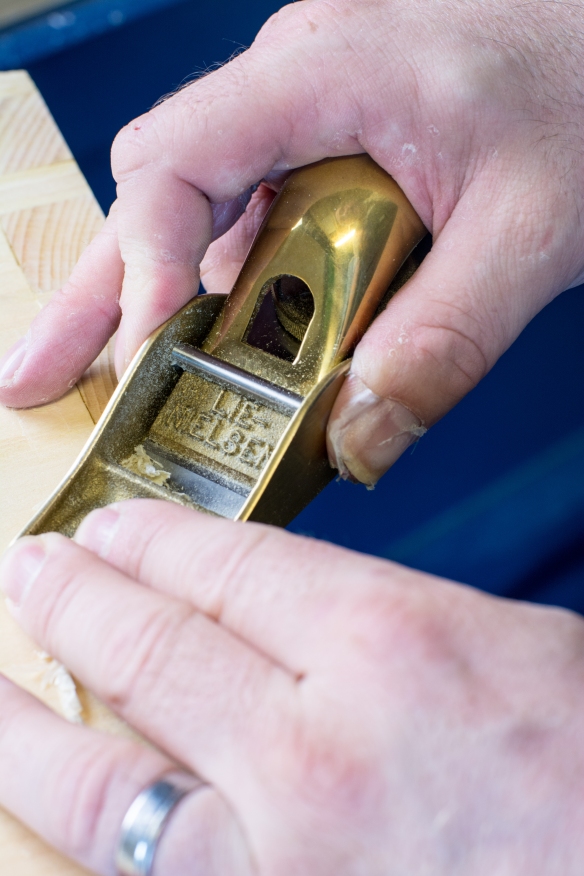
Dressing the front of the boot bench with my No3 smoother

I waited to clean up the dovetails on the boot bench until the very last stage before painting. The main reason for this is that I try to only clean up the exterior of a project once,  so as to avoid removing any more material than I strictly need to. By waiting until the last possible minute I am also able to address any “workshop rash” to the exterior.

_DPP7297

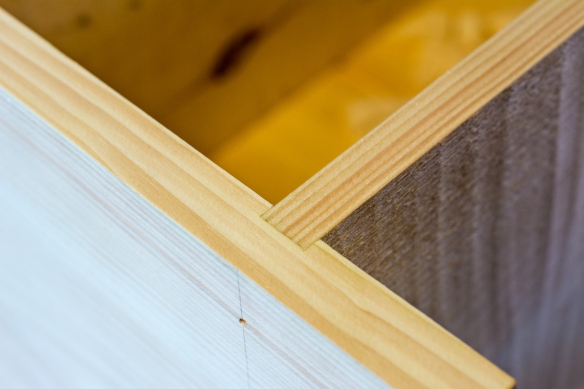
That moment of truth when you clean up a joint. This dado looks ok.

When cleaning up casework I try to approach the job in a methodical fashion, so that I only work on each face once, and to avoid denting or scratching a surface I’ve just cleaned up. This is all the more important given that workholding for a large-ish piece of furniture is different to flat boards. The most involved element of cleaning up the boot bench was the front, where all of the shelves intersect with the carcase, and need to be flushed up. I worked round the shelves in order using a freshly sharpened No3 smoothing plane and a No101 apron plane. Starting with the vertical divider, I flushed the ends up with the block plane, and then dressed the full length of the divider with the smoothing plane. Once the divider was flushed up, I then moved to the bottom shelf, and then each of the shorter shelves in turn, before lightly dressing the edges of the carcase. By moving around the elements in this order I was able to keep track of where I was, and also ensure that the casework is not planed out of true. When planing dados, skewing the plane to 45 degrees with a light cut as you work across the joint helps to avoid spelching or tearout on either component.

_DPP7338

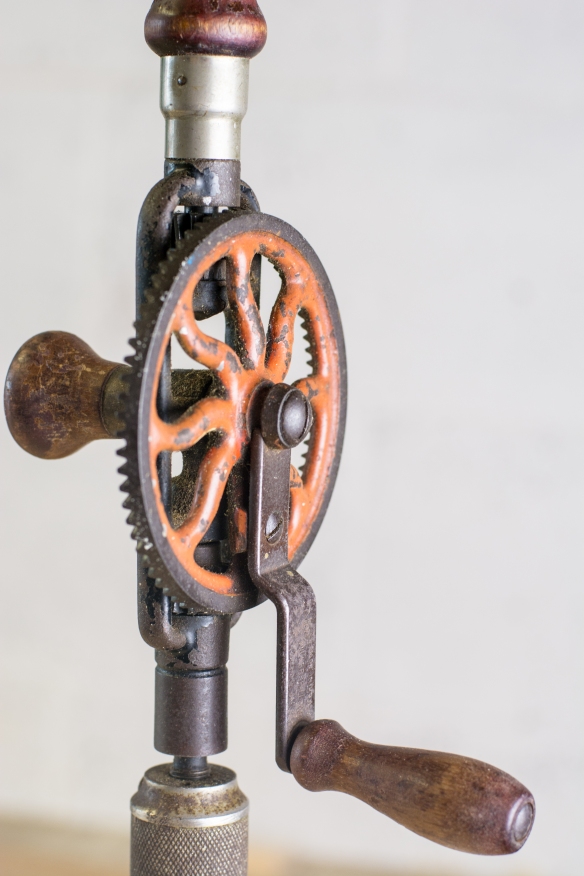
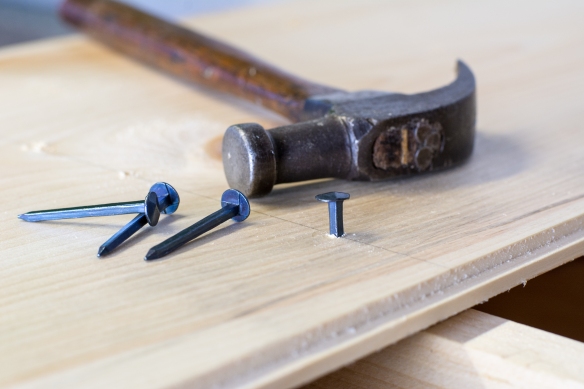
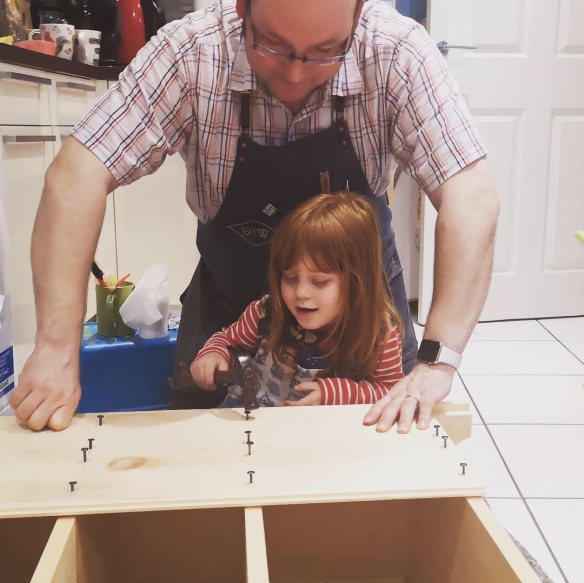
Drilling the pilot holes for more Roman nails. I wonder how many holes this drill has created over the years?


Once the front was looking good, I worked each end in turn before turning my attention to the top. The first task for the sides was to layout and drill pilot holes for the Roman nails which will pin the dados. The nails will be hammered in once the boot bench is painted, as I want the nail heads to be a decorative feature and not covered in paint. Five pilot holes per shelf were laid out with dividers, and drilled using a tapered drill bit in my grandfather’s egg beater drill. Next, each side was cleaned up with the No3 smoother taking light cuts until the pine was smoothly finished and the dovetails were flush. To work the ends, I placed the boot bench on top of a thick blanket to protect it from the floor, and braced it against the workbench. Some minor glue staining remains on the end grain of the dovetails – from my initial (highly unscientific) experiences Old Brown Glue seems to penetrate deeper than Titebond. As the boot bench will be painted this does not matter, and the joints were all clean with no glue left on the surface.

_DPP7345

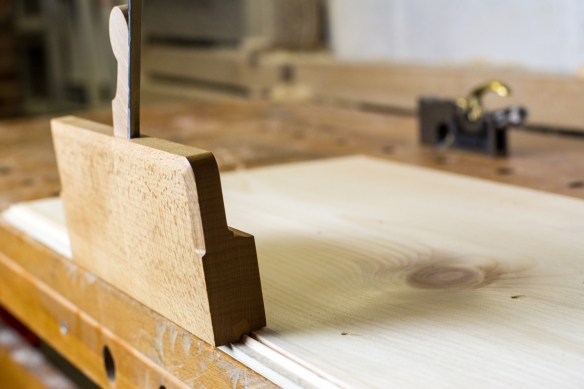
Trimming the dovetails flush


I trimmed the tails flush to the top with the block plane, and then smoothed the top until the surface was clear and free of tearout, standing the case on the floor (on top of a blanket) and bracing it against a bench leg. I’m pretty pleased with how these dovetails came out. The final touch was gently chamfering all four edges of the top, to avoid denting those delicate corners in use.

_DPP7351

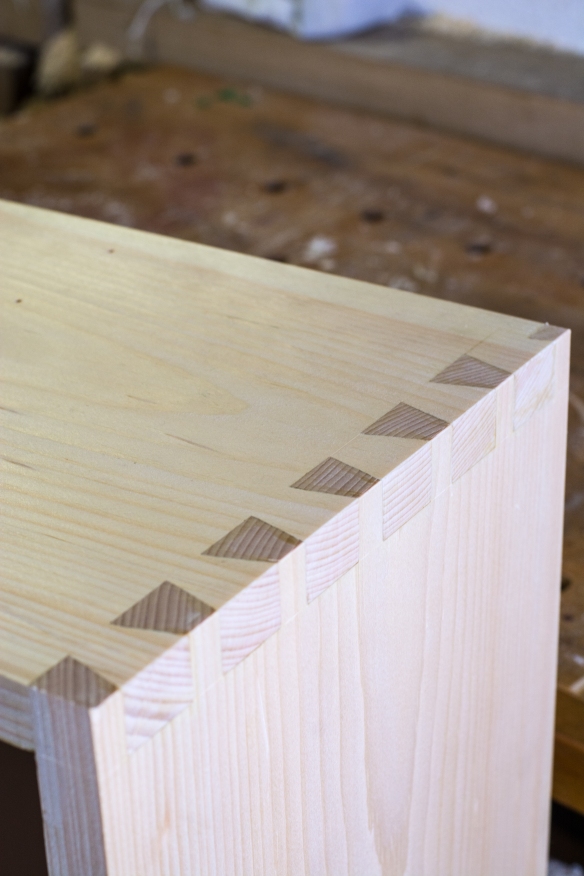
Clean dovetails, these look ok

I still need to complete the drawer, and apply finish to the whole piece. But the boot bench is almost finished, and should be in use by Christmas. In readiness for painting, I also applied blue tape to the inside edges of the casework and shelves, to avoid paint transfering to the interior. I have further strategies to address any paint that creeps under the tape, but you’ll have to wait until the next post for that.

_DPP7357

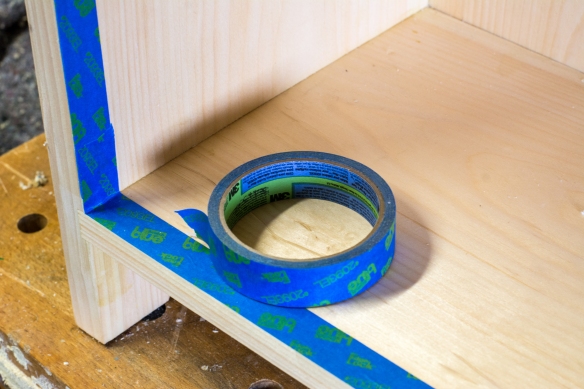
Taping up the casework before painting

Sharp Fixes Everything

IMG_0065

Writing about sharpening has always felt pretty redundant to me, simply because everything that needs to be written about how to sharpen has already been written – read “The Perfect Edge” by Ron Hock, the “Sharpen This” series by Chris Schwarz, and then get back to making your nicely sharpened edge tools blunt again (that’s the fun part!). So, over the five years of the blog I’ve always resisted writing about sharpening.

But this year a number of factors caused me to re-examine my sharpening routine and to change my system. So after getting acquainted with my new approach to sharpening, I thought a brief blog post was in order. I want to be clear though, there are many sharpening systems out  in the world, and all work providing you spend enough time to understand them. I”m not saying my current system is “best” (whatever that means), just that right now, it satisfies my needs. At Totness we used a Tormek followed by a fine water stone, finishing with a leather strop. After Totness I used oil stones for quite a while, because that’s what my Grandfather used. And for the past six years I’ve used Scary Sharp film on a sheet of 10mm thick float glass, lubricated with Liberon honing oil. All of those systems achieved a razor sharp edge, and I put in enough hours on each system to understand how to get my edge tools sharp. Each sharpening medium has different foibles, and there is always a period of familiarisation, which is why flitting between different systems is a recipe for blunt tools and frustration.

_DPP5871

Shapton Pro water stones – 1,000, 2,000 and 5,000 grits (top to bottom)

Scary Sharp worked really well, and the cost of admission is very low (£20 for an A4 sized piece of float glass, and a couple of pounds for the film itself). For those on a tight budget, or who are just starting out, it is an excellent system. So why did I make the switch? Parly because the Apprentice is starting to come into the ‘shop with me, and shows an interest in doing some basic tasks. It’s going to be a good few years before she’s sharpening edge tools, but with her being in the workshop I wanted to reduce the number of unpleasant chemicals splashing around. So honing oil was out.

The other factor that started to grate on my with Scary Sharp was the need to replenish the film every so often. Peeling off the old film, scrubbing away the residue and dried swarf with a meths soaked rag, and then applying the new film, all of this takes time. No one sharpens as often as they should, and anything which presents even a minor barrier to sharpening is less than ideal. Added to this is the fact that the film sharpens very nicely when new, but then cuts slower and slower as the abrasive is worn away. Which is not to knock Scary Sharp as a medium – if you have the patience and discipline to change films often, and if this doesn’t interrupt your workflow, then it is an excellent system.

_DPP7287

Setting the correct amount of projection to hone a 35 degree bevel, thanks to the angle block by Derek Jones

So a sharpening medium that can be lubricated without oil, and has a sustainable and fast cutting action? My solution was a set of Shapton Pro water stones (available in the UK from Knives and Tools). This isn’t a cheap option by any means, even using a minimal set of 1,000 grit (Orange), 5,000 grit (Pink) and 8,000 (Green). Adding a flattening solution to keep the stones true (I went with a DMT Dia-Flat plate) also adds to the cost. But after 6 weeks or so of using this system in the shop, I’m very pleased. Using a gentle spritz of tap water from a plant spray meets my criteria of having a non-harmful lubricant. And the Shapton stones cut very quickly, helping to achieve a keen edge in very little time. The faster it is to sharpen, the more often I sharpen. Flattening the stones with the Dia Flat is also a very quick process – the stones don’t dish particularly quickly, which means that minimal flattening is needed after each use. So right now this system works for me, and I am staying sharp.

_DPP7285

Honing the bevel

The rest of my sharpening kit is very simple. Honing guides are a whole other topic (and one I want to write about even less than I want to write about shaprning). After using a couple of different guides over the past six years, I’ve spent the past 3 being monogamouse to the Lie Nielsen honing guide, which holds blades firmly and allows a consistent bevel to be honed with ease. Again, it’s not better than the others, but it works for me. Derek Jones makes a very nice angle block for use with the Lie Nielsen guide, and that has been my go to for over 18 months now. I also keep a small engineer’s square in my sharpeng kit to check for square cross the width of the blade. The only thing I need to get now is a tray to hold the stones on in use.

_DPP7292

My simple, but effective, sharpening kit

Back to the Boot Bench… Part 4

Events have been conspiring to keep me out of the ‘shop for the past couple of weeks, although I did manage to steal a couple of hours on Sunday to fit the backboards to the boot bench.

_DPP7254

Preparing the tongue and groove joints

I’m not sure if I approach this method in the same way as everyone else, or whether I’m a bit screwball about it, as I prefer to fit the outer pair of boards, and then work my way in to the middle of the carcase. This ensures that I end up with a symmetrical arrangement of boards, and can adjust the size of the middle board (or pair of boards) to fit the aperture without too much measuring.

_DPP7267

Roman nails and a hammer by CE Hammond of Philadelphia

There are four backboards for the boot bench, and each are 1/2″ thick and pine, just like the rest of the project, and joined together with tongue and groove. The two outer boards are glued along their outermost long edge into the rabbet in the casework, and all four boards are nailed to the rear edge of the shelves with the Roman nails I wrote about last time.  I processed the two outer boards first, shooting the top edge square and planing the tongue and groove joinery into the inner edge with the Lie-Nielsen No.49. To trim the boards to length I dispensed with the shooting board, and instead struck a line across the widh of the board at 26 3/4″ along the length – this will give an overhang of 1/2″ beyond the bottom shelf. I then chiselled a trench to the waste side of the line (as you would for a “first class” cut), and then cut down the line with a Bad Axe 20″ mitre saw. This saw leaves a nice clean edge, and this method offered a very quick way to cut the boards to length keeping a good square end. Once all the boards are fitted I can then clean up the bottom edge with a block plane if necessary, but to be honest as this surface will be only a couple of inches above the floor and at the rear of the casework I’m not sure if it will need any clean up. Reading Mortise & Tenon has had a real impact in how I approach my work, in terms of the decisions between which surfaces must be pristine, and where it is more efficient to leave signs of process.

_DPP7274

The bead adds a nice shadow line for decoration, and also hides any gaps that occur as a result of seasonal movement in the backbords

Once the outer two boards were processed, I held them in place and drilled pilot holes for the nails using an egg beater hand drill. Each board has four nails for each shelf, and I partially inserted four nails per board to hold it in place while I measured up for the inner pair of boards, which turned out to be a little narrower than the outer pair. The final touch was to add a bead to the shoulder of each tongue with my Philly Planes 1/8″ beading plane.

dav

The Apprentice helping to nail the backboards in place

This stage of the build also offered a significant milestone. The workshop was too cold to use hide glue, so I relocated to the kitchen to glue and fit the outer boards. As I was doing so, the Apprentice was finishing her dinner and I asked if she’d like to help me fit the boards in place. She readily agreed, and was super focused while she knocked in nails (using the vintage CE Hammond hammer she received just after she was born) and cleaning up squeezeout with a toothbrush. This was the Apprentice’s first experience of woodwork, and she seemed to really enjoy it, so hopefully we will have many hours of father-daughter time in the workshop – she’s already talking about “making a chair for mummy” (although we may need to build up to chairmaking).