Roubo Is Coming… Part 17

DSC_1630

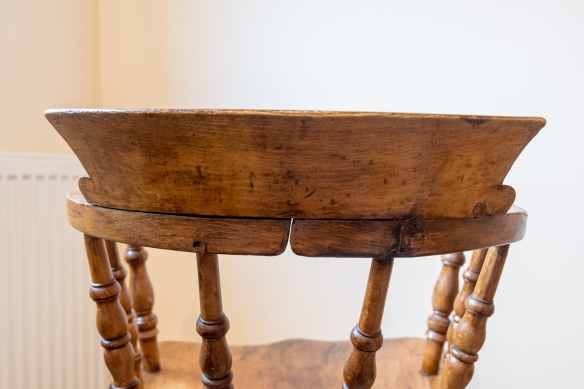
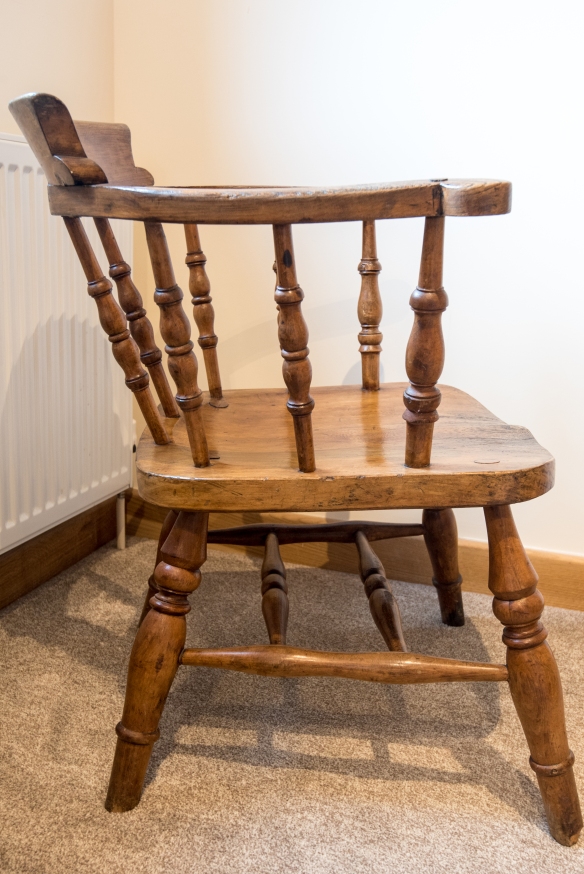
I find that most projects have a reassuringly familiar tempo. Stock preparation and the early stages are quiet leisurely, the pace quickens a little as you get into the interesting joinery and decorative elements, and then at a point just before the main glue-up everything starts to speed up. For the Roubo build (which started in February) this has held true, save for a two month break over the summer when I was working on my stick chair for the Mortise & Tenon article. The increase in pace just before assembly has definitely been felt on this project – due to the sheer weight of the slab I’ve needed to draft in a team of helpers when it comes to assembling the bench, and given how busy everyone gets at this time of year we had to schedule the glue-up date a ways in advance. We’ll be assembling the bench tonight (Roubo is nearly here!), and as a consequence every available moment over the past few weeks has been spent getting ready for this deadline. As is often the case, you think there is not too much left to do on a project and then you remember all of the small tasks necessary before assembling it for the final time. And so my evenings have been very full (and often late finishing).

DSC_1635

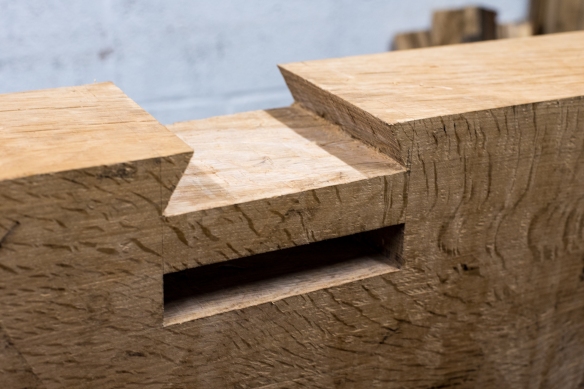
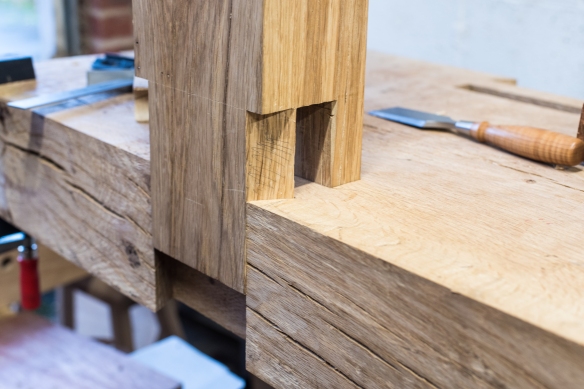
The biggest single task has been to tune the fit of the legs in their respective sockets. If you have not yet watched the Lost Art Press video on building a Roubo bench, I highly recommend it. That video, and Chris’ book on workbenches, have been invaluable resources for this build. There is a moment in the video when Will Myers tests the fit of one of the legs, and it casually slides 3/4 of the way into the socket, coming to a final rest with only a few taps of the mallet. Well precisely none of my legs fitted like that, which I was expecting (still, it would have been nice). So I’ve been tuning the fit, making sure each leg moves nicely into position but is also good and snug. I think this work has partly resulted because I approached cutting the mortises as I would cutting furniture joinery – cutting against the line rather than on it, and aiming for a super snug fit. And actually, I suspect that a Roubo work bench needs a little slack in the joinery to allow it to all go together. Not cavernous gaps, but slightly more slack than you would aim for in fine furniture. Or maybe I’m just trying to make myself feel better.

DSC_1637

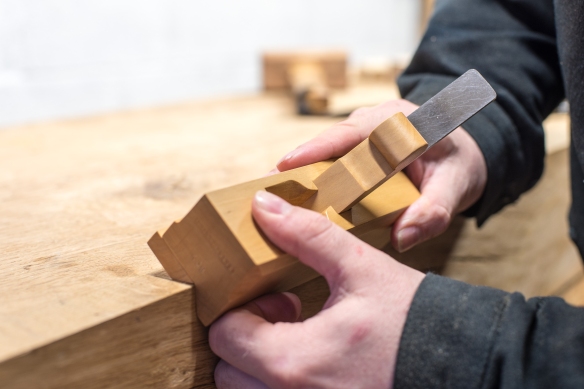
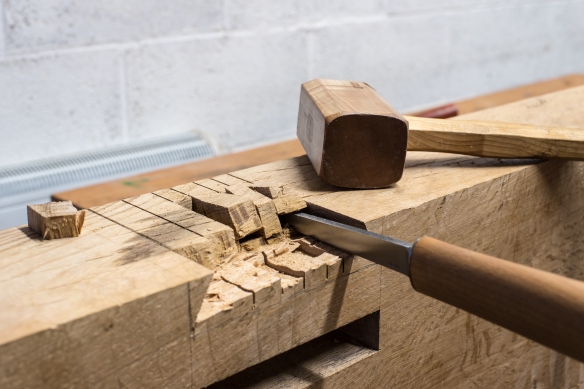
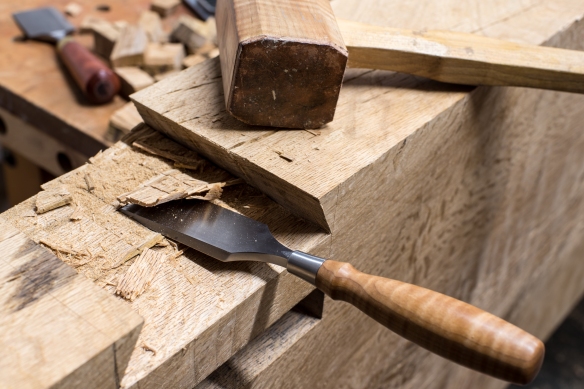
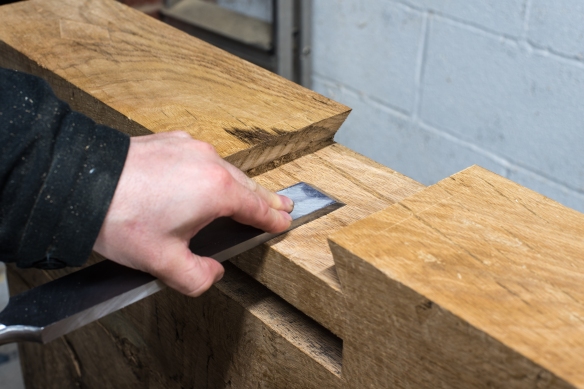
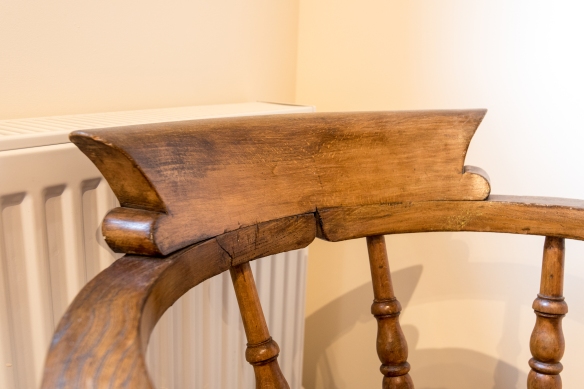
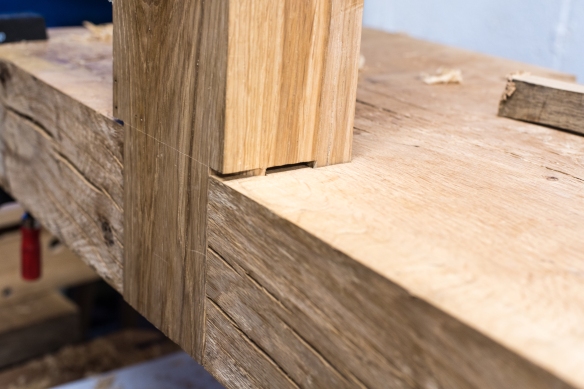
In any event, some tuning has been necessary. This is a case of dropping the leg into the mortise, looking for the burnished areas on either component which indicate a too-tight fit, and gently easing those out. On the leg, I’ve found that refining the external surfaces with a smoothing plane provideds a very controlled method of fine adjustment, while the internal surfaces of the tenons need help from a paring chisel, as do any high spots in the mortises. Here’s one of the odd things about writing about woodwork – you can summarise a process in two sentences which might actually take hours of painstaking work. Easing the fit of the legs while trying to avoid introducing horrid gaps in the joinery meant that this was fine and pernickety work, taking on average two hours per leg. But it was time well spent, and the end result is legs which drop about 3″ into the socket under hand pressure, and which then drive home to 1/4″ shy of fully seated with persuasion from a 1lb lump hammer. I have resisted the urge to fully seat the legs for fear of extracting them – the legs are pretty dry and this stage, while the slab will take decades to dry out. Moisture transfer from the slab to the leg will help to lock it place, which is good at final assembly but far from optimal at this stage.

189FC932-B346-4F32-BEA3-0E27F27CADB6

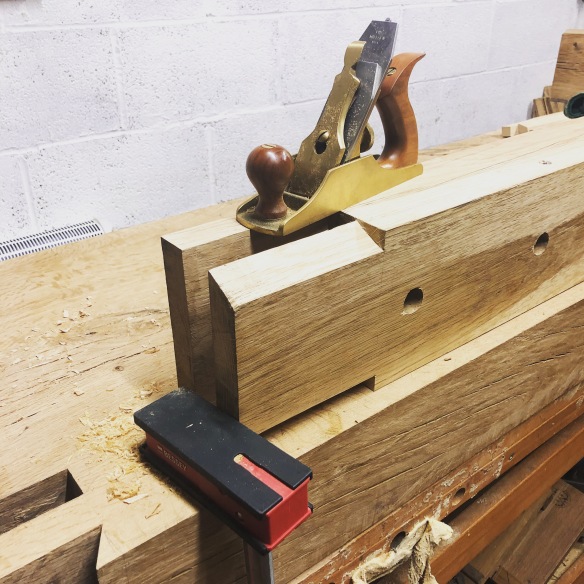
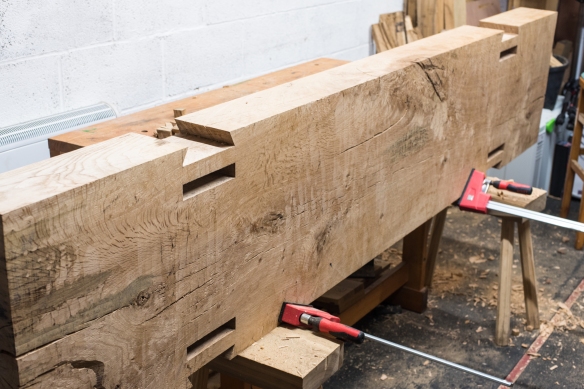
Building a workbench is an exercise in creative workholding, particularly when tuning the fit of the legs because the slab is on top of my Sjoberg bench. To facilitate easy working while tuning the fit of the legs, I clamped a Bessey K clamp to the slab, and used the clamp head as a makeshift planing stop, which worked quite well.

DSC_1641

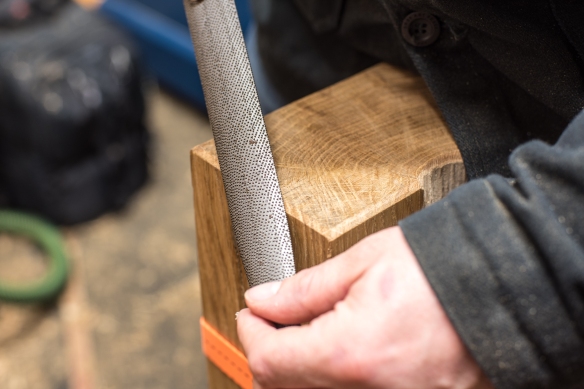
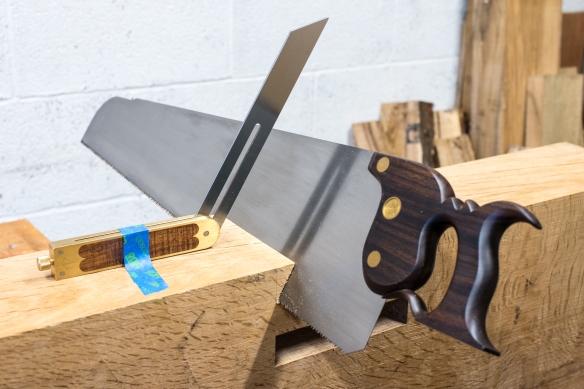
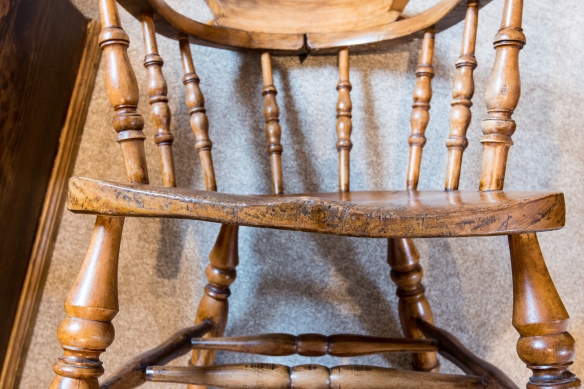
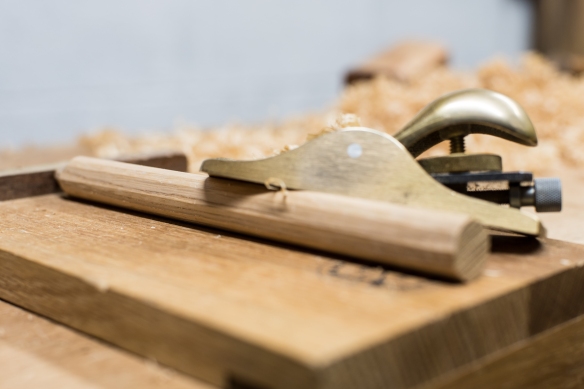
Other work included checking the fit of the stretcher tenons, and tuning these where necessary so that the stretchers drop into their mortises under hand pressure only (the joinery for the stretchers was cut in March, and we have had a lot of humidity changes since then). I’ve also chamfered the corner of the underside of the slab top, and the corners of the legs and stretchers, all with my new Philly Planes chamfer plane (a luxury item for sure, but one which makes cutting consistent chamfers a breeze, and Phil’s customary crisp workmanship means that the plane is as lovely to use as it is to look at). This was only a light chamfer, but will protect the delicate edges in use. The feet were also chamfered, this time with a 9 grain rasp, to avoid spelching the grain when moving the workbench.

DSC_1640

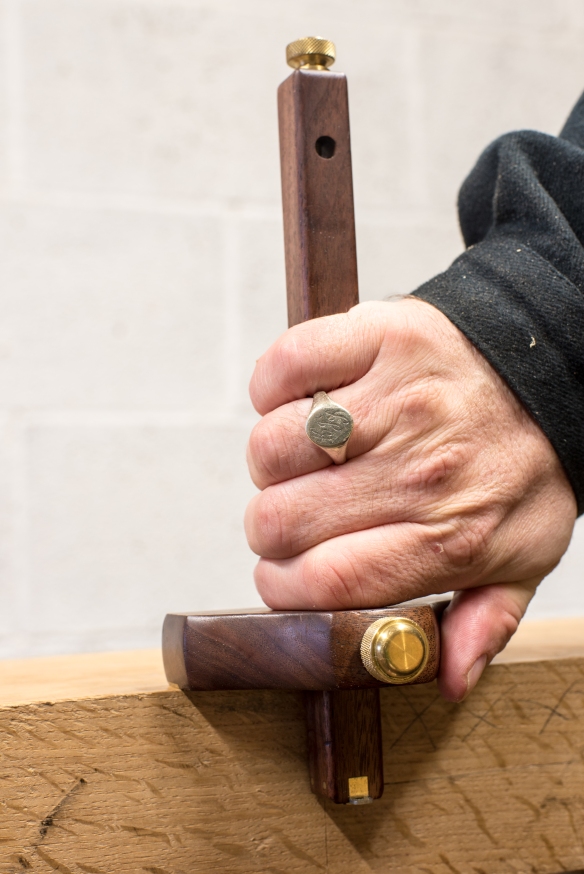
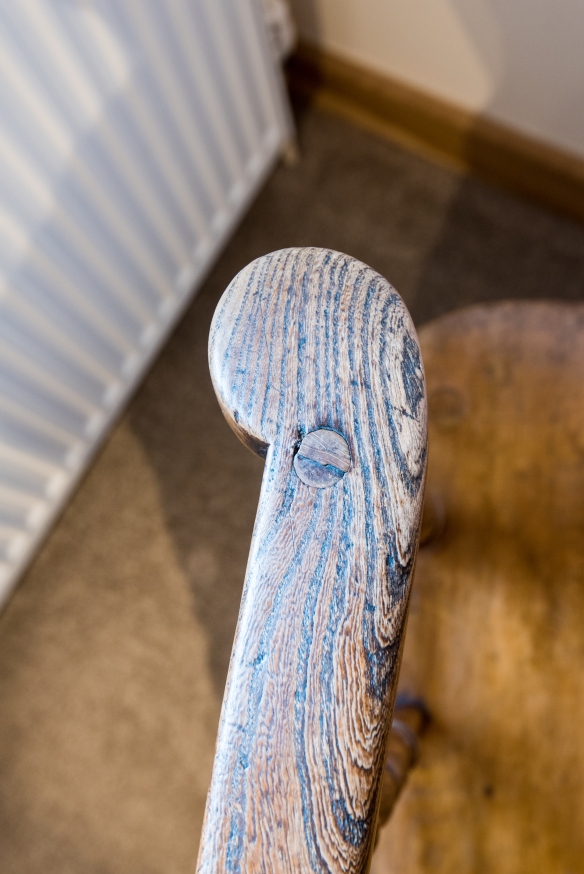
Boring the draw bore holes and shaping pegs was the final task. I used straight grained, riven oak stock, to ensure that the pegs are strong with grain that runs consistently from tip to tip. The pegs are shaped slightly oversided using a block plane, and then cut using a Lie-Nielsen dowel plate to tghe final 5/8″ diameter. When planing the rough pegs, I find that a bench hook provides a good way of holding the workpiece.

Today I will be doing final prep for assembly, and keeping every available digit crossed that we have a smooth glue-up – this is not one where taking everything apart to ease the fit is really possible! But I am looking forward to it, and to hitting a major milestone on the bench build.

Roubo Is Coming… Part 16

DSC_1564-2

Transferring the baseline with the Hamilton traditional marking gauge

Today is a momentous day – the joinery for the Roubo bench is now all cut. The one exception to this is the mortise for the planing stop, which will wait until the bench top has been flattened. But right now, all of the structural joinery is done, which feels like a huge milestone.

DSC_1565-2

The Vesper sliding bevel transfers the dovetail shoulders

Cutting the dovetail sockets for the legs is much quicker than cutting the mortises, but in many ways it feels more nerve wracking. Cutting a square mortise to the right dimensions is relatively straight forward, all told. But cutting the angled shoulders for the dovetail sockets – critical joints which will be visible every time I step up to the bench. That feels pressured. As often is the case, in practice it was not as tough as I had expected, although I am glad that I started with the rear pair of sockets first (these will face the workshop wall, so I won’t see them very often), to warm up. Breaking the operation down into a clear set of stages helps, as does remembering that joinery like this is just a series of fundamental hand skills (accurate layout, cutting to the line, and some chisel work to remove the waste).

DSC_1569-2

Cutting the slopes with the Skelton Panel Saw

First I transferred the layout from the underside of the slab (where I had previously traced it from the legs) to the top of the slab. This is simply a case of taking the precise angle of each side of the dovetails, and depth of baseline, from one side of the slab and striking corresponding lines on the other side.

DSC_1573-2

A motise chisel pops out the waste

After a bit of experimentation, I found that it was easier to cut the angled shoulders with a coarse cross-cut hand saw rather than a back saw, and my Skelton Panel Saw made short work of this critical cut. Setting the bevel to the right angle and standing it a few inches from the cut provided a clear visual guide as to how far to angle the saw plate. Cutting joinery with a hand saw feels counter intuitive at first, but works very well. I started each cut at the near corner, where I could see both the line across the width of the slab and also the angled line on the face of the slab. I knibbled a saw kerf along these two lines, and once I had hit the baseline of the angled cut, and the far corner of the straigh line, I allowed the toe of the saw to drop, taking full length strokes of the saw until the cut was complete. This is very much how I cut tails for furniture-sized dovetails, just on a much larger scale.

DSC_1578-2

Removing

To remove the waste I also cut five relief cuts in each socket, and then knocked out most of the material with a 1/4″ mortise chisel and mallet, working from each side of the slab into the middle. To avoid bruising the interior of the socket walls, I removed the waste from the middle of the socket first and then cleaned up the waste at the edges. The waste pops out easily, making this a very efficient way of hogging out a lot of material.

DSC_1582-2

A completed socket

To take the sockets to final depth, I use a similar approach to how I cut the mortises. First I deepen the baseline with a 2″ chisel and sharp tap from a mallet, followed by a 1 1/2″ wide chisel and mallet to get very close to the baseline. Once there is only a small amount of material left I moved to the big timber framing chisel. Although this chisel is huge, I find that it is very effective as a paring chisel when working across the grain, as the sheer mass means that it will cut without riding up over any difficult patches of grain, resulting in a flat bottomed socket. Ordinarily I would use a router lane for this task, but the sockets were deeper than my router plane could reach.

DSC_1581-2

Using a timber framing chisel to true up the bottom of the socket

My next task, once my slab moving team have helped get the slab back onto my existing bench, will be to test fit the legs into their mortises and to tune the fit where necessary.

DSC_1584-2

The slab now has all of the joinery cut

An interesting chair

DSC_1510-2

As regular readers will know, whenever I travel I always pay attention to the furniture in my accomodation. We have just returned from our annual family break in the Cotswolds, and the traditional cottages we often stay in have over the years provided some interesting furniture pieces to examine. This year’s trip was no exception, and in the corner of our bedroom I found an intriguing chair. When I first saw this chair, I started wondering  where it had come from.

DSC_1512-2

An elegant joint to the two arms, and a very stylised comb, all cut out of solid wood

The chair features an arm bow cut from solid wood rather than steam bent, and which terminates in pleasing rounded hand holds. The large comb was also cut from solid. The joint between the two halves of the arm is a neat way of hiding the shrinkage of an end grain butt joint (an issue you can find on antique Welsh stick chairs). The front pair of spindles have been wedged through the arm, and the legs are wedged in the seat. The rest of the spindles are fitted to blind mortises in the arm.

DSC_1520-2

Wedged spindle tenon

The seat has been saddled quite lightly, and has developed a pronounced amount of wind at the front.

DSC_1526-2

The seat was warped considerably

At first I thought that this chair was possibly user made as, the turnings aside, it had a rugged vernacular feel. However, turning the chair over revealed a maker’s mark stamp for J Elliott & Son. A google search identified that J Elliott & Son were a High Wycombe chairmaking firm, and this chair appears to be a “Smokers Bow Armchair“. Previously I’ve only encountered the use of solid sawn arms and a doubler in Welsh stick chairs – this is often a feature that is said to typify and distinguish Welsh stick chairs from other chair making traditions. In reality, I expect that many vernacular chair making traditions would have relied on using curved timber in preference to steam bending parts, and there was a lot about this chair that wasn’t Welsh.

DSC_1517-2

Maker’s mark

Of course, I couldn’t resist trying the chair out, and was delighted to find that it was very comfortable, with a healthy slope backwards which encouraged you to recline into the chair. Yes, the turnings might seem a bit heavy for contemporary tastes, but despite (or perhaps because of?) the warped seat and failing joint between the comb and arm bow, I found this to be a charming little chair.

DSC_1516-2

The joint between the comb and the arms has separated over the years, although the comb still feels solid

DSC_1528-2