A Welsh Stick Chair for the Apprentice – Part 6

Of all the processes for the Apprentice’s Stick Chair, shaping the sticks has been the one which has felt the most outside the my sphere of experience – the least like the lutherie or furniture making I am used to. There are no layout lines, no reference edges, just the stick in your hand and the dictat to “think round“. It has also been one of the most enjoyable elements of the build, maybe for precisly that reason.
_DPP6133

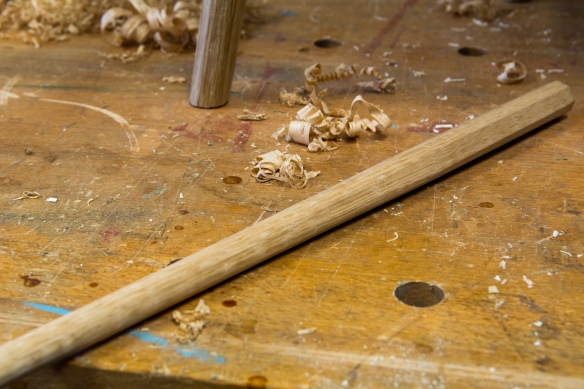
The sticks are 17 1/2″ in length, and oak (the traditional timber choice for sticks). The blanks start off at roughly 3/4″ square, before being shaved to a pleasing round profile and to the correct diameter. I drilled two holes in an offcut of oak to guide the process – one with the auger bit I used to drill the stick mortises in the seat, and the second with the 1/2″ forstner bit I will use to drill the comb. One of the things I’ve found recently is that there can be significant variations of the same size drill bit or chisel between manufacturers, so having test mortises for each drill bit I am using is essential. These test mortises tell me when the tenons are at final dimension, and avoid reaming out the mortises on the seat by testing overly large sticks.
_DPP6136

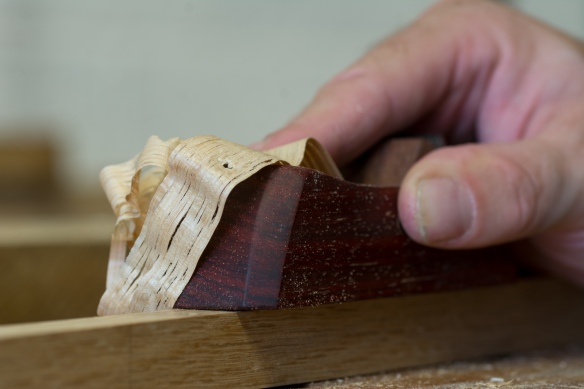
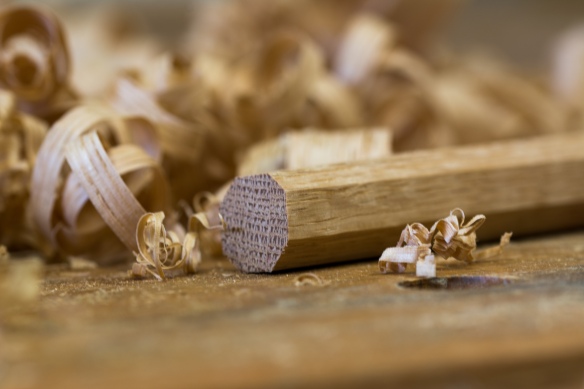
Start with a rough octagon, and then plane to a smoother cylinder

I’ve been doing all of the shaping work for the sticks with two block planes – a Lie-Nielsen No.101 and the Krenov style Padauk block plane Jim made me this summer. You could easily shape the sticks with only one plane, but when doing a mini production run of the five sticks I found it quicker to have two planes on the bench – one with a rank set iron for heavy stock removal (those corners aren’t going to remove themselves now, are they) and the other set for a very fine cut.

The sticks had been broken down to their rough dimension on the bandsaw when I started this build, including a couple of spares (always have spare sticks), which gave them ample opportunity to acclimatise and settle before being shaved. The first step is to bring the blanks down to a rough octagon by knocking off the corners – I do this purely by eye and without any layout lines, setting the stick against a bench dog and steadying it with my off-hand while taking heavy strokes with the block plane.
_DPP6137

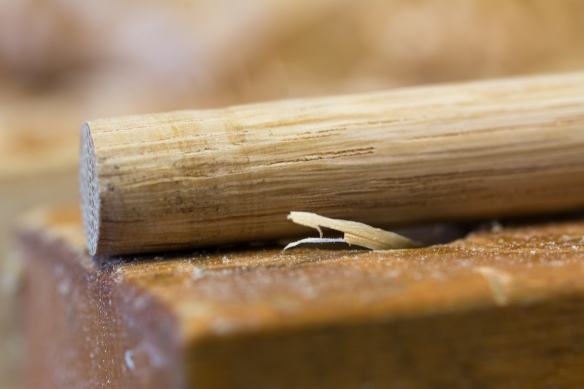
Test the stick in the mortise, and then shaving away the burnishes areas for a perfect fit.

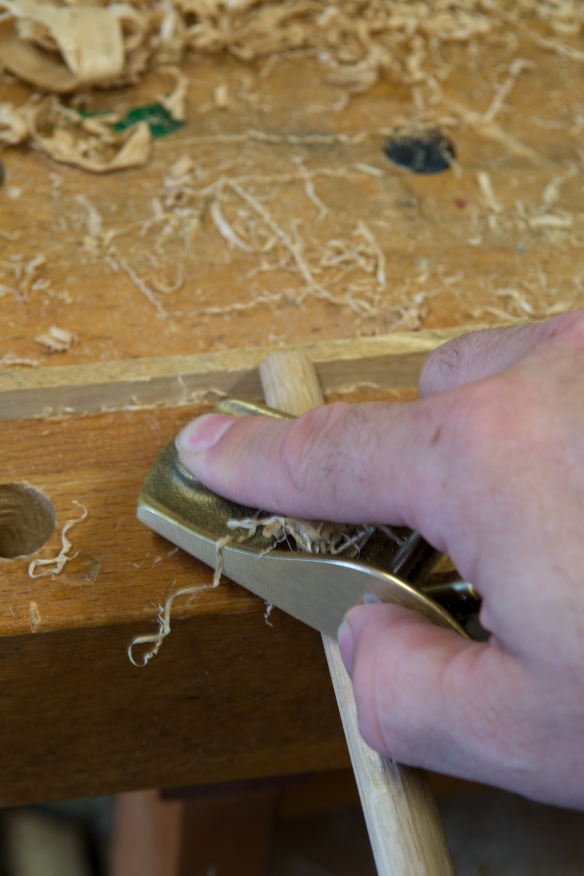
Once the corners are knocked off, it is time to round the sticks, using a similar process to how I rounded the chair legs. I set a tapered piece of scrap in the vise to act as a planing stop while supporting the far end of the stick in my hand . Being tapered in height means that as the stick comes closer to final dimension I can register the end of the stick against a lower section of the stop, rather than having to reposition the whole stop in the vise, which saves time. The far end is difficult to plane while you are holding it, so I round the stick by taking long strokes along 3/4 of the stick length, staying with the coarse set plane for now, and constantly turning the stick round. The aim is to remove the corners of facets and bring the stick into a smooth cylindrical shape.

Once I get close to the final size I change to the finely set plane, still working along 3/4 of the stick’s length, and constantly rotate the stick in my off-hand as I work. One of the difficult elements of shaping the sticks compared to flat work is that reading the grain is much more difficult, and also important. When using four-sided boards it is easy to tell from the reference edge and end grain which direction the grain is moving. But as the sticks become more cylindrical there are fewer visual cues. Fortunately, with mild timbers, using a very sharp and finely set plane, and skewing the plane heavily, it is possible to ignore grain direction somewhat. On more orney stock, it becomes a case of remembering where the trouble spots are and reversing the direction in which you plane.
_DPP6146

The stick part way through shaping – one end is fitted, and and I blend in the shape as I fit the other end

Once the stick is cylindrical and close to final dimension, I try it in the test mortise and plane away any burnished areas, as these are the high spots. I’m aiming for a “squeaky” fit, but one which goes a full 1″ into the seat mortise. Once that end is done, I swap the stick round so that I am working the the comb-end of the stick. That end is still octagonal in cross section at this point, although the stick tapers into a cylinder from about 1/4 of the length. I work that end, blending the octagonal end into the existing cylindrical elements of the stick until it is consistently round and fits the test mortise for the comb.
 

_DPP6147

Skewing the plane and using a very fine cut helps to control tearout

Finally, as much as I dislike sanding I do then hit the sticks with 120 grit abranet briefly. This helps to remove any remaining light tearout, and to smooth the sticks off. The end result is a stick that looks round, and doesn’t have too many obvious facets, but has obviously been rounded by hand rather than machine.
_DPP6150

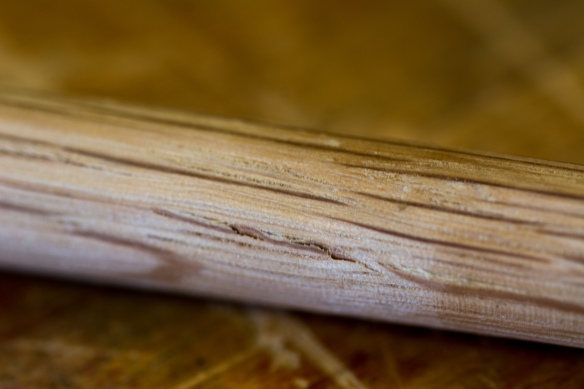
The first two sticks using oak left over from the Anarchist’s Tool Chest had shakes running throughout. So they went in the burn pile.

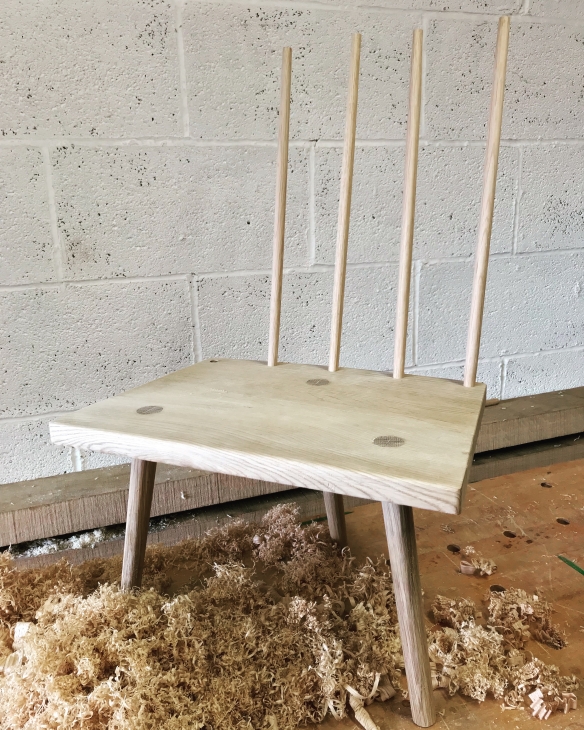
The oak I’ve been using for these sticks comes from two sources, all of it left over from previous projects. Some is left over from the Policeman’s Boot Bench, and has been wonderfully mild to work. The rest is excess stock I bought for fitting out the Anarchist’s Tool Chest in October 2014. That oak has been more problematic, despite never having had issues with the stock that actually made it into the tool chest. The first two of the sticks from the ATC oak revealed deep shakes along their length once I had finished shaping them  (it only ever happens after you’ve put the work in, right?). So those were scrapped instantly – this is one of the reasons it pays to have spare sticks. Fortunately the remaining sticks are all perfectly fine. I couldn’t resist dry-fitting the first four sticks, and the chair is starting to look quite nice.
IMG_0309

Four sticks down, one to go.


Daddy has a Saw Problem

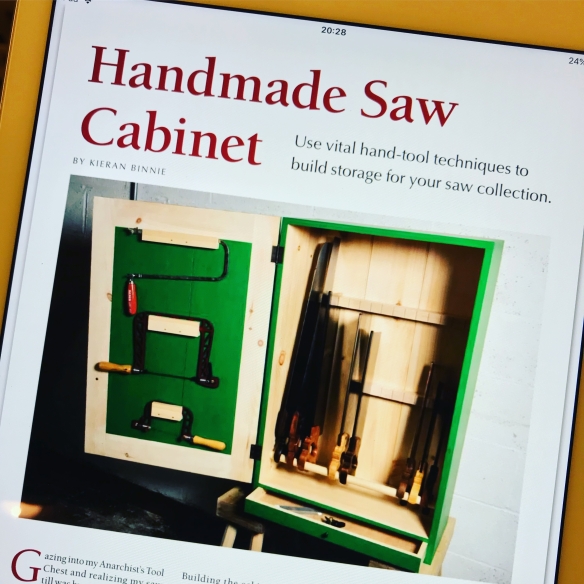
IMG_0315The October issue of Popular Woodworking appeared on my iPad this weekend, which means that it must be in print in the US now (though it will take a while longer to reach these shores). This issue includes my Saw Till as a project article, alongside fascinating articles by Nancy Hiller and Chris Schwarz amongst others. It was a real thrill to write a project for PopWood (thanks to Megan for asking me at Handworks last year), especially a project that I use every time I set foot in the workshop.
Ending the Tyranny of Straight and Square

The following is based on an article good friend Richard Wile and I wrote for issue 273 of Furniture & Cabinet Making. Although we hadn’t planned it this way, the article seems all the more timely given Auriou Tool Works current funding drive. Rasps are an integral part of the way Richard and I work, and we hope that this article will shed some light on their use and help identify which rasps might be most useful for readers to add to their toolchests.

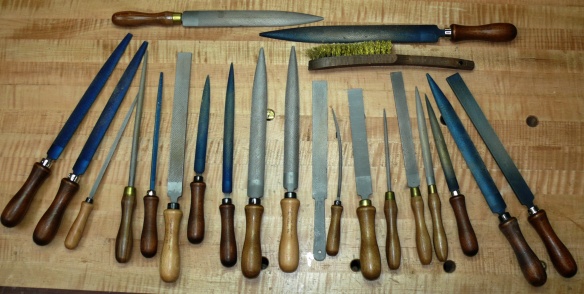
Photo 1

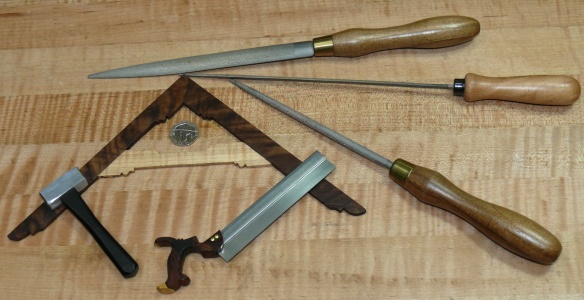
A selection of the rasps and files in Richard’s toolchest

Rasps have traditionally been a mainstay of many handwork disciplines, including lutherie, chair making, shoe making, and stonemasonry. But they also make excellent additions to the furniture maker’s tool chest, opening up the possibilities of curves and transitions to work, as well as allowing for precise adjustments to be made to joinery.

The variety of rasp options available, including how coarse (or refined) the rasp cuts, together with the multitude of shapes and prices, and choosing between hand-stitched or machine cut rasps, mean that for the newcomer investing in a first rasp can be a daunting experience. This article attempts to help modern woodworkers introduce rasps to their woodworking hand tool arsenal, focusing on hand-stitched rasps, which are increasingly available from retailers in different price points (and which we both use to the exclusion of machine cut rasps), and explain how rasps can release your work from the tyranny of straight lines and square corners.

What is a rasp?

Rasps are shaping tools which excel at creating and refining curves, chamfers, and decorative detail. For the luthier, rasps can transform a block of the hardest figured wood into a graceful guitar neck, heel and headstock in no time. For the cabinetmaker, the rasp takes a bandsawn cabriole leg from rough to ready for sanding in a few minutes, refines the curve of a lamb’s tongue chamfer, or chamfers the feet of chairs and table legs.

Photo 2

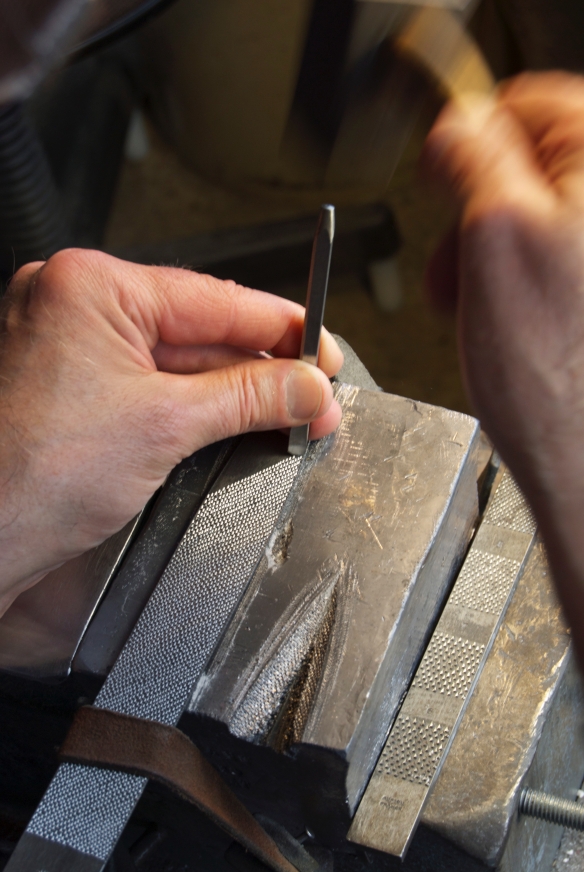
Stitching a rasp by hand at Auriou Tool Works

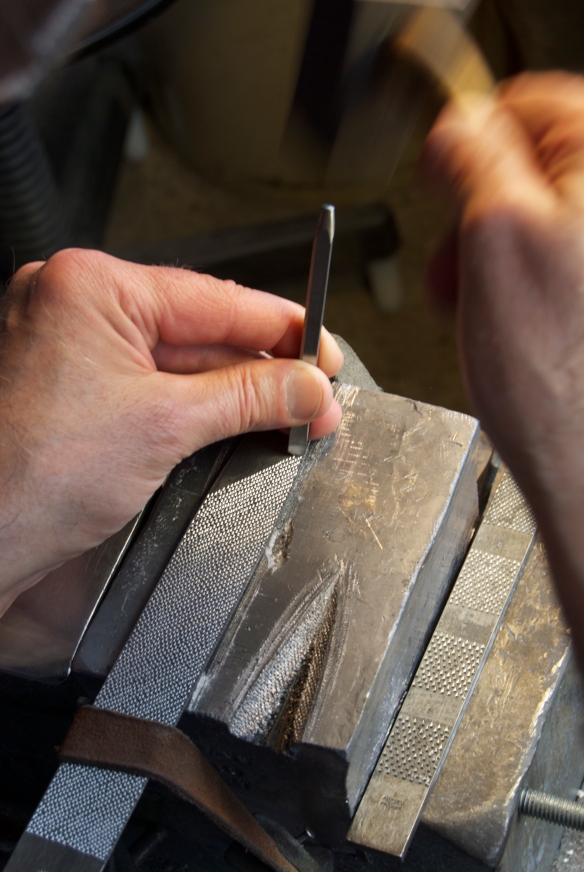
While many rasps look like files with bigger teeth, they are in fact quite different. Firstly, the teeth of the very best rasps are let into the hardened steel by hand, through a process known as stitching. Each individual tooth is hammered in by a skilled craftsperson using a specialized tool called a “barleycorn pick”, a skill which takes years to perfect (see this profile on Michel Auriou or more discussion on this technique). Unsurprisingly, this handwork aspect is the greatest influence on quality, as well as cost. The slight imperfections and inconsistencies resulting from the hand-stitching process contribute to the rasps’ effectiveness; an attribute that machine made rasps are unable to replicate. A hand-stitched rasp is able to create a surface much smoother than their machine-made brethren, with far less chatter in use – even with difficult grained timber.

The near endless options

Similar to files, rasps are available in seemingly limitless shapes and sizes, including flat, round, semi-round, leaf-shaped, tapered, and tiny rifflers. A few simple guidelines will help the novice “rasper” to make an informed choice on where to start. The stitching of the rasp is the most important aspect to understand. Generally speaking, the higher the number, the greater the number of “stitches” per inch, and the finer the rasp. Individual makers use slightly different grading systems, but generally speaking a stitching of 4 to 8 is coarse, with 4 being extremely coarse for the most aggressive stock removal and 8 for more general rough shaping work. A medium stitching of 9-11 is the most versatile pattern for general woodworking, providing a controllable cut that requires minimal cleanup. The fine patterns range from 12-15 and provide the ideal configuration for final shaping or very detailed work. As a result, the high-grain rasps tend to be smaller than their coarser brothers, (generally 6-8” long).

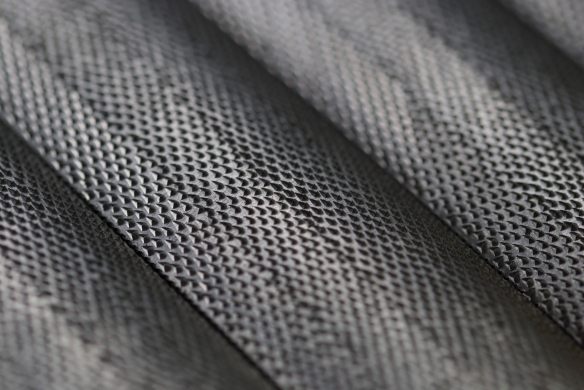
Photo 3

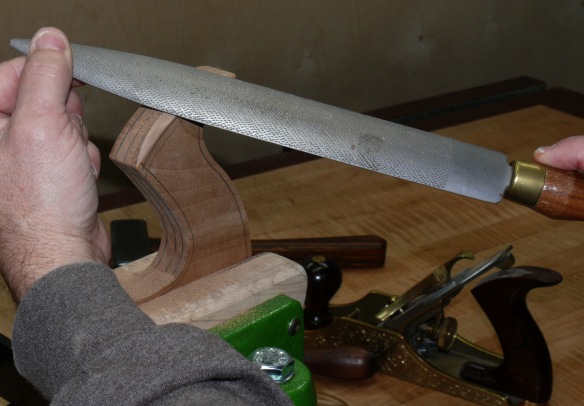
Handstitching rasps introduces minute variation to each tooth, resulting in a smoother surface on the workpiece, and less chatter in use.

Using a rasp.

The three categories of stitching roughly equates to the specific uses of the rasp; with coarse-grained raps suited to heavy stock removal or initial shaping tasks before introducing a finer rasp or moving to sandpaper. The medium-grained rasps are best for intermediate shaping and fine-grained rasps provide excellent tools for final refinement of the project.

Photo 5

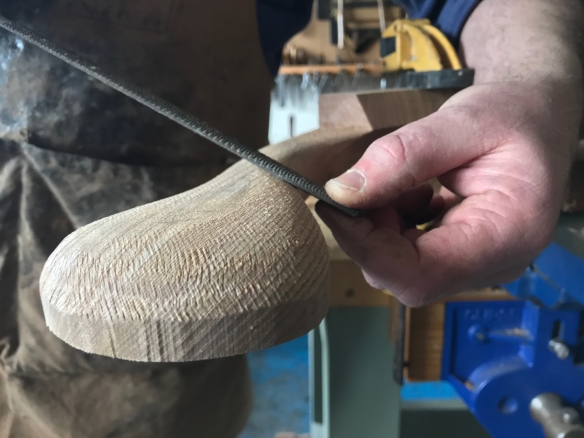
Shaping a plane tote with a cabinet maker’s rasp

A rasp’s most powerful attribute is that it allows the user to shape in 3 dimensions – creating a rounded edge, or shaping a component, is done in one operation with no machine setup or jigs to slow you down. With the workpiece held in place, the rasp brings one’s creative abilities to the fore and allows a true organic expression of the woodworker’s skill to emerge.

Many uses for each type of rasp exist and rasps can enhance or even replace existing techniques. We have found that rasps do not seem to care about the hardness of the workpiece, and hogging away large quantities of material on the most stubborn of timbers can be carried out with ease. Wood can be rapidly formed to shape with a coarse rasp where bandsawing may be difficult or dangerous. Turners often use a coarse rasp to knock the corners or protrusions off a piece to reduce tearout on square or odd-shaped workpieces, and using the spindle lock on a mounted piece is an excellent way to get closer to round before turning on the lathe.

Photo 8

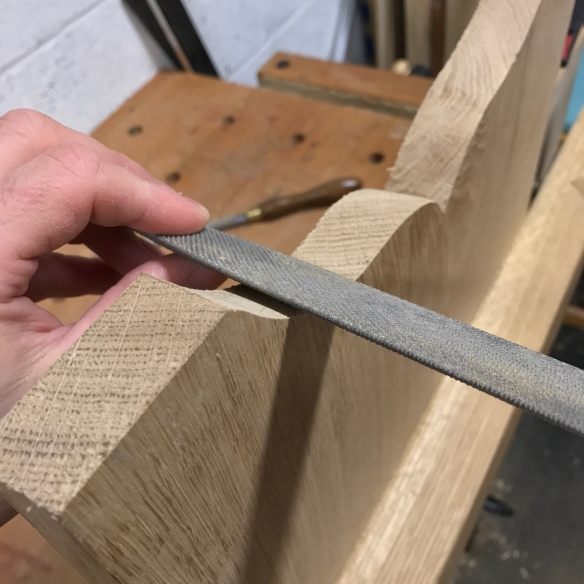
Small rasps give a fine finish and allow for very precise shaping

Medium-grained rasps are the most flexible, and a medium cabinetmakers rasp is a versatile tool if you only intend to buy one rasp. This type of rasp can perform a wide variety of shaping tasks and leaves a surface that can be cleaned up with abrasives if no other rasps are available.

The fine-grained rasp is for final refinement or very detailed work. With practise the woodworker can clean up a piece so that it requires no sanding; indeed these detail rasps can reach places sanding cannot, allowing smoothing of inside curves or complex shapes. These are also well suited to small work or small details in larger pieces; refining an edge detail with sandpaper is frustrating at times, while a rasp allows a controlled approach to get that final shape one is after.

Photo 11

Welsh stick chair maker Chris Williams shapes the arm of a chair with a coarse rasp

Regardless of how coarse a rasp is, the user’s cutting technique has a dramatic impact on the quality of cut. Much like carving, one must pay careful attention to grain direction to get the desired result. Working the rasp across the grain increases the roughness of the cut, removing material rapidly but increasing the risk of tearout. Following the grain produces the smoothest and cleanest cuts. Working along the grain can produce very smooth cuts that require little cleanup. Both can be effective techniques, depending upon the intended purpose. Heavy stock removal can be achieved by increasing how much you work across the grain.

Most hand-stitched rasps are handed, meaning they are designed to be used either right or left-handed. Using the rasp wrong-handed will result in a heavily scratched surface or with no wood removal at all. The general technique is to hold the rasp two handed, the dominant hand on the handle and the other holding the tip of the rasp. The smoothest cut is achieved by pushing the rasp away from the body along the grain of the piece; this direction is not always possible and practice will help to achieve the best result for the job.

Photo 10

Shaping the feet of the Policeman’s Boot Bench with a cabinet maker’s rasp

Using a rasp is an extremely tactile skill, with the feedback through the hands giving more information about the quality of the cut than simply looking at the workpiece. Generally, the smoother the cut feels, the smoother the cut is, and if the rasp is jumping and chattering across the grain, the cut will be uneven and irregular. Remarkably smooth surfaces can be achieved with semi-rough rasps by using the right technique. Like most hand tool skills, best achieved with use and practise. There are few things more satisfying than feeling a rasp cleanly glide along an edge leaving behind a perfectly feathered and consistent facet for that important project.

Using Rasps for Joinery

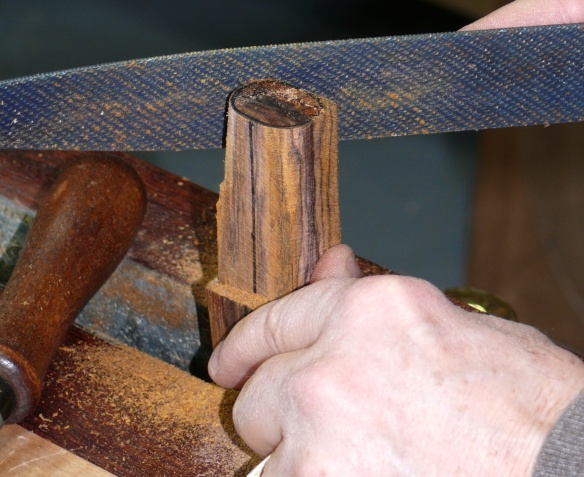
In many types of joinery, getting a good fit can involve fine-tuning the individual components. A medium or fine grained rasp can be an excellent choice for this type of work. Many joints involve flat surfaces, and the larger flat face of cabinetmaker’s rasp will register against the workpiece to stay in the correct plane. A through-mortise can be cleaned up or enlarged by gripping both ends of the rasp and aligning it with the face of the material to keep things square; sneaking up on the fit with light strokes. Tenon cheeks often need cleaning up to remove saw marks and to fine-tune the fit, once again the flat surface of the larger rasps is ideal to keep things square and in plane. Here the versatility of the rasp comes to the fore; simply by altering the force applied, one can easily control the amount of material removed for fine tuning or serious stock removal. For woodworkers who prefer to fit their tenons with a rasp, several makers offer a joinery rasp which is ideal for this application, and functions much like a planemaker’s float.

Photo 4

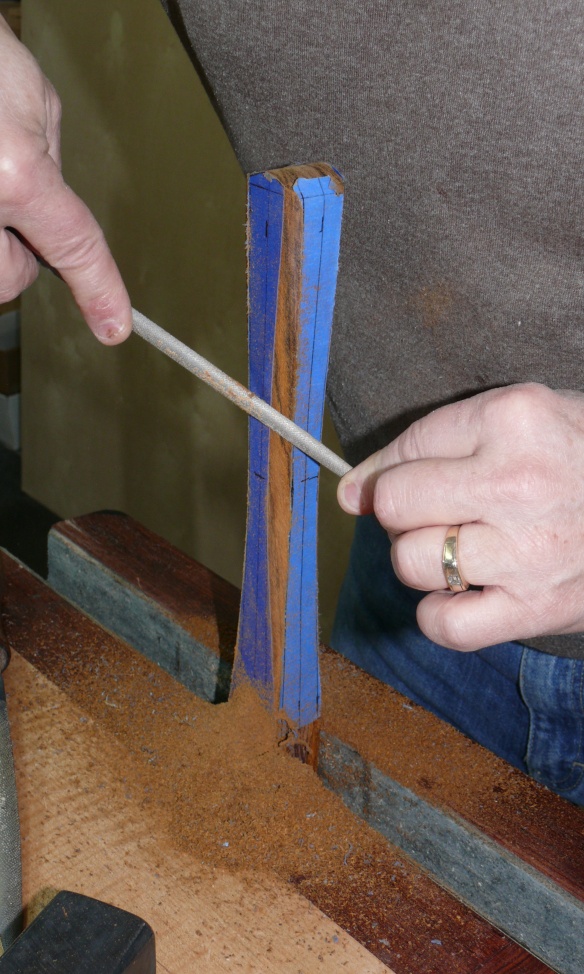
Large rasps are pefect for shaping tenons and other cylindrical features

Choosing your rasps

With rasps coming in so many shapes and grains, the conventional wisdom is to start with a 3-rasp set. The most versatile and useful rasp is the cabinetmaker’s rasp and is usually 12-13” long, with a flat surface and a semi-curved surface, and a medium grain finish. This rasp is perfect for general stock removal and leaves a surface similar to 80-grit sandpaper (depending on which grain you select) that is ready for final smoothing. The flat face provides a reference for smoothing and the size makes it much easier to use. If you buy only one rasp, this is the one to start with. Smaller than the cabinetmaker’s rasp, but with a similar overall shape, is the modeller’s rasp. Typically 8-10” long with a fine stitching, this rasp excels at final shaping and refining the surface left by a cabinetmaker’s rasp. The smaller size of the modeller’s rasp lets it get into small areas that may be difficult to sand and leaves a smooth surface requiring little or no clean-up. The third rasp in the typical starter kit is a medium grain rat tail rasp, for working tight radii, refining shapes, and widening holes for expansion joints. This rasp can also be used with light cuts to refine an edge, leaving a surface smooth enough to sand.

Photo 6

Rat tail and modeller’s rasps used to shape a miniature layout square

Properly cared for, high-quality hand-stitched rasps will provide many years of service and can open-up a whole new world of curves, flowing transitions, and precise fine-tuning of joints.

Last call for Otw tees

IMG_2504

I’m down to my last seven OtW tees of print run No.4 – six assorted sizes in Cardinal Red, along with a single XXL in British Racing Green. This is likely to be the last print run of tees for some time, so if you’ve been thinking of ordering one now is the time to let me know. I also have plenty of stickers and button pins in stock.

IMG_8941

Tees are priced at £20, stickers are £3 per set, and button pins are also £3 (all prices exclusive of shipping). I’ll also do some bundle deals for folk who order a tee with stickers and/ or button pin. As always, to order or make an enquiry, drop me an email at kieran at over the wireless dot com.

img_1208

A Welsh Stick Chair for the Apprentice – Part 5

_DPP5965

Trimming the leg tenons flush

The Apprentice’s Stick Chair is now looking quite chair-like, and there’s now only four sticks left to make along with the comb, before I’m ready to break open the milk paint.

_DPP5966

Paring the flush to the seat


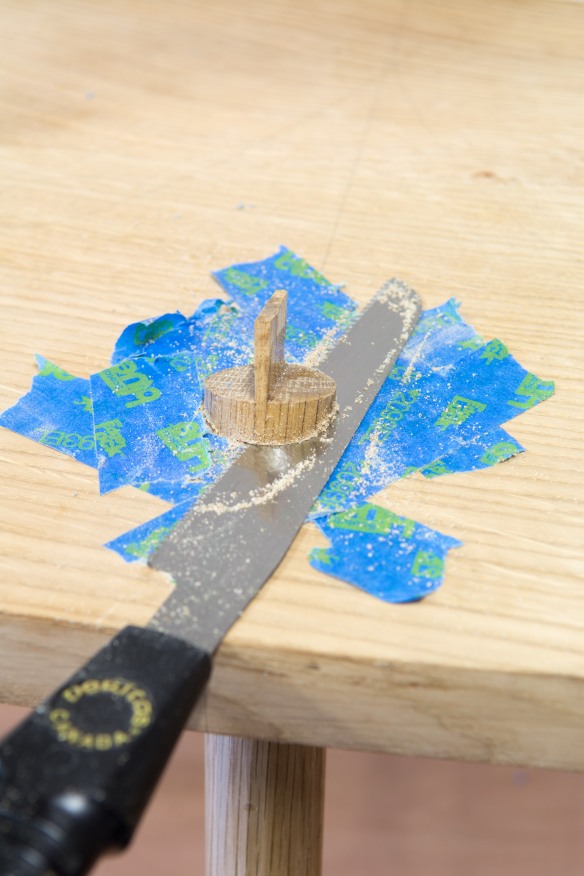
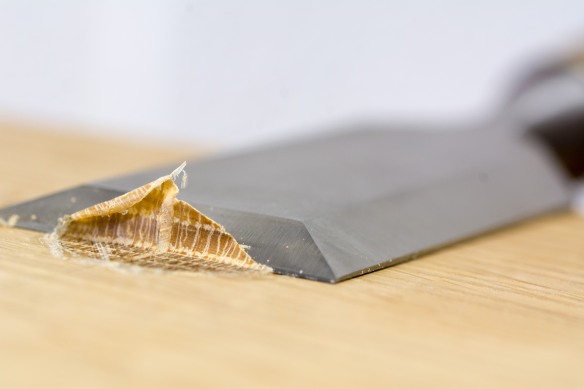
Once the glue had cured on the legs, I cleaned up the surface of the seat and flushed up the tenons. Chris recently wrote a useful blog post about getting good results from a flush cut saw. I take a slightly different approach, although the gist of it is the same. First, I surround the tenon with a web of blue tape to protect the surface of the seat. I then hog off the bulk of the tenon with a flush cut saw. The tape means that there is a small amount of tenon left protruding from the seat, and I remove this with a sharp paring chisel (I use a 2″ Ashley Isles butt chisel which I keep honed to a shallow angle for paring tasks). Push the chisel with one hand, and with your off hand press down on the back of the chisel to keep it co-planar with the seat. This way the chisel won’t dive into the seat, and will also resist the temptation to ride over the tenon. If your chisel is sharp enough it is possible to remove a complete cross section of the tenon in one pass.

_DPP5992

A complete wafer thin tenon shaving!

Once the tenons were pared flush I turned my attention to the other small details on the seat. Those crisp corners and edges are helpful for laying out the legs, but won’t be comfortable for little people sitting on the chair. I rounded over each corner using a fine (13 grain) rasp, and a sharp block plane rounded over the aris on each side of the chair. I haven’t saddled the seat of this chair, but I did want to add a bit of extra comfort to the front edge of the seat. To this end, I rounded over the front edge with a block plane, but took progressively more strokes in the centre third of the front edge than I did at each end. The result is a gentle radius to the front edge, and a subtle dishing to part of that edge, which will stop the seat digging into the backs of the Apprentice’s legs.

_DPP5969

Rounding the corners with an Auriou 13 grain rasp

With the top of the seat now ship shape, I turned my attention to below the seat. On the original chair that this build is based on, the top edge of the seat is 11″ from the floor. To level the chair I set it on a sheet of 3/4″ ply which was dead level and flat. I then placed wedges under each foot of the chair until it was level side to side, and had a finger’s width of slope to the back of the seat. Then it was a case of hunting through the scrap bin until I found an offcut which was the right thickness to be 11″ from top edge of the seat. To the scrap I taped a Hock Tools marking knife – I keep this knife especially for scribing legs to length. It is sold without a handle, and has a single bevel to the blade. By keeping it un-handled I have a razor sharp knife that registers true on whatever scrap block I need to tape it to.

_DPP5961

Cutting the legs to length

After selecting the right offcut, it was a simple case of knifing in the correct position of the feet, and then cutting to lose lines with my Bad Axe 12″ carcase saw. Cutting legs to length is one of my favourite elements of a legged build – while the angles look screwy, if you follow the lines it always works out ok. I finished up by chamfering the bottom edge of each leg with the same 13 grain rasp.

_DPP5973

Dividers make for easy layout of the sticks

While I was working on the seat I decided to drill the mortises for the sticks. These are 1/2″ in diameter, and centered 3/4″ from the edge of the rear edge of the seat. I stepped the position of all five seats off wih dividers, and ater experimenting with bevel angles I settled on a back stick angle of 11.5 degrees – it looks close to my photos of the original chair, and more importantly, should provide plenty of back support and comfort.

_DPP5976

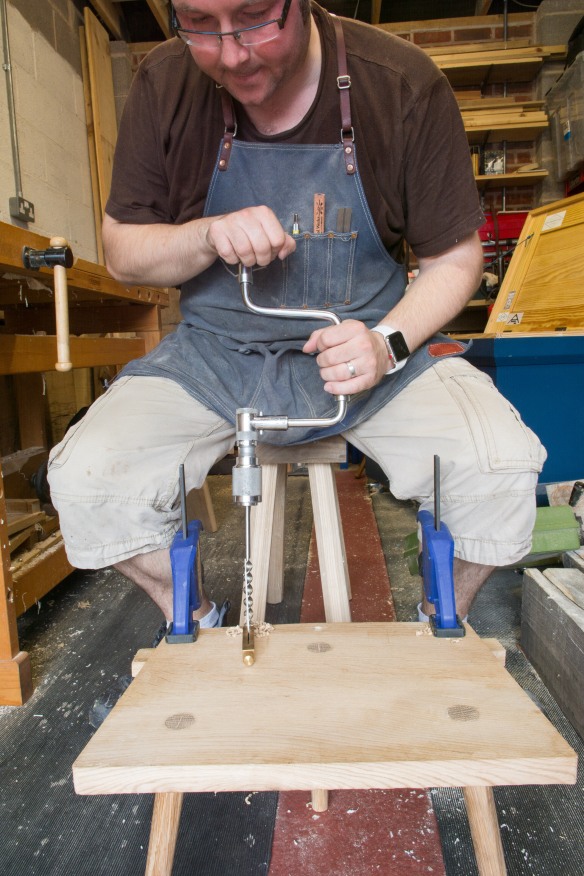
Doing my finest Chairman Brown impersonation

The thing about drilling mortises is that you need to hold the workpiece securely. Chairs don’t give you much to clamp, and so I decided to follow John Brown’s example from Welsh Stick Chairs, and put the chair on the floor, and drill the mortises while sitting on  a saw bench, holding the chair in place with my feet which gripped the legs. After gravity, your body is the best clamp you own. A 1/2″ diameter auger bit in my North Bros brace made quick work of the mortises – this is another task I real enjoy, as it doesn’t take long to dial your eye in to the angles, and drilling with a brace is a very relaxing affair. The mortises go all the way through the seat, so I clamped a scrap to the underside to avoid blowing out the exit side of the mortise.

_DPP5989

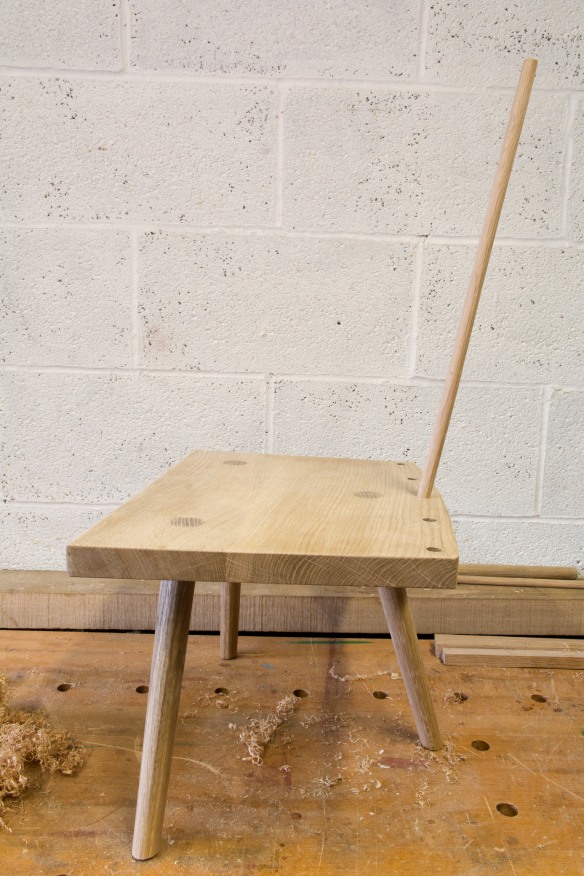
You can see the dished and roudned over edge of the seat

Once the mortises were drilled, I couldn’t resist test fitting the first stick to see what the completed chair would look like. So far, I’m quite pleased with how this one is turning out.

_DPP5977

Test fit! The chair is looking quite handsome.

Rising to the Occasion

IMG_0166

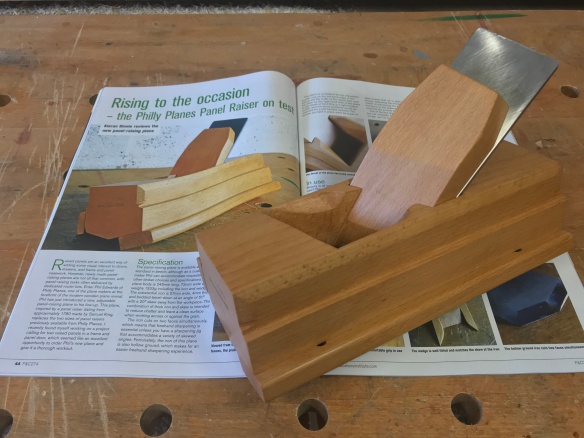
Furniture & Cabinetmaking issue 274 is now in stores, and features my in-depth review of the new panel raising plane by Philly Planes. Also included is Nancy Hiller’s article on the history and social significance of the Hoosier Cabinet, and part 3 of Steve Cashmore’s on-going series of WoodRat techniques, along with plenty of excellent content and inspiration.

Roubo is Coming

Roubo is coming, and he’s a heavy dude. I know this, because on Monday night I unloaded an oak slab that is destined to become the top of my new workbench. It’s hard to believe that over two years have passed since I last wrote about the ideas and options for a new workbench. While I may not have written about benches since then, I’ve spent a lot of the intervening period thinking about what I wanted from a workbench. Often when I was straining the capabilities of my current Sjoberg bench. In that time, I’ve refined my plans, settled on the design, and given some serious thought to how I’m going to approach the build. This is a big project to undertake, and so I wanted a narrative arc to carry me through. I think I’ve found one.

_DPP5852

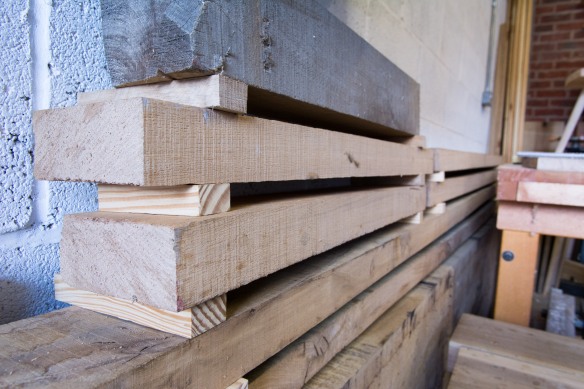
Stretchers, planing stop, and slab all stickered. The legs and vise chop are stacked up separately.

It was Ethan who convinced me at the start of this year to stop putting this project off for another day, and to get to building. Since then I’ve been trying to source the timber – no small endeavour for a project like this, but which came to fruition on Monday, when a very heavily laden truck arrived at the workshop. But what exactly am I going to build with all of this oak?

_DPP5887

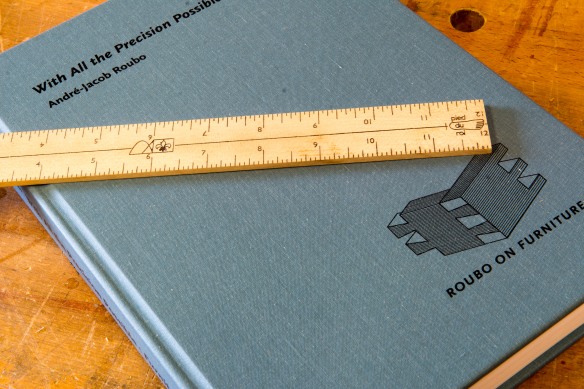
My instruction manual for this buld – Roubo’s desciption of the work bench, and the Pied du Roi ruler

Well, as you’ve probably guessed by now the new workbench will be Roubo-orientated. In my last workbench posts I was considering a dovetailed end cap, sliding deadman, wagon vise. Lots of accoutrements that Roubo would not have recognised. Instead, I’ve decided against doing a modern interpretation of a Roubo bench, and will follow Roubo’s description of the workbench (and in the excellent Lost Art Press translation of With All the Precision Possible) together with the illustration in Plate 11. So no sliding deadman, tail vise, or other modern additions. This is going to be as close to the illustration in Plate 11, and Roubo’s description, as I can make it – including the grease pot and drawer.

And this extends to the basic unit of measurement. In an effort to follow Roubo’s description faithfully I will be using the period appropriate Pied du Roi as my unit of measurement, in preference to the modern inch, with the aid of Brendan Gaffney’s excellent rulers. One of the practical research questions that I’m interested in exploring with this build is whether using a different unit of measurement has any practical implications once the bench is in use.

_DPP5857

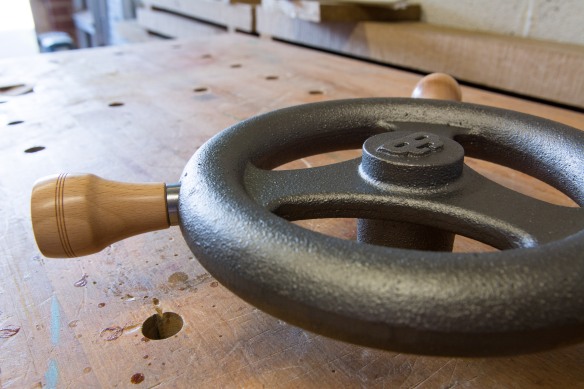
Benchcrafted Glide C vise – the texture of the casting, and beech knobs, work really nicely with the oak. And who doesn’t want a steampunk ship’s wheel on theit workbench?

So a slab top oak bench, with the iconic sliding dovetail leg joint. That sounds pretty good. For work holding I have a traditional planing stop made by Peter Ross and my one concession to modernity – the Benchcrafted Glide C vise. To supplement the planing stop I’ll be using 1″ diameter holdfasts and Does’ feet. At this stage I’m not convinced by the need for a crotchet, so will be omitting that from the build. But it is always something I can add at a later date if it becomes useful.

_DPP5865

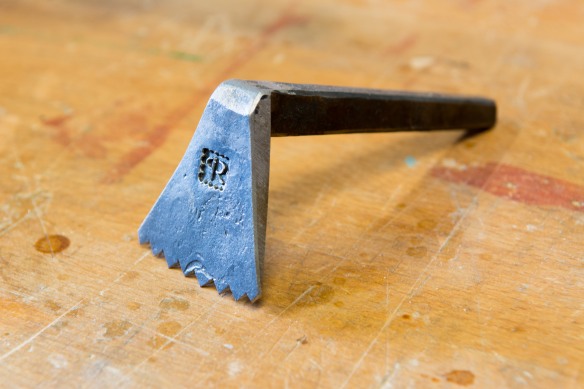
Peter Ross planing stop

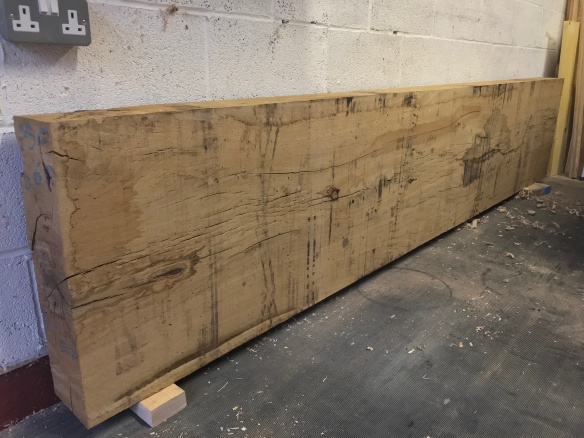
How about the dimensions of the bench? As it currently sits in my ‘shop, the slab top is 6″ x 22″ x 110’ in the rough. Ultimately. I’m shooting for a top that is 8 Pied du Roi long (in the region of 102 modern inches). This should be long enough that I’ll never outgrow it, but short enough that it is easily housed. My hope is that this will be the only bench I ever build. Sourcing oak of this size has not been an easy task, but Matthew Platt of Workshop Heaven kindly put me in touch with Acremans Timber, who were very helpful in supplying oak in what is an unusual set of dimensions.

IMG_0112

The slab top – 110″ of green oak ready to be transformed into a workbench

The oak is now stacked up and stickered in the ‘shop while I wrap up a few projects. Towards the end of the year I’ll start the build in earnest – that will have given the legs and stretchers time to acclimatise. As for the slab top, well, given that it is both air dried and huge, it will take decades to dry out. My moisture meter tells me the end of the slab is at 16% moisture content, but the middle of the slab is likely to be much, much wetter. One of the other learning experiences of this build will be working with a monolithic slab which is, to all intents and purposes, still green. It promises to be a very interesting (and exciting) build, and I hope you all join me for the ride.

Help Fund Auriou Tool Works

img_2885

Forge de Saint Juey, home to Auriou Tool Works

Last week a mailshot landed in my inbox from Classic Hand Tools about a crowdsourced funding drive Auriou Tool Works are undertaking. I was fortunate to visit Auriou back in 2016, and it is a truly special place steeped in over a century and a half of dedication to craftsmanship. Michel Auriou, the 4th generation of his family to work at the forge, has an encyclopedic knowledge of his craft, and a real passion for building on the Auriou legacy. It would be a real tragedy if Auriou were unable to continue trading

The crowdfunding site can be found here, and the newsletter from Classic Hand Tools is reproduced below (with kind permission of CHT). If you want to invest in a woodworking institution, and help ensure the survival of an incredibly important family business, then click through to read more.

Auriou Toolworks is just 162 years old. It survived the 2008 financial crash through assistance from 2 altruistically inclined investors who worked hard to keep this historic forge going when the proverbial hit the pan several years ago.
The order book for Auriou tools has always been full this last decade with great demand from North America and the UK in particular. However,  retiring skilled workers, worn out spring hammers, tooling and other essential equipment plus lack of credible government funded training schemes for apprentices have always constantly undermined the drive to get the forge on an even keel.
Funds are now needed for capital investment to keep the company going.
The ownership fully returned to Michel Auriou last summer and he is seeking help through crowd funding to help secure the future of toolmaking at Forge de Saint Juery (home of Auriou Toolworks).
We are happy to direct potential funders to this cause as at Classic Hand Tools, we do believe that Forge de Saint Juery is alone in its forging and rasp/riffler techniques which makes them appreciated by hobbyist and professional woodworkers worldwide.
Commercially, as their UK retailer, we would like to see them continue for decades to come.  Of greater concern to the wider woodworking world would be the loss to the hand tool making fraternity should Auriou tools disappear from the marketplace for ever despite their healthy order book.
As a matter of disclosure Classic Hand Tools Ltd does not (since September 2017) have any share capital in Forge de Saint Juery – home of Auriou Toolworks. Consequently we cannot comment on the financial well being of the company but can confirm we have recently received 2 large stock orders and have large orders placed with Forge de St Juery for delivery this year.
Michel Auriou is unaware of the posting of this newsletter. We feel his crowd funding initiative deserves as wider audience as possible. Any correspondence can be directed to Michel at michel-auriou-fsj@orange.fr
dsc_0095

A stitcher uses the barley corn pick and hammer to cut each tooth individually