“Hey man, need any of the good stuff?” The moulding plane gateway drug

I’ve not had any opportunity to make progress on the parlour guitar yet this month, thanks to some minor surgery which meant that pushing a plane was off the cards for a couple of weeks, and a front loaded year in terms of article deadlines (3 articles all due within 4 weeks of each other). Which is fine because it means the writing is going well (and I am looking forward to writing more about those articles in due course).

DSC_0150

In the meantime, I’ve been meaning to write a review of the 3/8″ beading plane Philly made me last year. I’d borrowed a similar beading plane by Philly off Alex Primmer of Classic Hand Tools whilst on the Anarchist’s Tool Chest course, to bead the floor boards on my tool chest, and found the process simple and thoroughly addicted. I only have myself to blame, after all, as there are plenty of blogs out there which warned of the dangers of beading planes. Set the plane’s fence against the edge of the work, plane the beading detail, and stop when the depth-stop bottoms out. Simple. And effective – the subtle shadow line introduced by the bead adds a touch of class to the floor of my tool chest. I was hooked.

Of course, beading doesn’t just add a decorative element, it also protects exposed edges that would be otherwise prone to knocks chips and dents. The bead absorbs the damage of daily use, and prevents any splits from travelling deeper into the piece. So pretty and useful? Isn’t that the perfect combination?

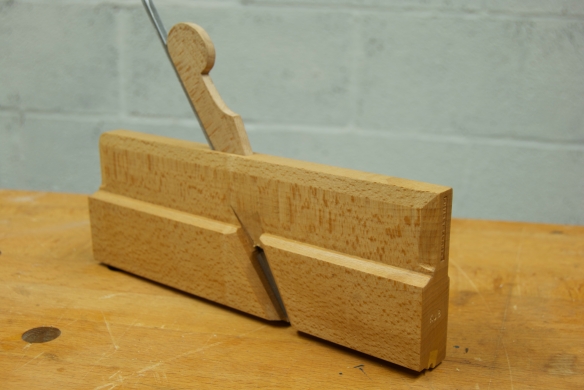
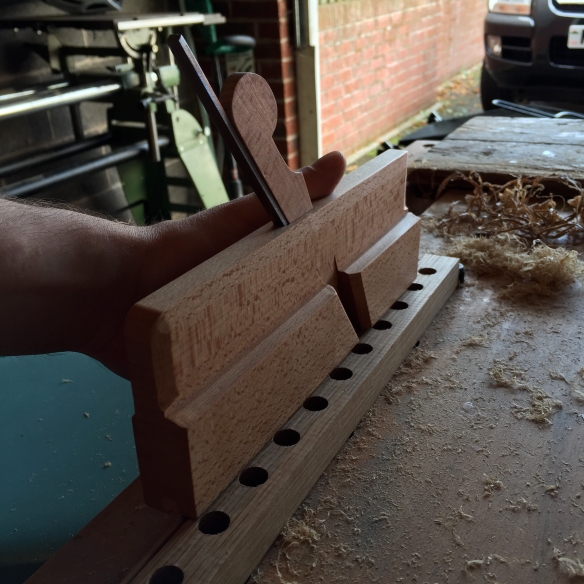
Not long after the Anarchist’s Tool Chest course finished, I dropped Philly a line to commission a 3/8″ beading plane of my own. After a couple of months wait what arrived was a beautiful example of a traditional handmade wooden plane. The beech body has crisp chamfers, a nicely fitted wedge, gorgeous finish, and perfectly fitted boxwood insert (which establishing the bead profile). The O1 steel blade is sharp out of the box, and cuts oak just as smooth and effortlessly as it does pine. As an advert for traditional tools made in a traditional way, Philly just can’t be beat (and he’s a thoroughly nice chap to boot!).

IMG_1321

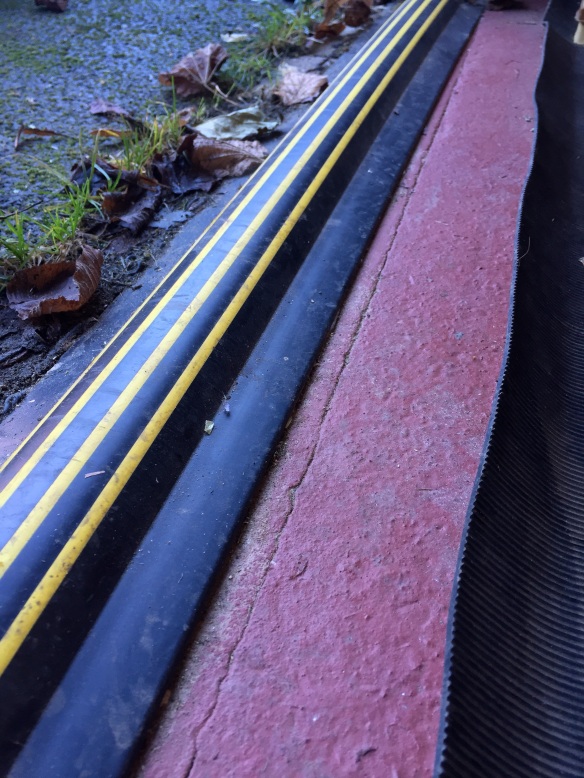
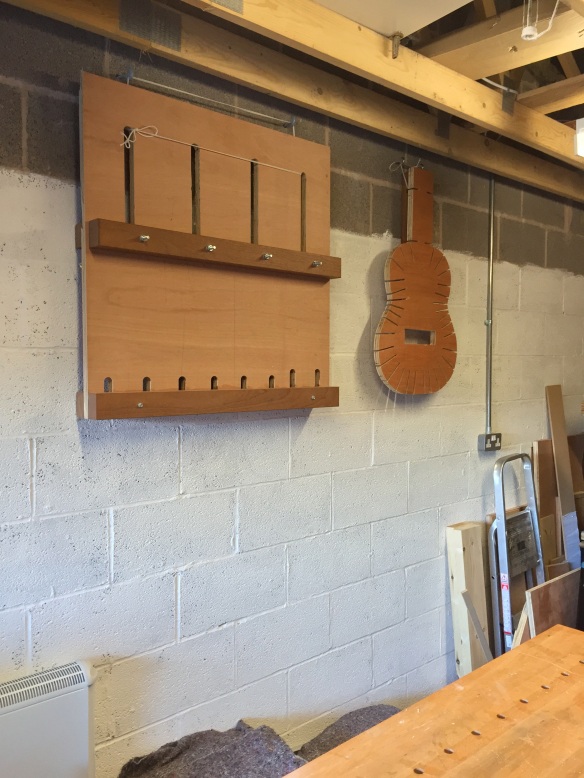
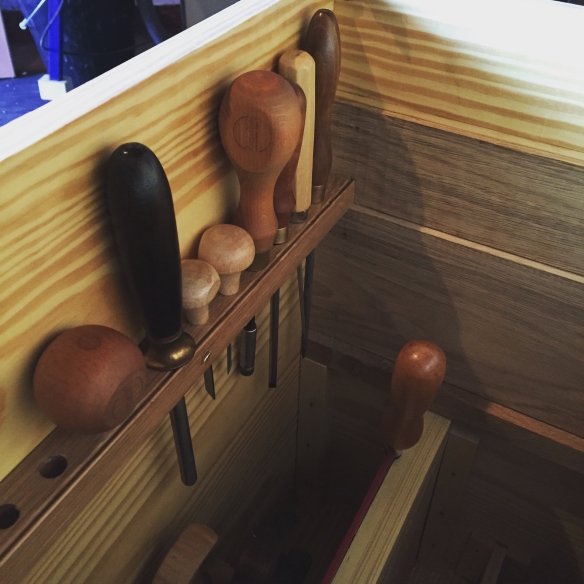
The beading plane isn’t a tool I reach for every day; there is limited opportunity to bead guitars. But in terms of furniture building it is invaluable for the ability to pretty-up an otherwise plain component with subtle shadow lines and visual interest, and also to protect those delicate edges. I only wish I had had this plane before I started work on the dust seal and runners for my Anarchist’s Tool Chest, as these would be perfect candidates for some beading. I did reach for the beading plane when installing the front tool rack in my chest last August, and this is a prime example of where beading can really lift an otherwise uninteresting element. Truth be told, it’s a wonder Dr Moss and the Appentice haven’t yet been beaded (though they are far from uninteresting), but I shall have to wait until they are fast asleep before I attempt this…

IMG_1325

So are beading planes really the gateway drug? I obviously couldn’t comment, but having found myself in dire need of a re-up (yeah, I watched The Wire) Philly is now making me a pair of No.6 hollow and round planes. So I suppose I have sucumbed to moulding plane addiction. And it feels so good.

Branding: not just for cows

OTW_Web-Banner-4

Some ideas snowball quickly, while some slowly percolate over a far greater period of time. Nonetheless, no idea is born in a vacuum, and most are linked to other thoughts. I’ve wanted a maker’s mark for some time now, but two (quite significant) stumbling blocks have thus far stopped me from doing anything about it; I can’t draw whatsoever, and I couldn’t decide whether any maker’s mark should be linked to the blog, or my name, or something else entirely. So the inertia set in.

And then last autumn, as the freelance woodwork writing continued to grow, and further opportunities presented themselves, I set up Over the Wireless Limited as a way of formalising and managing the different threads of my writing and woodwork. Bingo, a new entity is born, and my woodworking identity started to coalesce. In truth this shouldn’t have been a big surprise –  I’ve been writing as Over the Wireless for two and a half years now, the blog is how I originally scored the writing gigs, and EWS 2015 showed (much against all expectations) that I do have a good sized and loyal readership. So Over the Wireless it is.

Now, it’s easy when you set up a new business to fall into the trap of thinking that you now need to invest in all manner of equipment and merchandise that you didn’t previously need (hey, we need two photocopiers and a watercooler, because how can we have an office without those?!). And that is a way to lose money and quickly go bust. Which doesn’t sound like much fun. And to be honest my woodwork needs are simple, and I’ve never enjoyed buying gadgets for the sake of it. So there’ll be no Over the Wireless calendars or bumper stickers. But having some way of communicating with the world as to what (and who) Over the Wireless is, and how folk can contact me, is fundamental. At EWS I got through a vast number of business cards which identified the blog url and my contact details. But that was prior to setting up the company, and this time around I wanted to do it with a little more… style.

So (and this is where we get back to my original point) I asked graphic designer, and all round great chap, Tom Richards to design some company branding. One of the skills of a real craftsman is being able to understand what the customer wants, even if they aren’t sure themselves, and Tom showed himself to be such a craftsman. Although I had an idea of the feel I wanted for the branding, I didn’t have anything concrete in mind as to how it should look, and Tom ran with the brief I sent him and far exceeded all my expectations.

The result is a trio of strong designs that tie in together, and can be used for the different formats I need. So, for a logo (and now proudly displayed at the banner of the blog):

OTW Logo - Double Line Lockup

That longed for maker’s mark, now looks like this (which will also be embroidered onto a set of chisel and auger bit rolls Jason is currently making for me):

OTW Logo - Maker's mark

And finally, as a stand banner for future woodwork shows:

OTW Logo - Graphic

I couldn’t be more pleased with the branding, and the way this captures the identity of Over the Wireless. Tom’s work has been top notch and very swift, and I’d happily recommend him to anyone who needs graphic design services (you can email Tom at phototropicalia [at] gmail [dot] com to discuss your design needs).

Next post will be back to the real business of making woodshavings. But I’m really pleased with the new graphics – and what is the point of having branding unless you can have an online launch!

Winter Is Coming: workshop improvements

We have owned our house for 12 months now, and I’ve been working out of the new workshop for the past 10 of those. Which is good amount of time in which to get a feel for a work space, and to make any necessary adjustments. Although far from fancy, my current workshop is perfect for my needs; being handtool led I don’t need acres of space, and the 17′ x 11′ footprint is plenty big enough.

JVRR2320

I wrote about the first round of workshop improvements back in March last year, and since then I have undertaken a second phase of work to facilitate better working, and to ensure it is a pleasant (and safe) environment to work in.

Firstly weatherseals were fitted to the bottom and top of the up-and-over door. This has had a significant improvement in keeping the elements (and endless leaves off our 3 storey tall lime tree) out of the shop, as well as keeping heat in – all of which have been very welcome this winter.

IMG_2302

The bottom weather seal has kept the workshop dry and free of leaves. The concrete floor paint I used last year, and the rubber matting, have both held up well.

A new small shed in the garden has provided ample storage space for the usual mess of gardening equipment (and the BBQ) that would otherwise pile up in the workshop, and means that the only non-woodwork equipment now in the workshop is my bike.

As I commented last March, the one area where the workshop was really lacking was in terms of lighting and power sockets, with only a single lightbulb and a solitary double socket representing the full extent of getting electrons into the shop. Now raking light is rather wonderful, but on wet and dark evenings I used to find myself reduced to practically no light, which is rather less wonderful (or safe). So the biggest upgrade to the workshop was the introduction of a spur off the main fuseboard in the house, leading to a separate fuseboard in the shop itself. This now powers two 4′ florescent strip lights, a small heater, and 6 double wall sockets, giving me all the light, power and warmth I could ever need.

IMG_2300

Wall hanging the two large jigs has released a lot of floor space.

My final upgrade was to install some wall fixings so that the thin panel gluing jig and solera could both hang from the wall (freeing up a great deal of floor space), and a simple board above my tool chest on which my shop apron, dustpan and brush, and deadblow mallet, could hang within easy reach of my bench.

These adjustments have definitely added to the experience of working in the shop, and the next round of workshop alterations will be mainly to refine what is already a very pleasant and practical space. I intend to build a wall-mounted clamp rack, and a Roy Underhill style nail cabinet. The big task will be to clear out the troublesome junk corner behind the bandsaw, where the go-bar station and my scrap bin currently reside. My plan for this corner is to build a 4′ knockdown Nicholson bench, which will also be invaluable for EWS 2017 (I’m hoping to exhibit there again, and 4′ is the maximum length I can fit in my trusty Kia). The drillpress and go bar station will sit on the KDN bench, and that bench will also double up as an assembly bench when needed. I am also toying with the idea of installing a dust extraction system (possibly a Microclene extractor) above the rafters.

A workshop, very much like a tool chest, is never really complete, but my current space is evolving quite nicely.

With sound and moving pictures

Thanks to an eagle eyed reader, it has come to my attention that there is video footage of Esmerela on YouTube! Gerardo of My Vintage Victory stopped by my stand at EWS and played Esmerelda for a couple of minutes. What I didn’t know at the time was that he had recorded the whole event. Esmerelda makes her appearance at 4:21 on the below video.

Enjoy!