Lights! Camera! Action!

IMG_8835

A final test of the lighting rig before I load the car.

While I’ve not posted an update on the progress of the John Brown book for a while, behind the scenes we’ve been working hard on interviewing people who knew (or were influenced) by Chairman Brown, investigating historic examples of Welsh Stick Chairs (see my article for Furniture & Cabinetmaking this month for a beginner’s guide to the chair form), and working out how exactly we are going to structure the book.

Today I am heading down to Carmarthenshire to spend a week with Chris Williams. We will spend the next week hunkered down in Chris’ workshop – him building a Welsh Stick Chair while I photograph and document the process for the book. This will form the basis of the “Build a Welsh Stick Chair” section of the book, a section we started last year with our trip to the timber yard. Over the course of the next week, we hope to be able to capture how John Brown built his chairs, but also how the chair design has continued to evolve in the years Chris has been buiding them since John’s death, and why Chris has changed some of the techniques he uses to build them. Researching these chairs over the past year has highlighted how dynamic a form they are – they constantly evolve maker to make, and often chair to chair. We hope over the course of the next week to be able to lift the lid on some of that process.

At the end of the week we should then be in a position to write the “Build a Welsh Stick Chair” chapters, and a substantial element of the book will be complete (at least in draft form). And so I’m looking forward to setting out westwards this evening. Not just because this represents a major milestone in the development of the book, but also because of the opportunity to learn first hand from Chris – to watch how he crafts his beautiful chairs and to ask questions about the process, the evolution of his approach, and his relationship with John Brown. The next five days or so promise to be a real education, one which we plan to share with you through the book.

IMG_8837

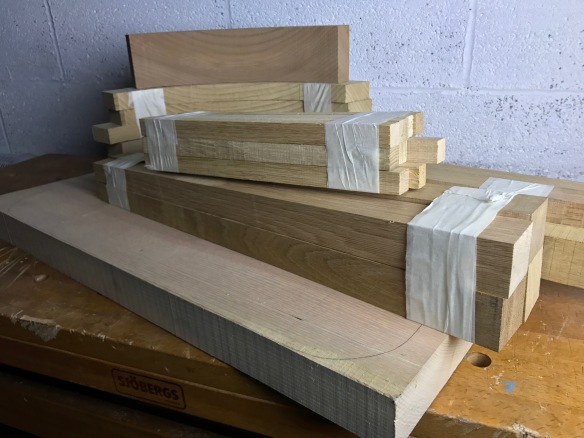
The chairmaking chapters will explain how to turn a set of timber like this, into a Welsh Stick Chair, and also how to source the timber in the first place.

All Assembly Required

or: The Anarchist’s Office Suite, Phase 2

The staked desk was the first of three pieces for my office, and by the summer I will hopefully have completed the remaining two projects – a boarded book case and a staked chair, both from the Anarchist’s Design Book, and both in maple to match the desk.

Because my workshop is unheated, I tend to tee up projects a couple of months in advance of when I plan to start them – breaking stock down to rough dimension and then stickering it in the house to acclimatise until I’m ready to get building. Before I can work on the book case , I am writing (and building) a project article for Popular Woodworking, scheduled for the October issue later this year. But in the meantime, and before I started working on the piece for PopWood, I took some time to prepare the stock for the bookcase and chair.

IMG_8392

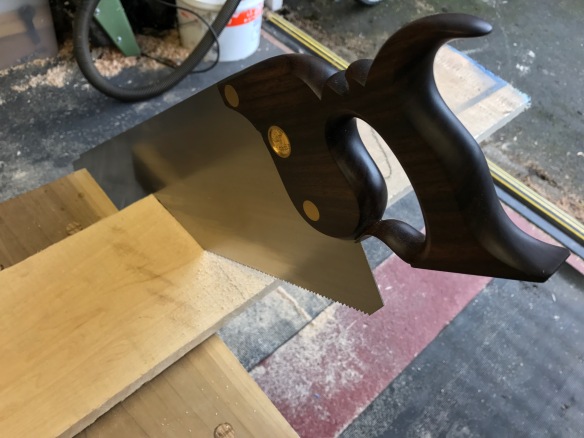
Breaking maple boards down with the Skelton Panel Saw

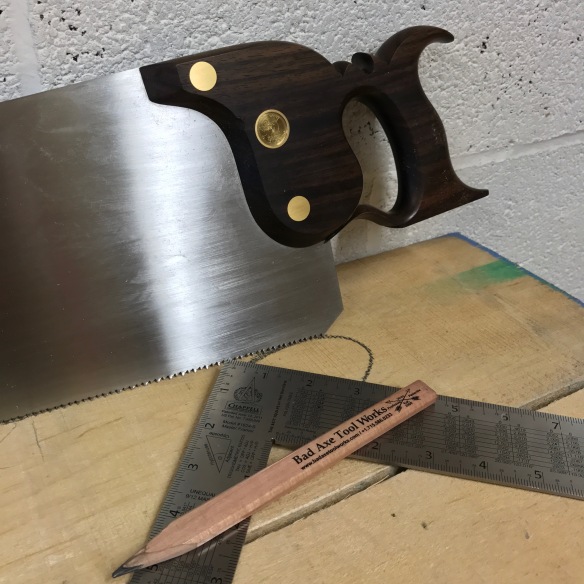
When marking rough timber to length I prefer a timber framer’s square, and a chunky carpenter’s pencil (my saw *ahem* addiction means that I have a healthy supply of the carpenter’s pencils Bad Axe include with each saw), while rip cuts are easily marked out with a chalk line. Although this is not tricky work, I tend to take it quite slowly so that I can look over the boards carefully and make cuts to avoid knots or other defects. Once the boards have been marked out, and triple checked that the lengths are correct (including an extra inch or so to allow for any end checking that may occur), onto the saw benches they go to be broken down. Sawing the stock is straight forward – my Disston D8 handles rip cuts while the Skelton Panel Saw cross cuts stock to length.

IMG_8395

Stock preparation tools – Skelton Panel Saw, timber framer’s square, and carpenter’s pencil

After breaking the boards down I left them in the workshop for a week or so before stickering them in the house. I find that this staged process of cutting to rough length and width, resting in the ‘shop, and then moving into a heated environment avoids shocking timber and so reduces drying related movement or checking. Once I’ve finished the project article for PopWood, it will be onto the book case, which will provide a home for the remainder of my books and research materials currently languishing in boxes on the floor. And finally, the chair. Slowly but surely, the office suite is coming together!

IMG_8393

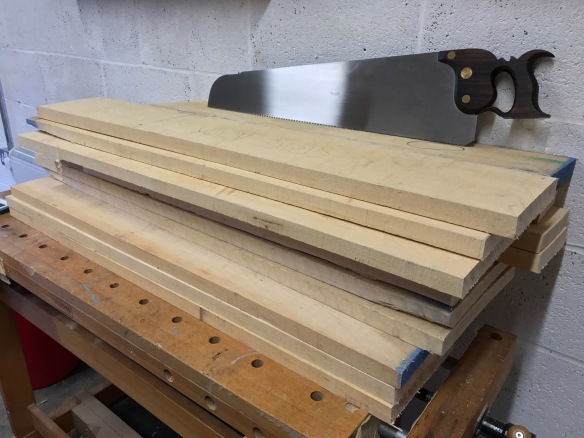
In this pile of maple is a boarded bookcase, just waiting to be assembled.

Welsh Stick Chairs – A Beginner’s Guide

If you’ve been waiting for an update on the John Brown book, then you might want to pick up issue 268 of Furniture & Cabinetmaking (which went on sale yesterday). Issue 268 carries my “Beginners Guide to Welsh Stick Chairs“, featuring photos of historic examples, and chairs by John Brown, Chris Williams, and Chris Schwarz. As always, the rest of the magazine contains a bumper crop of projects, reviews, and tricks of the trade.

Staked Work Table – in situ, in pictures

_DPP4173-2

A vintage compass (from 1904) sits on the corner of my desk. The lif of the compass is engraved with “The Road Not Taken” by Robert Frost.

As soon as a project is finished and installed, most of my attention tends to switch to the next build on my work bench. The staked desk is a little different, in that I’ve been sitting at it most evenings this week catching up on various items of work. And it has been wonderful to spend some quality time working at the desk – I’m sure this is a piece of furniture that will age well as I spent many hours, and years, working at it.

_DPP4178-2

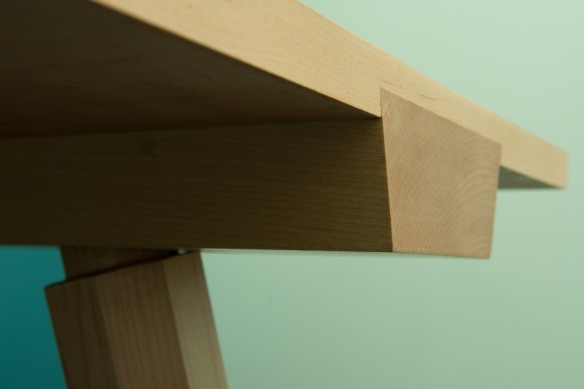
A confluence of components – the top, batten, and leg all coming together.

One of my favourite post-completion stages is always taking detail shots of the completed piece. Gareth is booked for a photo session in April, so there will be new additions to the Portfolio section of OtW in the near future. But in the meantime here are some detail shots I took of the desk in situ.

_DPP4213-2

The finish on the top worked very well. Plenty of protection, and the figure is emphasised without becoming distracting.

_DPP4208-2

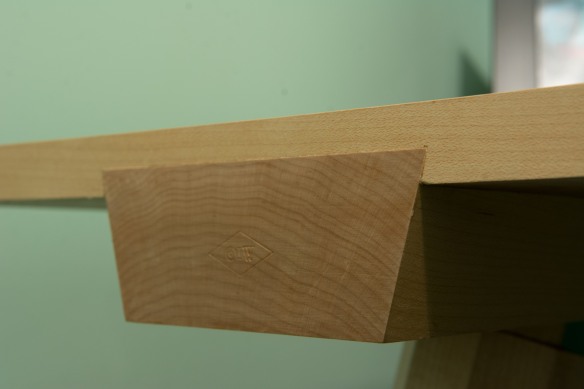
Maker’s mark on the left hand batten.

_DPP4209-2

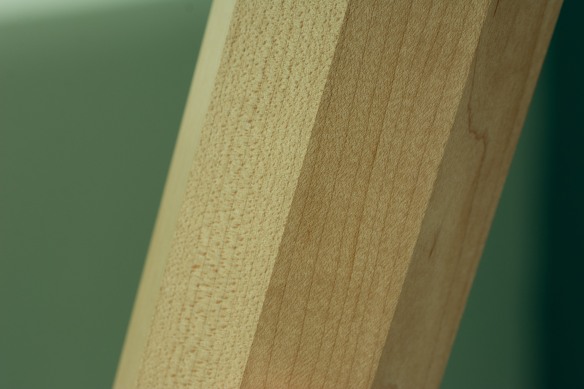
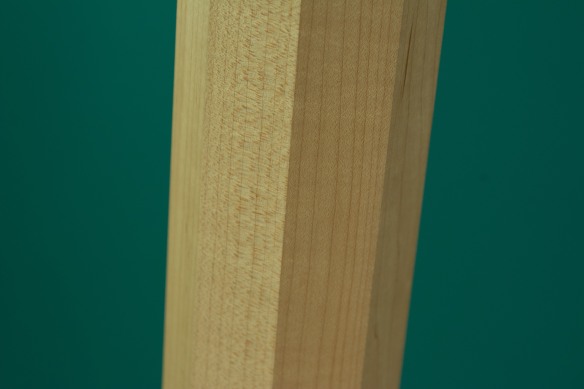
Facets!

_DPP4211-2

More facets. This time one of the back legs.

_DPP4181-2

Left hand batten.

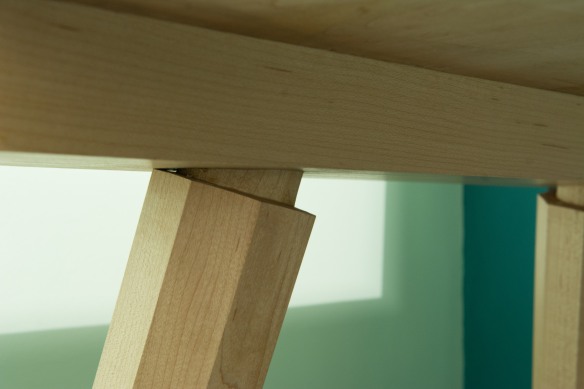
_DPP4179-2

This is my favourite detail – the leg tenon entering the batten. Just a little hint of the, compound angles, and lovely facets. I could look at this element of the desk all day.

Pretty Up

As every project nears completion I start to think about what finish will be the most appropriate given the timber selection, the location of the project, and the intended use. Some woodworkers have a favourite finish that they reach for as a matter of course, but I’ve never found that one magic finish. Sure, there are finishes which I really like for certain timbers or applications (water based lacquer for acoustic guitars, shellac and black wax for oak, milk paint for pine), but there is no one finish which I instinctively reach for. The benefit of being somewhat restless when it comes to finishing solutions is that I’m always open to trying new products or combinations.

IMG_8643

The completed work table in situ. Maple, sea foam green, and teal. All the hallmarks of a vintage Stratocaster!

For the staked work table I planed up an offcut of the top as a sample and divided it into quarters. I like to have a couple of options to choose from, and with my sample board prepared I tried varying combinations of blonde shellac and hard wax, blonde shellac and Osmo Polyx, and a choice of either Osmo Polyx or Osmo Raw directly onto the maple (with no shellac). What I was looking for was a finish that subtly displayed the figure of the maple, but which did not add a high sheen – I will spend a lot of time working at this desk and don’t want to be distracted by light reflecting off a high gloss finish or by the figure becoming too loud.
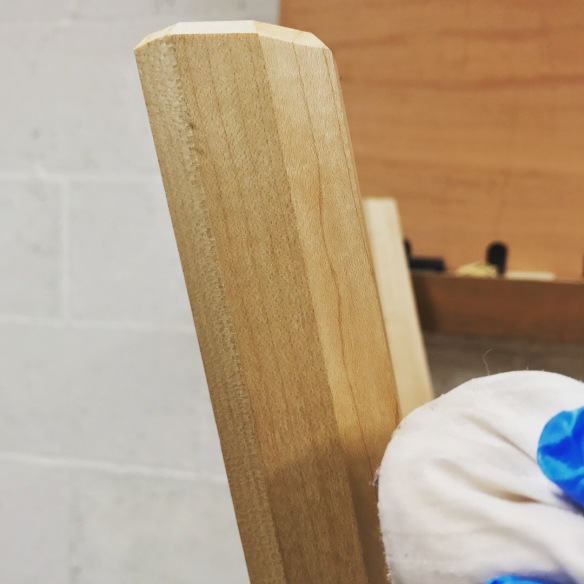
IMG_8642

Applying shellac with a rubber

After living with the sample board for several weeks I decided that a base coat of blonde shellac with a top coat of Osmo Polyx matt would achieve my desired criteria. The shellac lifts the subtle curl of the maple top but never becomes too brash, while the Osmo adds a low-sheen protective layer which will ensure the longevity of the desk.

Before I applied the finish I spent some time checking the assembled desk and making pretty; cleaning up glue squeeze-out from the batten sockets, flushing up the front of the battens with a smoothing plane, and removing any last traces of tearout with a cabinet scraper. Finally, I broke the sharp corners of the desk top with 220 grit sandpaper. This last step is both for my comfort (maple can take a wicked sharp edge when planed) and to reduce the risk of the aris breaking in use.
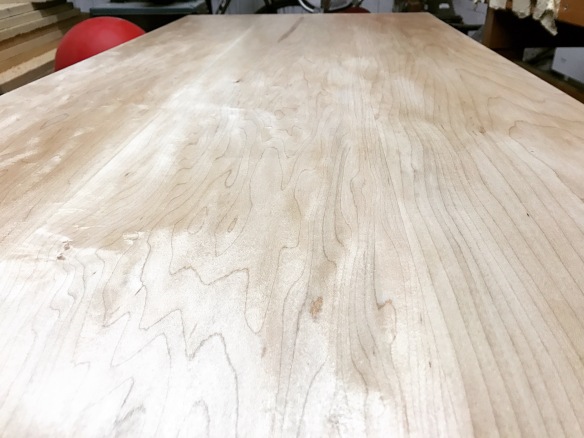
IMG_8648

The top after two coats of shellac. Now for the Osmo.

Most of my finishing solutions tend to be quite simple – I want the finish to look good but I also want it to be easy to apply, and this was no exception. Previously I’ve applied shellac using a good quality polishing mop, but after some sage words of advice from Derek Jones (Derek really knows finishing) I decided to try applying shellac using a rubber. A quick order to John Penny Restoration later and I had plenty of lint free rags and skinned wadding to make the polishing rubber. Derek’s book provided a very useful walk through on how to fold the rubber and use it to apply the shellac. I used blonde tiger flake shellac from Tool for Working Wood, mixed to a 2lb cut. This went on very easily, and after two coats the figure on the table top was popping nicely without becoming brash. Using a rubber left a smoother texture than brushing shellac, which reduced the need for sanding between coats, and will definitely be my preferred method of applying shellac going forwards.

The final step was to apply the Osmo. I ragged generous coats on to every surface save for the underside of the top (which left with just a shellac coat) and then wiped off the excess after 20 minutes. Two coats applied 24 hours apart gave a good build up of finish and left a matt sheen which is attractive without being distracting.
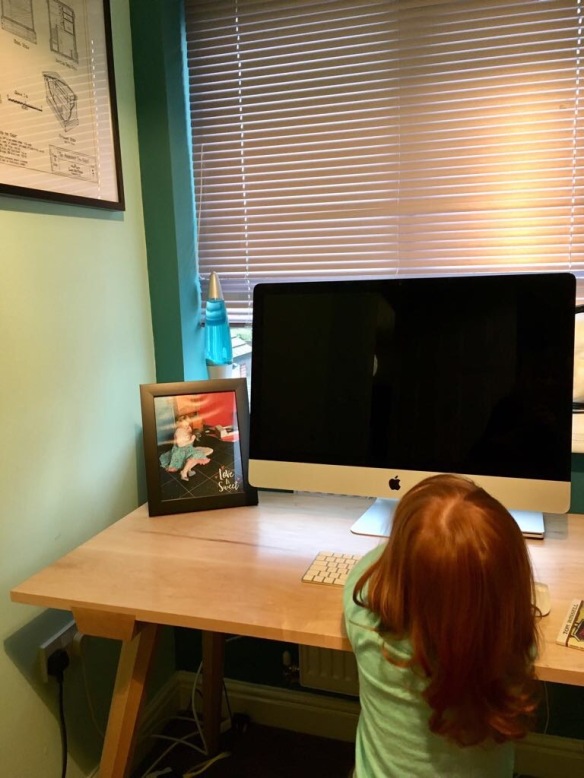
IMG_8661

Quality inspection by the Apprentice

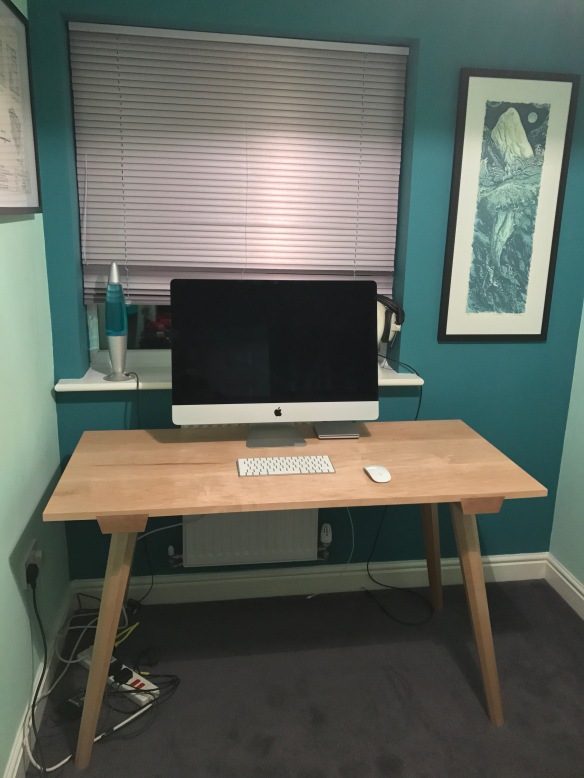
After leaving the desk for another 24 hours to get rid of the worst of the chemical aroma of Osmo, I moved the desk up to my study. This is the first piece of furniture I’ve built for our house, and the first time I’ve decorated a room with a specific furniture project in mind. When I started to decorate the study I wasn’t sure what colour to paint the walls – it is a small room so I wanted something that made it feel light and vibrant. Dr Moss suggested that I look to my favourite vintage guitars for inspiration, and so the walls were painted sea foam green and teal (my two favourite vintage Fender colours) with the knowledge that the Anarchist’s Office Suite of desk, chair, and bookcase, would all be maple. Moving the desk in was the first opportunity to see whether this combination had the desired effect. I’m pleased to say that seeing the desk against the painted walls really does evoke a mid-1950’s Fender Stratocaster, so the concept worked!

But more than that, the desk is sturdy, comfortable, and provides a very generous working area. It is also a very tactile piece – the smooth top contracts wonderfully with the roughly scalloped underside, and it is wonderful to run your fingers over the facets of the legs.
IMG_8646

Loaded up with my iMac and ready for work.

And so, I’m sitting in my study, typing the first of many blog posts which will be written at the new desk (not to mention magazine articles, and the small matter of the John Brown book). The study will continue to be a work in progress until I’ve finished the staked chair and bookcase to match the desk, but already it feels good to have a dedicated and comfortable place to work. I’ll be covering the progress of the rest of my Anarchist’s Office Suite over the coming months.