Curing Plane Addiction

The following is based on an article that originally appeared in Issue 250 of Furniture & Cabinet Making magazine. Thank you to Patrick Leach for his invaluable knowledge on historic Stanley planes, Philip Edwards for his assistance with wooden bodied planes, and Classic Hand Tools for photos of the Lie Nielsen range of bench planes.

img_1094

My set of bench planes, from left to right: No.8 jointer, No.5 jack, and No.3 smoother

Step 1 – Admit you have a problem

1869 was a good year for woodworkers. Stanley had just started selling their Bailey pattern bench planes, which set a standard for metal bodied hand planes that endures today with tools made by the likes of Lie Nielsen and Veritas. In contrast to wooden planes, which were referred to by their function, those early Bailey pattern planes were helpfully numbered 1 to 8, with each successive number referring to an increase in size. The Stanley numbering system has become a familiar industry standard but also sets a trap for the unwary woodworker. Because while a standardised numbering system makes it easy to identify hand planes, instead of focusing on the function of a plane we start to look at our tool kits and at the gaps in the numbers. From there, it is only a short step to convincing ourselves that our work would be so much better if only we had a No.6 plane, or a No.2, or all eight. Yes, definitely all eight. Before you know it you are a tool collector, with an expensive habit to feed and a growing stable of tools to keep sharp and rust-free.
dsc_0135

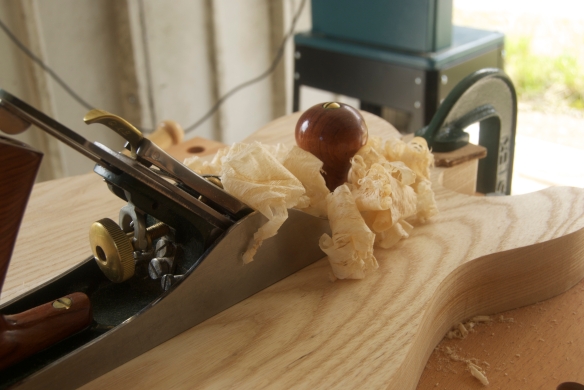
Jack planes are versatile tools – they can be used for rough stock removal, smoothing, and as short jointers

Now, hand planes are the most totemic woodwork tools and form the cornerstone of any handwork tool kit, as well as being highly useful even in machine-focused workshops. However, the available range of planes can be bewildering, particularly to the beginner woodworker. Even if we focus on bench planes and ignore more specialised joinery planes (for instance, plough, moving fillister, and shoulder planes), the range of smoothing, jack, try, and jointer planes is extensive, particularly given the modern proliferation of bevel up and rebate bench plane models.

But what planes do we actually need to build furniture? Do we really need all 8 bench plane sizes, or is a smaller tool kit sufficient to produce high quality work? I am happy to report that there is a cure for plane addiction, and it starts with ignoring the size numbers and focusing on what we actually use the planes for. Here’s how it works.
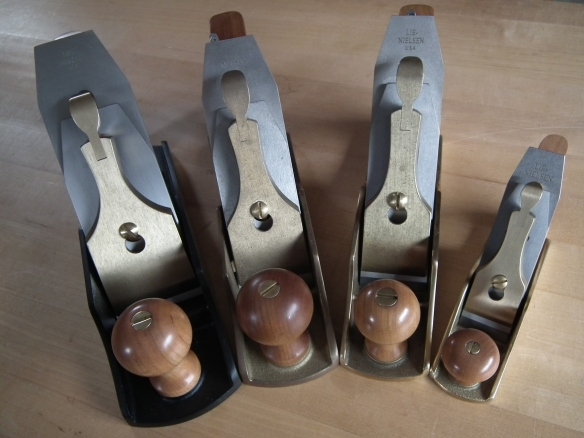
dscf0438

Smoothing planes come in a rang of sizes from the tiny No.1 (far right) to the much larger No.4 (far left)

Step 2 – Ask the dead guys

There are very few hard and fast rules in woodworking, but one that always holds true is that if you ask a question about which tools to buy, you will get many conflicting answers, each based on personal preference. The result is increased confusion and a longer shopping list. So lets take an entirely different approach, and ask woodworkers from the past 400 years. This approach is instructive, because pre-industrial woodworkers did not have the benefit of machines in their workshops, nor was pre-dimensioned timber as readily available as it is today. Instead, historic woodworkers relied on their hand planes to bring rough boards down to dimension, to prepare joints for gluing, and to smooth casework. And what is more, they needed their hand planes to work as efficiently as possible – time has always been money for the professional woodworker, and without a thickness sander or jointer to process stock quickly, efficient hand plane use was essential. Finally, tools were expensive so few craftsmen could afford to buy tools that would not be used. Even if you use pre-dimensioned timber, or incorporate machines into your workflow, understanding how pre-industrial hand tool workshops used hand planes helps to narrow the shopping list of bench planes.
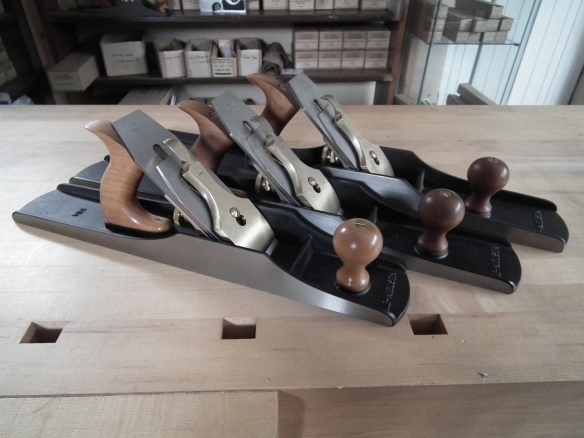
dscf0445

For a jointer plane the choices are between the No.6, No.7 or massive No.8

Joseph Moxon

Mechanick Exercises or the Doctrine of Handy-Works by Joseph Moxon is the earliest recorded English language text on woodworking. Originally published as a series of pamphlets in 1678 covering a range of skilled trades, before being compiled into a single volume in 1703, Mechanick Exercises provides a detailed account of the tools found on the bench of the 17th century joiner, and how those tools were used. Moxon helpfully identifies five planes in the joiner’s tool chest: the fore plane, the jointer, the strike block plane (an early precursor to the mitre plane) and a rebate plane. Moxon does not give any measurements for the size of the planes, but does provide clear descriptions of their uses. The fore plane, Moxon tells us, is to prepare timber for the smoothing or jointer planes. The jointer is used to flatten a work piece, while the smoothing plane is used to create a finished surface on the work piece. These are functions with which the modern woodworker is very familiar.
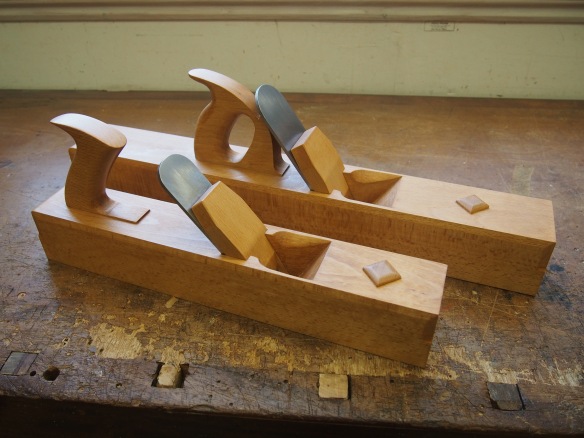
OLYMPUS DIGITAL CAMERA

Wooden jack and jointer planes by Philly Planes

Benjamin Seaton

Ninety-three years after Moxon published the complete Mechanick Exercises, a young Kentish joiner named Benjamin Seaton was building a chest to hold his tool kit. Seaton’s tool chest, built in 1796, is the most complete surviving example of an eighteenth century joiner’s tool kit, and is currently maintained by the Guildhall Museum in Rochester, Kent. Seaton’s chest is also of interest because the tool kit was assembled at a time when the first chip breakers (referred to in the Seaton inventory as “double iron”) were first coming into use, and Seaton appears to have bought the more traditional planes as well as planes fitted with chip breakers. The Seaton chest contains seven bench planes – two jack planes, a fore plane, a try plane, two smoothing planes, and a jointer. The pairs of jack and smoother planes include one example of each with a chip breaker, and one in the more traditional single iron format. If we discount the duplicated planes, Seaton therefore considered five bench planes to be necessary. One word of caution is that Seaton did not purchase the tools himself, nor were the tools purchased as they were needed. Instead Benjamin’s father, a successful cabinet maker, bought the tools as a complete set, and it is quite possible that a wealthy father might have bought a more extensive kit than was strictly necessary for a favoured son. Still, the contents of the Seaton chest are very useful in understanding the typical tool kit of the eighteenth century furniture maker, particularly as the planes are of similar dimensions to their modern equivalents.
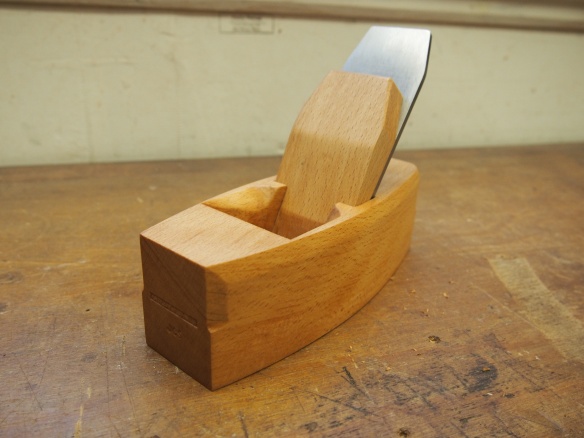
OLYMPUS DIGITAL CAMERA

The classic coffin smoother by Philly Planes

The Joiner and Cabinet Maker

Forty-three tears after Joseph Seaton bought Benjamin his tool kit, The Joiner and Cabinet Maker was first published. The author of the story about a fictional young apprentice is unknown, but they were clearly very familiar with woodwork and were perhaps a woodworker themselves, given the level of detail given about workshop practices. Despute being a work of fiction, The Joiner and Cabinet Maker can therefore be taken to be an accurate account of the ninetheenth century professional workshop. In the text, the apprentice Thomas makes use of a smoothing plane, jack plane, and jointer (referred to in the story as a “try” plane). The length of size for the planes is not given in the text, but as the story unfolds and describes Thomas’ work, it is clear that the author considered these three bench planes to be sufficient for the professional woodworker.
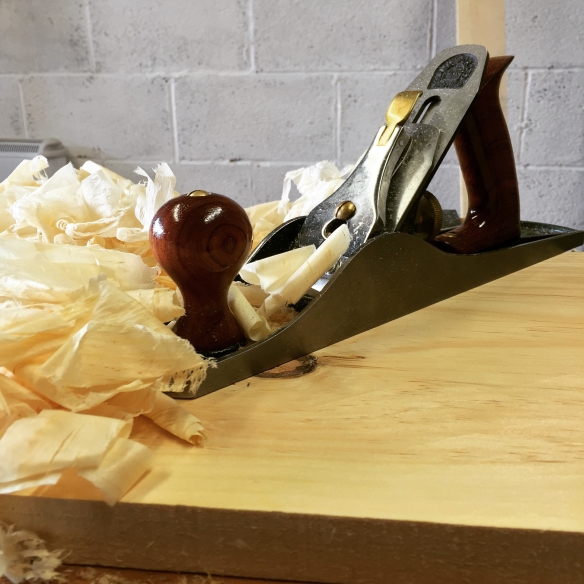
img_3253

Using a jack plane to rapidly remove material from rough stock

Step 3 – Curing plane addiction

Hopefully this post, together with the supporting cast of historic woodworkers, has shown that there is no need to amass a large collection of bench planes, and that high quality work can be achieved with a limited set of just three planes. While it is not possible to direct a woodworker to the specific size of plane they need, narrowing the choice to the three key tools based on their intended function will make the final choice that much easier. Although I have focused on the numbering system used for metal-bodied planes, the same approach can be applied to wooden planes.
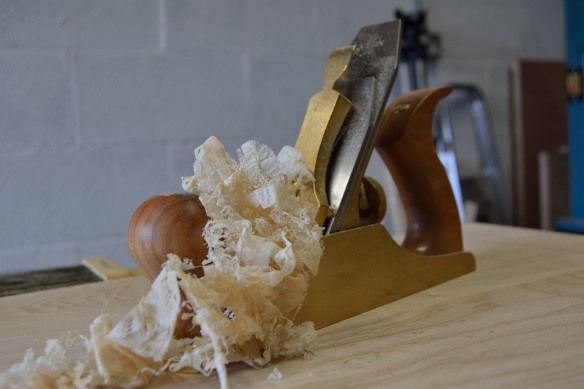
_dpp2266

The smoothing plane excels at leaving a perfectly clean, finish ready, surface

The Secret Fourth Option

So far I have focused on how to go about selecting bench planes for your tool kit. But there is one other plane which I genuinely think no woodworker should be without, and that is the humble block plane. None of the historical sources discussed above make mention of a block plane, nor did it feature in the tool chest of Benjamin Seaton. This is primarily because the block plane has traditionally been viewed as a carpentry tool rather than something that the furniture maker needed. However, the block plane is a remarkably versatile tool, which is likely to become invaluable once you have spent some time using it. Likely uses include dimensioning small stock, chamfering edges, acting as a very small smoother, trimming end grain – particularly on runs of narrow moulding, and shooting small pieces to size. In many ways it could be seen as a smaller successor to the “strike block plane” Moxon described. As with bench planes, there are endless iterations of the block plane available, from the tiny 101 apron plane, to Karl Holtey’s incredible 983, as well as a choice in bedding angles for the blades.

dsc_0093

So how do you go about deciding what block plane to use? Again, this all depends on what the scale of your work, your hand size, and what you might use the block plane for. The one feature which I think is indispensible is having a low bedding angle for the blade as this makes trimming end grain much easier and less likely to tear out. But beyond that everything is personal preference. The main thing is that you give the block plane a chance, and include one in your tool kit.

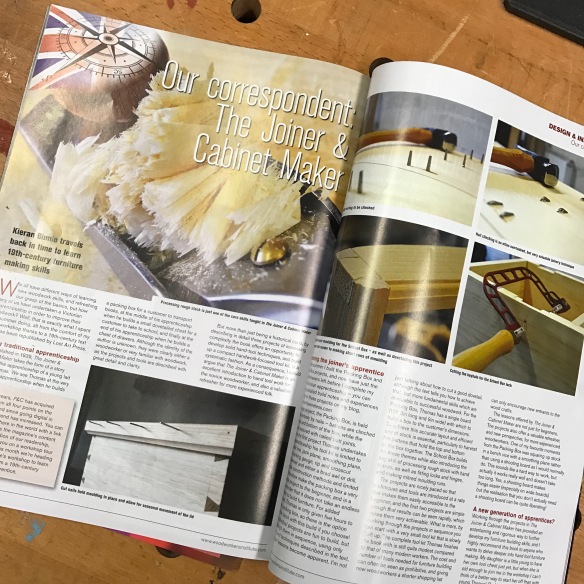
The Anarchist’s Saw Bench… part 5

_dpp2835

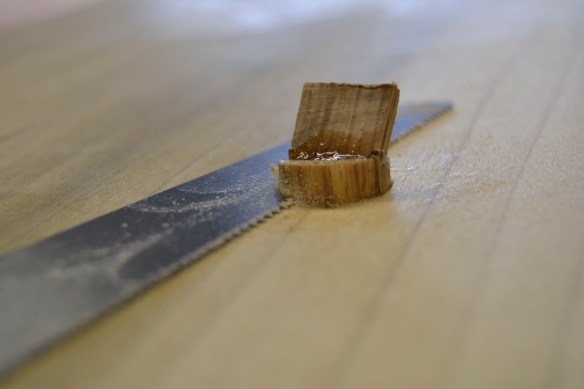
Trimming the tenon stubs with a flush cut saw

From my perspective, one of the very best things about The Anarchist’s Design Book is how Chris used it as an opportunity to democratise furniture making – the suggestion that you need a minimal tool kit and only a handful of core techniques in order to make durable and stylish furniture is an incredibly powerful message. Yes you still need to develop those core skills, but by focusing on a small number of key techniques and removing the need to purchase an endless list of expensive tools, or to spend a lifetime making fancy jigs, furnishing your home with your own hands suddenly looks very feasible. For me, never has this been more apparent than reading the chapters on staked chairs and benches – chair making can often appear to have more than a touch of voodoo to it, so to see staked construction methods and compound geometry placed firmly within your grasp, is quite frankly intoxicating. Building this pair of staked saw benches is the equivalent of dipping my toe into chair making, and I hope to be spending a lot more time working on chairs of one form or another over the next couple of years.

_dpp2903

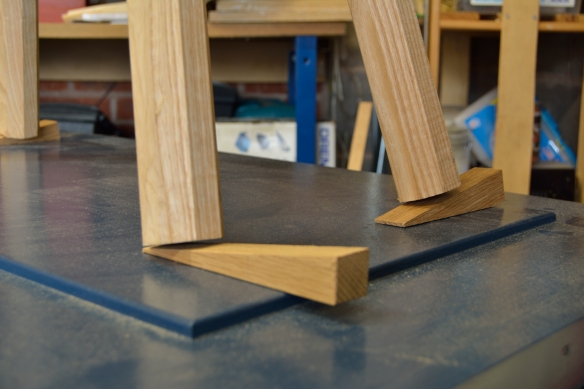
Wedging the feet to get the bench level

Once the glue had cured on the first saw bench I trimmed the wedges and tenon stub with a flush cut saw, and then smoothed the whole bench top with my No.3 smoothing plane. Next was another introduction to a key element of chair making – levelling the legs and trimming them to length. As with the compound joinery, this actually sounds a lot more difficult than it is, and Chris’ clear instructions in the book left me with a bench that was level and stable in next to no time, and didn’t require any complex jigs (there is nothing I enjoy in the workshop less than jig making). After checking various available surfaces with a spirit level I decided to use the lid of my Anarchist’s Tool Chest – the raised panel was plenty big enough for the saw bench and it just happened to be the most level surface available. Standing the saw bench on top of the tool chest, with the spirit level on top of the bench, I wedged up the legs until the top was perfectly flat across it’s length and width. The oak wedges I made for the luthier’s thin panel jig worked perfectly for this operation, as I was able to tap them in to make precise incremental changes, instead of diving into the scrap bin for suitable off-cuts.

_dpp2913

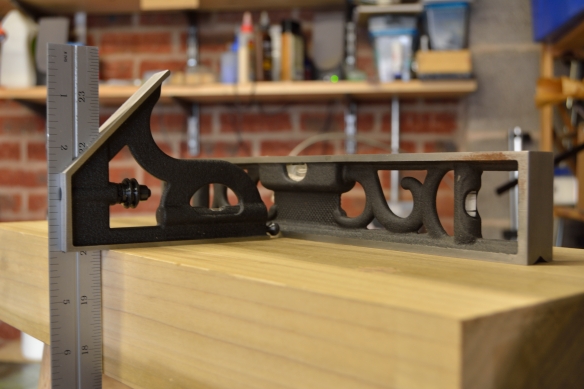
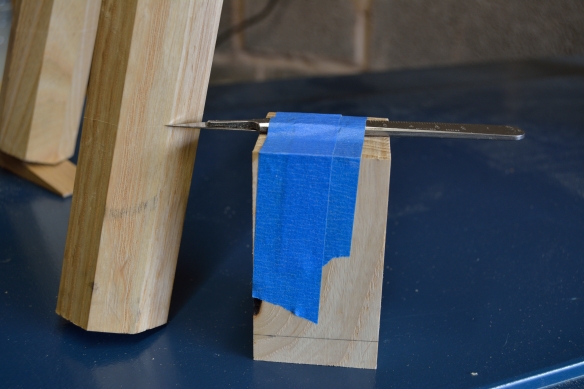
Once I was satisfied that the top was level I was able to work out the appropriate height of the saw bench by measuring the distance between my kneecap and the floor, and then determine how much the legs needed to be trimmed to get the top of the bench to the desired height, using nothing more complex that a 24″ rule in a combination square, and my small Sterling Tool Works Double Square. To continue the simple-jigs-or-no-jigs theme, to mark off the legs I taped a scalpel with No.10 blade to a piece of scrap the right height, and marked off each facet of the legs.

_dpp2914

A simple way of marking off the right length of the legs. I know people woodworked before the invention of blue tape, but I don’t understand how.

Actually trimming the legs is a bit nerve wracking at first – there’s not much margin for error if you want the bench to remain at the right height, and the angles are (yet again) a little funky. For the first leg I kerfed in the line on all eight facets of the leg to create a path of least resistance, and then trimmed the leg fully. That worked fine, but was a little fiddly, so for the other three legs I decided to be brave and just go for it. Positioning yourself properly definitely helps reduce the risk of this operation – standing where you can see the lines on at least three of the faces of a leg helps keep the saw at the right angle. After the first leg or so it became easy to dial the correct angle in by eye, and I think goes to show that compound angles are not to be feared. To trim the legs I used a 12″ carcase saw by Bad Axe, which although a little slower than my 16″ tenon saw, gives a very precise cut which needs virtually no clean up. As a finishing touch I gave the feet of the bench a 1/8″ by 1/8″ chamfer using a fine (13 grain, 7″) Auriou rasp.

_dpp2917

Trimmed and chamfered legs

A quick test with the new Skelton Saws Panel Saw confirmed that the first saw bench is rock solid and at the perfect height. All that remains to do now is apply a simple finish, although I will wait until the second bench is finished.

_dpp2920

One saw bench finished, one to go.

And now for something completely different

I’m back in print this week, but in a very different context. Dr Moss has been a contributor to Times Higher Education for a while now, and when THE were putting together a feature on how academic life impacts on married life, they asked Rachel and I to contribute. Rachel posed me a couple of questions about my take on life married to a university academic, which has to be the first time I’ve been on the other side of the interview questions! The piece was published in this week’s edition of Times Higher Education, and can be viewed here.

Normal service will be resumed shortly.

The Anarchist’s Saw Bench… part 4

_dpp2799

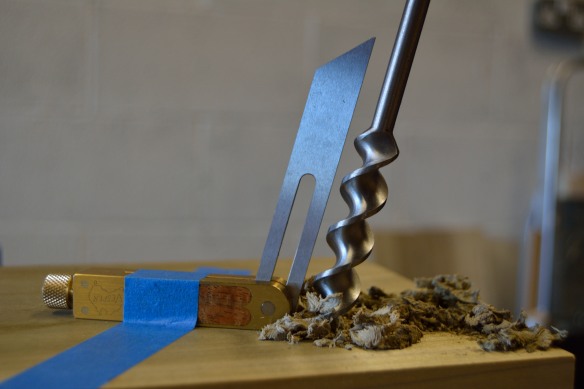
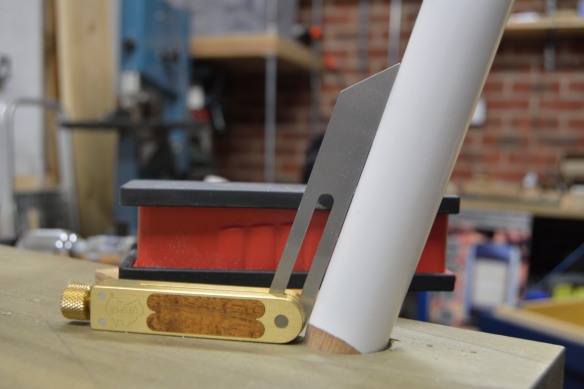
A Vesper 4″ sliding bevel, Jennings pattern auger bit, and North Brothers brace, has to be the most fun way to bore holes

It occurs to me that every build process can be seen as a series of straight forward operations, punctuated by moments when the risk of failure becomes significantly greater. There has been a lot of great discussion recently about the relationship between craftsmanship and the risk of failure, and for me one of the most captivating ideas offered by Peter Galbert in his outstanding book was that chairmaking places the maker much closer to the risk of failure than some of the other woodcrafts. From my perspective, risk of failure becomes greater during any significant glue-up operation in a build, although clear planning and a dry-run can help mitigate the risks associated with such a crunch point. 

Which is a roundabout way of saying that the first of the pair of saw benches is now glued up and ready to be leveled.  I’m pleased to say that gluing up the saw bench was one of the least stressful glue-ups I’ve ever had, which is remarkable when you consider that this is my first time building with staked and wedged joinery. I can’t take any credit for the ease of glue-up however (as much as I’d like to) – I think that the simplicity and effectiveness of the joinery lends itself to a straight forward and stress free experience.

_dpp2804

Here you can see the funky compound angles – not a 90 degree reference line or surface in sight!

But I’m getting ahead of myself a little. Before I could fit and glue the legs I needed mortices to house them. The mortices are drilled through the bench top using a 5/8″ bit and then reamed to match the taper of the leg tenons. This was one of the most challenging, yet enjoyable elements of the saw bench build, and the introduction to chairmaking geometry was one of the reasons I decided to use this saw bench design over the other (very good) options.

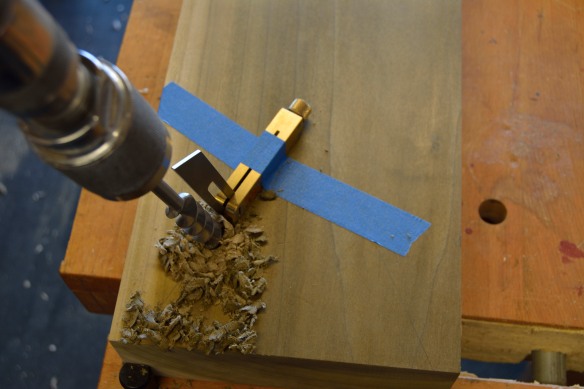
Drilling the holes is pretty straight forward, despite the compound angles involved. The key is to go slowly and to have a good sliding bevel set up on the workpiece to keep you boring at the right angle. Chris writes in The Anarchist’s Design Book that compound angles are just as easy as boring at 90 degree, and he’s got a point. Boring the hole at a funky angle to both the surface and the edges of the bench top feels counterintuitive at first, but the sliding bevel offers an excellent guide and once you’ve got the body position dialed in it becomes second nature. I used one of the excellent Jennings Pattern auger bits by Tools for Working Wood, driven by my 1920’s era (pre-Stanley takeover) North Brothers brace, which is definitely my favourite way to bore holess. Despite being nearly 100 years old the brace chuck holds bits with an iron grip, and the 10″ sweep is smooth as silk.


_dpp2812

Veritas reamer and 1920’s era North Brother’s brace

Reaming the holes is more challenging, as the sliding bevel offers much less guidance against a conical shaped reamer. Instead, I took Chris’ advice from the book, and shaved a test tenon using a length of spare curtain pole – the pole shaved to a clean tenon very easily, and gave me something with which to test the angle I was reaming every 10 turns or so of the brace. This then becomes a process of checking using the test tenon, and making subtle adjustments to keep the reaming on track with the right angles. I didn’t quite manage to ream all four mortices to the same angle, but hopefully the finished bench won’t have too much of a resemblance to Bambi-on-ice. We shall see. To ream the mortices I used the Veritas reamer, which was again driven by my North Brothers brace. The Veritas reamer has the same included angle as the tenon shaver, which keeps things simple and ensures that the tenons will match the mortices.

_dpp2806

Checking that I’m reaming at the right angle. This one looks ok.

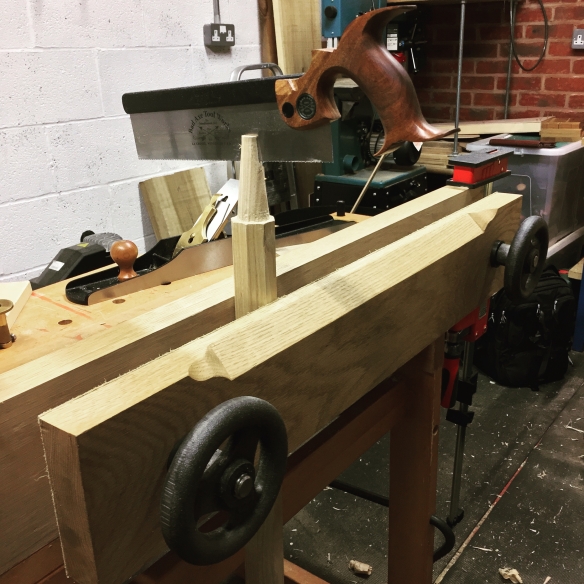
Once the mortices were all reamed I tested the fit of the legs, and numbered them along with the matching mortices – small steps like this definitely take the pressure off during glue up. I also recycled some scrap oak into wedges. The final step before glue-up was then to kerf the tenons to accept the wedges. The bench vise on my Sjoberg bench is guided by two rods which prevent racking, but also meant that the vise had only the most precarious grip on the tapered octagonal legs. My Moxon vise on the otherhand has a little bit of give in the front jaw, partly due to the lack of any guides and also the enormous force exerted by the cast iron wheels. All of which meant that the Moxon was able to close around the legs despite their taper, and grip them tightly while I kerfed the tenons with my dovetail saw. It’s a useful reminder that not all racking is bad!

img_3936

The Moxon racks just enough to grip irregular shaped workpieces like these tapered octagonal legs.

After running through a dry run (which did not include hammering in the oak wedges, because I’m not sure they would ever come out again!) I glued up the saw bench using Titebond Hide Glue which had been gently warming in a mug of warm water for 90 minutes, working one leg at a time. Once the legs were glued and hammered in (I used a 24oz mallet, but I’m sure a lump hammer would work just as well) I flipped the bench over and knocked the wedges in, again using the Bluespruce 24oz Joiner’s mallet.

_dpp2833

Back wedging the tenons provides a good mechanical joint and will hold the saw bench together even in the event of glue failure

A Stitch in Time: France’s last rasp making dynasty

The following is based on my profile of Auriou Tool Works from issue 249 of Furniture & Cabinet Making.

img_2885

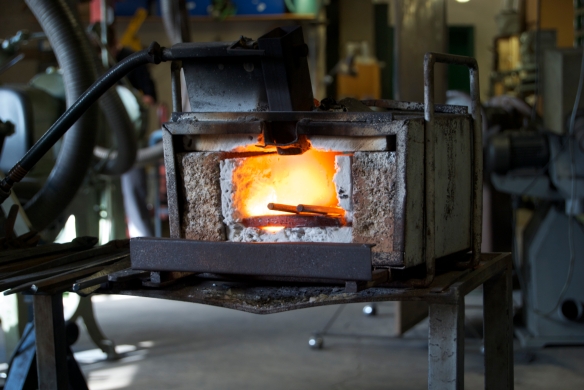
Forge de Saint Juey, home to Auriou Tool Works

Of the many artisan tool manufacturers currently making high quality hand tools few can claim the heritage of Michel Auriou – the 4th generation rasp maker of Forge de Saint Juery. Most commonly known for their hand stitched rasps, the craftsmen at Forge de Saint Juery also make highly acclaimed stone carving tools, plaster sculpting tools, and most recently a range of wood carving tools in collaboration with master carver Chris Pye.

img_2884

This mural on Michel’s office wall was carved by customer’s using the Auriou range of plaster carving tools

A Family Affair

The Auriou tool business dates back much to 1856, when Michel’s great-uncle Paulin Causse moved from Saint Juery in the south of France to Paris, to work as a rifler stitcher for a business making plaster and clay sculpture tools. Paulin was subsequently joined by Louis Auriou, Michel’s grandfather. In 1933 Louis returned to Saint Juery having bought the tool business from Paulin, with his son (Michel’s father) joining the family trade in 1960. In 2007 Auriou closed for business but re-opened in 2008 under the Forge de Saint Juery moniker. Today Auriou is the only rasp manufacturer in France with its own forge, and continues to trade out of the forge the family first opened in 1967. “We are making to survive. But also we are making for the customers, for the tools” says Michel, reflecting on their practice. Tools are made in sets of 7 or 11, as well as individually, all from steel produced locally in Saint Juery by what Michel believes is the best file steel foundry in the world.

img_2882

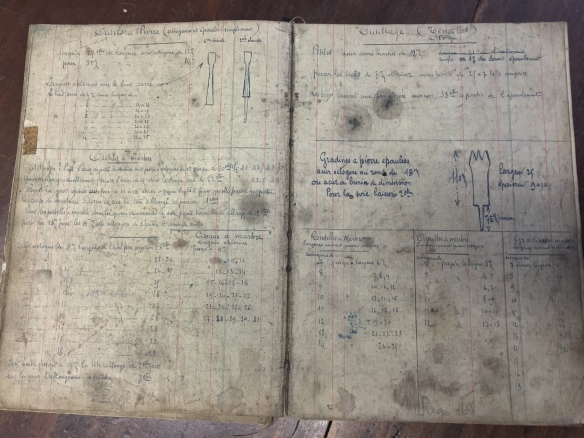
One of the historic ledgers containing the designs and methods developed by successive generations of Auriou craftsmen


When I arrived at the forge on a warm April morning I found a hive of activity – Michel is training a new rasp stitcher, and has also taken on additional blacksmiths. If this was not enough, a couple of weeks after my visit the Discovery Channel were arriving to film a documentary about Auriou. Today, Forge de Saint Juery has increased from 7 to 13 workers, split between the blacksmith room where tool blanks are forged and cutting edges ground, and the stitching room where rasps are toothed.

Meet Michel Auriou

dsc_0104

Michel Auriou, 4th generation blacksmith

Michel joined the family business in 1980 at the age of 18, and has trained as both a blacksmith and a rasp stitcher. However following the rebirth of the Auriou brand in 2008 he has had little opportunity outside of trade shows to stitch rasps. These days his focus is split between preserving the knowledge and patterns developed over four generations of tool manufacture, improving workflow efficiency at the forge, and research and design for new tools.

It is when talking about the preservation of knowledge that Michel shows the greatest enthusiasm, and he unveiled to me the handwritten ledgers in which previous generations of Auriou craftsmen described their working practices and tool designs. Unsurprisingly, these records occasionally contain incomplete descriptions or conflicting designs of the same tools, and one of the biggest problems Michel experienced when restarting the company in 2008 was in extracting working methods and information from the historical records. This knowledge preservation process has resulted in detailed drawings, heat treatment techniques, and specifications, for each stage of production for each tool. In this way, Michel explains, that the preservation of knowledge also becomes a means by which efficiency is improved and tool quality is standardised.

dsc_0069

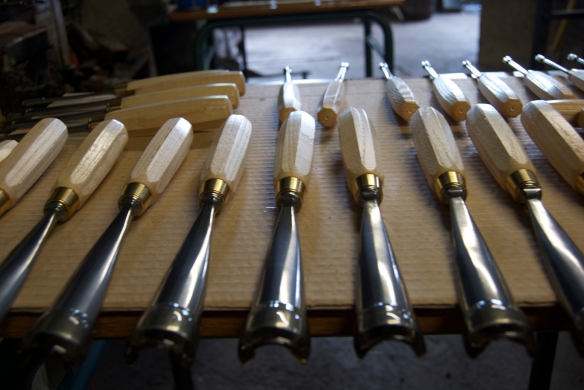
Chris Pye carving tools, in the grinding room

When it comes to tool design, Michel explains that his focus is always on the experience of the end user and “never about tools”. He continues, “if you are working with our tools, and you forget about the tools at your fingers, we have reached our aim”. So, for carving and sculpture tools Michel considers the shape of the tool to be the most important factor, followed by steel hardness and bevel angle. He also maintains that focusing on the technical specification of a tool at the expense of the user’s experience is missing the point. This applies, he suggests, particularly to technical aspects such as Rockwell hardness, for which he considers 53-55 Rockwell to be sufficient, and for the tools made at Auriou there is no need to achieve Rockwell 60. This focus on the user’s experience has paid off, and in France Michel tells me that stone carvers describe Auriou tools as not being “dry”; stone carvers report that the vibration passes into the work piece rather than the user’s hands.

Surprisingly for someone whose family name has become synonymous with hand tool excellent, Michel looks distinctly uncomfortable when asked what he considers to be his individual contribution to rasp making. He explains, “I don’t like to see my name on the tools. Until the 1980’s we put our customer’s names on the tools, then my father changed to using the family name”. More important to Michel is to preserve the knowledge and keep the company going, even if it is under a different name. “If I had to decide now” he says “I would choose another company name”.

img_2836

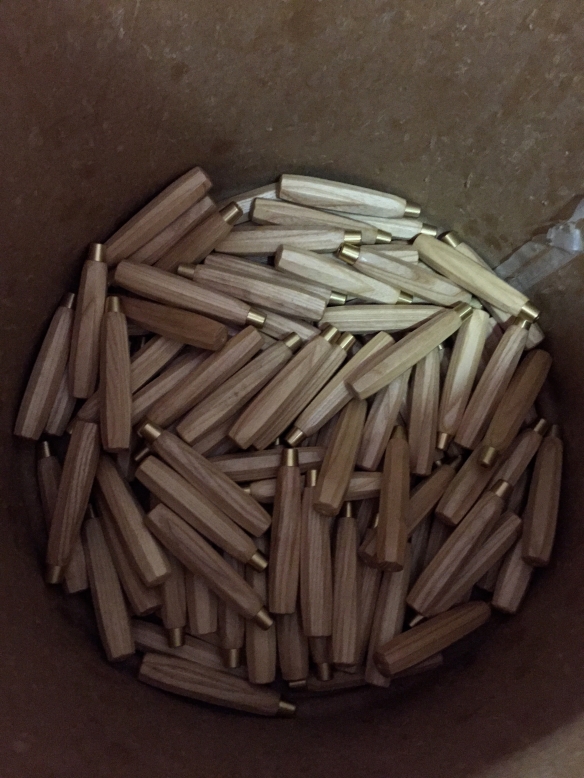
Carving handles, waiting for their tools

A stitch in time

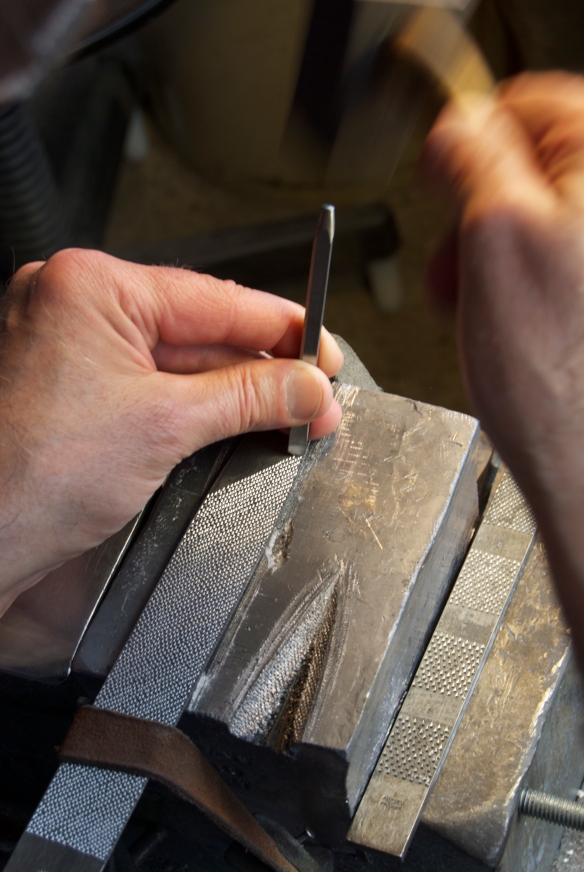
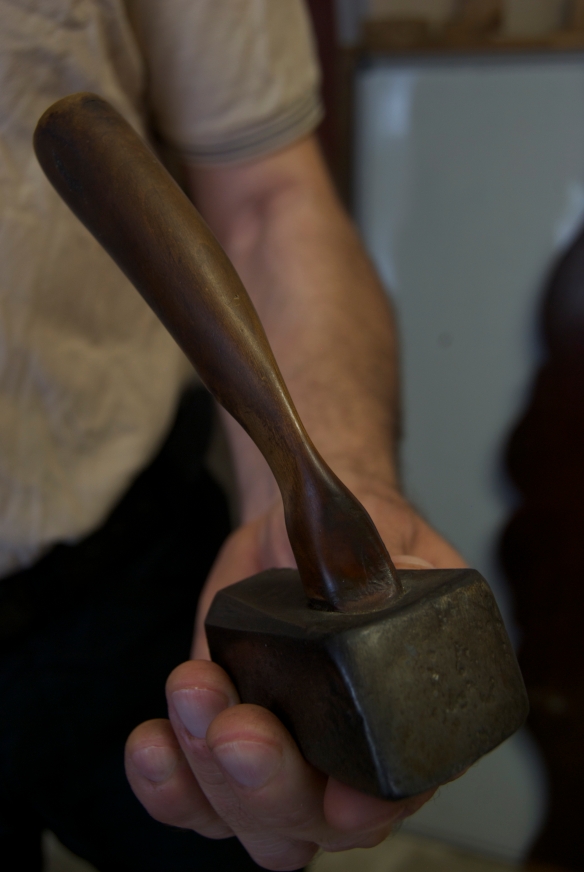
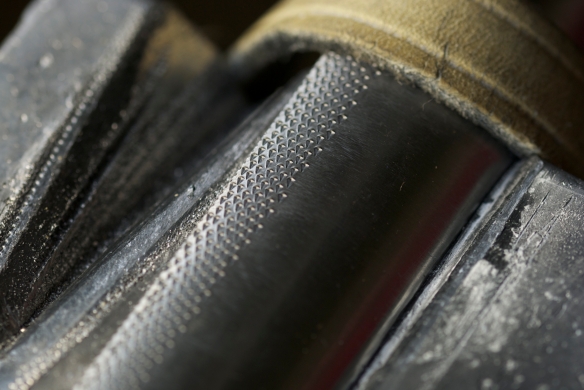
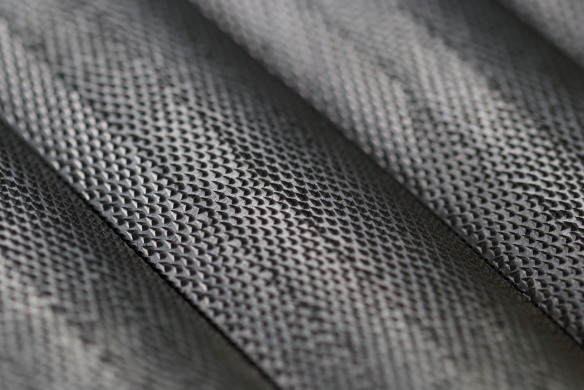
He Auriou name is probably most associated with the hand stitching of their rasps, for which the forge is most renowned. Rather than using a machine to cut rows of teeth, each tooth on an Auriou rasp is individually cut using a “barleycorn” pick and hammer at an anvil. The small variations inherent in hand-cut teeth result in a smoother finish and reduced chatter when compared to the perfectly uniform rows of a machine-produced rasp.

dsc_0095

A stitcher uses the barley corn pick and hammer to cut each tooth individually

Talk about anvils and hammers and you will inevitably think of burley blacksmiths beating metal into shape. The stitching room at Auriou is a far cry from this preconception however. The emphasis is on good lighting and absolute precision, and the stitchers sit at their anvils wielding their hammers using just fore finger and thumb. The need for precision is obvious from anyone who has taken a close look at an Auriou rasp – the stitcher must hold the barleycorn in a constant orientation to the rasp blank they progress across rows of teeth. To aid in this precision, the curved side of the rasp is divided across the width into quarters, and each quarter is toothed along the full length of the rasp before reseating the blank on the anvil to cut the next quarter. Although repositioning the rasp blank makes for a slower process, it ensures that the barleycorn is held at a consistent angle to the surface, and results in the precise stitching for which Auriou are celebrated.

dsc_0122

The handle of this stitching hammer has been worn away by the forefinger and thumb grip used by Auriou rasp stitchers

Stitchers are trained for 14 weeks, but it takes as much as two years before they are stitching to the correct standard at a production pace. Watching an experienced stitcher, the barleycorn flies across the surface of the rasp blank in a succession of sharp taps, and a small rasp can be completed in 90 minutes. In contrast, an inexperienced stitcher can take several days to tooth a single rasp.

dsc_0082

The curved face of a rasp is divided into quarters along it’s width, and each quarter is toothed before reseating the rasp on the anvil for the next quarter.

Even if stitching is not physically demanding in terms of the force with which the work is struck, Michel explains that there is a steep learning curve. Most difficult is the concentration and focus needed to maintain the correct posture in relation to the work piece.

Universal problems

Over lunch at local favourite Restaurant Flambee, Michel bemoans the decline of both industry and education in hand tool skills – universal complaints which will be familiar to readers in the UK and American (and no doubt many other countries too!).

dsc_0079

A macro view of the stitched teeth on a rasp

Saint Juery was a little Sheffield”, Michel tells me, “in every house was a file or rasp maker”, and at the height of the rasp industry there were over 3,000 rasp and file makers in the city. Often these makers would work out of their own homes, although there were also larger businesses. Stitchers would be freelance and paid on the basis of each tool they stitched. As with Sheffield, this industry has declined and according to Michel, Auriou are now the only company in France (let alone San Juery) making rasps with their own forge. The decline of traditional industry has had an inevitable impact on Auriou’s supply chain, Michel believes that it is only a matter of time before Auriou will have to produce their own steel if they are to maintain current quality standards.

Similarly, the decline in hand-tool education means that there are now only a handful of places in France where it is possible to learn a hand tool focused approach to furniture building. As a result, Auriou export 80% of their current production run.

dsc_0072

Tool blanks waiting to be worked

The future

The re-opening of Forge de Saint Juery represents a remarkable recovery. However Michel is more focused on the future of Auriou tools than he is the past. Constantly throughout our time together he refers to improving efficiency at the forge, of which the knowledge preservation and standardisation exercise forms part. He also wants to continue to develop new heat treatment techniques, and expand the workforce at the forge in addition to the three new members of staff he employed in early April of this year. When asked how he goes about finding apprentices Michel explains that at first he thought it was important to find people with diplomas and training in related areas. He considers that to be a mistake – now he looks for “people who are very calm to be stitchers, and for blacksmiths I try to find a genius DIY person”. With so many forward looking plans, now is an exciting time for all at Forge de Saint Juery, and Michel’s intention to preserve the tool making knowledge accumulated by his family looks certain to succeed.

dsc_0058

Heating tool blanks prior to hammering them to shape

The Anarchist’s Saw Bench… part 3

Now that we’re back from holiday I’m pressing on with the saw bench builds. Having octagonalised the legs the next step of the build was to cut the conical tenons at the narrow end of each leg, to fit into the mortices in the bench top. I’m using the Veritas 5/8″ tapered tenon cutter and matching reamer, which have a 12.8 degree included angle (if you’re interested in that sort of thing).

_dpp2789

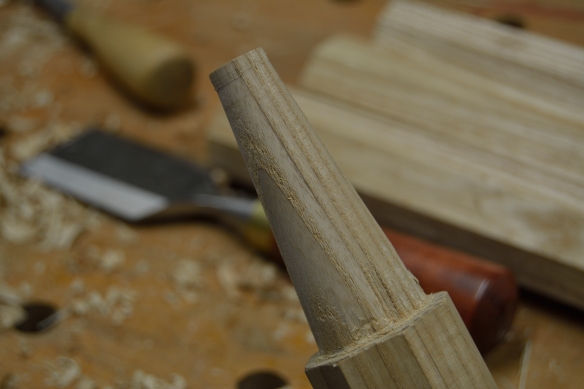
Fairing the tapered tenon with a Veritas tenon cutter

In The Anarchist’s Design Book Chris makes the point that you want to use the tenon cutter sparingly, and only to fair up the shape of the tenon. While it is possible to use the tenon cutter to cut the tenon from scratch, it is a painfully slow way to work, and would require having arms like Popeye. After tenoning the four legs for my first saw bench I’d have to agree with this. Although there are no “tricks” to woodworking (and I’m going to start a swear box for everytime that I say “the trick is…”), you can definitely make cutting tapered tenons easier if you remove the vast majority of the waste before you reach for the tenon cutter.

There are several stages to cutting the tenon – reducing the tapered octagon to a straight cylinder, then rough shaping the tenon, and finally bring it to true with the tenon cutter. Not having cut tapered tenons before, I decided to work my way through the first tenon from start to finish, and then try to refine the process with the other three. I’m glad I took this approach, as while the first tenon turned out fine it took a lot longer than I had expected, even though I tried to hog out as much waste by hand before using the tenon cutter.

_dpp2791

One tenon down, three to go

I’ve a few observations about this process:

1. I wish I had a draw knife. Or even better, that I had got round to setting up the Shopsmith I acquired last year in it’s lathe setting. The lathe would be a particularly speedy way to shape the tenons, and rigging up the Shopsmith will be an essential project for the winter. A draw knife would probably be the fastest way to remove the excess material. In the absence of a draw knife I used a spokeshave, which worked perfectly well but was much slower.

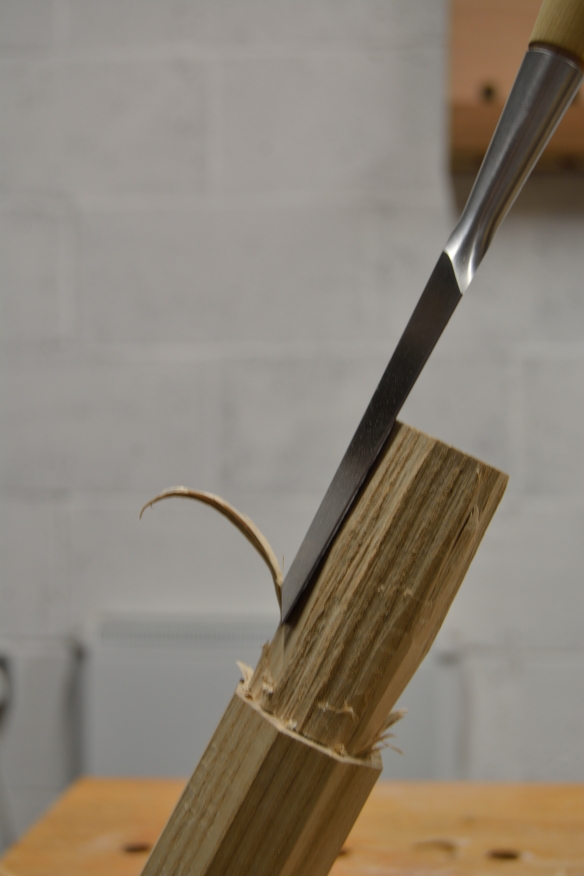
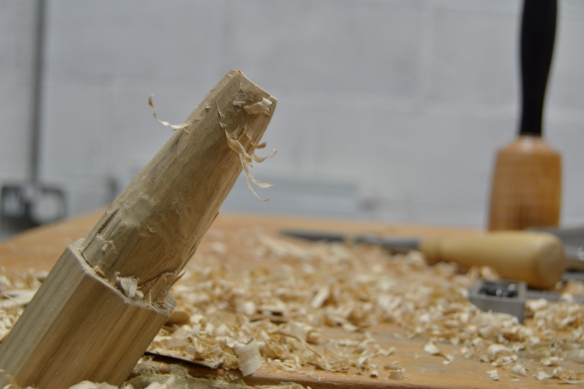
2. You can afford to be quite daring when it comes to hogging out the waste. On my first tenon I used the spokeshave exclusively to remove the waste, followed by gentle paring with a chisel, and it took forever. For subsequent tenons I shaped the cylinder by splitting off the waste with a chisel and 16oz mallet. That sounds high risk, but there are ways to make it a very controlled process.

3. Chairmakers have very different experiences of grain direction to woodworkers who mainly build flatwork. Thanks to carving guitar necks I’m relatively used to working with curves and to watching grain change direction. However, a guitar neck always has a fretboard, which means that you’re only carving 3 sides of the workpiece. On a tapered tenon you are working every side and facet of the work, which means that each tenon is likely to have a patch of difficult grain. Sharp really does fix everything though, and a keen chisel can remove highspots without tearing out if you use a slicing motion and are creative about the direction you cut from.

_dpp2779

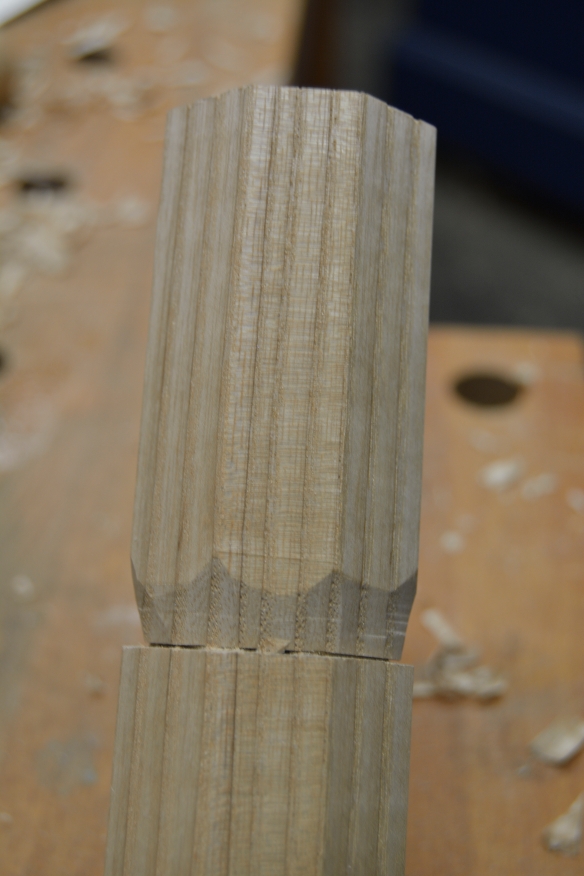
Relieving the material around the tenon shoulder mitigates against the risks of splitting off the waste

The process I ended up using started off with cutting the shoulder of the tenon with a fine crosscut saw. I received one of the first production run of the new luthier’s saws from Bad Axe a couple of weeks ago, and this looked like the perfect opportunity to press it into servce. The whisper thin kerf perfectly defined the shoulder of the tenon, and the depth stop ensured that I didn’t overshoot the depth. I then relieved the shoulder kef by paring the waste deeply away from the kerf. This was to create a safety zone for splitting the waste away.

_dpp2782

Ordinarily pounding a chisel into the end grain of a workpiece is a recipe for deep splits and a lot of heartache. However, by aiming the chisel carefully you can remove a lot of waste quickly, and the shoulder cuts stop the splits from travelling into the rest of the leg. This turned out to be a very efficient way to remove the waste and achieve a cylindrical tenon.

_dpp2786

It looks rough right now but that is fine – there’s plenty of material left to be removed with the spokeshave

Once I’d split away the waste to leave a cylindrical tenon I then used a spokeshave to taper the tenon until it was close to the final shape. The sole of the spokeshave prevented it from reaching the area adjacent to the tenon shoulder, and so I pared that area down with a sharp chisel. I also hollowed the length of the tenon very slightly with the spokeshave, so that the first turn of the tenon cutter only caught each end of the tenon – this made for an easier start and meant that the cutter was removing less material overall.


Following this process meant that I was able to tenon the remaining three legs much more efficiently (the final two took about 35 minutes each), and until the lathe is set up or I have a draw knife I think I’ll continue to take the same approach. More importantly, all four tenons are good and smooth, and are tapered to the correct angle. So all being well they will be a good fit for the mortices once I have drilled and reamed them to shape.

_dpp2796

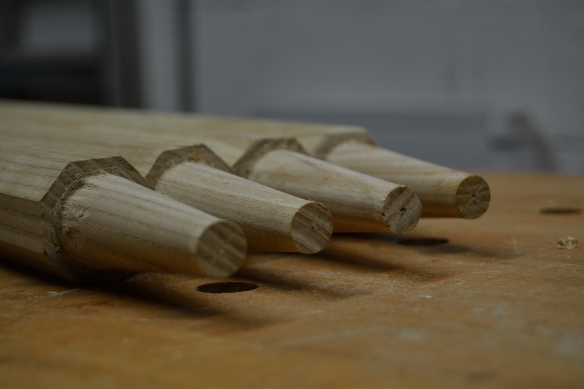
Four tenoned legs