Interative Design

The following is based on an article originally published in issue 284 of Furniture & Cabinetmaking.

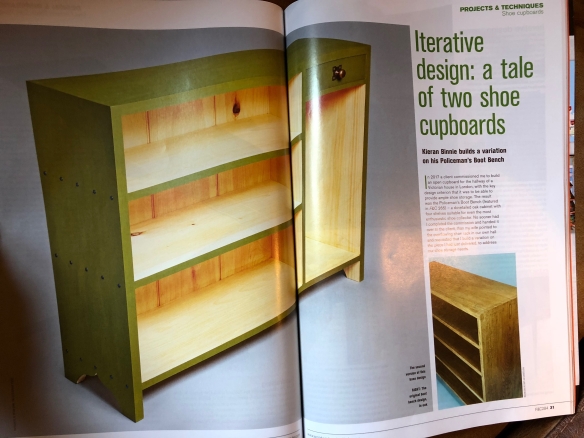
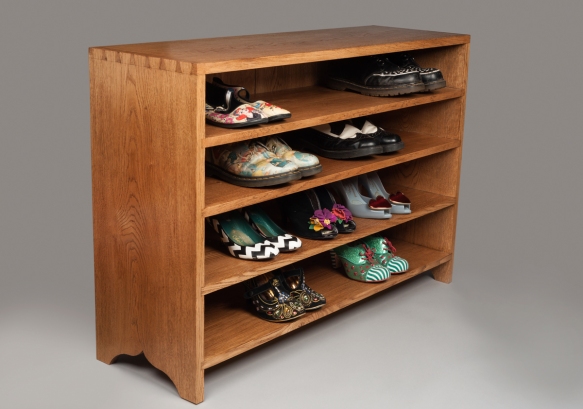
In 2017 a client commissioned me to build an open cupboard for the hallway of a Victorian house in London, with the key design criteria that it was to be able to provide ample shoe storage. The result was the Policeman’s Boot Bench – a dovetailed oak cabinet with four shelves for even the most enthusiastic shoe collector. No sooner had I completed the commission and handed it over to the client, then Dr Moss pointed to the overflowing shoe rack in our own hall and requested that I build a variation on the piece I had just delivered, to address our shoe storage needs (the finished piece can be found here).
_DSC9090

Iterative Design

The process of designing, and building, a second interpretation of an existing project provides an excellent opportunity to review your design process: both in terms of how small design changes can have significant impact on functionality, and how design choices affect the overall form of the piece. Subsequent approaches do not rewrite the base design, but adapt and mould it to new settings and uses that reflect the specific needs of the end user.
_dsf4949

Despite my best efforts, I have been unable to find a design term that reflects the process of adapting a base design for different functionality or aesthetic criteria, and so for the purposes of this article I will refer to it as “iterative design”. If any reader is aware of a design term which better reflects this methodology then please drop me a line and let me know!

Compare and Contrast

While I will be using the two shoe cupboards to illustrate the benefits of iterative design, really the same process could be applied to any furniture form. In fact, on my workbench are two child-sized Welsh stick chairs. These chairs are both based on an 18th century example, but thanks to changing some design elements (one has a round leg profile while the other uses octagonal legs) and material choices (one is oak, the other maple), they have radically different appearances. Returning to the shoe cupboards:

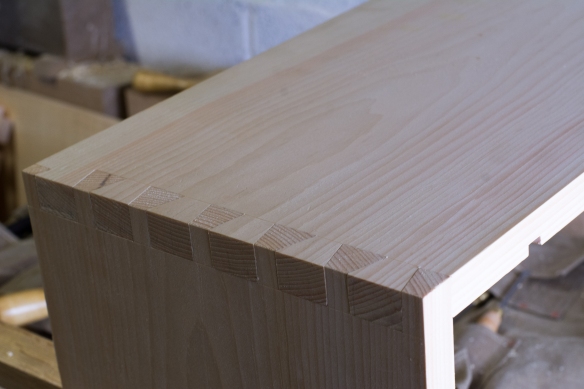
Version One (the original Policeman’s Boot Bench) is all oak construction, with four full-width shelves housed in dados. The finish is blonde shellac and black wax.

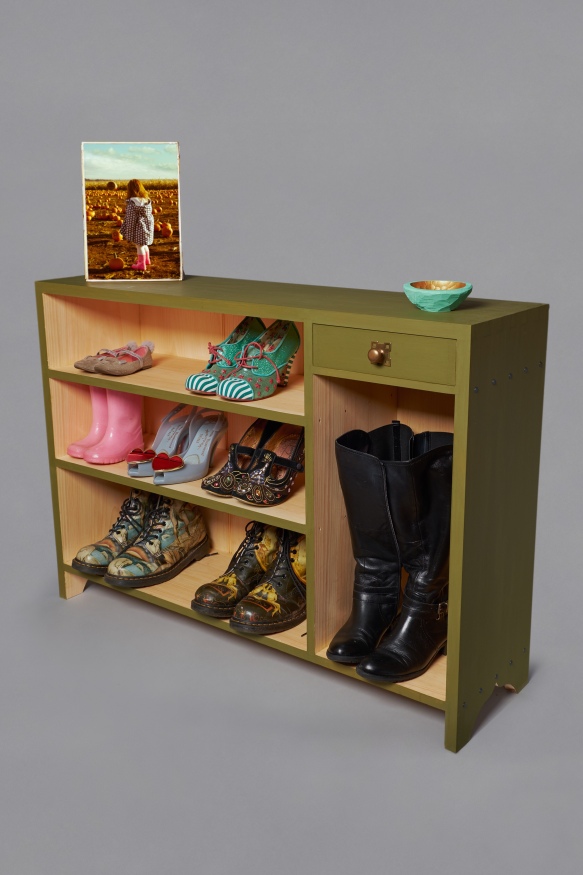
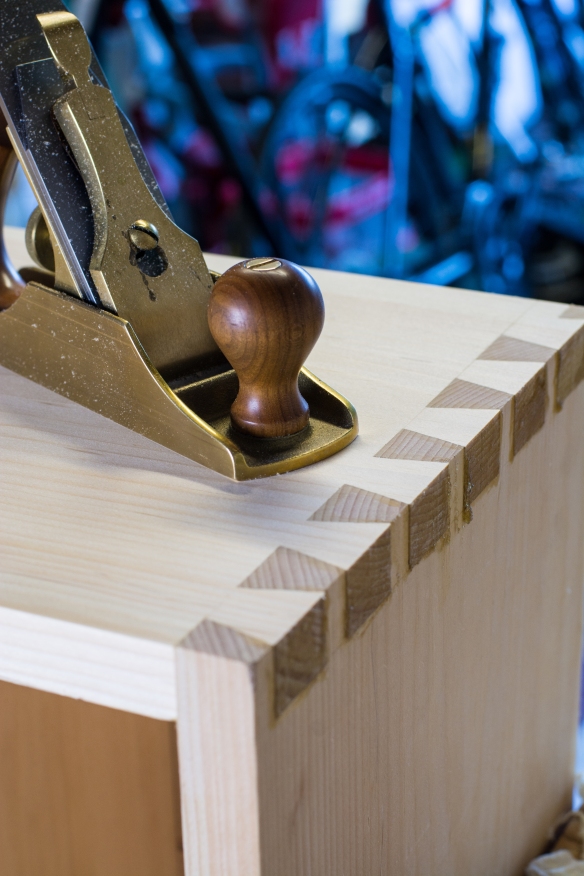
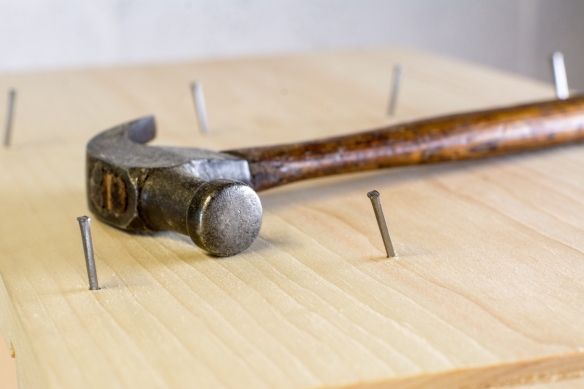
Version Two (which resides in our hall) has the same overall proportions, save for being slightly narrower (11.5” compared to 13”). Pine is used throughout, and the joinery (dovetails, dados, and tongue and groove for the backboards) is exactly the same as for Version One. However, there are three shelves in this iteration of which only the bottom shelf is full-width. The other two shelves terminate in a vertical divider 12” from the righthand end, resulting in a tall compartment at that end. At the top of the compartment is a dovetailed drawer for keys, post, and the inevitable clutter that seems to accumulate by the front door. The shelf spacing is also different compared to Version One. In terms of finish, the exterior of Version 2 is painted with Bayberry Green milk paint by Old Fashioned Milk Paint, topped with Osmo PolyX, while the interior is also treated with Osmo. The dados are pinned with “Roman” style nails from Rivierre Nail Factory, while a Mackintosh brass pull from Horton Brasses allows the drawer to be accessed.
_DPP7006

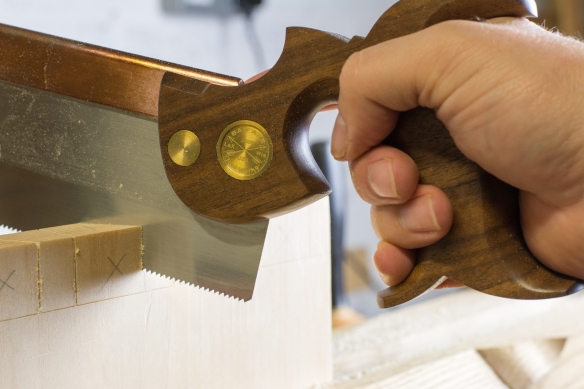
Cutting the dovetails

So those are the differences, but what design choices led to them? This can be split into two elements – functionality and aesthetics.

Functionality – adjusting the functionality of the shoe cupboard was where negotiations started for version two. Our existing shoe rack (by a popular Swedish home furnishing company) struggled to accommodate anything larger than a standard work shoe, and was downright hopeless at holding the Apprentice’s tiny shoes. So, from the very start we knew we needed shelf spacing that would work for my Dr Marten boots as well as a three year old’s favourite sequinned wonders, and Dr Moss’ knee-high boots. The addition of the vertical partition provided the tall boot storage without creating too much unusable dead space, and left me free to have shelves in the main compartment. Having determined the space required for the Dr Marten’s (8 ½” in case you were wondering), the shelf spacing for the main compartment was stepped off with dividers to achieve a gradually reducing space for each shelf up, without the need to deal with awkward fractions. A small drawer at the top of the full height compartment added an extra level of functionality as well as some visual balance to the design – before adding the drawer, the right-hand compartment looked cavernous and disrupted the proportions of the piece.
_DPP7314

Aesthetics – the Policeman’s Boot Bench was designed for a Victorian property with an original tiled hallway, and the emphasis on oak and a simple finish fitted that setting very nicely. Thanks to a large lime tree in the front garden our hallway has a tendency to be gloomy, and in an effort to mitigate this we have painted the walls a bright yellow. For this reason we wanted to avoid adding large pieces of furniture in dark wood, and so pine was chosen for gentle tones it would add. The overall form of the shoe cupboard is understated, and relies on hand cut joinery as well as an elegant foot detail to provide visual interest. Milk paint is the perfect finish for adding colour while keeping joinery visible, and the benefit of a mid-toned colour is that the natural wood of the interior illuminates the shelves, making the overall piece “pop”.

These are all simple choices – asking what we want to use a piece for, and how it will sit in the intended setting. And yet, when added together, they result in substantially different pieces.


_DPP7188

Cleaning out dados

The Benefits of Iterative Design

Having found the iterative design process to be beneficial and thought-provoking, I was interested to see if other makers used this process. Canadian furnituremaker Rich Wile makes extensive use of this approach, particularly when deploying specific joinery solutions. Rich explained that while he developed a “chair base design using bent laminated braces” for a dining chair, “it has provided the design and build basis for many other projects including benches, stools and small tables. Each application requires small tweaks to the design, such as the size and angle of the brace, but the technique remains the same”. Carver Danielle Rose Byrd also makes use of iterative design, particularly with spoons and shrink pots which “are limited to more nuanced changes in design that benefit from an iterative design process”.

I have found two main benefits to this process, although I am sure there are plenty of others I’ve not yet stumbled upon. Firstly, once the base design has been prepared, creating further iterations is a more time-efficient process, because the overall form (proportions and joinery, not to mention the construction process) have already been established. Instead, subsequent design time is focused on making adjustments to achieve a different functionality aesthetic, or to accommodate different materials. Those efficiencies are not confined to the time spent on design either. As Rich explains: “I tend to over-engineer a piece with extra structure or support the first time around. But the experience of each subsequent iteration allows for refinement or efficiencies to develop in the built to either save material or time, or to increase the flexibility of the design”.
_DPP7005

Dovetails for the first corner

Secondly, having an established based design already built (iteration one – in my case the Policeman’s Boot Bench) enables the impact of each design change to be readily compared and contrasted. Again, that might be in terms of functionality, or appearance. By expanding the uses of a base design, you develop an understanding of what functionality can be achieved within a given footprint or internal fitout. This reflects Danielle’s experience, as “it’s one thing to see a new pattern carved onto a flat board, but being able to use an actual shrink pot so I can see how the pattern relates to the shape of it allows me to make better informed decisions about what ultimately gets used on the final piece”, and for this reason she keeps all of her “practice boards and failed past projects”.

The Drawbacks of Iterative Design

No design process is perfect, so are there drawbacks to iterative design? The obvious one, to my mind, is that any process based on repetition or making adjustments to a base design, has the potential to limit design language and result in a narrower breadth of work. Danielle’s experience would support this, and suggests that “iterative design holds me back – I tend to think smaller, be more conservative, and limit myself”. Richard adds that “I think you can become too comfortable with your ‘hammer’ and perhaps have a blind spot for other approaches”, although staying interested in other makers’ designs and approaches can counterbalance that risk.
_DPP7202

Conclusion

Within the context of a broader approach to design, I’ve found that iterative design can be a useful tool, and one which has some very beneficial attributes. What I find really interesting about using the Policeman’s Boot Bench as a base design is that making changes to the internal layout requires only moving the location of the dados, which really emphasises the flexibility of both the joinery and the design. As Rich observed about his own experience with iterative design “when the project I am building can [make use of an established design feature], I know I can rely on solid experience and approach, and focus on details and aesthetics and not on behind the scenes building techniques”.

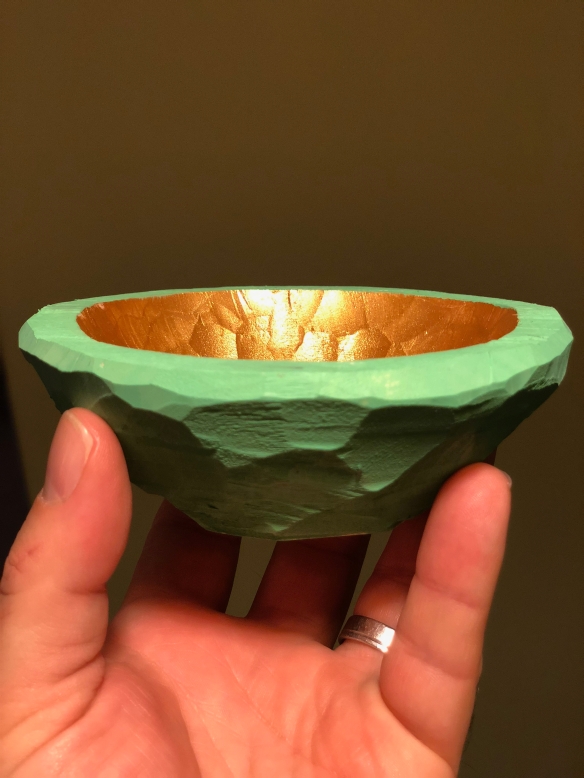
At its root, this iterative design process is about developing a design language and experimenting. In fact, the more I dig into this as a process the more I find that I am engaging in a design conversation with myself and the overall brief of the project. Building that design language presents the opportunity to explore ideas, and draw upon previous experience to trial new approaches As Danielle explains, “when I first got into bowl carving, I set aside ten or so maple bowl blanks and let myself go wild on them, entertaining any and every idea I had so I could find the extremes of what was possible, including texture. I also have bowl failures that I keep around. This comes in handy during the iterative design process because it allows me to easily expand on previous ideas that I’ve hashed out on these testers seemingly picking up where I’ve left off”.
IMG_1370

Bowl by Danielle Rose Byrd

This represents my first forays into iterative design, and the experiences of some other makers. And so, I shall finish with a challenge – next time you come to design a piece, ask yourself if you need to start from scratch, or whether you have already built a base design that could be adapted. This approach may save you time and provide some unexpected results.

The virtues of the 60 second sketch

Design as a process is something I find simultaneously fascinating and daunting. Much of the apprehension about sitting down to design something comes from the fact that I am terrible at drawing. I mean, most of my stick figures look like they need urgent spinal surgery. One of the most challenging aspects of the rigorous training at Totnes was drawing the outline of our guitars. Those three days spent with a sheet of tracing paper and a pencil, chasing smoothly flowing curves was at times hard going (no templates, no french curves, just freehand drawing and lots of rubbing out). It’s funny, because actually once I move beyond the how do I want this to look stage and into the how do I build it? I find the design process much more enjoyable and less painful, because at that stage it is down to engineering a solution.

IMG_2285

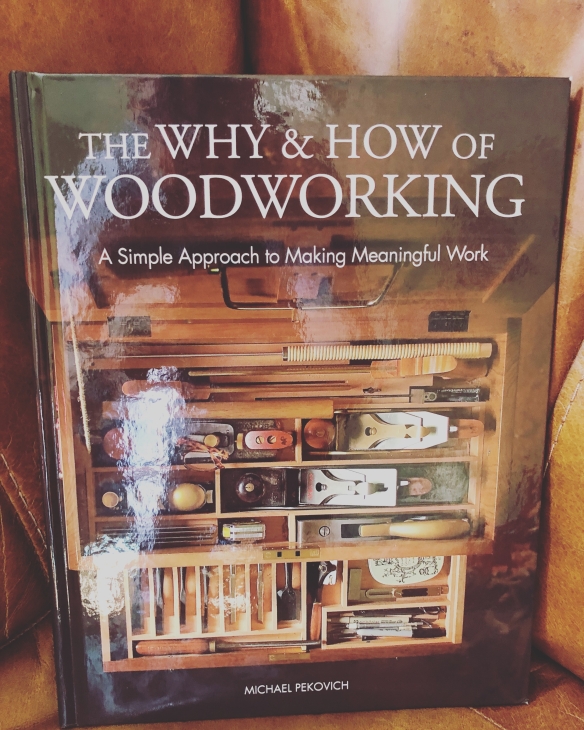
The guitar I built at Totnes came out pretty nicely, as did the few furniture pieces I’ve designed from scratch, and to progress as a maker the design process is something I want to feel much more comfortable with. So I’ve been thinking about how to make the act of designing pieces more natural. Mike Pekovich’s excellent book The Why & How of Woodworking makes the excellent suggestion of drawing thumbnail sketches to rough out an idea for a piece before drilling down into measured drawings, and this is an approach Chris has also touched on previously. The idea of a 60 second sketch appealed as an efficient way to capture the essence of an idea. Such a quick sketch would be rough by nature, and so mitigates against my lack of artistic prowess.

So, on a whim I picked up a sketch book from our local newsagents. Nothing fancy, just an A5 sized fliptop pad with 5mm squared paper. Not long after, Dr Moss and I were planning the next round of decorating (we are slowly but surely eliminating all of the magnolia paint left by the previous owners) and next up is the landing outside our bedroom, which has become a bit of a dumping ground for clutter. Rachel made the excellent suggestion of a narrow table to sit on the landing and prevent clutter build-up, which would also form part of a feature wall with some art work. As well as a new piece to build after the Roubo bench is complete, this gave me a reason to start sketching.

IMG_2891

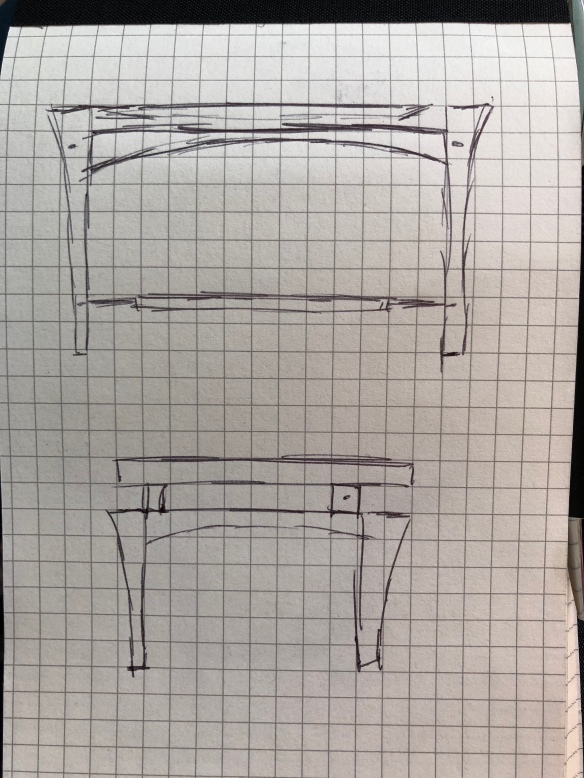
Sketches 1 (top) and 2 (bottom) were exercises in seeing how the components might fit together.

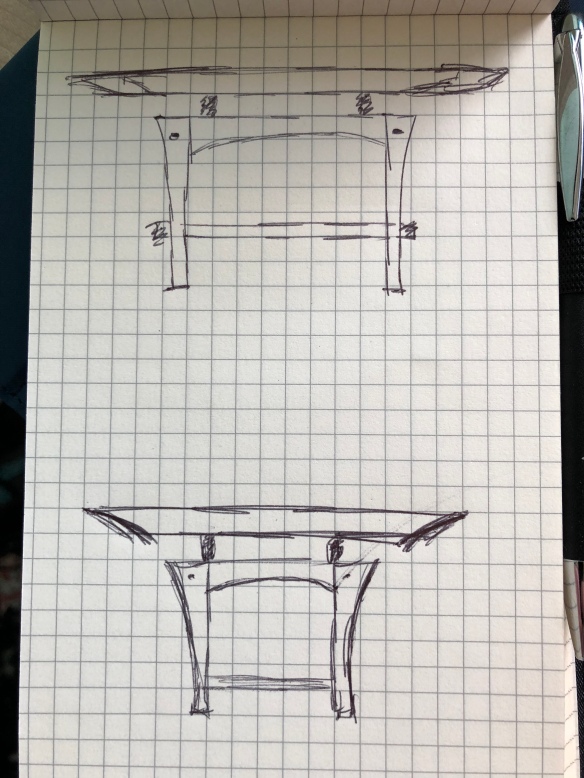
I knew I wanted to try something different to my previous furniture builds, including greater use of curves, and a floating table top. That all sounds like a lot of fun, but how would it fit together? Would the legs go at the corners of the table top, or within the length? Would there be a lower stretcher, or just stretchers at the top of the legs? What would the proportions of the table be? I wasn’t thinking about joinery or technical solutions at this stage, just how the various elements that make a table might be arranged. I had no answers, so I started to draw, limiting myself to 60 seconds or so for each sketch. Now these are rough, rough drawings, but over the course of four sketches I started to zone in on how I thought the table should look – a curved tapered leg profile, with the legs situated underneath the table top allowing a good overhang at each end. A thin, straight stretcher towards the bottom of each leg, and a more substantial curved stretcher at the top. Possibly chamfering the ends of the table top to add to the curved feel.

IMG_2892

Sketches 3 (top) and 4 (bottom) start to dial in how the design might look.

It didn’t take long to get to something I was broadly happy with. The next stage is to do a more detailed scale drawing (which is the design work I’m much more comfortable doing) and work out the specifics. And the notebook? The notebook will be a permanent resident in my work bag, and I’m setting myself a challenge to sketch furniture pieces at least 3 days a week for a month. At the end of the month, I’ll report back on whether that more regularised and focused design work has had any impact.

In Print and Covered Up

IMG_2768

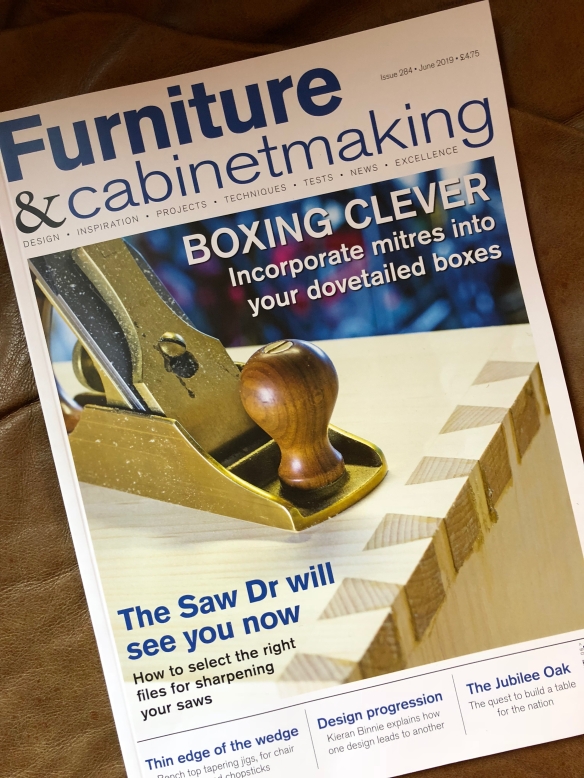
Issue 284 of Furniture & Cabinetmaking is now in print and features a wealth of interesting content by Mark Harrell (on saw sharpening), Rich Wile (on the Midlands Woodwork Show), and Derek Jones (on box making). Also featured is my article on iterative design process. This article uses the example of how the base design for the Policeman’s Boot Bench evolved into the Back to the Boot Bench, and as well as insight into design process from Danielle Rose-Byrd and Rich Wile (both of whom graciously agreed to be interviewed for the piece, for which I am most grateful).

This article is my 34th piece for F&C, but the first time that I’ve contributed the cover image, which I am very excited about.

IMG_2770

Last call for Otw tees

IMG_2504

I’m down to my last seven OtW tees of print run No.4 – six assorted sizes in Cardinal Red, along with a single XXL in British Racing Green. This is likely to be the last print run of tees for some time, so if you’ve been thinking of ordering one now is the time to let me know. I also have plenty of stickers and button pins in stock.

IMG_8941

Tees are priced at £20, stickers are £3 per set, and button pins are also £3 (all prices exclusive of shipping). I’ll also do some bundle deals for folk who order a tee with stickers and/ or button pin. As always, to order or make an enquiry, drop me an email at kieran at over the wireless dot com.

img_1208

Button Pins, Stickers and T-shirts

IMG_8941

Have you ever felt the need to fly the OtW flag, but it’s laundry day and your tee is in the wash? Well, help is at hand because I’m now stocking these delightful 1.5″ OtW button pins. As a teenage music fan in the 90’s, button pins were an integral part of music fandom, and my guitar strap was host to a constantly rotating cast of button pins by my favourite bands. So I am really pleased to have a limited stock of branded pins.

img_1208

Speaking of tees, I still have a couple of sizes left in both British Racing Green and Cardinal Red, as well as sets of stickers. Tees are priced at £20, stickers are £3 per set, and button pins are also £3 (all prices exclusive of shipping). I’ll also do some bundle deals for folk who order a tee with stickers or button pin. As always, to order or make an enquiry, drop me an email at kieran at over the wireless dot com.

IMG_2504

The next evolution of Over the Wireless

OTW Logo - Graphic

If you use an RSS feed to read OtW, or if you read via an email subscription, then you may not have seen the recent changes to the site. Over the Wireless started over four years ago as a way to simply describe what I was doing at my workbench, without any real expectation that anyone would want to read it. Now, with regular articles published in Furniture & Cabinetmaking and Popular Woodworking, the John Brown book for Lost Art Press, interest in commissions from prospective clients, and frequent enquiries about teaching classes (and more on this development very soon) I decided it was high time for an update of the site to better reflect the professional direction OtW has taken.

The blog feed remains the beating heart of Over the Wireless, so readers do not need to make any adjustments. But if you visit the site itself, you’ll now find on the menu bar (in order):

The aim with the new site is to give a clearer picture of what OtW is about, to present the important information clearly, and to properly showcase some of my work. A website, very much like a tool chest, is never truly finished. But I think that this iteration of Over the Wirless is a significant improvement, and puts the site on a good footing to explore and develop the new opportunities and adventures that keep presenting themselves.

Despite the fact that a large part of what I do here is communicating, I find it absolutely excruciating to write about myself. So when my good friend Jim McConnell announced his new venture (with wife Emily) as Wishbone & Hearth offering a writing, editorial, and transcription service, I knew exactly who to commission writing the new About page for OtW. Jim is an excellent writer (if you haven’t already, you should subscribe to the Daily Skep, and read Jim’s article in issue three of Mortise & Tenon) but most of all I knew I could rely on Jim to present who (and what) Over the Wireless is in a sympathetic and accurate light. After exchanging a couple of emails about the scope of the copy, and providing Jim with some background information, it was a case of waiting a couple of days for the first draft to arrive. The difference beween that first draft and the final copy you can see on the site is very slight, with only a couple of changes to tidy up and clarify some points.

What I hadn’t anticipated was that Jim’s enquiring mind would pull together threads I sometimes overlook and draw them together to give a much better representation of Over the Wireless than I could have hoped to do myself. All this, with cutting through the myriad tangents and facets which occurred to me, but which did not add to the OtW message or narrative. Sometimes it takes someone with a bit of distance and perspective to capture what is truly important about your work – I’ve certainly found this with both the OtW branding designed by Tom, and now the copy written by Wishbone & Hearth.  And working with other designers and craftspeople is an embodiment of the community spirit and engagement I really want to place at the heart of what OtW is about. Returning to Wishbone & Hearth in particular, Jim is a consumate professional (and very reasonably priced) and I would have absolutely no hesitation in commissioning further writing from him if the need arose. So, if you need someone to draft, edit, or transcribe recordings, then Wishbone & Hearth come highly recommended.

An update on stickers and tees

IMG_2504

The next print run of Over the Wireless t-shirts has just landed, and pre-orders will be shipped out tomorrow. I currently have sizes L to XXL in British Racing Green, and M to XXL in Cardinal Red. Prices are £20 including shipping within the UK, £25 including shipping to the US, and shipping to other locations on request.

img_1208

OtW decals are also in stock, in two designs. A pair of decals (one of each design) is £3 including postage in the UK, or $5 including postage to the US. Other locations (as always) on request.

If you would like to have the OtW logo displayed about your person or tool chest, and would like a t-shirt or decals, then drop me a line in the comments or at kieran@overthewireless.com. I can never guarantee that we will do another print run (although I hope to be able to) so if you’ve been holding on for a tee, now is the time.

Joining the sticker swap revolution

Handworks 2017 promises to be a really special couple of days, not least because it is just about the only time you can expect to find a significant proportion of our community all together in the same barn. And so I thought it would be fun to have some new OtW merchandise for the event.

These OtW decals have now arrived from the printer, and Tom’s design work is looking as crisp as ever. But how do you get your hands on these stickers? Easy. Come and find me at Handworks – I’ll be helping out on the Sterling Tool Works stand, and also dashing about covering the event for Furniture & Cabinetmaking. The stickers are $2 each or $3 for the pair. BUT if you wear an OtW tee to Handworks then you can claim both decals free of charge. I will also have a couple of OtW tees for sale (priced at $25 each).

If you’re not going to Handworks, but will be at the European Woodwork Show in September, do not despair – I’ll have a fresh print run of the decals with me at EWS.

If you’re going to Handworks let me know by leaving a comment below. Looking forward to steering everyone in Iowa next week!

A different thread…

IMG_2504

Winter seems to be dragging on with no end in sight round these parts, so wearing extra layers is an essential survival strategy. Which is why I am pleased to announce that I’ve had a third run of Over the Wireless t-shirts printed. Now that all the pre-orders have shipped out, I have a good range of sizes in Cardinal Red left in stock, as well as a lone medium left in British Racing Green. The tees are priced at £20 including shipping in the UK, or £25 including shipping to the US (other shipping locations on request). Orders can be placed by leaving a comment below, or by emailing kieran@overthewireless.com

As always, I hope to have another run of tees printed but that depends on demand. So if you want a tee, drop me a line just in case this is the last print run. Of course, if you would like a British Racing Green shirt in a size other than medium, let me know and I’ll start the fourth print-run order list.

The Policeman’s Boot Bench… Part 1

There may be better ways of starting a new year than with a new project, but I’ve yet to find any. I started off 2017 as I mean to go on – spending the first day of the year in the workshop breaking down stock for my next funiture build. It all seemed very appropriate.

For this project I’ve been commissioned to build an oak side table and shoe rack to sit in a hallway. The client had a strong idea of what he wanted, but was open to some design input from me, and so we batted sketches back and forth until we reached the final specification. This was a perfect opportunity to apply the key design tenets from the Anarchist’s Design Book (a book that has had a significant impact on how I think about design), whilst meeting the specific dimensions the client wants (the piece will fit in a corner of the hall between a wall and radiator). We started with a low “boot bench” type design (and the name has stuck), although the final design did take advantage of the one dimension I could change, by increasing the height somewhat. Where we ended up was a 43″ wide, 14″ deep table with the top secured to the sides with through dovetails, while the four shelves (the client and his housemates have a lot of shoes!) are let into the sides with dados. To protect the wall behind from being marked by shoes, and to add rigidity to the piece, tongue and grooved boards will be set into a rebate and nailed to the back of the carcase.  So, dados, rebates, cut nails, and tongue and groove backboards. That definitely sounds like an Anarchist’s design!

img_4072

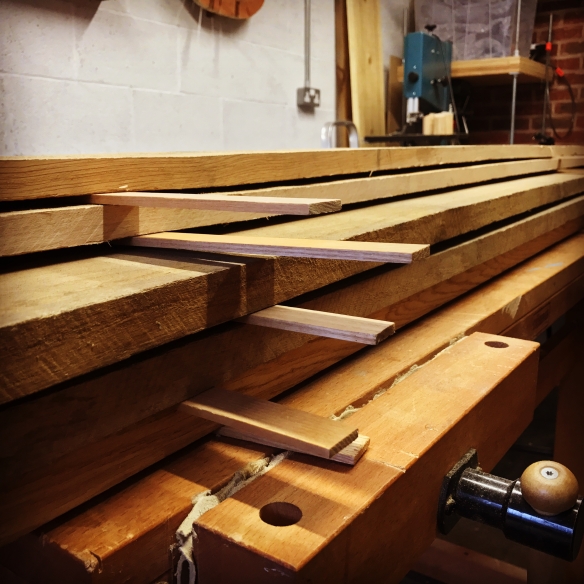
Rough oak boards, waiting to be turned into a boot bench

The boot bench will stand on a period tiled floor, and the client wants to make a feature of the floor as much as possible. So one of the design questions was how to give the table a solid footing without obscuring the floor tiles. My suggestion was to carve the bottom 3″ of the sides (up to the lower edge of the first shelf) into a cyma reversa foot detail similar to the feet of my Roubo bookstand build. This retains a good base for the table, but still allows sight of the floor tiles. The table will be finished with shellac and topped with a home brewed hard wax (the recipe for which is courtesy of Derek).

With the design agreed, my next stop was Sykes Timber, who were able to provide some gorgeous 15″ wide 5/4″ thick oak boards. These lay in stick in the workshop for November and December, before being broken down and moved into the house to acclimatise.

img_4507

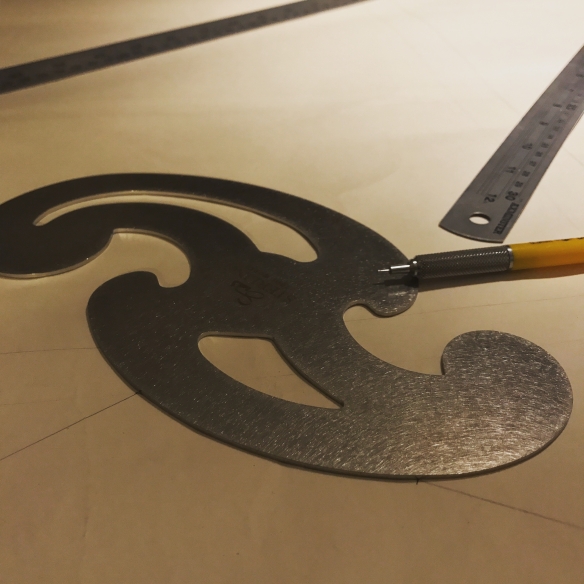
Drawing full sized plans – I wouldn’t want to be without my set of Roubo curves by Sterling Tool Works for drawing curved parts.

Working from scaled drawings is all well and good if you’re following instructions from a design someone else has tested, but when building a brand new design I’m not happy putting saw to wood until I’ve worked up a full sized drawing. I find that making a full sized drawing gives me the opportunity to spot any design issues I’ve overlooked, and also to clarify in what order I need to carry out each stage of the build. I like rolls of lining paper for making full sized plans, as you can cut each piece to the precise length you need it, and the thick paper is quite durable. And so over Christmas I hunkered down and drew full size front, back and side elevations for the boot bench. With the drawings complete I then wrote a detailed list of each stage of work, making sure that each stage followed logically and wouldn’t complicate any stages that followed. This will be my masterplan for the build going forwards, so is worth getting right!

img_4520

Laying out the top and sides on one of the 15″ wide boards.

The moment that you start to work on rough boards always feels transformational to me – taking splintery and dirt encrusted timber in order to realise the beauty and furniture within. It can also be a somewhat nerve wracking moment – you only get one chance to make that first cut! S0 only once I was happy that the design worked, and that the dimensions would fit in the physical space the client has available, did I start thinking about breaking the oak down to size. If I’m honest, making the three cuts for the top and sides took over an hour, and even after a lot of careful checking I was still a touch nervous about cutting such beautiful stock. Having pulled the three oak boards out of their resting place, I selected the best board for the casework, and spent time laying out the top and sides so that they would run sequentially along the one board, avoiding any knots or shakes. These boards were very clear, but in any wide stock there is bound to be a couple of minor defects. Having laid out the cuts for the top and sides on one face of the board, I flipped it over to make sure there weren’t any surprises on the other side. Through careful layout I was able to place the few knots in areas where the foot detailed would be cut away, or in waste sections. The other two boards provided the four shelves. Breaking down 9′ long boards by hand definitely makes me want to build a third saw bench to support the extra length, but the two saw benches I do have worked perfectly and provided a lot of support to these wide oak boards. The Skelton panel saw is a monster, munching through the wide oak like it wasn’t even there. That saw is definitely a worthwhile addition to my tool chest.

img_4526

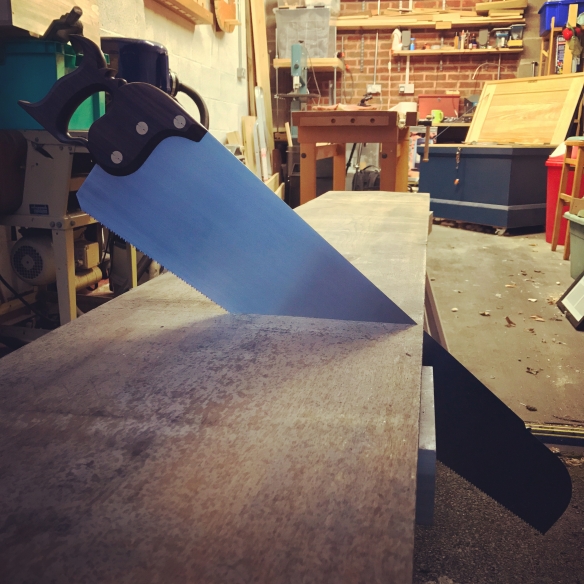
For breaking down rough stock the Skelton Saws cross-cut panel saw and a pair of saw benches is the perfect combination.

The stock is now safely stored in the house to finish acclimatising before I start work on the build proper, more of which next week.