Ingenious Mechanicks – on review

IMG_9776

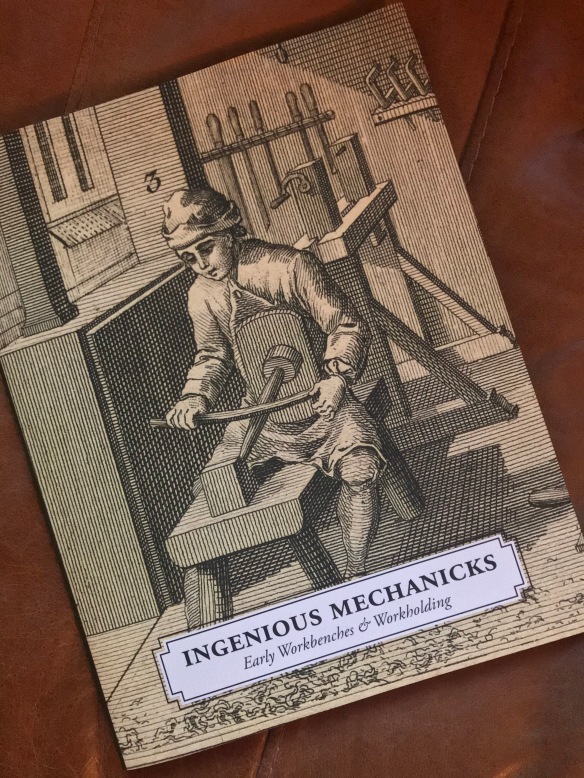
Aside from my round-up of favourite woodworking books earlier this year, book reviews are not really something I’ve done on the blog. But as soon as I finished reading Chris’ new book, Ingenious Mechanicks on holiday earlier this month, I knew that I was going to have to write about it here.

If somehow this book has passed you by, then it can briefly be summed up as an investigation into low workbenches and workholding solutions spanning a 2,000 year period from the Romans to 20th century Estonia, by way of China and South Ameria. In the book, Chris draws upon a vast body of history of art, written primary sources, not to mention the Saalburg bench – the oldest surviving workbench in the Western world (dating from 187 AD).  The research is then rigorously tested by building four low bench designs and working at them to unlock techniques and working methods. So far so niche, you might think, but actually the information and lessons in this book have a wide application.

The book contains a useful guide to building (any type of) workbench with a thick slab top, which is a very welcome and helpful supplement to the Workbenches book. Next follows a detailed survey of the source material, and explanation as to how the research led Chris to build the benches as well as the simple appliances which increase their functionality. The production values of this book are high, as you’d expect from a Lost Art Press release, and the benefit is that the pictoral sources are reproduced with great clarity so that the reader is able to interrogate the images and reach their own conclusions about how artists have represented workbenches and woodworking. As I’ve written previously, history is one of my first loves, so this book was always likely to be like catnip for me. I wasn’t disappointed.

But putting aside my particular interests for a moment, as I was reading Ingenious Mechanicks I was struck by the recurring thought – this book is quite possibly the most important work Chris has published since the Anarchist’s Tool Chest. That’s a pretty bold statement, I know. But there are two reasons why I think this.

First is that Chris is presenting a way of working which is (for most people) entirely new – one which presents solutions for age old workholding problems, as well as new challenges. The vast majority of the way we work is from handed down knowledge – we learn from books, Youtube videos, or (heaven forbid) other woodworking humans in the same room as us. These are all healthy and invaluable ways of gathering and transmitting knowledge. But what I find exciting about Ingenious Mechanicks is that it offers something truly unique – the opportunity to experience a vibrant way of working for which not all the answers are known, and for which there is not a pre-existing corpus of knowledge on which to draw. Instead, the reader is presented with a chance to explore the benefits and limits of low workbenches and to report back from the frontline of woodwork research as they happen upon working methods and techniques. The only price of admission is to suspend pre-conceptions, and spend some time using unfamiliar workholding solutions.

Secondly, Chris has laid bare his workings and research methods. In doing so he provides the tools for others to research historic woodworking practices, and demonstrates how a rich seam of art history, archaeology, written primary sources, and an inquisitive disposition, can provide valuable insight into woodworking practices that are both historic and relevant today. Ingenious Mechanicks therefore becomes part woodworking book on pre-16th century workbenches, and part woodwork research methodology.

As I was reading the book I found myself asking questions about how familiar operations would translate to a low bench. Would wooden bodied planes respond differenty, or feel more comfortable, than metal bodied planes when processing stock? What sort of body position and posture would be necessary for sawing accurate dovetails? Would ow benches encourage the use of specific joinery techniques? There are few answers yet, and I know that there is really only one way to understand how these benches work. The oak for my slab-top Roubo bench is on order and should be here in the next couple of weeks. And now I am measuring up the workshop and trying to decide whether I should build one of these low benches too. And when all is said and done, persuading a reader to build one of these curious old benches goes to show just how effective Ingenious Mechanicks is.

We turned and turned and turned

_DPP5672

Nine completed legs. Batched work has benefits from a learning and efficiency perspective.

The three sets of campaign stool legs are now turned and ready for finish, hardware, and leather. Repeating the same form in three different species provided some very useful lessons about turning, particularly how to achieve a clean surface on different stock, including tear-out prone timber (I’m looking at you, ash trees), working stock of differing hardness (that maple was tough stuff), and achieving consistency of form. All in all, I’m pleased with how these legs came out, and definitely looking forward to spending more time at the lathe.

_DPP5677

Two different foot profiles

I really like the Roorkee inspired foot detail on the ash and sapele legs, but variety is the spice of life, and as I was feeling comfortable at the lathe by that point I thought it would be interesting to try something different for my third set of legs. So for the maple legs I went for a more rounded ball foot instead of the cylinder and cove profile. Although this is only a small detail, it has a significant impact on the overall appearance of the leg. Rounding the foot was good fun, although probably the most challenging element of turning all nine legs, as it requires an entirely different body position and movement with the tool. Again, this was a valuable part of the learning experience, and with more practice I’ll be up for trying more involved profiles – the aim ultimately is to work up to a set of Windsor chair legs (although that is likely a ways off). Maple takes a really crisp detail at the lathe, and it will be interesting to explore the possibilities presented by becoming more familiar with turning.

_DPP5675

It is a simple detail, but one I really like

The tribolts are on order from Lee Valley, although unfortunately they appear to be out of stock until the end of the month. While I wait for the hardware to arrive, I’ll apply finish to the legs (Chris recommended in his book that you drill out the holes for the tribolts once the finish was applied), and then press on with the Apprentice’s Stick Chair. As far as finish goes, the maple legs will receive the same combination of blonde shellac and Osmo as I used for the staked work table. I need to do some sample boards for the ash and sapele legs, but currently I’m leaning towards blonde shellac for the ash, garnet shellac for the sapele, and black wax for both (my favourite top coat for porous timber).

IMG_9582

Gorgeous leather seat from Texas Heritage

The burgandy leather has now arrived from Jason, and the quality of material and workmanship is excellent, as I have come to expect.  With three sets of legs up to the standard I was aiming for, I need to order two more sets of leather. The burgandy leather seat has been earmarked for the sapele legs by Dr Moss, so I am thinking of pairing a mid-brown seat with the ash legs, and black seat for the maple. Rising up the to do list is a set of Roorkee chairs to match the campaign stools – making stuff always leads to making more stuff. And I wouldn’t have it any other way.

_DPP5683

Proof of handwork – I’m tempted to leave the layout lines on the sole of each foot

The campaign turns, and turns, and turns

We’re back from a much needed, and very relaxing, family holiday in Devon. After a week away, I was feeling recharged (which I’m sure will last until approximately 9:47 am on Monday morning) and looking forward to turning the legs for the campaign stools.

IMG_9525

Easy Wood Rougher, Detailer, and Finisher (from back to front)

Prior to the campaign stools, the full extent of my time at the lathe was turning the tenons for the staked work table. The campaign stool legs are quite a simple design, which means that they are well suited as a beginner’s project. Because I had enough sapele for two sets of stools I decided to start with that species to get any initial mistakes ironed out – I only have enough ash and maple for one set of stools each, so an error on those species means that I wouldn’t have any spare material to make a replacement leg.

IMG_9699

An octagonal leg blank in the lathe ready to go

With this project I had two key learning points in mind – getting more familiar with the lathe and basic turning operations, and achieving consistency of form across each set of three legs. Before I switched the lathe on, I re-watched a section of Chris’ video on turning spindles for Roorkee chairs which contained some useful pointers.

The first task was turning the leg down to a consistent cylinder. As I had octagonalised the legs previously this reduced the amount of material to be removed at the lathe, and also mitigated against the risk of catching a corner and ruining a blank. The tool rest on my Shopsmith lathe is roughly one third of the length of a stool leg, and so the process I adoped was to turn down a small section to final thickness at each end of the tool rest, and then connect those two sections by removing the material in the middle. I started at the left-hand end of each leg, and worked my way towards the right-hand end, moving the tool rest to the next section once that third of the leg was at final thickness. This bulk removal of material (and in fact, most of the work for the legs) was removed with the Easy Wood Rougher.

IMG_9705

Laying out the details and transitions with the story stick

Once the leg was a consistent cylinder, I used my story stick to layout the details to be turned, always laying the foot out at the right-hand end of the leg – for batched work repeating the same process each time reduces confusion and helps ensure consistency. The first detail I turned for each leg was the decorative lines either side of where the tribolt will secure the legs, using the Easy Wood Detailer. These lines were the easiest error to make, and also the hardest to correct, so by turning this detail first I knew whether completing the rest of the leg would be worthwhile.

IMG_9707

The danger zone successfully navigated

With the decoration safely turned, I then turned down the foot to dimension, followed by the ankle. Instead of turning down the ankle straight to final dimension, I removed most of the material and then started roughing in the taper. This meant that I could avoid having an unsightly flat where the ankle bottomed out at the end of the taper, and helps the taper resolve to more fluidly into the ankle. For my first two sets of legs I decided to go with a Roorkee inspired foot shape of a cylinder with cove at each corner. For the next set of legs I’m thinking of trying a ball foot instead (variety being the spice of life, apparently).

IMG_9708

Turning the foot

Once the leg was looking ship-shape, I gave it a quick sand with 120 grit Abranet to remove any fur and tool marks, and then moved on to the next leg in the set. With subsequent legs, I compared progress against both the story stick and the legs in the same set, to make sure I was on the right track.

IMG_9698

Ash is one of my favourite timber species to work with

The very first leg I turned was relegated to the burn pile, as I botched the spacing of the decorative lines. With that mistakes done and out of my system, I managed to get three usable and consistent sapele legs, followed by two good ash legs (with one ash blank left to turn). The benefit of batching tasks like this is that increased familiarity results in increased precision and speed. My first leg took nearly an hour an a half, which I reduced to 40 minutes per leg by the end of the day (and I’m sure with practice that time would come down furthe still). Most of the work involved is turning the octagon into a cylinder, with the details taking about a third of the time.

IMG_9709

Five consistant, and completed, legs

The story stick and go-blocks definitely assisted in achieving consistency, and were well worth the effort. Next up will be turning the remaining ash leg and the set of maple legs, applying finish to all of the legs, and then drilling for the hardware. But that will be for next time.

(What’s the) Story Stick (Morning Glory)?

The biggest technical challenge in turning the legs for the campaign stools, for me at least, will be achieving a consistent form across each batch of three legs. The shape itself is very basic (which is one of the reasons that I’m using this project as an opportunity to notch up some more hours at the lathe) so getting one good looking leg should be achievable. But three legs which are not only good looking, but have a consistent shape? That’s where the challenge sets in. So I’m trying to make this as easy for myself as possible.

IMG_9564

A piece of scrap the right size, sharp marking knife, and combination square are all that is needed to make a useful story stick

One of the areas of risk is laying out the proportions for each leg by measuring. Every time you reach for a ruler you run the risk of making an error. Across the twelve leg blanks I have waiting to be turned, that’s a lot of potential errors. So for this project I’m ditching my nice rulers and going for a pre-industrial method of capturing all of the information I need for the project – a story stick. For the uninitiated, a story stick is simply a piece of scrap which records all of the dimensions and transition points for the leg, so that I don’t have to do any measuring at the lathe.

My scraps bin yielded a nice 1 3/4″ wide, 3/8″ thick piece of oak which would do perfectly. After cutting the story stick to the length of the leg blanks, I then laid out each of the key points of the leg pattern on the stick with a 6″ combination square and sharp marking knife. The foot, where the leg taper starts, the position of the hole for the tribolt, the decorative elements (coves, grooves, etc), each of these were marked as knife lines across the full width of the story stick. A 0.3mm mechanical pencil then filled the knife lines in so that they are easily seen, and I also wrote the various diameters at each of the transition points.

Now, when I come to turn the legs, it is a simple matter holding the story stick against the leg blanks and checking off the details which I need to turn. No more measuring means a reduced risk of errors which would lead to inconsistent leg profiles.

IMG_9576

Another dirt simple measuring device – go blocks sized for the three thicknesses of the stool legs

While I was at it, I prepared a go-block with each of the diameters to which I will be turning elements of the legs (full thickness, ankle, and foot diameters). This was simply a scrap of 3/4″ thick oak into which I cut holes matching the three thicknesses I need to turn to. So when it comes to turning the legs, the go-block will slide over the various sections when I am at the correct thickness. Again, no measuring with callipers, and the potential to make an error when reading off a scale. Dirt simple measuring which will help to keep the focus on turning a consistent profile (which will be a challenge enough). I’ll report back on whether these strategies helped when turning my first sets of stool legs!

IMG_9568

The finished story stick, with all the key dimensions and details laid out.