A Tale of Four Hammers

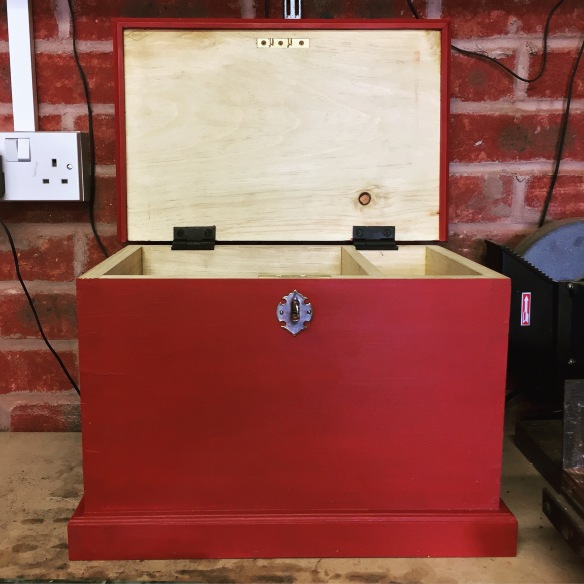
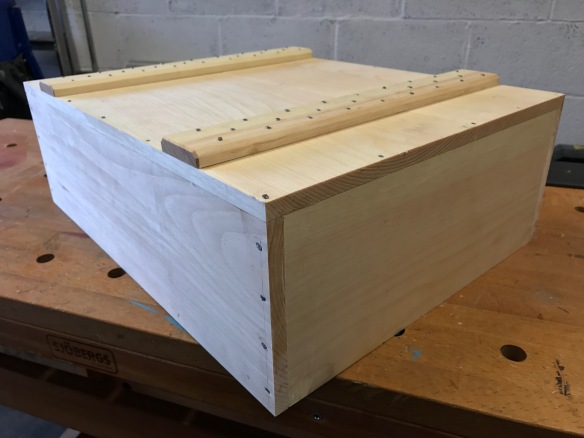
I don’t often write posts dedicated to tools. Not because I don’t love woodworking tools (I do – nice tools are one of the best things about woodwork) but because on the whole I’m more interested in processes, in how the tools are used and what they contribute to a build. But sometimes it is fun to do something a bit different, and after clinching the bottom and lid for the Apprentice’s Memory Box I’ve been thinking about the the relationship I have with my hammers. Most people, I’m sure, will remember the post when Chris suggested that hammers were as personal as “things you put in your nether regions“. And while most woodworkers save their superlatives for planes and saws, a good hammer can be a beautiful thing.

img_4350

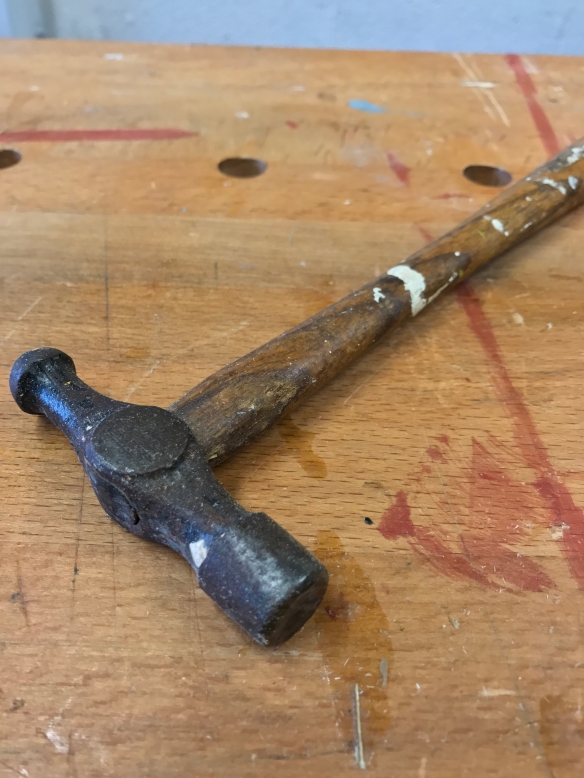
My first hammer – a dainty ball pein hammer which used to belong to my Grandfather. She ain’t pretty, but she does the job.

There’s not much call for hammers in lutherie, apart from seating frets in their slots (for which I use a dedicated fret hammer). Sure, a hammer is a useful thing to keep around, but it isn’t what I’d call essential. So for years the only hammer in my tool box was a small ball pein hammer that used to belong to my grandfather. After decades of hard use it is unlikely to win any beauty contests, but for my limited needs at the time it did pretty well. To be honest I’m not sure I asked any more of it than gently tapping shell inlay into a cavity, or knocking in fretboard locating pins prior to glue-up, but it worked fine for those rare moments I needed it, and is still in my Anarchist’s Tool Chest.

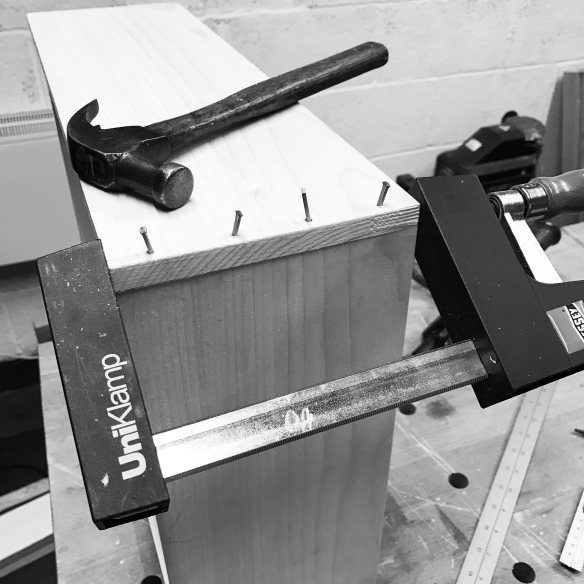
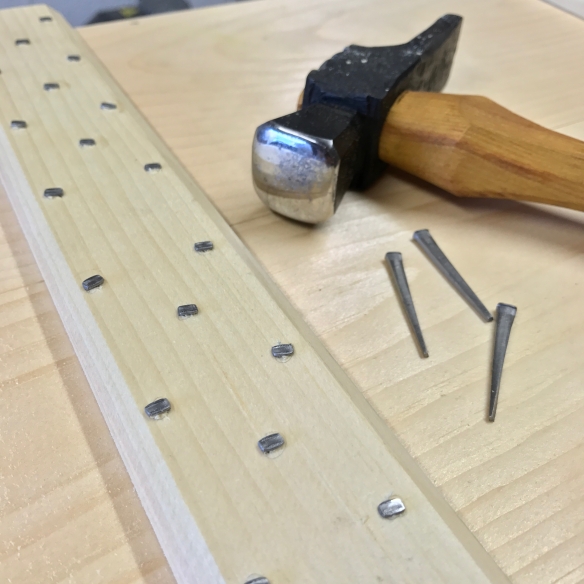
It was signing up to the Anarchist’s Tool Chest class in 2014 that made me realise I needed a beefier hammer. That dainty ball pein hammer was entirely inadequate when it came to knocking in 6d nails for the bottom boards, or even the 4d nails I used to hold the top dust seal in place. So I dived into the boxes of tools I’d inherited from my grandfather and found a larger claw hammer. The sticker said Stanley, but I’m guessing the hammer was a modern product – it feels pretty unbalanced, the handle is far from comfy, and the face is perfectly flat. Not that I noticed these imperfections at the time. As I say, I was inexperienced in the ways of nail punishing.

img_4349

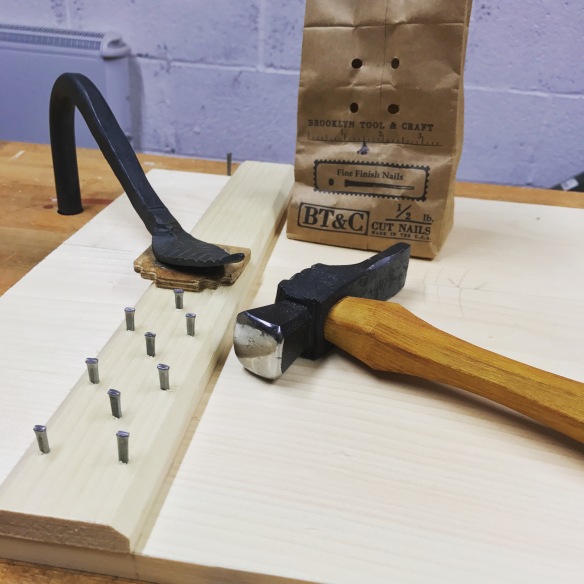
The small claw hammer by C Hammond of Philadelphia works like a dream when it comes to delicate work.

My first encounter with a great hammer came in late August 2015, just after the Apprentice was born. Among the gifts the Apprentice received from friends and family to celebrate being earthside, was a small claw hammer made in the nineteenth century by C Hammond of Philadelphia. This hammer currently resides in my Anarchist’s Tool Chest, on loan from the Apprentice (although it will be returned to her as soon as she enters the workshop). For driving headless brads and other small nails, this hammer is perfect – the balance is ideal for delicate work, and it instantly showed how lacking my other hammers were. It was a revelation, but one that meant I couldn’t go back to my Stanley hammer-shaped anchor. I needed a large hammer for driving nails into casework, particularly as I’d already resolved that 2016 would be the year I finally worked my way through the projects in the Joiner & Cabinet Maker.

img_4354

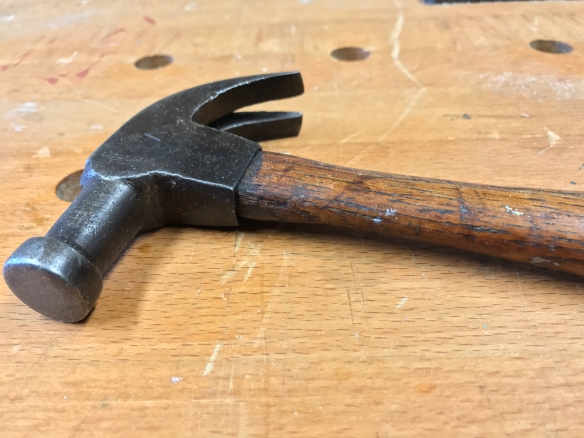
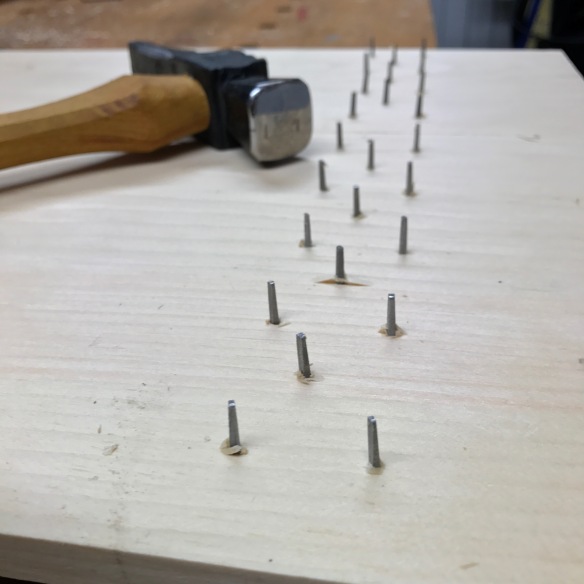
Up close – 8oz hammer by C Hammond

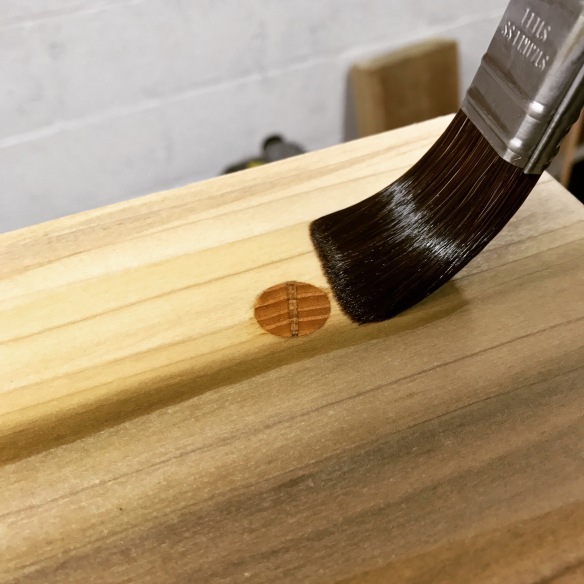
Unfortunately it is a long bus ride from Birmingham (U.K) to the nearest Mid-West Tool Collectors Association meeting, or most of Chris’ other suggestions to find a good hammer. So I decided that commissioning a blacksmith to make me a hammer to my exact specification would be the only way to go. The ideal opportunity presented itself when I started thinking about writing a follow up to the Dancing About Architecture article for Furniture & Cabinet Making. How could I put myself on the customer-side of the maker/customer relationship? I needed to commission something, but what? A larger hammer, obviously. I’ve admired John Switzer’s work for years, and knew that he could solve my current large hammer inadequacy. So we discussed a brief, including engravings of historic hammer patterns, and identifying all of my key requirements. Two months later, the last large hammer I will ever buy arrived from Beulah, Colorado. Like the smaller C Hammond hammer, the Black Bear Forge hammer is perfectly balanced and does exactly what I ask of it. At 16oz it drives larger nails with authority, the domed head reduces the risk of “frenching” the work, and the carved handle fits the hand just right.

img_4391

My 16oz hammer from Black Bear Forge. The last hammer I will ever buy – it is simply that good.

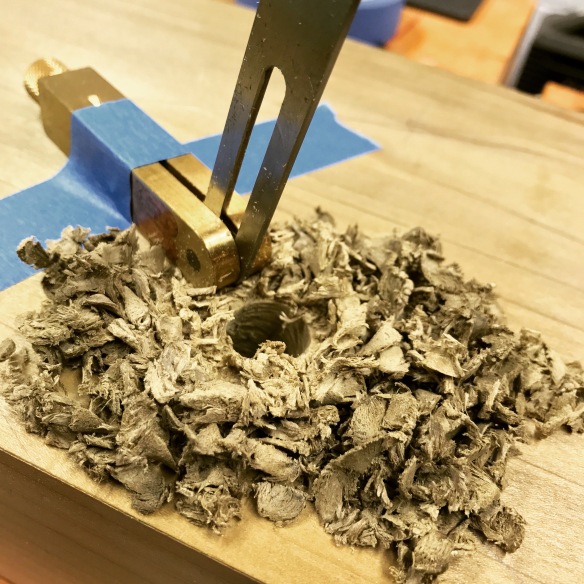
It is easy to look at something as apparently simple as a hammer, and to assume that all hammers are born equal. Afterall, it is essentially a chunk of metal on the end of a stick. But that would be to gravely underestimate the blacksmith’s art. Poise and balance are as important to hammers as they are to ballet dancers, and having had the privilege to use great hammers, as well as hammer-shaped objects, it seems to me that a great hammer wants you to get out of the way and let it do its job. I can clinch nails with my Black Bear Forge hammer till the cows come home, and never feel the slightest fatigue in my hammer hand or arm. A poorly balanced hammer on the otherhand requires steering and fighting in order to drive those nails, and tires you out faster than it should.

None of this is to to say that my perfect hammers are yours – Chris was right when he said that hammers were intensely personal. But making the move from a big box store hammer might just be a revelation. And if you can’t find a secondhand hammer you like? Well, there are some very talented blacksmiths out there…

The Apprentice knows her saws

Issue 253 of Furniture & Cabinet Making is now in print. The final issue of the year includes my review of the new Panel Saw by Skelton Saws, which was inspired by the Kenyon saws from the Tool Chest of Benjamin Seaton. Also in this months issue is Anne Briggs’ account of Woodwork in America, and Glenn Rundell’s experience at The Windsor Workshop.
As you can see, the Apprentice is thoroughly enjoying my copy.

The Apprentice’s Memory Box

img_3976

The School Box holds my sharpening kit. I like how the Salem Red looks against the brick wall behind.

There can be a tendency when writing about woodwork that you devote a huge amount of time to each stage of the build, but once the project has left your workbench it is never mentioned again. Which is fine up to a point, but sometimes a project is built with a specific purpose or function in mind, and when that is the case I think it is interesting if the reason for making the piece can be included in the narrative. I’m as guilty of this as anyone – having spent the summer writing about my experiences working through the projects in The Joiner & Cabinet Maker, I failed to make any mention of where the Packing Box and School Box are now, or what they are being used for. I filled my first Packing Box was with beer and a mix cd and sent it to a good friend, while the School Box resides in my workshop and holds my sharpening gear.

img_4332

Nailing the frame together. Placing a clamp across the grain minimises the risk of the nails splitting the edge of the workpiece.

I mention this because I’ve been working on a second Packing Box, but the intended function of that box has had a significant impact on how I’ve approached the build. In The Joiner & Cabinet Maker the Packing Box is an exercise in minimising work in order to build a sturdy box within a very limited period of time. So Thomas uses pre-dimensioned 1/2″ stock, and nails instead of more complex (read: time intensive) joinery. The lessons taught in this project are hugely important, and it is a great introduction to building case work. My second Packing Box is going to be a memory box for the Apprentice – somewhere for us to put all of the small treasures and ephemera that you inevitable collect over a baby’s first year (the first set of clothes she wore after she was born, the first lock of hair we trimmed, the scissors I used to cut her cord). I also intend to include a mix cd and a letter to her. Then we’ll nail the lid shut and put it in the loft until her 18th birthday, when we’ll give it to her (will they even have cd players then?).

img_4362

Clinching 4d cut nails hold the battens in place – instead of measuring I stepped off the nail locations with dividers.

The Packing Box is perfect for this – it is the right size to hold everything we want to put in, the nailed joinery will easily last the next 17 years (and many more after that), and it really is quite a handsome piece. But because this is an emotionally significant build, I’ve approached it quite differently.

Firstly, I’m not racing the clock on this build, and instead I’m savouring every element of the build. This is, after all, the first piece I’ve built specifically for my daughter. The big change has been processing all of the stock by hand, rather than using the timber as it came from the mill. So both faces have been treated with the jack, jointer and smoothing planes. The advantage of this, apart from looking good, is that I’ve been able to use 4d cut nails instead of the chunkier 6d nails I used on my first Packing Box. The pine I used on both Packing Boxes came in at 3/4″ thick rather than the 1/2″ thick Thomas used in the book. For my first Packing Box I followed the text closely and didn’t plane the faces of the boards, which meant that I had to compensate with longer nails. The difference when clinching 4d opposed to 6d nails is quite noticeable. You can clinch with 6d nails, providing you’ve got a weighty hammer (I’m using my 16oz hammer from Black Bear Forge) but getting the nails to bend smartly and re-enter the wood can be a little bit like real work. In contrast, the 4d nails bend easily and hold everything together just as tightly. So the extra work in planing the stock pays for itself with a smoother clinching experience.

img_4363

Inside – a forest of nails waiting to be clinched.

Working through a second Packing Box at a more leisurley pace also allows some of the deeper lessons to sink in. I built my first Packing Box at a fair lick (although still a touch slower than Thomas managed his – I would have been a bad apprentice) which meant that I was focused on the physical processes and the associated lessons in the text. So, squaring up the ends with only a smoothing plane (no shooting board for young Thomas!) and of course nail clinching. All of which are important lessons, and I got a lot out of doing a timed first build. The second time around, and not chasing the clock or having to think so much about the obvious elements of the build, the more subtle lessons really come to life and are consolidated. In particular placing the clinched battens using proportionate measurement rather than hard numbers has been a real delight, and it has me thinking more deeply about some of the ideas Jim Toplin and George Walker wrote about in By Hand and Eye. Working through any project several times helps to consolidate learning points, even when it is something as apparently simple as the Packing Box.

img_4395

Am I allowed to say “that’s a nicely clinched bottom”?

I’ve just got the lid to finish up and fit, and then we’ll be ready to fill the Apprentice’s Memory Box and stash it safely away for the next 17 years. This feels like a very apt project with which to finish the year.

The Anarchist’s Saw Bench… part 6

img_4301

The finished pair of saw benches

The second staked saw bench is now assembled, and I’ve had my first opportunity to press the pair of benches into use. In my last post on this project I had finished work on the legs for the second bench and just had the mortises to drill and ream before glue-up. I approached the rest of the build in the same way I’ve written about previously in this series (which is collected under the “staked furniture category” on the right-hand side of the screen).

img_4215

The sliding bevel provides a reference surface for drilling the mortise, but is less assistance when reaming the mortise to match the tapered tenon.

This project has been my first introduction to staked furniture, and to the compound geometry chairmakers use. Dipping my toe into this new world (which is very different to the guitar building or casework I’m used to) has been a great experience. When drilling the mortises for the second bench I was amazed at how quickly the angles for the sight lines settled into my arms and eyes, and steering the auger bit through the bench top at the correct angle using only a sliding bevel for reference felt a lot more natural. There’s no voodoo to this – just a matter of practice. Unfortunately reaming the mortises still feels much less natural, I suppose because there is no reference edge on the reamer which you can use to follow the sightline. I was quite happy with the splay on my first saw bench – it could afford to be a touch more consistent, but it certainly wasn’t terrible. Somehow, despite prioritising the reaming on the second bench I managed to be less consistent than with the first bench. This is definitely an area I need to work on, and I think there may be a third saw bench in my future to really get to terms with this technique (anda to be honest  third saw bench would make sawing long stock easier anyway). I have total admiration for chair makers who can get this operation right time after time – it is definitely the most difficult element of the saw bench build. That being said, even with legs that look a little like Bambi on ice, the second saw bench is still rock solid in use, which goes to show how forgiving the form is.

img_4277

A simple coat of shellac and pumice powder is all the finishing these saw benches need

In The Anarchist’s Design Book Chris didn’t apply any finish to his saw benches. I decided that a simple finish would help them survive the rigours of workshop use, and I wanted to try a recipe Derek had given me. Both saw benches received a coat of freshly mixed amber shellac (a one pound cut) to which I added pumice powder. After this had dried and sat for a couple of days I then burnished the benches with a handful of plane shavings. The result is a slightly grippy, matt finish which will offer the benches protection and which can be easily renewed as and when it becomes necessary.

img_4299

Then just burnish the finish with a handful of fresh plane shavings

As soon as the finish has been burnished I was keen to put the saw benches into use, and so I used it as an opportunity to break down a 14′ long board of 12″ wide pine that I’ve been saving for a second Packing Box from The Joiner & Cabinet Maker. This is the first time I’ve used a good pair of saw benches sized specifically for my height, and the experience was extremely illuminating. My initial observations on working this way are as follows.

  1. I need to re-organise my workshop so that I can break down long stock without having to open the doors. This is something I’ve been thinking about doing anyway, but it is now clear that having the workbench in the middle of the shop (instead of against the wall) is not an efficient use of space. Time for a reschuffle in the new year. I’ll then be able to set up the saw benches down the middle of the workshop as needed.
  2. Crosscutting stock at the saw bench is a much more efficient way of working than breaking down wide boards at the workbench, especially with the Skelton Saws Panel Saw (which is a complete monster).
  3. For long rip cuts I think I still prefer working at workbench height and using an overhand ripping technique. Partly because I find it easier to keep to the line when overhand ripping compared to ripping on a saw bench (although I am sure that will improve with practice) but also because I carry an old shoulder injury from martial arts training which makes ripping at the saw bench somewhat uncomfortable.
  4. The saw bench design offers an excellent platform for sawing. Placing the workpiece along the length of the saw bench top provides a great deal of support for ripping long stock. Placing the workpiece across the width of the bench top gives a good reference edge for making square cross cuts.
  5. Two saw benches are good, three would be better. Working the 14′ long board required careful placement, and the occasional relocation, of my two saw benches, and having a third would definitely make life a bit easier. That will be another project (and opportunity to get the reaming bang on) for next year.
img_4290

A good pair of saw benches can entirely change your hand saw experience