It’s the End of the Year as We Know it (And I Feel Fine)

And another year draws to a close – as I write this there are a mere 75 minutes left of 2017. I’m really not sure where the year has gone, every year passes faster than the last, and even more so since the Apprentice arrived. Where did the year go? At my workbench (mainly working on the Policeman’s Boot Bench), and in Iowa, and at Cressing Temple. Those, I think, are the enduring mental images of 2017 – the virtual community turned into real connections with living breathing people. Good friends met, stories exchanged, and projects completed.

IMG_5855

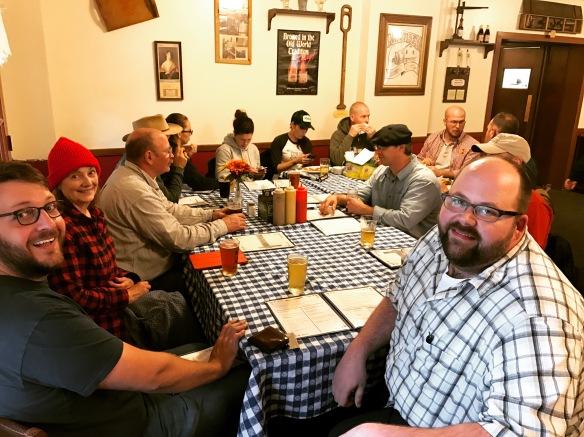
End of Handworks dinner, Amana. Good people, good conversation, good memories.

Of course, the most important element of any end-of year reflection has nothing to do with woodwork. The traditonal end of year mix cd, and list of the top albums, has been a part of my December reflections since I was a teenager. These are the albums that have soundtracked hours logged at the workbench, and songs which have accompanied me as I build. This year has continued the dominance Bloodshot Records hold over my listening habits (seriously, everything they release is golden, and very much deserving of your listening time). So, in time honoured tradition, here is my top five favourite albums of 2017 (in order):

  1. Sidelong – Sarah Shook & The Disarmers
  2. Boy in a Well – The Yawpers
  3. In Spades – Afghan Whigs
  4. Prisoner – Ryan Adams
  5. Folksinger Vol.2 – Willie Watson

The Year That Was

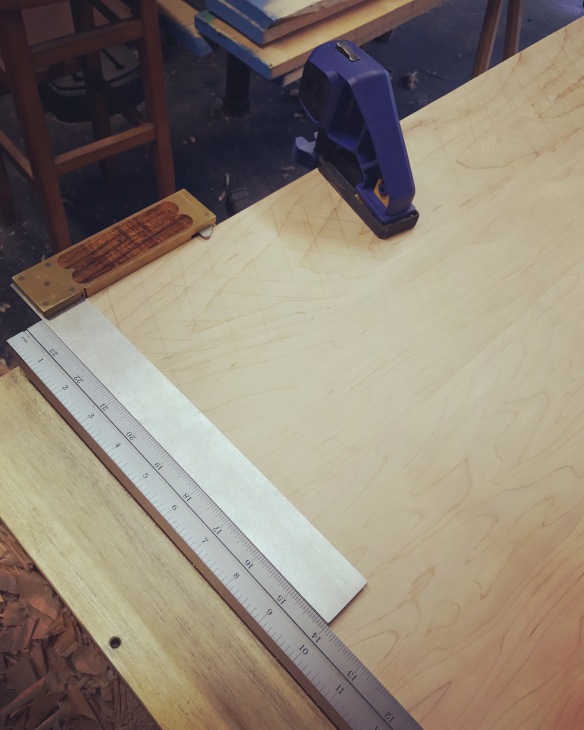
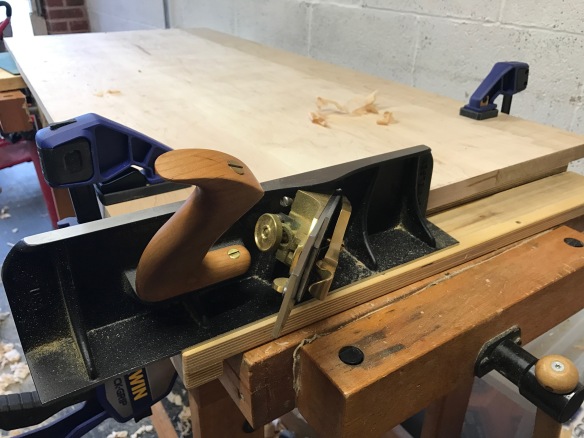
2017 proved to be another rewarding year with plenty of opportunities to challenge myself and to progress as a woodworker. Although my output this year has only been 1 and a half projects (the Policeman’s Boot Bench, and the staked worktable) there has been plenty to learn. One of my goals this year has been to try and slow down my work pace in order to focus on execution rather than speed of a build. As I’m sure is familiar to anyone who has limited opportunities to be at their bench, over the past couple of years I have had to fight the temptation to rush work so as to complete a particular operation in one workshop session. This year I decided to try and live by the maxim slow down, its faster and ignore the ticking clock. It has paid off, and focusing on the execution of each technique has been very beneficial.

_DSC9090

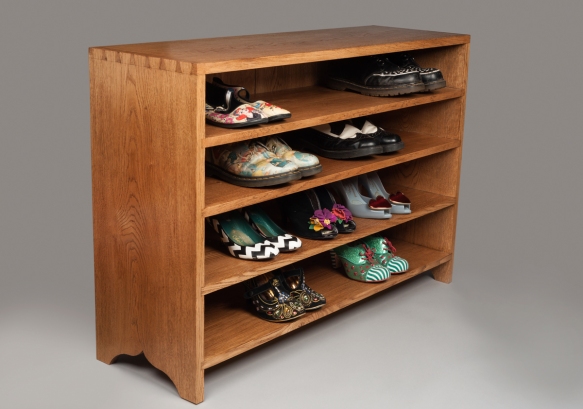
Photo by Gareth Partington Photography

2017 was also the year when I delivered my first paying furniture commission. At times, working on the Policeman’s Boot Bench felt like wading through bottomless self doubt (can I make this to the standard the client expects? Will he be satisfied with the end product? What happens if he hates it?). All emotions which keep us honest and striving towards our best work. And you know something? While the boot bench is not perfect, the client’s response when seeing the completed piece made those moments of agony all worthwhile. That first commission was a big step, and I am looking forward to making more pieces to order.

The blog readership continued to increase steadily, and I am constantly grateful to everyone who takes the time to read these posts, and to those who leave comments. For a first on the blog, I was honoured to welcome Nancy Hiller as a guest writer for a thought provoking piece on utility dovetailsFurniture & Cabinetmaking also published nine of my articles, including my first detailed project article.

IMG_7849.JPG

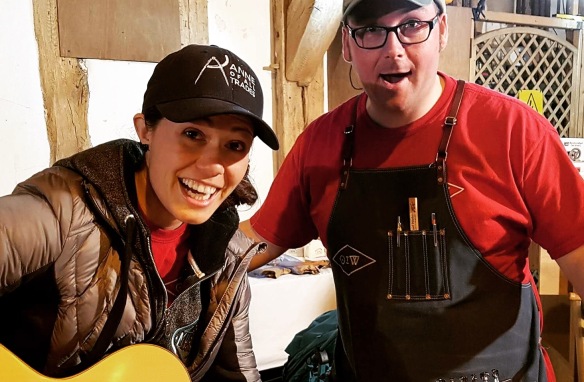
This ridiculous photo sums up the defining vibe of 2017 – community.

But the truly special thing about 2017 was the opportunity to connect with the wider woodworking community in person, first at Handworks and then at the final European Woodworking Show. It was wonderful to see so many old friends again, and to meet new friends for the first time. Community has been a really important part of woodwork for me over the past three years, and both events really demonstrated how vibrant and inclusive our community is. I am very much looking forward to travelling and spending more time with other woodworkers in 2018 and beyond.

IMG_7386

The Year That Will Be

So what does 2018 have in store? I should know by now not to predict too much what will cross my workbench in the year ahead because unexpected opportunities and projects always arise. But I just can’t seem to help myself.

_DPP4050

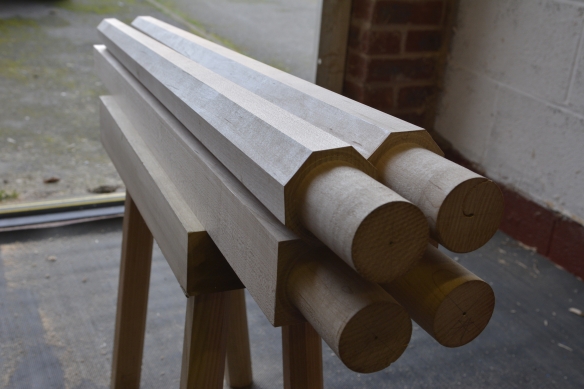
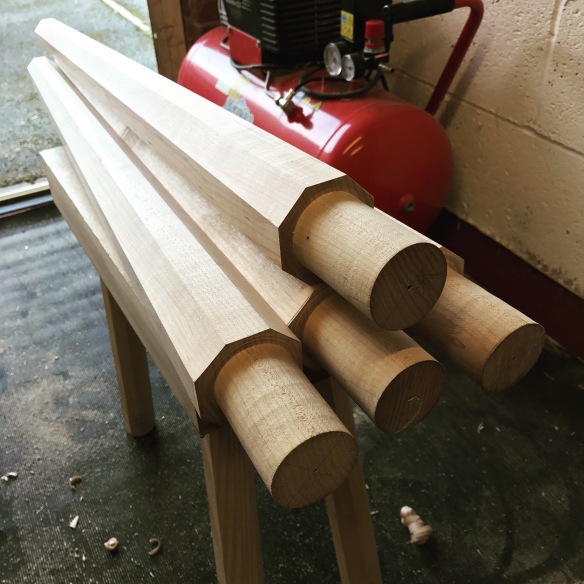
The main focus at my bench is going to be completing the suite of office furniture I started this autumn. The staked worktable is getting close o being completed, and I have the matching chair and bookcase (all out of the Anarchist’s Design Book) to build so that my study/music room is fully furnished and I can decant the last two boxes of research materials onto shelves. I also have a project for Popular Woodworking which I am working on, and finally a different twist on the boot bench design for Dr Moss. There will also be more articles in Furniture & Cabinetmaking. So plenty to keep me occupied.

IMG_6238

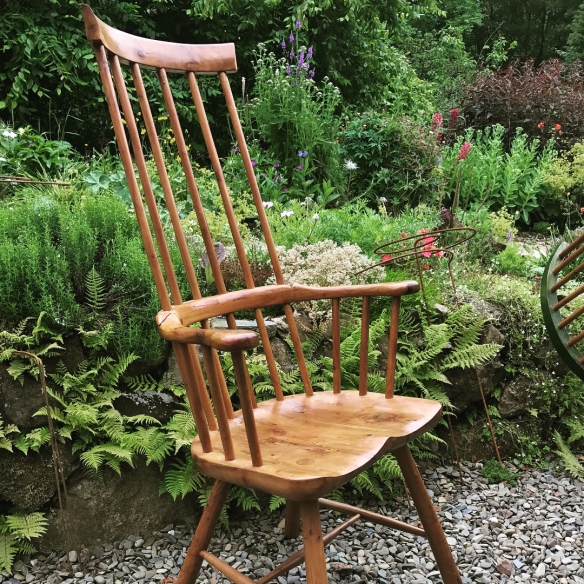
Welsh Stick Chair in yew, by John Brown

In terms of developments away from the workbench, I am lining up some classes on interesting woodworking topics which I hope to be able to announce in 2018 for a 2019 registration – stay tuned for more details. There is also much to do on the Life and Work of John Brown. Chris Williams and I will be locking ourselves away in February to work on the chairmaking section of the book, an element of work that I am truly looking forward to.

IMG_6627

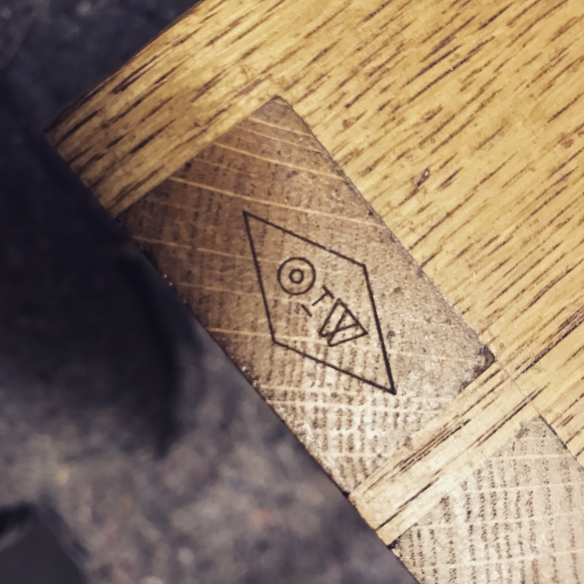
The maker’s mark after a coat of shellac and dab of black wax

And so, with only 14 minutes left of 2017, thank you dear reader, for following along this year. Wishing everyone a bright start to 2018, I hope you’ll continue to take the journey with me.

IMG_8429

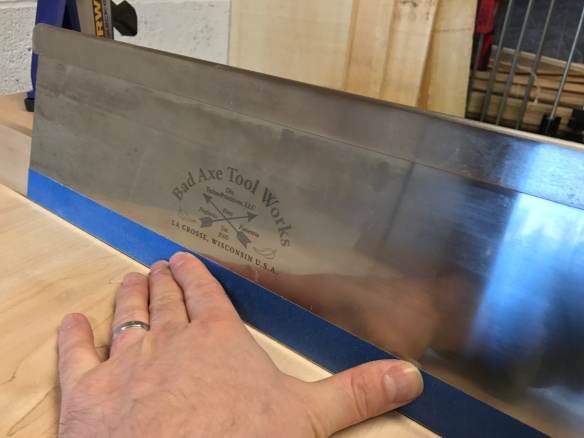
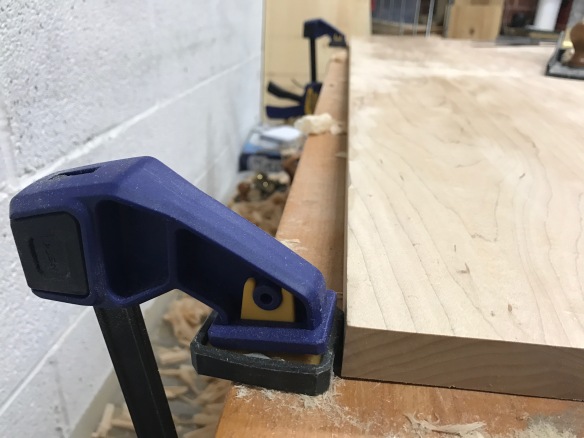
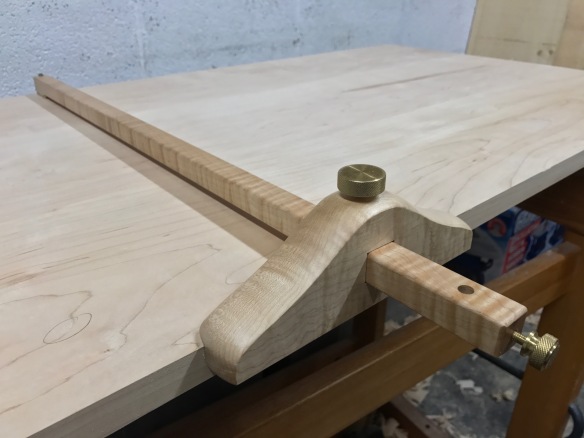
Ending 2017 on a cliff hanger – how did cutting the monster dovetails in the staked work table top go? You’ll have to tune in next year to find out…

This just tops it all… part 3

The top of the staked worktable is now flattened and down to final dimension. Which means that all I need to do now is give the underside a final dressing and then cut the joinery.

IMG_8329

Vesper square and Sterling rule teaming up for accuracy and extended reach

At the end of my last session of working on the top I felt like there was still a great deal of work to get the top flattened. So to make the task at hand feel achievable (and really, it was very achievable) when I went into the workshop yesterday morning I decided to dimension the top before I finished off the flattening. Bringing the top down to final width and length did not remove much excess material, but it certainly put the rest of the flattening into perspective. To start off, I jointed one edge with the No8, to establish a reference edge for the rest of the dimensioning. As the majority of the top was flat at this point I had enough of a reference face to ensure that the edge was square and true. Jointing this edge did not take very long, and I then used it to lay out the right hand end of the top.

IMG_8321

Shooting the ends square with the Lie-Nielsen No.51

Working on a top of this size requires a slightly different approach to some common workshop tasks. A Vesper 10″ square acts as a master square in my workshop, and while a 10″ length is as big as I need in day to day work, it did not extend far enough onto the table top. I didn’t want to sacrifice the accuracy of the Vesper, so instead I ganged it with a 24″ rule by Sterling Tool Works. The Vesper gave me a near absolute square layout line (deviation of no more than +/-0.058mm over 150mm!) which the Sterling rule then followed to extend my layout line along the full width of the table top. Striking the layout line with a sharp marking knife left a crisp, square, end to hit.

IMG_8327

Two clamps secured to the back edge of the bench stopped the table top slipping from between the bench dogs

My go-to combination for shooting boards square is the Lie-Nielsen No.51 on an Evenfall Studio wide shooting board, but even the wide shooting board did not have capacity for the 24″ wide table top as currently set up. I quickly removed the fence and the chute sides from the shooting board, allowing the table top end to be placed on it while allowing sufficient support for the plane. I lined up the knife line of the end with the side of the chute, and then planed the end deadnuts square. With one end square I was able to measure off the length of the table top and strike a layout line for the opposite end, using the same technique. There was more waste than I really wanted to plane off, so I quickly cross-cut the excess off with my Skelton cross-cut saw before sneaking up on the line with the No.51.

IMG_8325

The Clifton No.5 made short work of flattening the rest of the table top

With both ends and one edge finalised, the top was looking manageable even though not much material had been removed (the wonders of psychology!), and setting the freshly sharpened jack plane to a rank cut, the final flattening did not take much time at all. After flattening the top with traversing cuts, I moved to a diagonal cut with the No.8, until the top was close to flat, before finishing up by working along the grain with the No.8. After the frustrations of taking a heavy traversing cut last weekend, I moved the bench away from the wall and filled the gap with several large storage boxes in which I keep my grandfather’s old tools. This improved matters significantly, although the bench dogs I was using to secure the top in place did not have enough holding power (I don’t like to overtighten them as it causes the workpiece to bend), and the top occasionally slid out of their grip. Two clamps fixed to the back edge of the bench stopped any lateral movement, and planing the top progressed noticeably quicker than my previous session. I am definitely working at the limits of the Sjoberg bench, and following my frustrations over the past 12 months, as well as Ethan’s welcome encouragement, the Roubo build has moved substantially up my project list. I spoke to a sawyer this week who assures me he can obtain a 5″x24″x96″ oak slab for the bench top (dimensions which most timber yards struggle to supply). I’m waiting for a price, following which, Roubo will well and truly be coming. With the Sjoberg fighting me every step of the way when flattening the table top, I can definitely see the attraction of a toothed planing stop and doe’s foot for hand work.

IMG_8328

Maple on maple. The Hamilton Woodworks panel gauge works smoothly even at full extension.

Dressing the table top revealed some unexpected curl on two of the boards, which will be very attractive once I’ve applied a gentle finish. There are a couple of isolated spots of tearout, but I am inclined to leave cleaning those up until the table is assembled, as these can be removed with either a smoothing plane or a cabinet scraper along with any other surface wear that can accumulate during assembly. The overall thickness has come out at 13/16″ (22mm) which given the strength of maple, should be plenty thick enough for normal use. Finally, I marked off the final width of the top with a panel gauge, and jointed that edge with the No.8 plane.

IMG_8326

Lovely figure, and tight joints, on the table top

This just tops it all… part 2

Everything you make is practice for the next thing you make. And every time you practice a technique, or carry out an operation on a project, is practice for the next time you use that particular technique. I was reminded this as I started to flatten the top of the staked desk yesterday. Although the top is the largest piece I’ve flattened by hand, the techniques are exactly the same as I practiced on the Joiner & Cabinet Maker projects last summer, and the Policeman’s Boot Bench earlier this year. All that is different is the amount of time, and the patience, required when flattening a 52″ x 24″ top rather than a 15″ x 9″ panel for a School Box (or a 40′ x 13″ shelf for the Boot Bench). Ultimately it just boils down to traversing cuts, then a 45 degree skew across the piece, and finishing by working along the grain. Just those simple three steps, repeated on a larger scale.The important thing is to remember the core techniques, and not to get overawed by the scale of the piece.

IMG_8267

Cleaning up the top shows good tight joints

When I started work on the desk the thought of flattening such a large piece as the top didn’t bother me at all – I’ve flattened enough timber by hand over the past couple of years to make this second nature. What I did feel a little nervous about was jointing up the top – at 54″ long in the rough, these were the longest edge joints I’ve planed. As it turns out, the joints weren’t as difficult as I had anticipated, and cleaning up the show face of the desk top revealed two tight and gap-free joints, a success I attribute to all of the long edges I planed up for the Policeman’s Boot Bench (there were a lot of long panels that needed square and true edges on that build).

IMG_8260

The underside before flattening. This is a big old surface to work, but the techniques are essentially the same.

Checking the desk top with a straight edge revealed that while most of the top wouldn’t need much cleaning up, the board at the back of the top had cupped after glue up, resulting in the show face falling off by over 2mm (0.7874″ – don’t ask me what this is as a fraction). My first reaction was to rip that board off the top, re-flatten, and then joint back on. This would avoid removing too much material from the top overall, but would stall progress on the desk for a while. After considering my options, and checking the thickness of the top in multiple areas, I decided that I would be able to flatten the top without needing to rip the problem board off – I left the boards at just under an inch thick, so even taking into account the fall-off at the back edge, I still have enough material to make a viable desk top. The top is also currently overwidth, so if I remove the excess entirely from the cupped board that will remove the lowest edge and mitigate the worst of the cupping. Traversing the boards with a jack plane flattened most of the top quickly, and I then marked where the low area started with a pencil and straight edge. Cross hatching the low areas gives a quick visual indication of my progress.

IMG_8271

The familiar feathery texture of traversing shavings

Once the majority of the top was flat, with only a couple of inches of width in the low spot remaining on the back edge, I flipped the top over to flatten the underside. The jack plane made short work of flattening this face, and I’m going to leave the traversing marks on that surface – there’s no need to smooth the underside and the scalloped texture will remind me of the handwork that went into this desk when I am writing at it in years to come. I then moved back to the top surface, planing at a 45 degree angle to the grain with the jointer. This approach removes material easily but reduces the risk of tearout compared to traversing at 90 degrees to the grain, which means less clean up once the top is flattened.

IMG_8263

Flattening the underside with the No.5 jack plane


All of this is pretty straight forward, and in fact the hardest thing was my bench fought me most of the way. While the Sjoberg bench was a very good initial bench when I bought it, and perfectly fine for lutherie work, it is simply too lightweight for processing stock by hand. I moved it against a wall in January of this year in an attempt to stop it skittering  around the ‘shop, which has worked to some extent. But for this operation I had to move it back from the wall so that I could traverse the 24″ wide top (which is the same width as the workbench). To hold the bench in place,  I ended hooking my left foot over the lower rail in order to pull the bench towards me as I plane forwards. These workshop aerobics have me dreaming once again of a stout and stable Roubo bench, so now might be the time to call a couple of sawyers and see if anyone can cut me a 24″ wide, 5″ thick oak slab. Roubo is coming.

IMG_8265

The jointer plane keeps everything flat and coplanar. The crpsshatching identifies the low spots.

I didn’t quite have the time to finish flattening the top this weekend (with all the snow I had to assist the Apprentice with snowman building) but that break has given me the opportunity to take stock of progress and decide the best next steps. So, next up I will bring the top to final width and length, including squaring up the ends, all of which will help to reduce the amount of flattening necessary.

Applying Body Mechanics to Octagonalisation

All of the legs for the staked worktable are now octagonalised, and I spent a couple of hours today making them pretty – final smoothing to remove a few spots of tearout, plenty of time with an eraser to remove stray pencil marks, and refining the fit of the tenons. Finalising the tenon size was a good opportunity to revisit the lathe and get a spot more turning practice in.

IMG_8214

The 50mm maxi-cut bit by Colt is a monster, and chewed through this oak rapidly while leaving a very clean finish and no splintering on the exit side.

When I originally turned the tenons I had been quite cautious and left them a touch oversized, which also abetted by wear to my “go block“, the corners of which had become burnished and slightly widened when checking the still-spinning tenons. So I prepared a new test mortice in some scrap oak left over from the Policeman’s Boot Bench, and took the barest shaving off each tenon until they all fitted smoothly without any slack. I also took the opportunity to clean up the shoulder of the tenon. Ideally I would like to turn a gentle cove into the shoulder, but my turning kit currently extends to one tool (the Easy Wood Rougher) and until I order the Easy Wood Finisher that particular shape is outside of my grasp. Instead, I made sure that the shoulder was clean and square to the tenon, with no stray bumps or unslightly catches.

IMG_8217

My standard grip for traversing boards and heavy stock removal is no good for octagonalisation – placing the off-hand on top of the bun raises the centre of gravity and encourages the plane to wobble during the stroke.

One of the advantages of performing a repetative task, such as octagonalising a set of four legs, is that it provides the opportunity to review technique and make incrimental changes towards efficiency. An aspect of woodwork that I find constantly interesting is the impact of body mechanics – the way that posture, including hand and foot placement in relation to the tool and the workpiece, will influence the outcome of a technique (for instance, cutting to a line, or planing a square and straight rabbet). Body mechanics have been a constant focus throughout my martial arts training, particularly when training with Clive, and that emphasis is something I find increasingly useful at the workbench. Octagonalisation is a case in point.

IMG_8215

This jointing grip helps hold the plane steady when removing the corner and establishing the facet. My fingers are pressed against the face of the leg to centre the plane on the aris of the workpiece.

When octagonalising the table legs, I found that my standard off-hand grip for planing wasn’t providing the control or comfort I wanted. Mainly this was because the initial strokes find the plane balanced on the aris of the workpiece, which makes holding the plane in a constant orientation to the leg difficult until the the facet is established. My standard grip works well for traversing boards with the jack plane, as it provides downward pressure to keep the plane in the cut, especially in ornery timber. But for octagonalisation it meant that the centre of gravity was too high and the plane was prone to wobbling.

IMG_8218

I transition to this grip once the facet has been established. Keeping the hand low to the plane body lowers the centre of gravity and keeps the plane in a constant orientation to the workpiece.

Instead, I established the facet by dropping my hand to the sole of the plane, mimicing the grip I use when jointing an edge – the thumb grips the side wall of the plane and the fingers curl under the sole to provide a fence to register against the workpiece. Once the corner is knocked off and the facet established, I shifted my thumb so that it was curled around the base of the bun while the fingers gripped the front edge of the bun – this kept the centre of gravity low for stability, but provided more power behind the plane stroke for rapid stock removal. After a few facets transitioning between these grips became second nature, providing a comfortable and precise way to carry out the operation.

IMG_8221

Four legs octagonalised, and made pretty. These are ready to be fitted to the sliding battens.

When I started octagonalising the legs I did not think much abut the plane grip I was using. Starting with a jointing grip, and transitioning between the two hand positions, occured insinctively in response to the feedback from the tool and the need to stabilise the plane on a narrow surface. Just as the projection of a plane iron is adjusted throughout a planing task (for instance, backing off for a finer cut as you near your layout lines), I would suggest that body mechanics are not static but also evolve throughout an operation in order to reflect to the changing state of the workpiece. I’m sure there are plenty of other examples of how body mechanics influence woodworking technique – I’ve previously written about how posture can contribute to effecive use rabbet planes and tongue and groove planes. But what are your favourite body mechanic tips for woodworking?