Kieran James Binnie, 26 May 1982 – 10 April 2021

Kieran on his 38th birthday in 2020

On 10 April 2021, after a painful struggle with anxiety and major depression, Kieran took his own life. The year since has been a challenge for his family and everyone who loved him, but we have also been able to do a lot of good in his memory. The Pathcarvers’ Kieran Binnie Memorial Fund has raised over £7000, which Pathcarvers are using to support people’s mental health and overall wellbeing through craft. Warley Woods, one of Kieran’s favourite green spaces, received £1000 from friends and family in his memory. And Quench Arts has received over £3000 so far to support people’s mental health through music therapy. Kieran’s sister Erica and some friends are also climbing Ben Nevis in May and will be donating the proceeds of that fundraiser to Quench Arts to help them continue their work. So far they’ve raised over £1000, and would gladly welcome your donation. So that’s over £12000 So far raised in Kieran’s memory, all intended to do good within our local community. It doesn’t make up for his loss, of course, but it is a good legacy.

Kieran was proud of the work he did here under the banner Over the Wireless, and we hope his website will remain a useful resource to inspire woodworkers of today and tomorrow. Kieran really lived by OtW’s strapline – Craft & Integrity – and we hope his example will inspire you to do the same.

A Grand Kentucky Adventure… part 3

And with that, the Anarchist’s Tool Chest class is done. On one hand it is hard not to feel very proud of the students and all that they have accomplished – all six tool chests were finished by 3pm on the Friday (which i believe is a class record!). On the other, when such an immersive experience ends, it is hard for there not to be a touch of melancholy, and I am reminded of the final day of my own ATC class five years ago.

Of course, there was a lot of work since my last blog post to get the tool chests finished. On Wednesday afternoon we got the lower skirts fitted and glued on. Thursday was then spent cleaning up the exterior of the casework, and fitting the base boards and upper skirts. Which meant that the students got to work with cut nails, tongue and groove boards, and cut more dovetails – plenty of learning opportunities! I found that for glue-ups it worked well to have teams of three do each glue up. So I would work with a pair of students to glue their casework, and those students would then talk the next student through the process while I assisted, and they would in turn help the next student. Three man teams works nicely for casework of this size, and helping their class mates consolidates the learning process for the students (it also helps to prevent the more advanced students from getting too far ahead).

Friday was spent assembling the lids, cutting and fitting the dust seal, and then gluing the lids up. Every person’s dovetails improved over the curse of the week, which was proved by the quality of the dust seals, which are joined with a single tail (much harder than a set of multiple tails). We even managed to find time to bead the upper skirts, and to talk about hardware choices, before everyone loaded their tool chests into their cars and started the long journey home.

I am also headed home, and about to commence the 22 hour trip back to Birmingham. It has been a real privilege to teach at the Lost Art Press store front, and to spend five days working with such a great bunch of students. A final work of thanks to Chris and Megan for not only the invitation to teach, but all of their work preparing stock for the class, and their assistance this week. I will be sad to leave Kentucky (Covington is, as far as I’m concerned, the promised land), but I am looking forward to seeing Dr Moss and the Apprentice after 9 nights away.

Back to the Boot Bench… Part 4

Events have been conspiring to keep me out of the ‘shop for the past couple of weeks, although I did manage to steal a couple of hours on Sunday to fit the backboards to the boot bench.

_DPP7254

Preparing the tongue and groove joints

I’m not sure if I approach this method in the same way as everyone else, or whether I’m a bit screwball about it, as I prefer to fit the outer pair of boards, and then work my way in to the middle of the carcase. This ensures that I end up with a symmetrical arrangement of boards, and can adjust the size of the middle board (or pair of boards) to fit the aperture without too much measuring.

_DPP7267

Roman nails and a hammer by CE Hammond of Philadelphia

There are four backboards for the boot bench, and each are 1/2″ thick and pine, just like the rest of the project, and joined together with tongue and groove. The two outer boards are glued along their outermost long edge into the rabbet in the casework, and all four boards are nailed to the rear edge of the shelves with the Roman nails I wrote about last time.  I processed the two outer boards first, shooting the top edge square and planing the tongue and groove joinery into the inner edge with the Lie-Nielsen No.49. To trim the boards to length I dispensed with the shooting board, and instead struck a line across the widh of the board at 26 3/4″ along the length – this will give an overhang of 1/2″ beyond the bottom shelf. I then chiselled a trench to the waste side of the line (as you would for a “first class” cut), and then cut down the line with a Bad Axe 20″ mitre saw. This saw leaves a nice clean edge, and this method offered a very quick way to cut the boards to length keeping a good square end. Once all the boards are fitted I can then clean up the bottom edge with a block plane if necessary, but to be honest as this surface will be only a couple of inches above the floor and at the rear of the casework I’m not sure if it will need any clean up. Reading Mortise & Tenon has had a real impact in how I approach my work, in terms of the decisions between which surfaces must be pristine, and where it is more efficient to leave signs of process.

_DPP7274

The bead adds a nice shadow line for decoration, and also hides any gaps that occur as a result of seasonal movement in the backbords

Once the outer two boards were processed, I held them in place and drilled pilot holes for the nails using an egg beater hand drill. Each board has four nails for each shelf, and I partially inserted four nails per board to hold it in place while I measured up for the inner pair of boards, which turned out to be a little narrower than the outer pair. The final touch was to add a bead to the shoulder of each tongue with my Philly Planes 1/8″ beading plane.

dav

The Apprentice helping to nail the backboards in place

This stage of the build also offered a significant milestone. The workshop was too cold to use hide glue, so I relocated to the kitchen to glue and fit the outer boards. As I was doing so, the Apprentice was finishing her dinner and I asked if she’d like to help me fit the boards in place. She readily agreed, and was super focused while she knocked in nails (using the vintage CE Hammond hammer she received just after she was born) and cleaning up squeezeout with a toothbrush. This was the Apprentice’s first experience of woodwork, and she seemed to really enjoy it, so hopefully we will have many hours of father-daughter time in the workshop – she’s already talking about “making a chair for mummy” (although we may need to build up to chairmaking).

Ending the Tyranny of Straight and Square

The following is based on an article good friend Richard Wile and I wrote for issue 273 of Furniture & Cabinet Making. Although we hadn’t planned it this way, the article seems all the more timely given Auriou Tool Works current funding drive. Rasps are an integral part of the way Richard and I work, and we hope that this article will shed some light on their use and help identify which rasps might be most useful for readers to add to their toolchests.

Photo 1

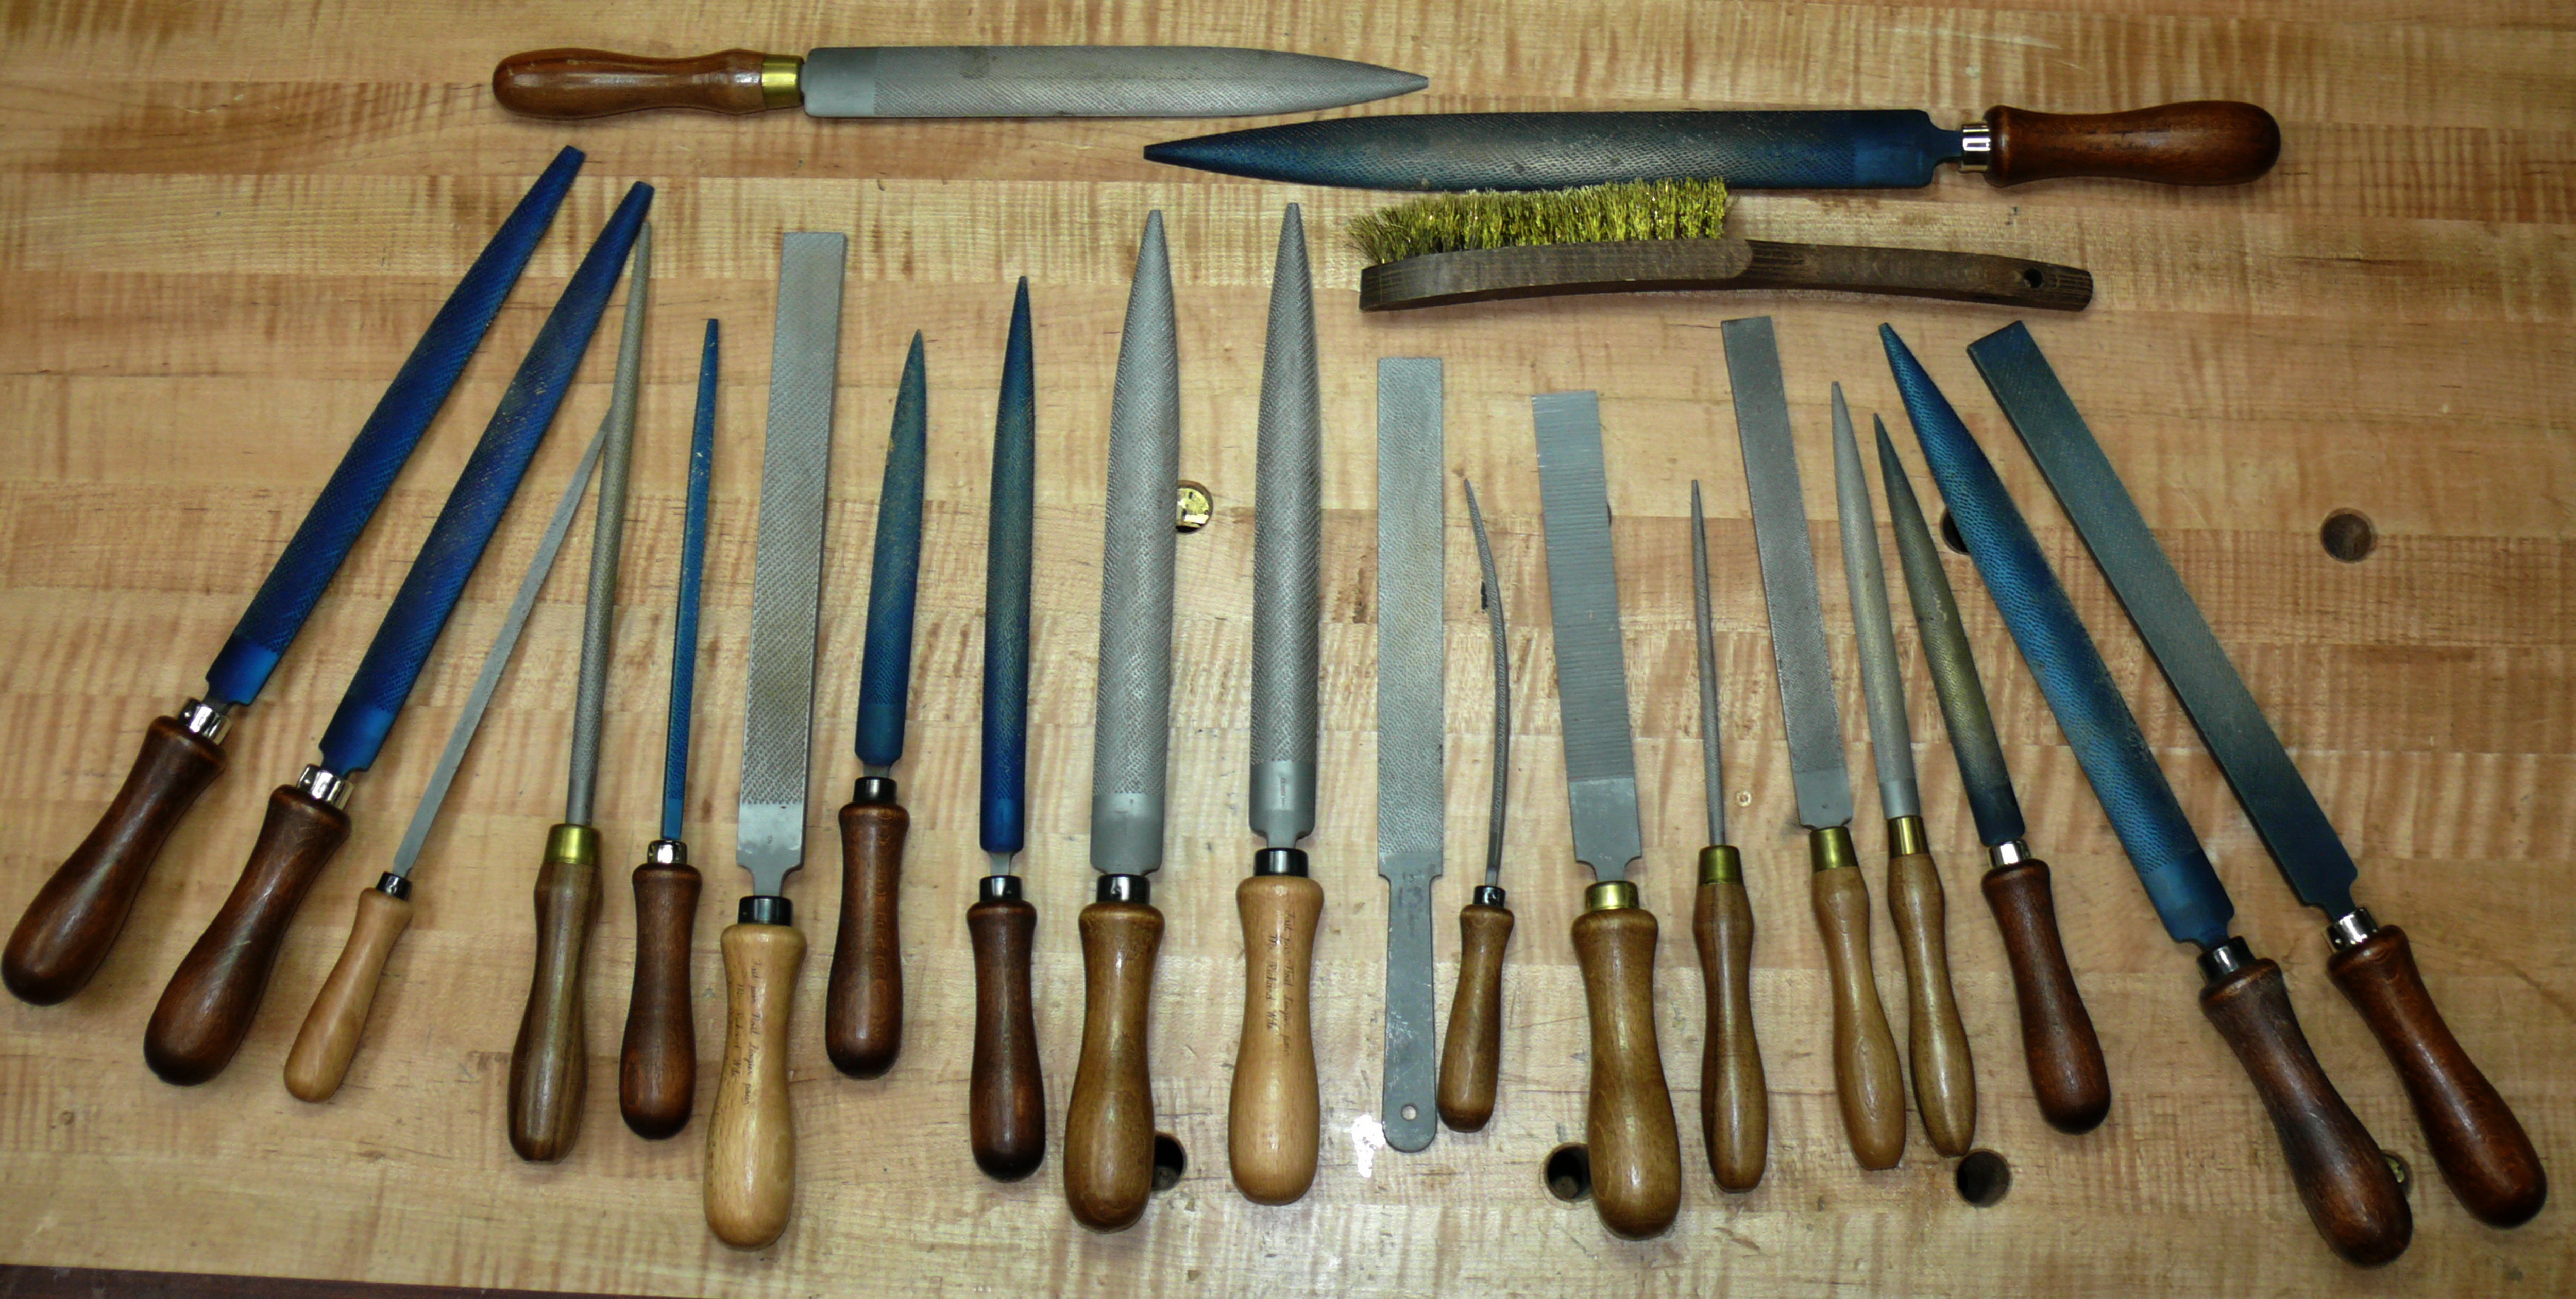
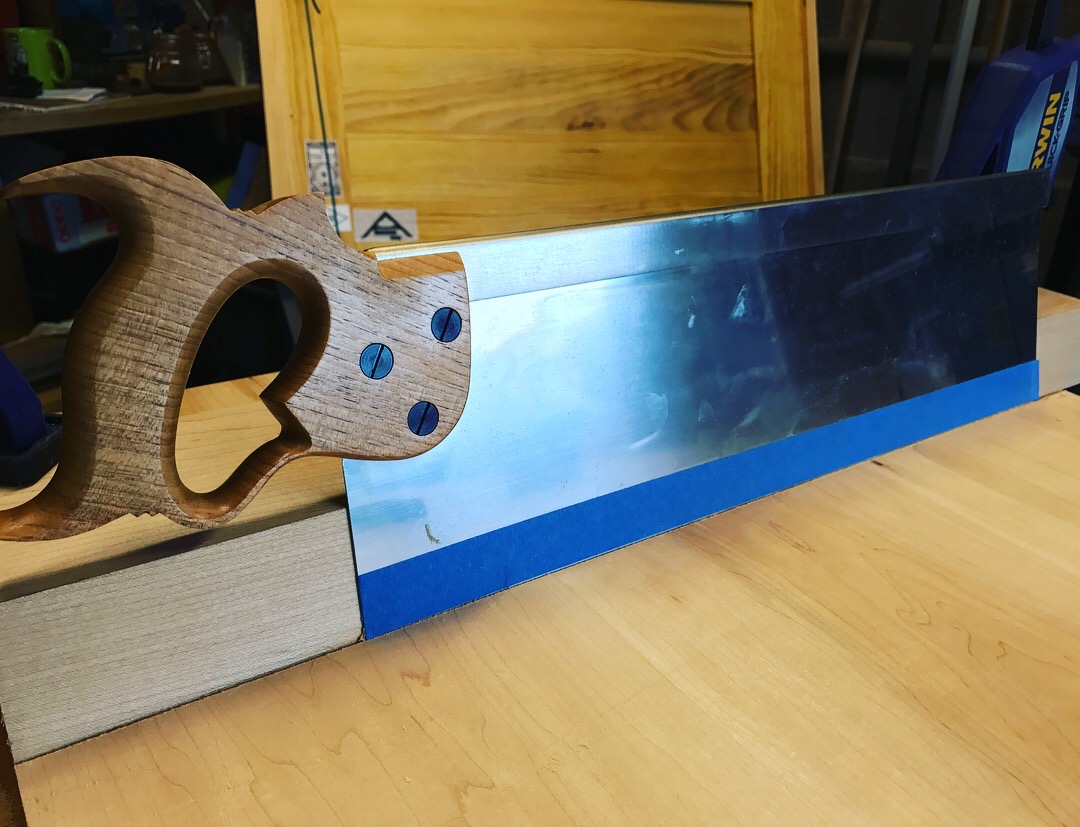
A selection of the rasps and files in Richard’s toolchest

Rasps have traditionally been a mainstay of many handwork disciplines, including lutherie, chair making, shoe making, and stonemasonry. But they also make excellent additions to the furniture maker’s tool chest, opening up the possibilities of curves and transitions to work, as well as allowing for precise adjustments to be made to joinery.

The variety of rasp options available, including how coarse (or refined) the rasp cuts, together with the multitude of shapes and prices, and choosing between hand-stitched or machine cut rasps, mean that for the newcomer investing in a first rasp can be a daunting experience. This article attempts to help modern woodworkers introduce rasps to their woodworking hand tool arsenal, focusing on hand-stitched rasps, which are increasingly available from retailers in different price points (and which we both use to the exclusion of machine cut rasps), and explain how rasps can release your work from the tyranny of straight lines and square corners.

What is a rasp?

Rasps are shaping tools which excel at creating and refining curves, chamfers, and decorative detail. For the luthier, rasps can transform a block of the hardest figured wood into a graceful guitar neck, heel and headstock in no time. For the cabinetmaker, the rasp takes a bandsawn cabriole leg from rough to ready for sanding in a few minutes, refines the curve of a lamb’s tongue chamfer, or chamfers the feet of chairs and table legs.

Photo 2

Stitching a rasp by hand at Auriou Tool Works

While many rasps look like files with bigger teeth, they are in fact quite different. Firstly, the teeth of the very best rasps are let into the hardened steel by hand, through a process known as stitching. Each individual tooth is hammered in by a skilled craftsperson using a specialized tool called a “barleycorn pick”, a skill which takes years to perfect (see this profile on Michel Auriou or more discussion on this technique). Unsurprisingly, this handwork aspect is the greatest influence on quality, as well as cost. The slight imperfections and inconsistencies resulting from the hand-stitching process contribute to the rasps’ effectiveness; an attribute that machine made rasps are unable to replicate. A hand-stitched rasp is able to create a surface much smoother than their machine-made brethren, with far less chatter in use – even with difficult grained timber.

The near endless options

Similar to files, rasps are available in seemingly limitless shapes and sizes, including flat, round, semi-round, leaf-shaped, tapered, and tiny rifflers. A few simple guidelines will help the novice “rasper” to make an informed choice on where to start. The stitching of the rasp is the most important aspect to understand. Generally speaking, the higher the number, the greater the number of “stitches” per inch, and the finer the rasp. Individual makers use slightly different grading systems, but generally speaking a stitching of 4 to 8 is coarse, with 4 being extremely coarse for the most aggressive stock removal and 8 for more general rough shaping work. A medium stitching of 9-11 is the most versatile pattern for general woodworking, providing a controllable cut that requires minimal cleanup. The fine patterns range from 12-15 and provide the ideal configuration for final shaping or very detailed work. As a result, the high-grain rasps tend to be smaller than their coarser brothers, (generally 6-8” long).

Photo 3

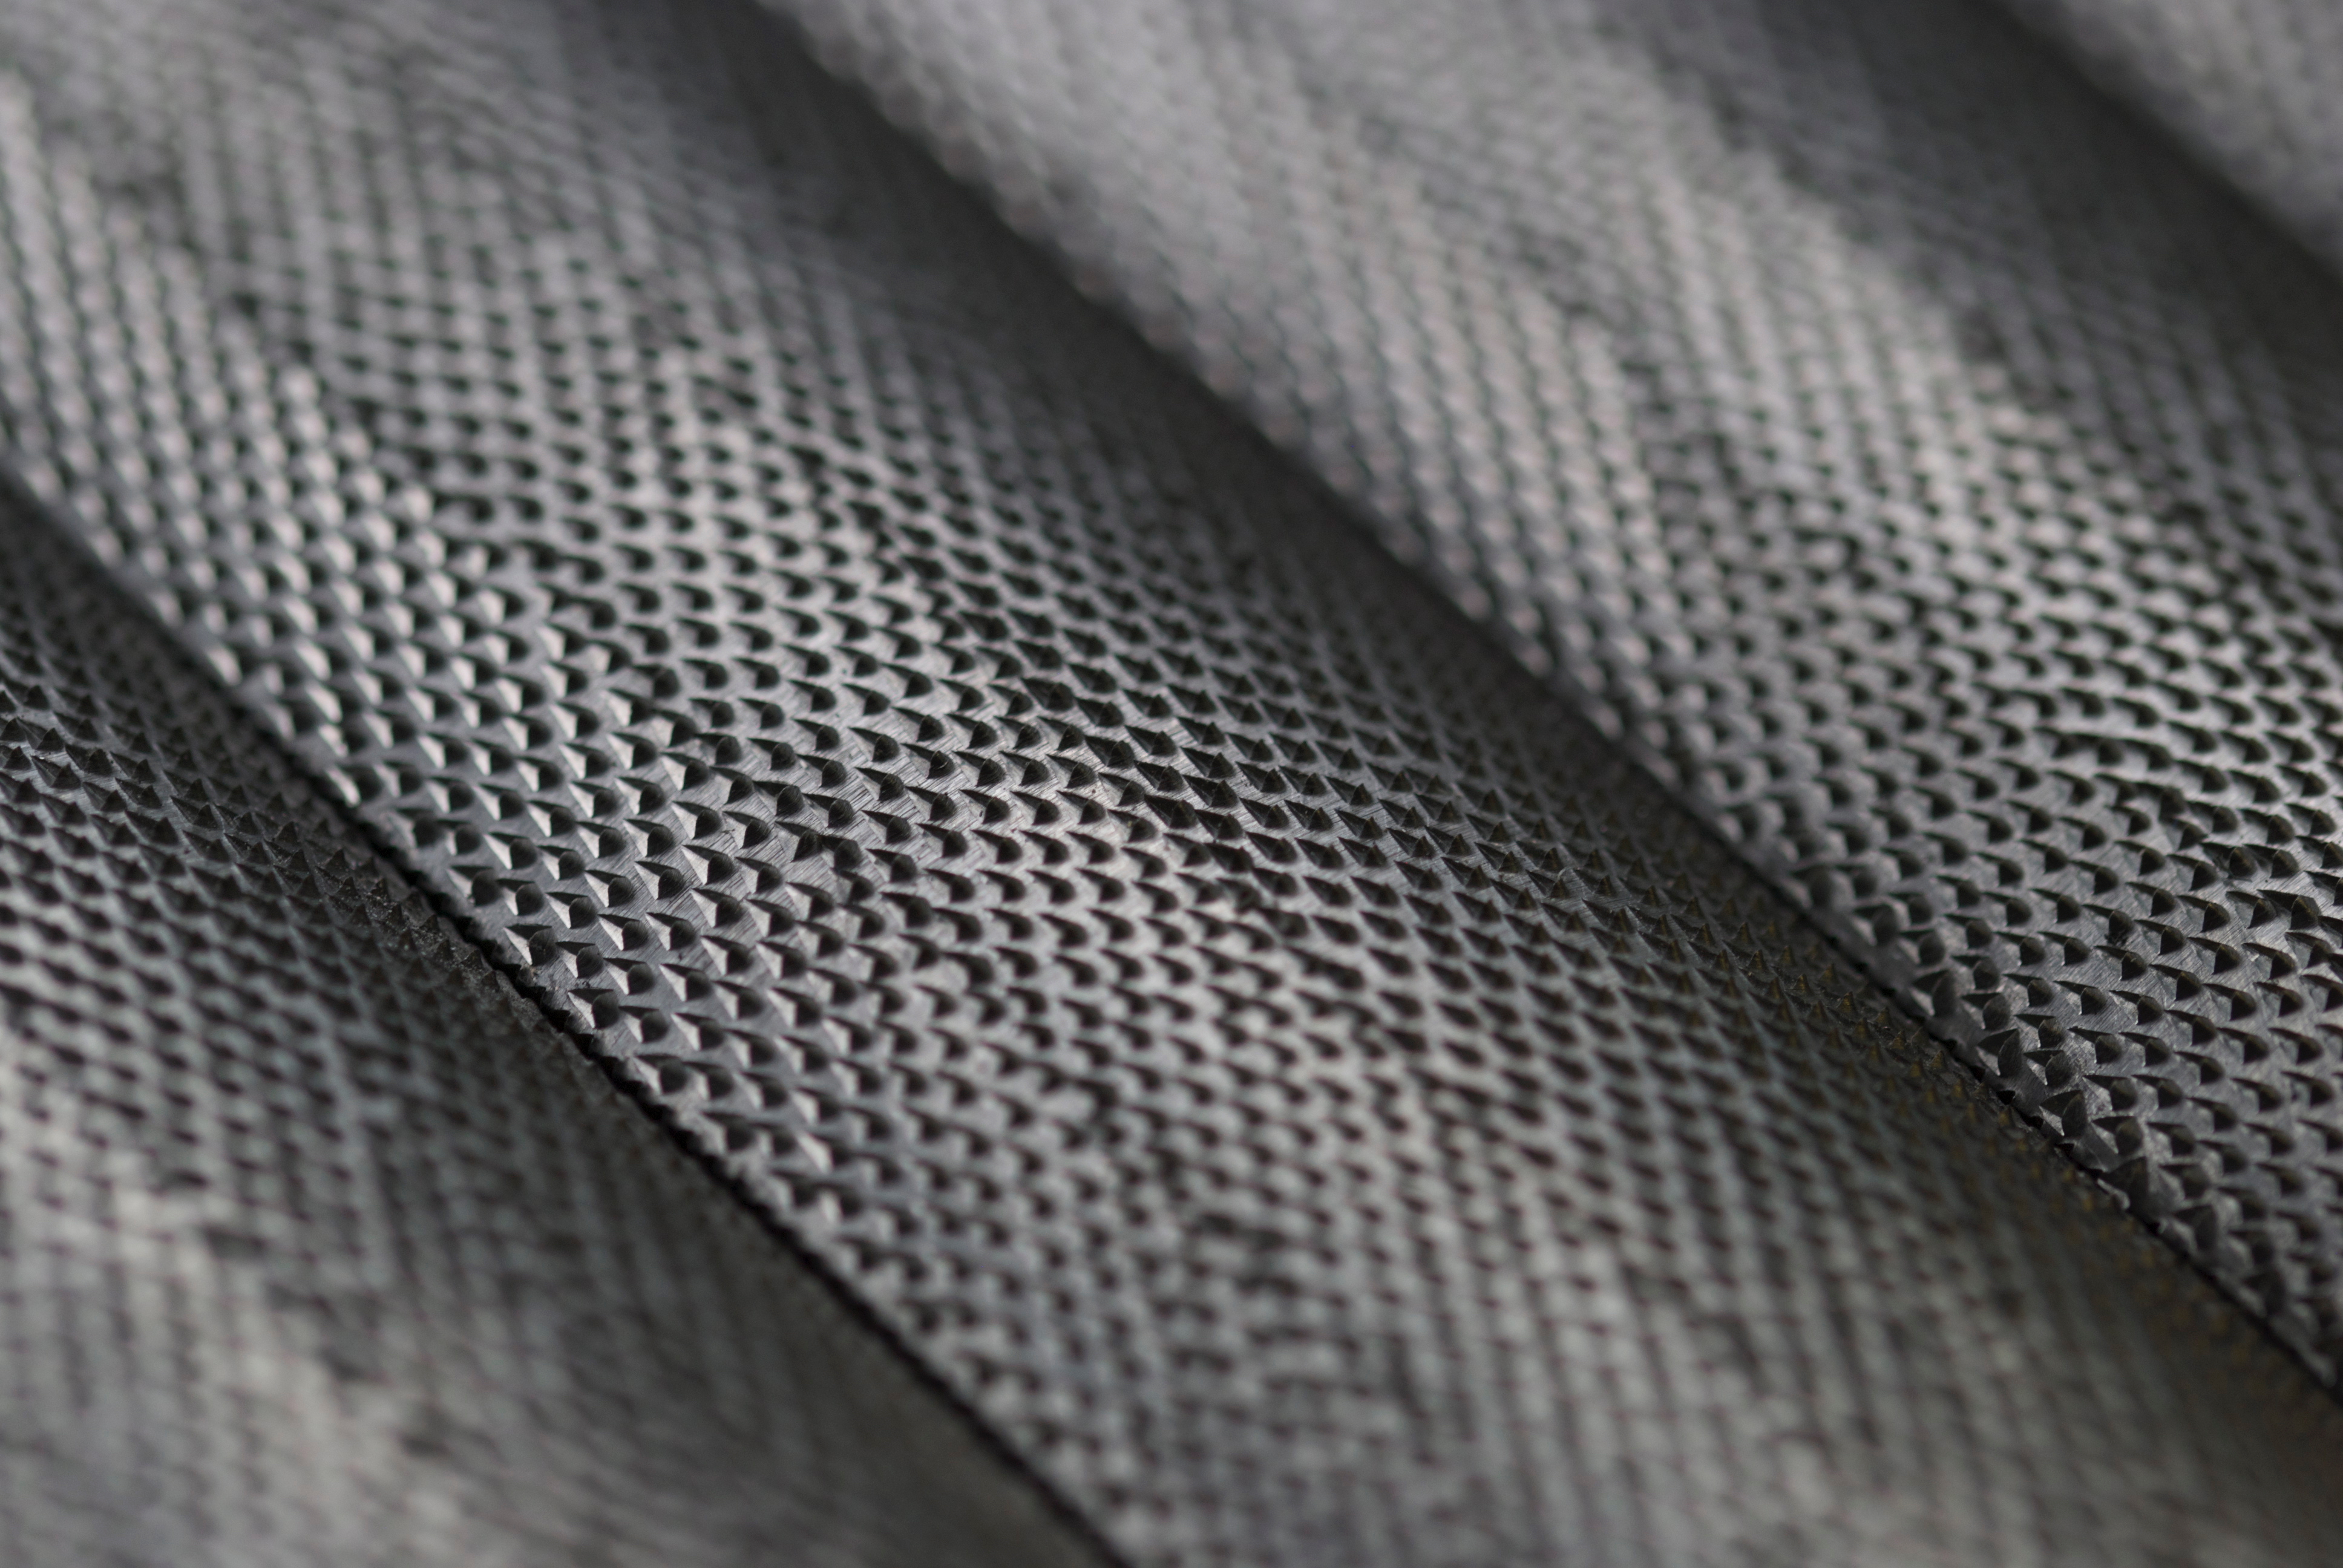
Handstitching rasps introduces minute variation to each tooth, resulting in a smoother surface on the workpiece, and less chatter in use.

Using a rasp.

The three categories of stitching roughly equates to the specific uses of the rasp; with coarse-grained raps suited to heavy stock removal or initial shaping tasks before introducing a finer rasp or moving to sandpaper. The medium-grained rasps are best for intermediate shaping and fine-grained rasps provide excellent tools for final refinement of the project.

Photo 5

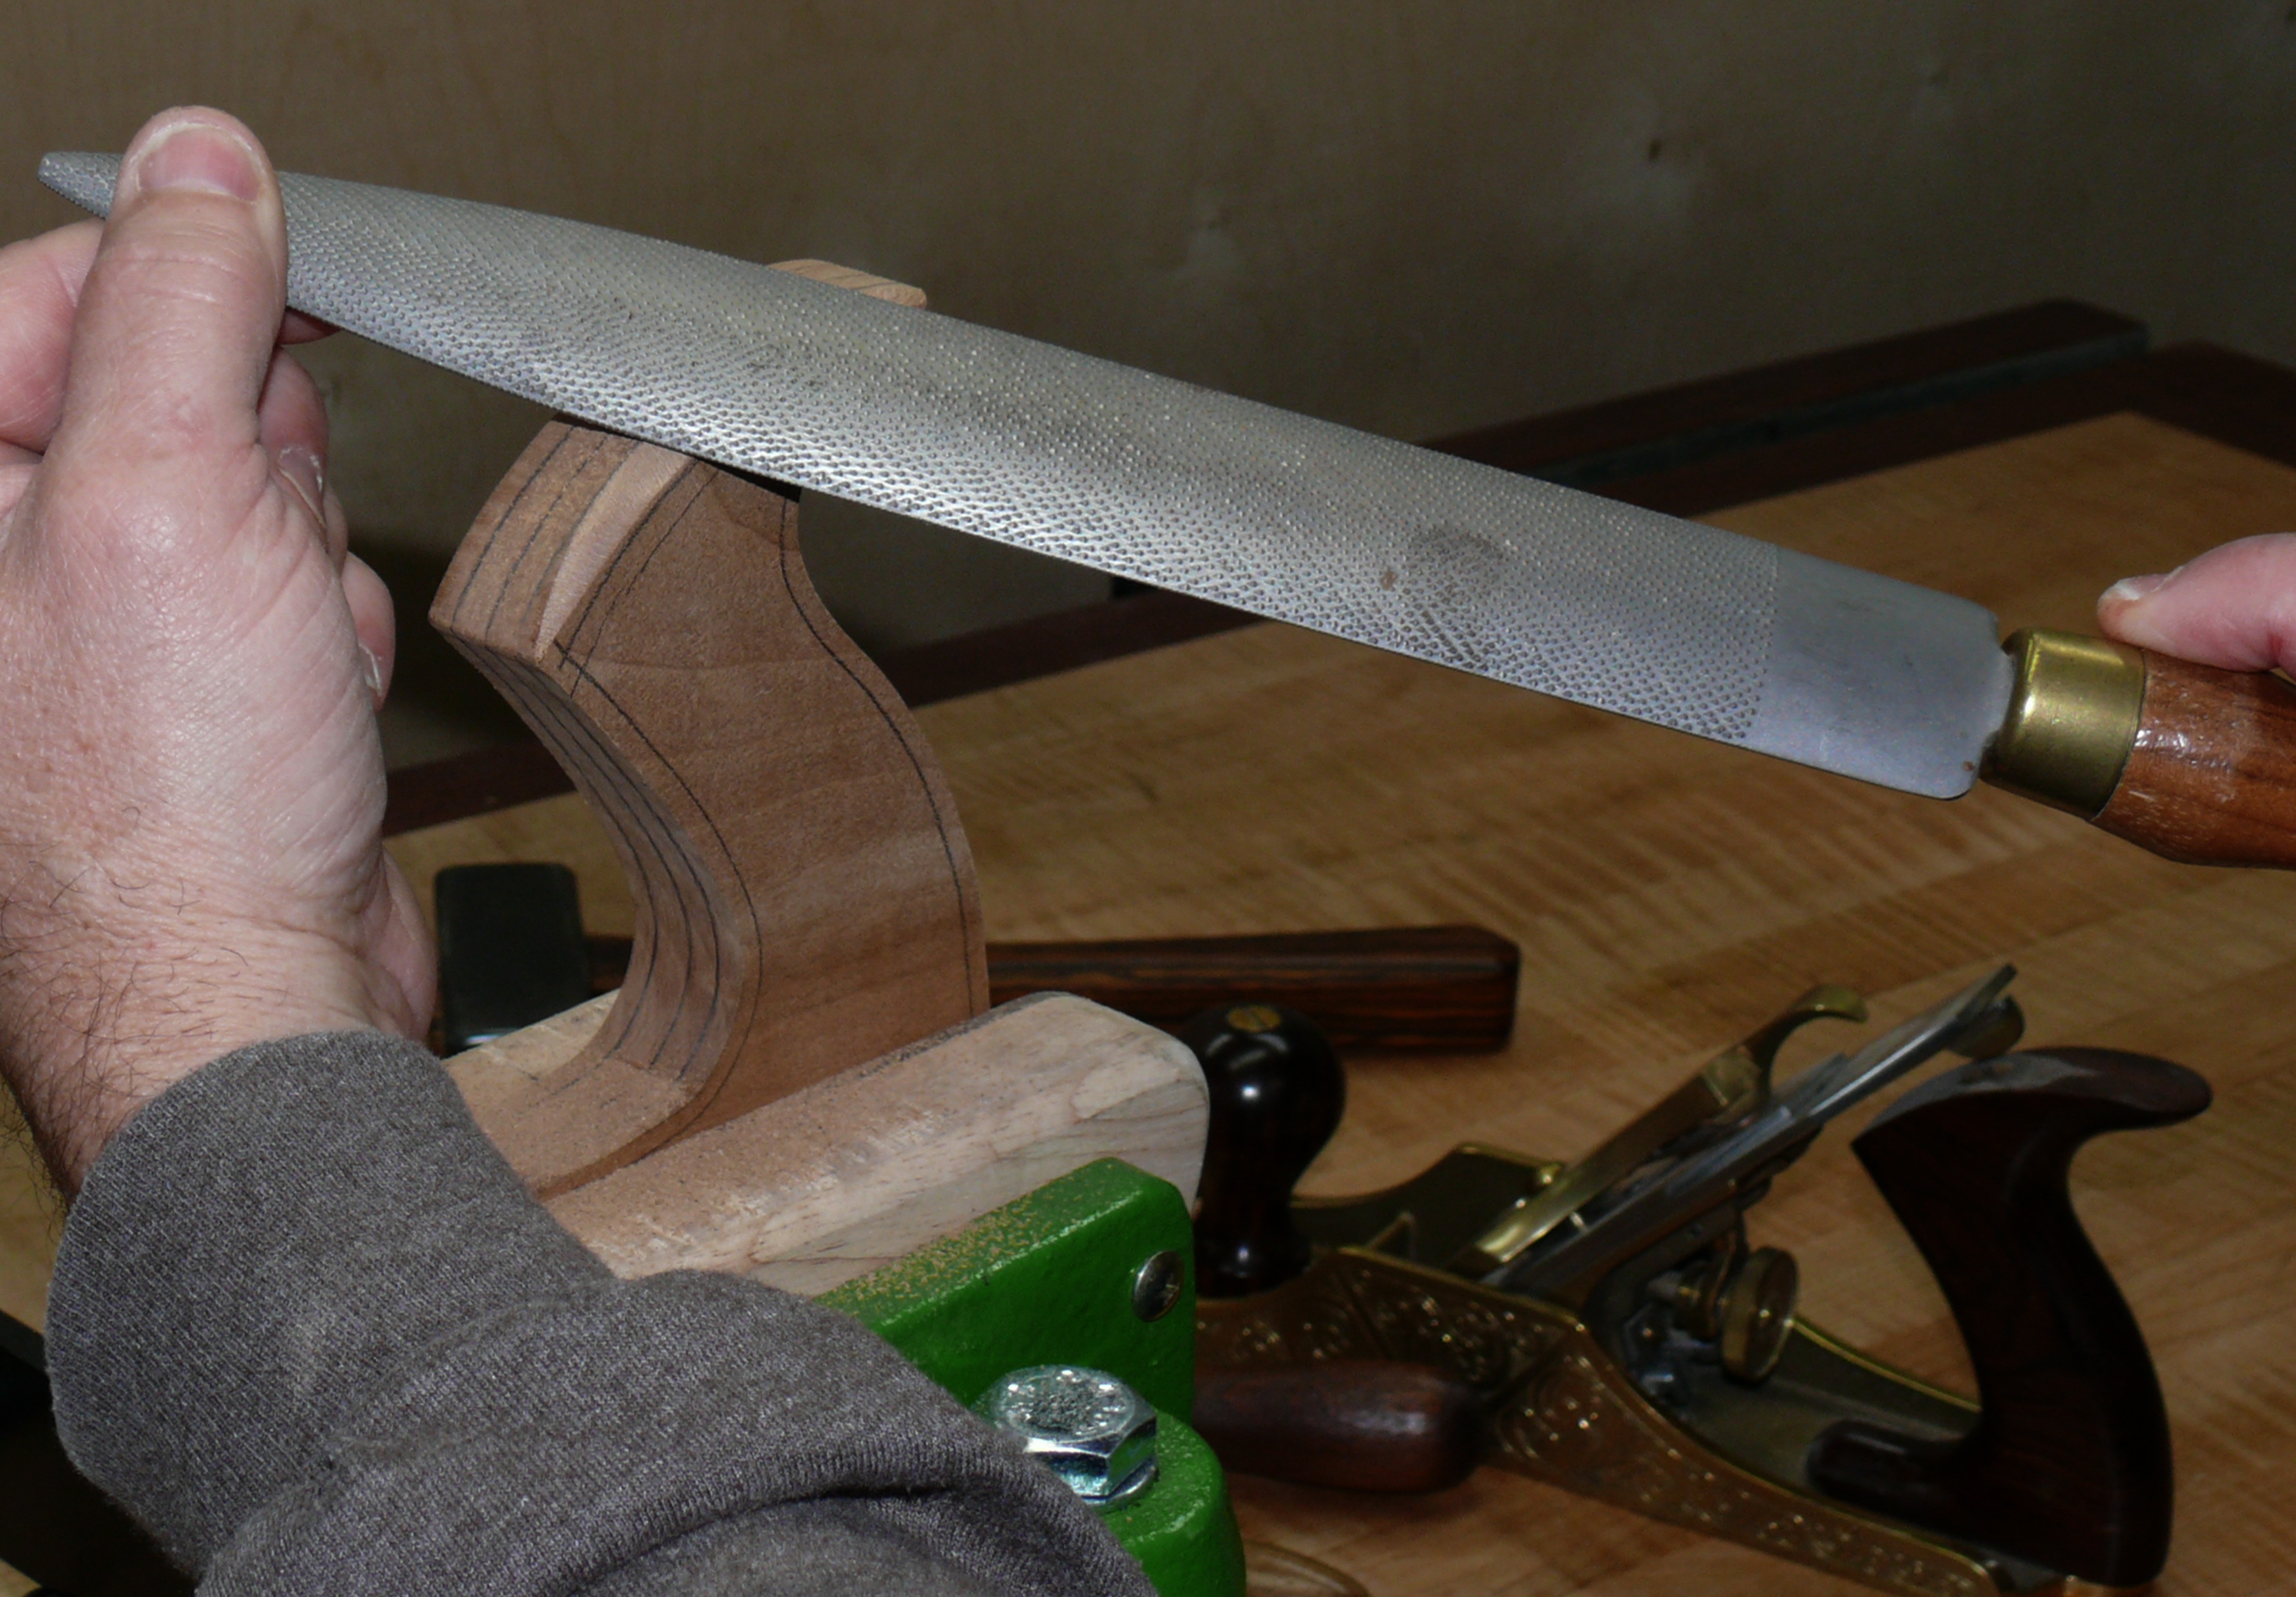
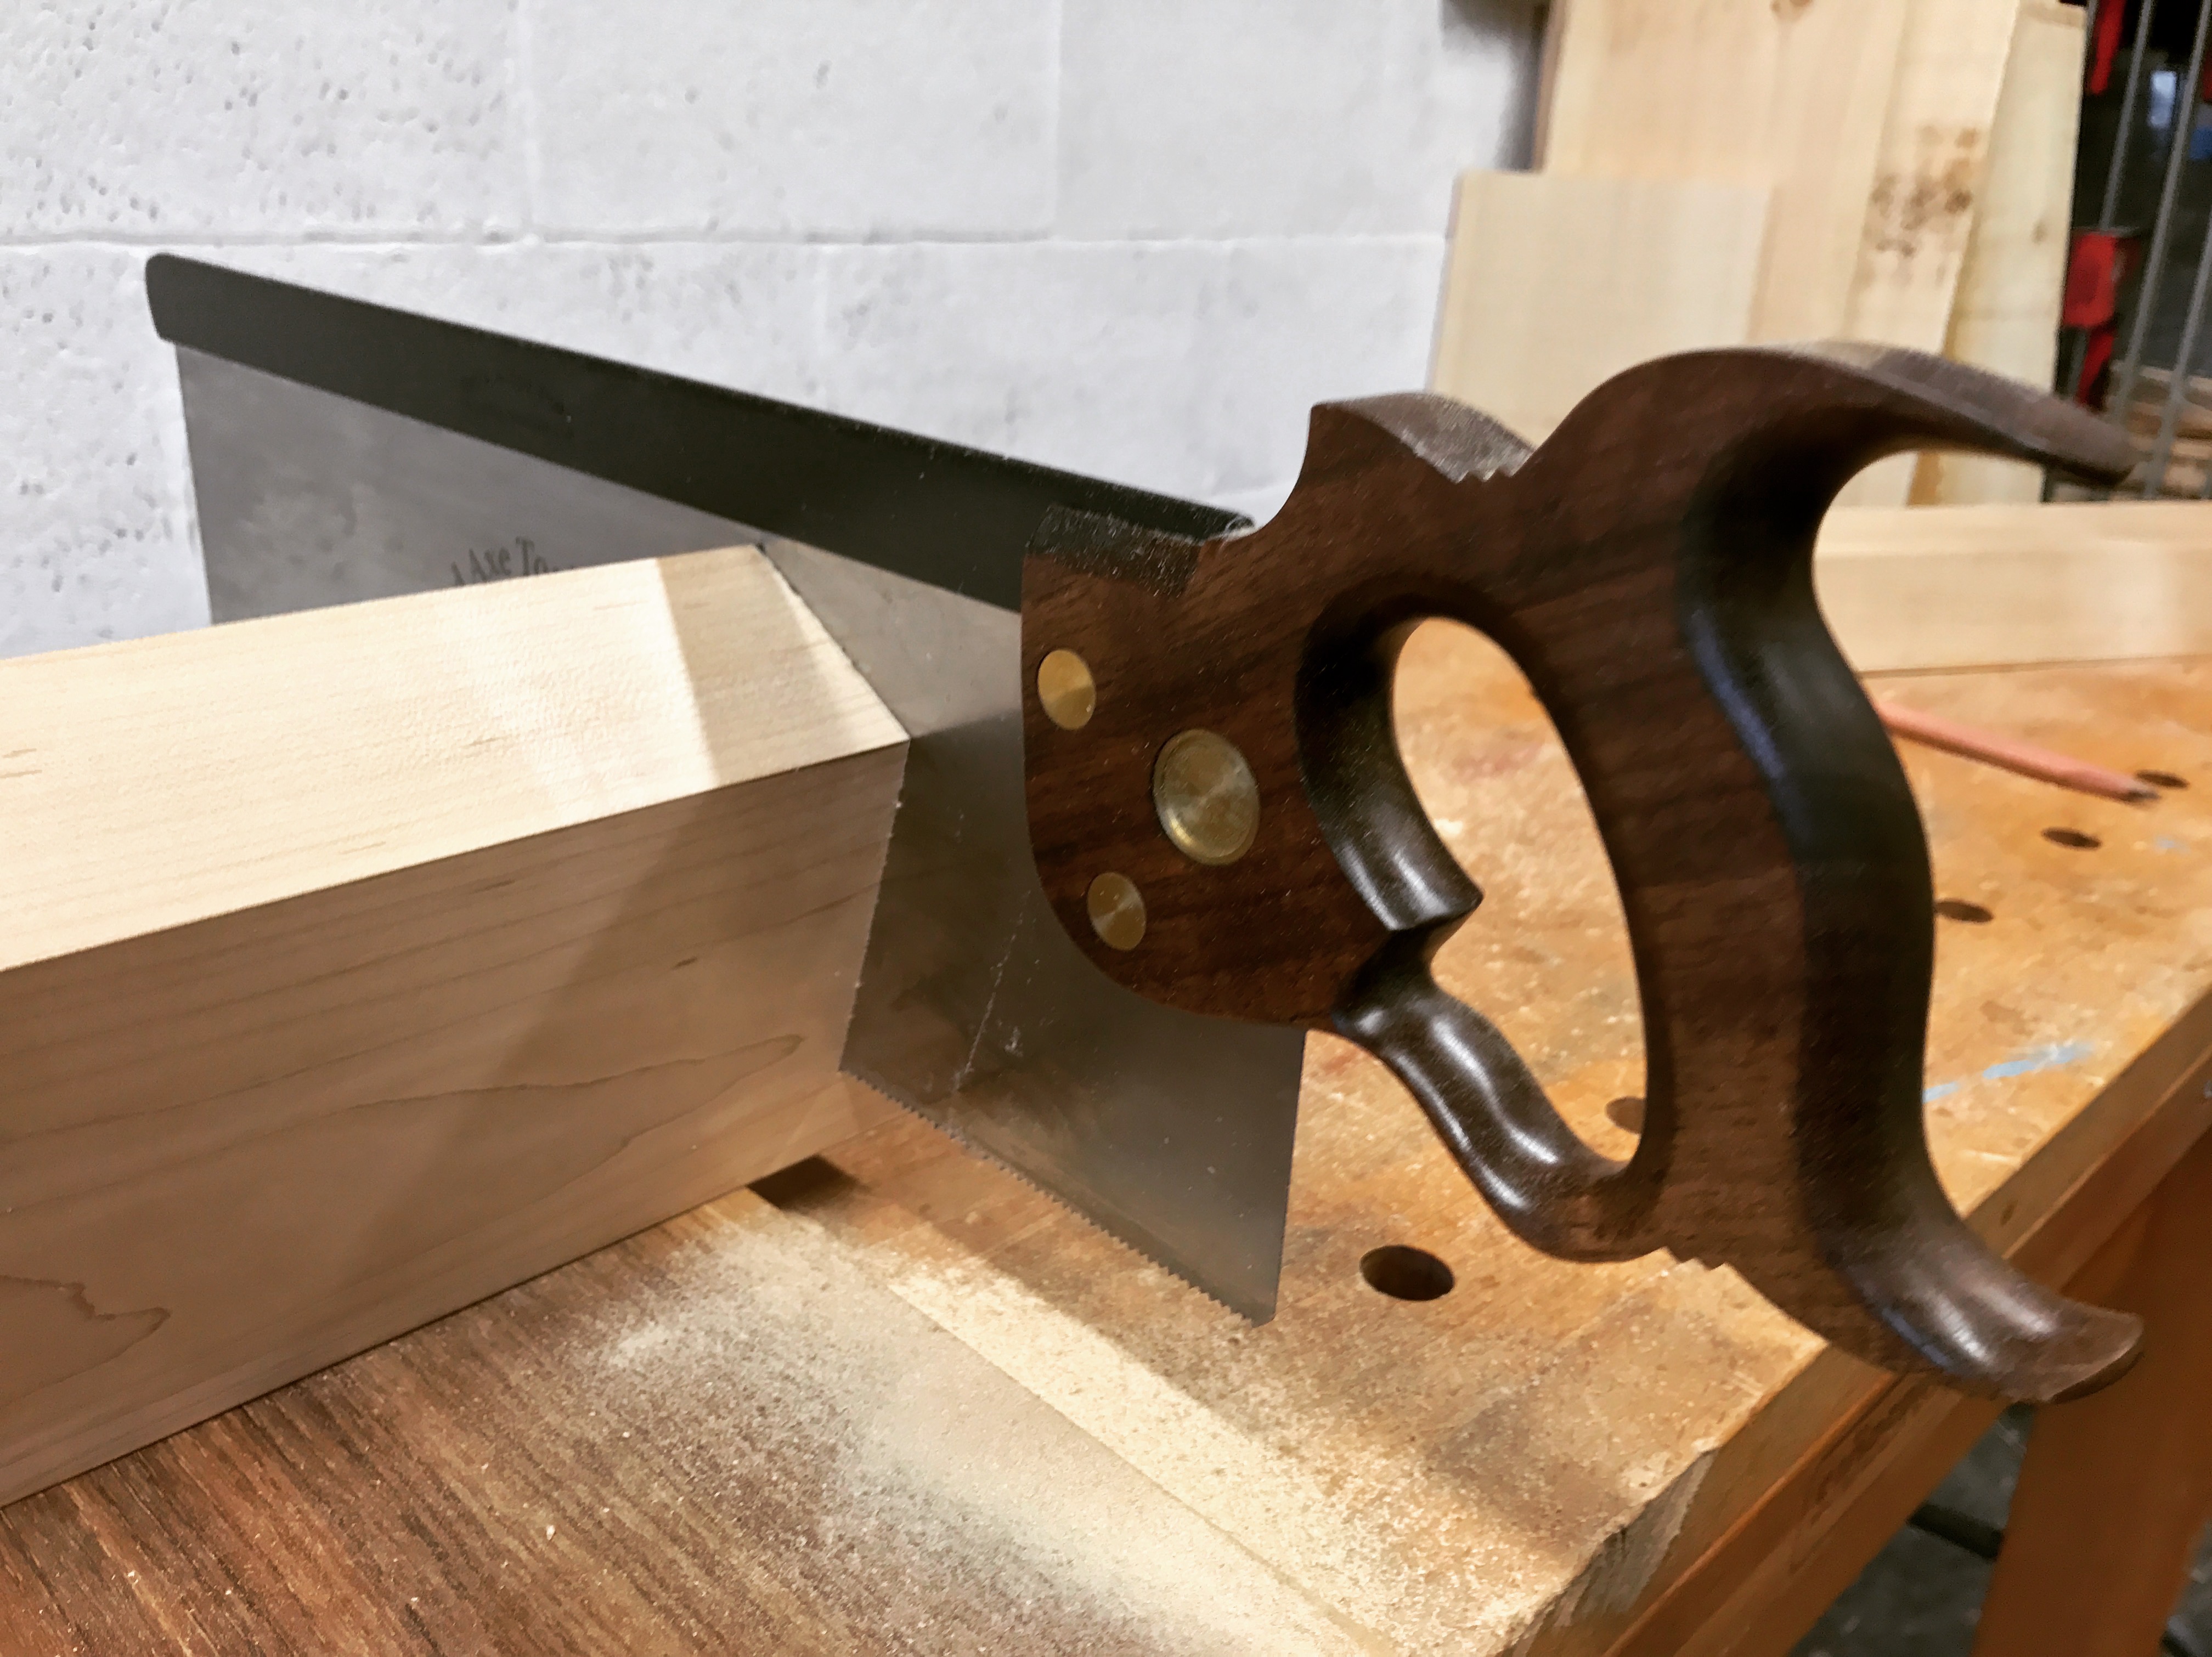
Shaping a plane tote with a cabinet maker’s rasp

A rasp’s most powerful attribute is that it allows the user to shape in 3 dimensions – creating a rounded edge, or shaping a component, is done in one operation with no machine setup or jigs to slow you down. With the workpiece held in place, the rasp brings one’s creative abilities to the fore and allows a true organic expression of the woodworker’s skill to emerge.

Many uses for each type of rasp exist and rasps can enhance or even replace existing techniques. We have found that rasps do not seem to care about the hardness of the workpiece, and hogging away large quantities of material on the most stubborn of timbers can be carried out with ease. Wood can be rapidly formed to shape with a coarse rasp where bandsawing may be difficult or dangerous. Turners often use a coarse rasp to knock the corners or protrusions off a piece to reduce tearout on square or odd-shaped workpieces, and using the spindle lock on a mounted piece is an excellent way to get closer to round before turning on the lathe.

Photo 8

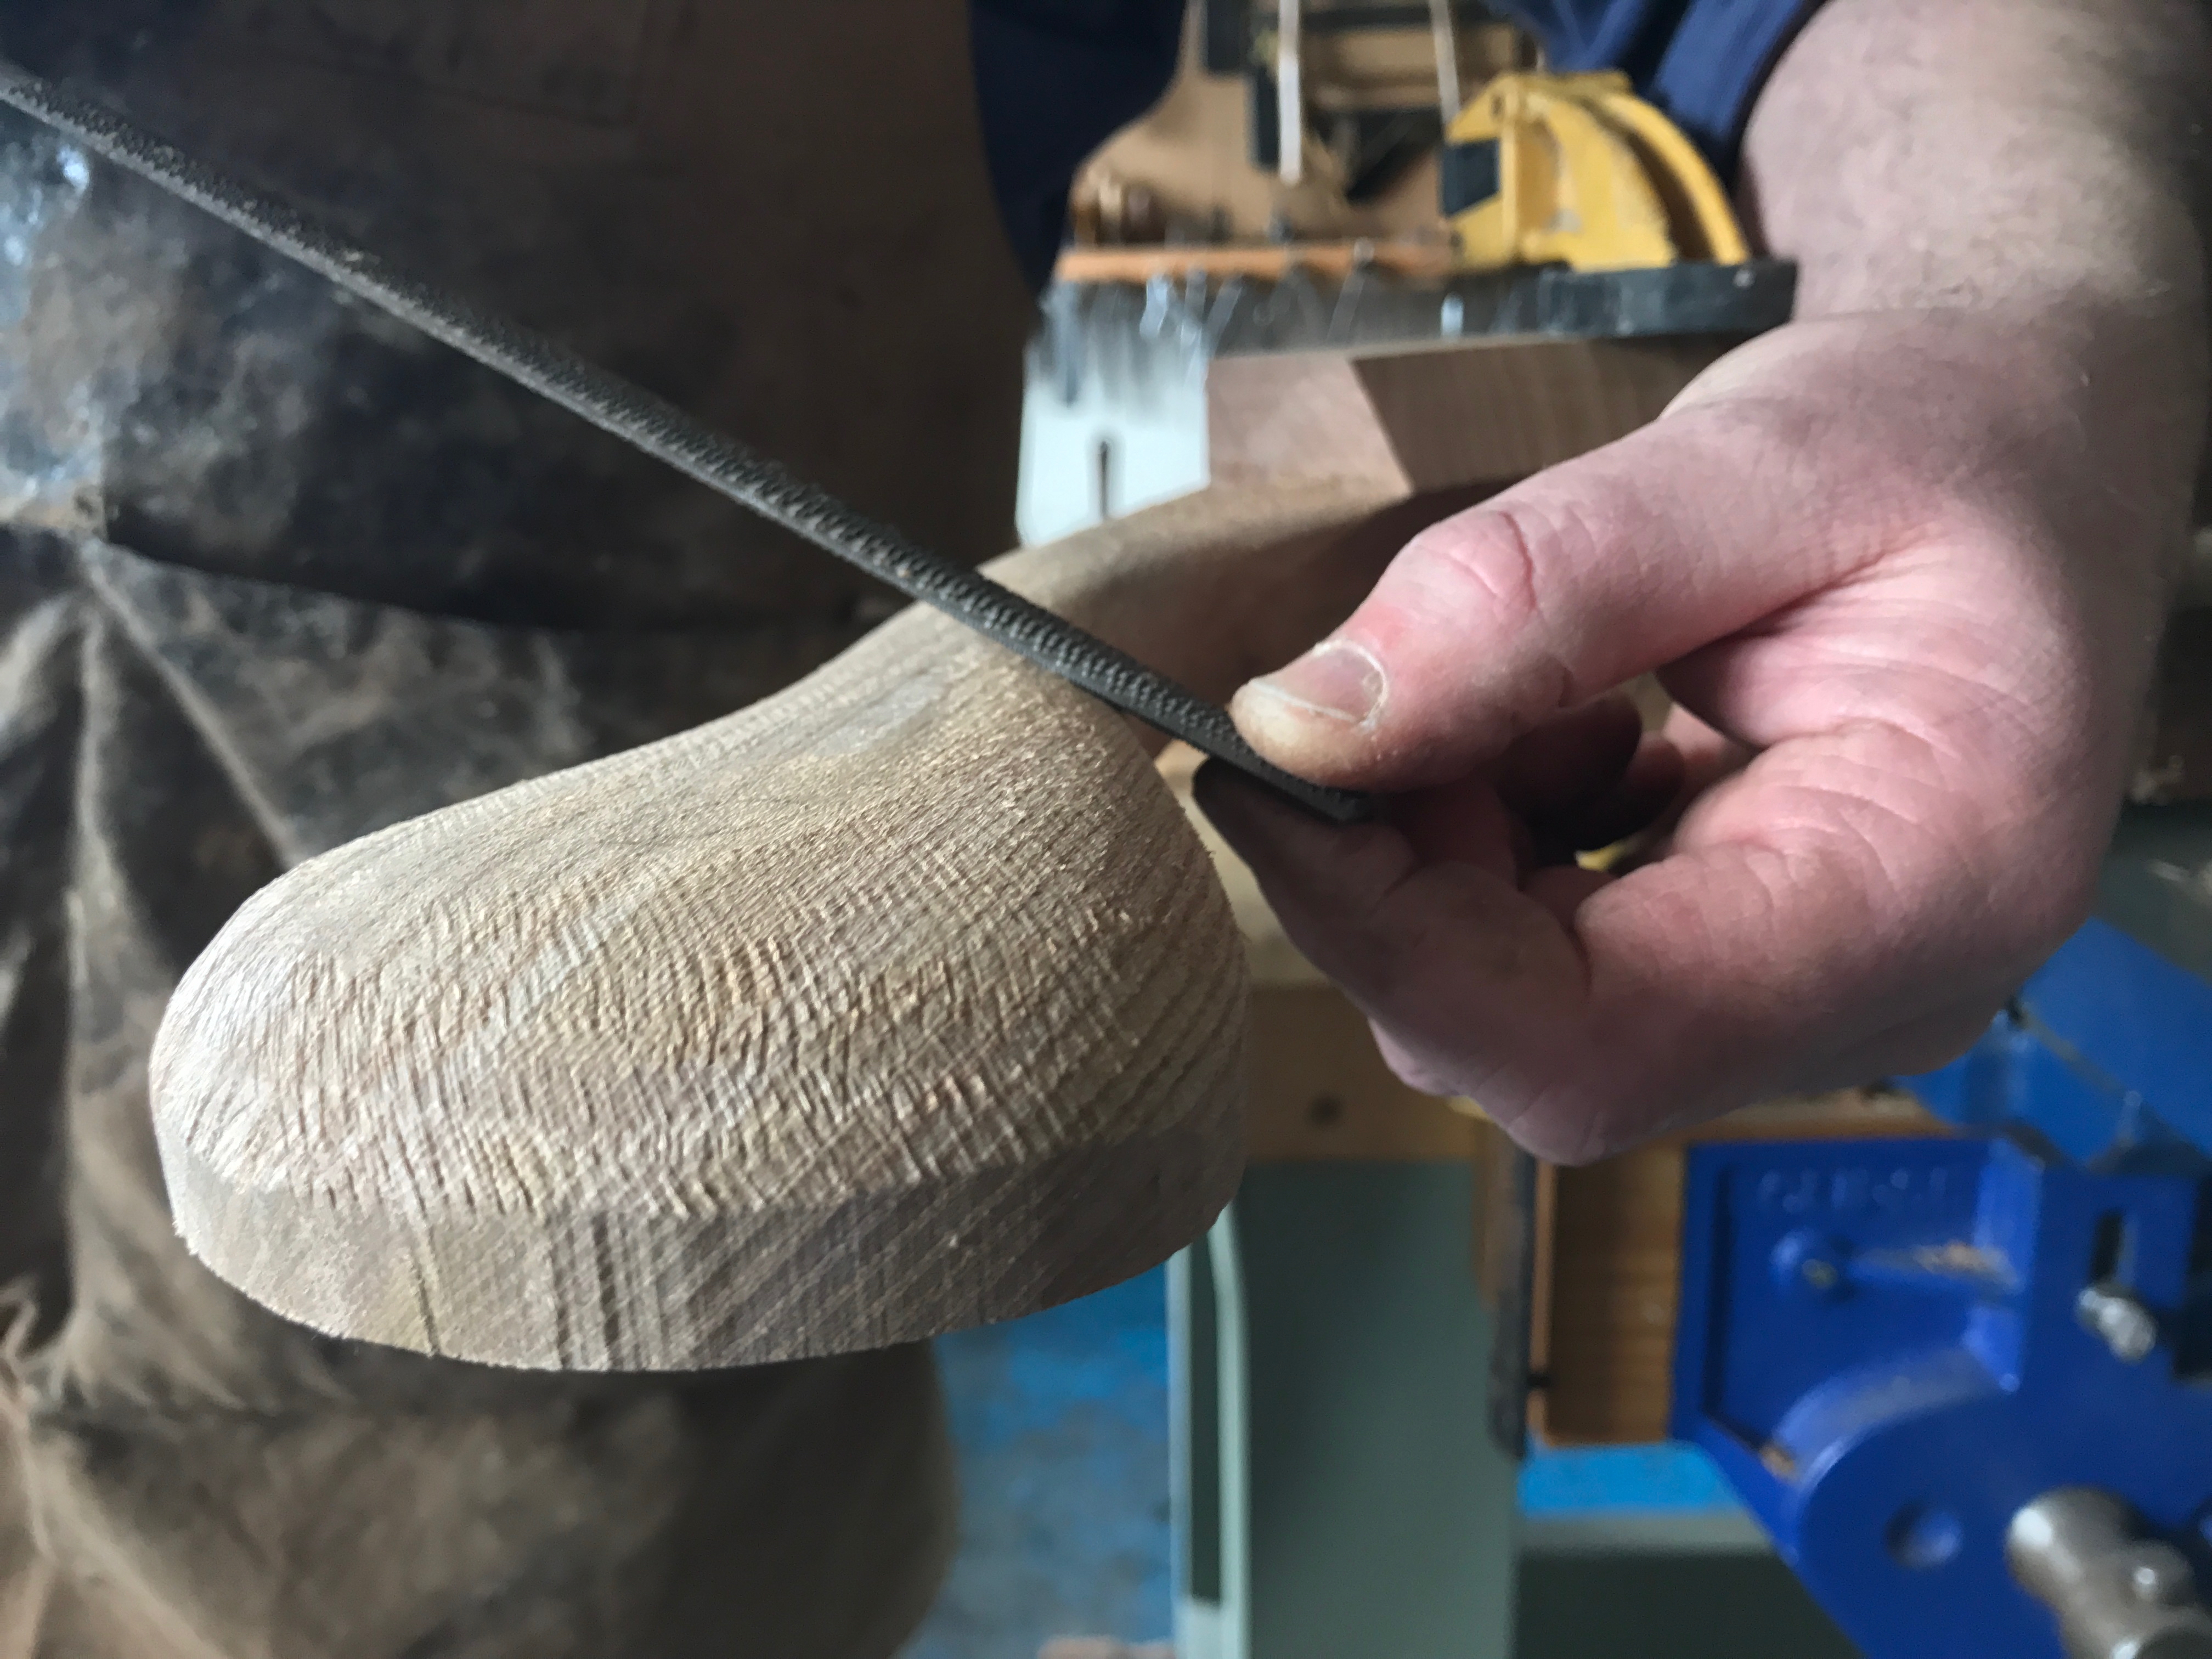
Small rasps give a fine finish and allow for very precise shaping

Medium-grained rasps are the most flexible, and a medium cabinetmakers rasp is a versatile tool if you only intend to buy one rasp. This type of rasp can perform a wide variety of shaping tasks and leaves a surface that can be cleaned up with abrasives if no other rasps are available.

The fine-grained rasp is for final refinement or very detailed work. With practise the woodworker can clean up a piece so that it requires no sanding; indeed these detail rasps can reach places sanding cannot, allowing smoothing of inside curves or complex shapes. These are also well suited to small work or small details in larger pieces; refining an edge detail with sandpaper is frustrating at times, while a rasp allows a controlled approach to get that final shape one is after.

Photo 11

Welsh stick chair maker Chris Williams shapes the arm of a chair with a coarse rasp

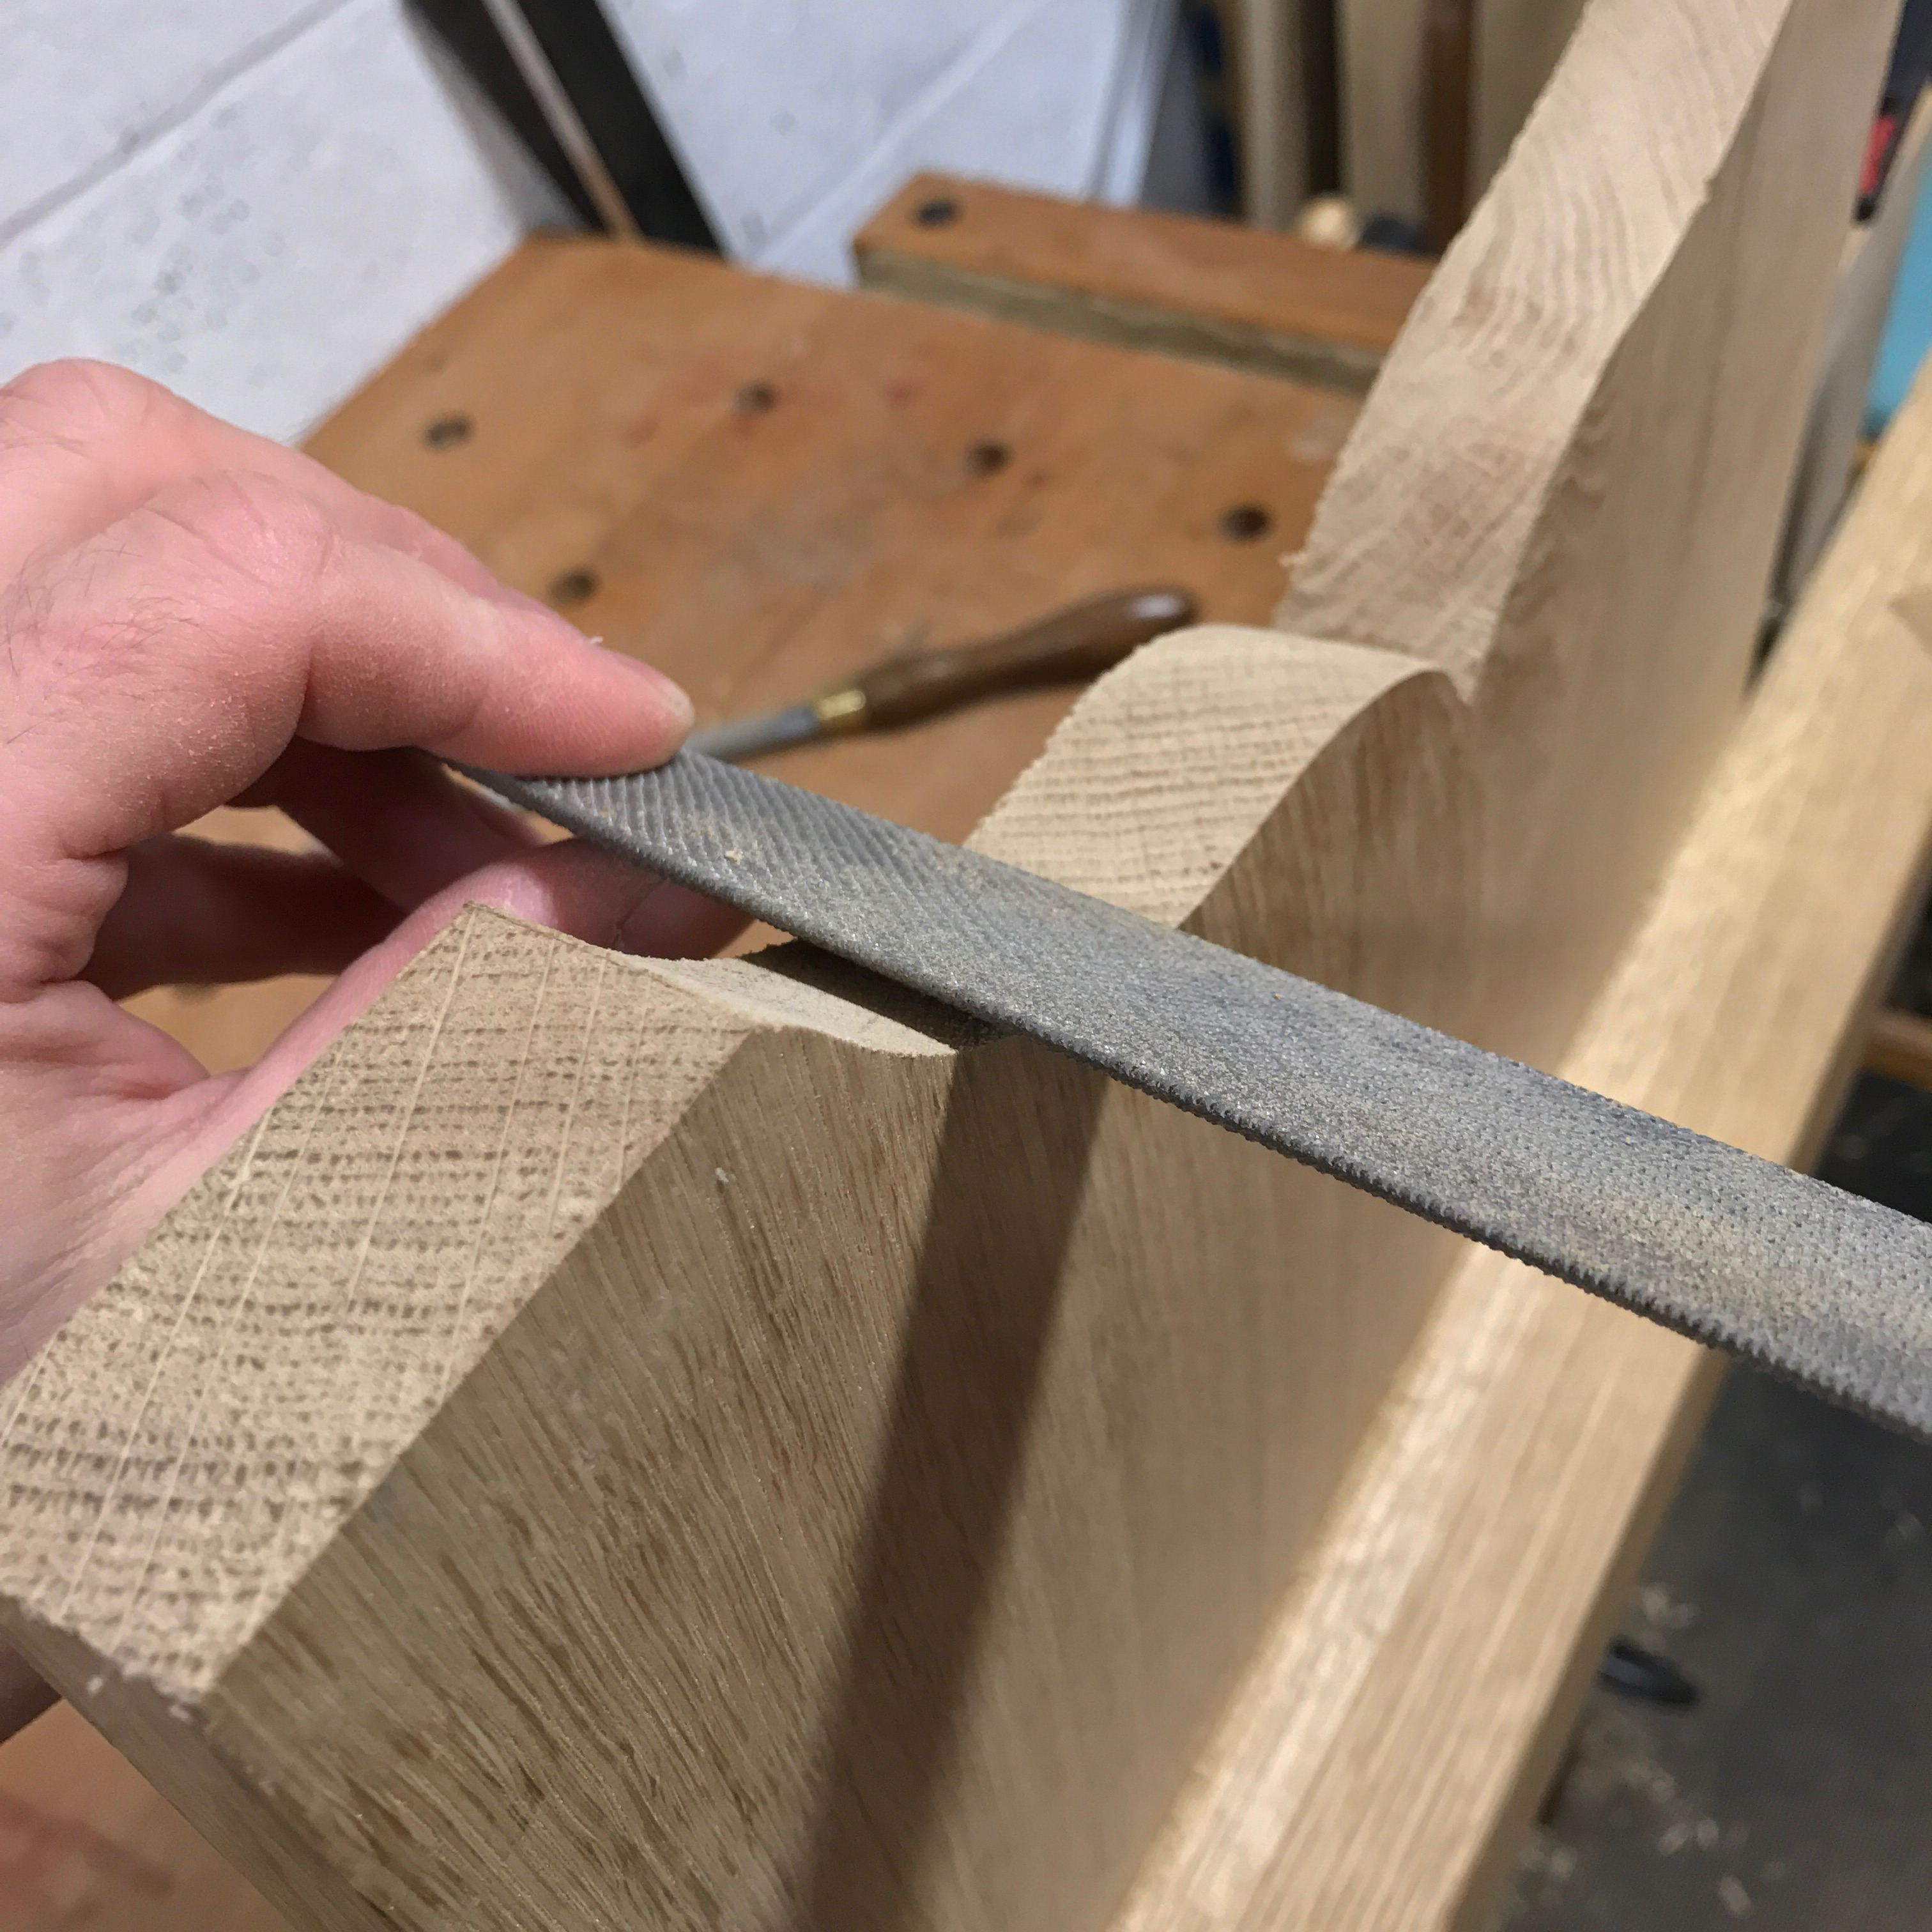
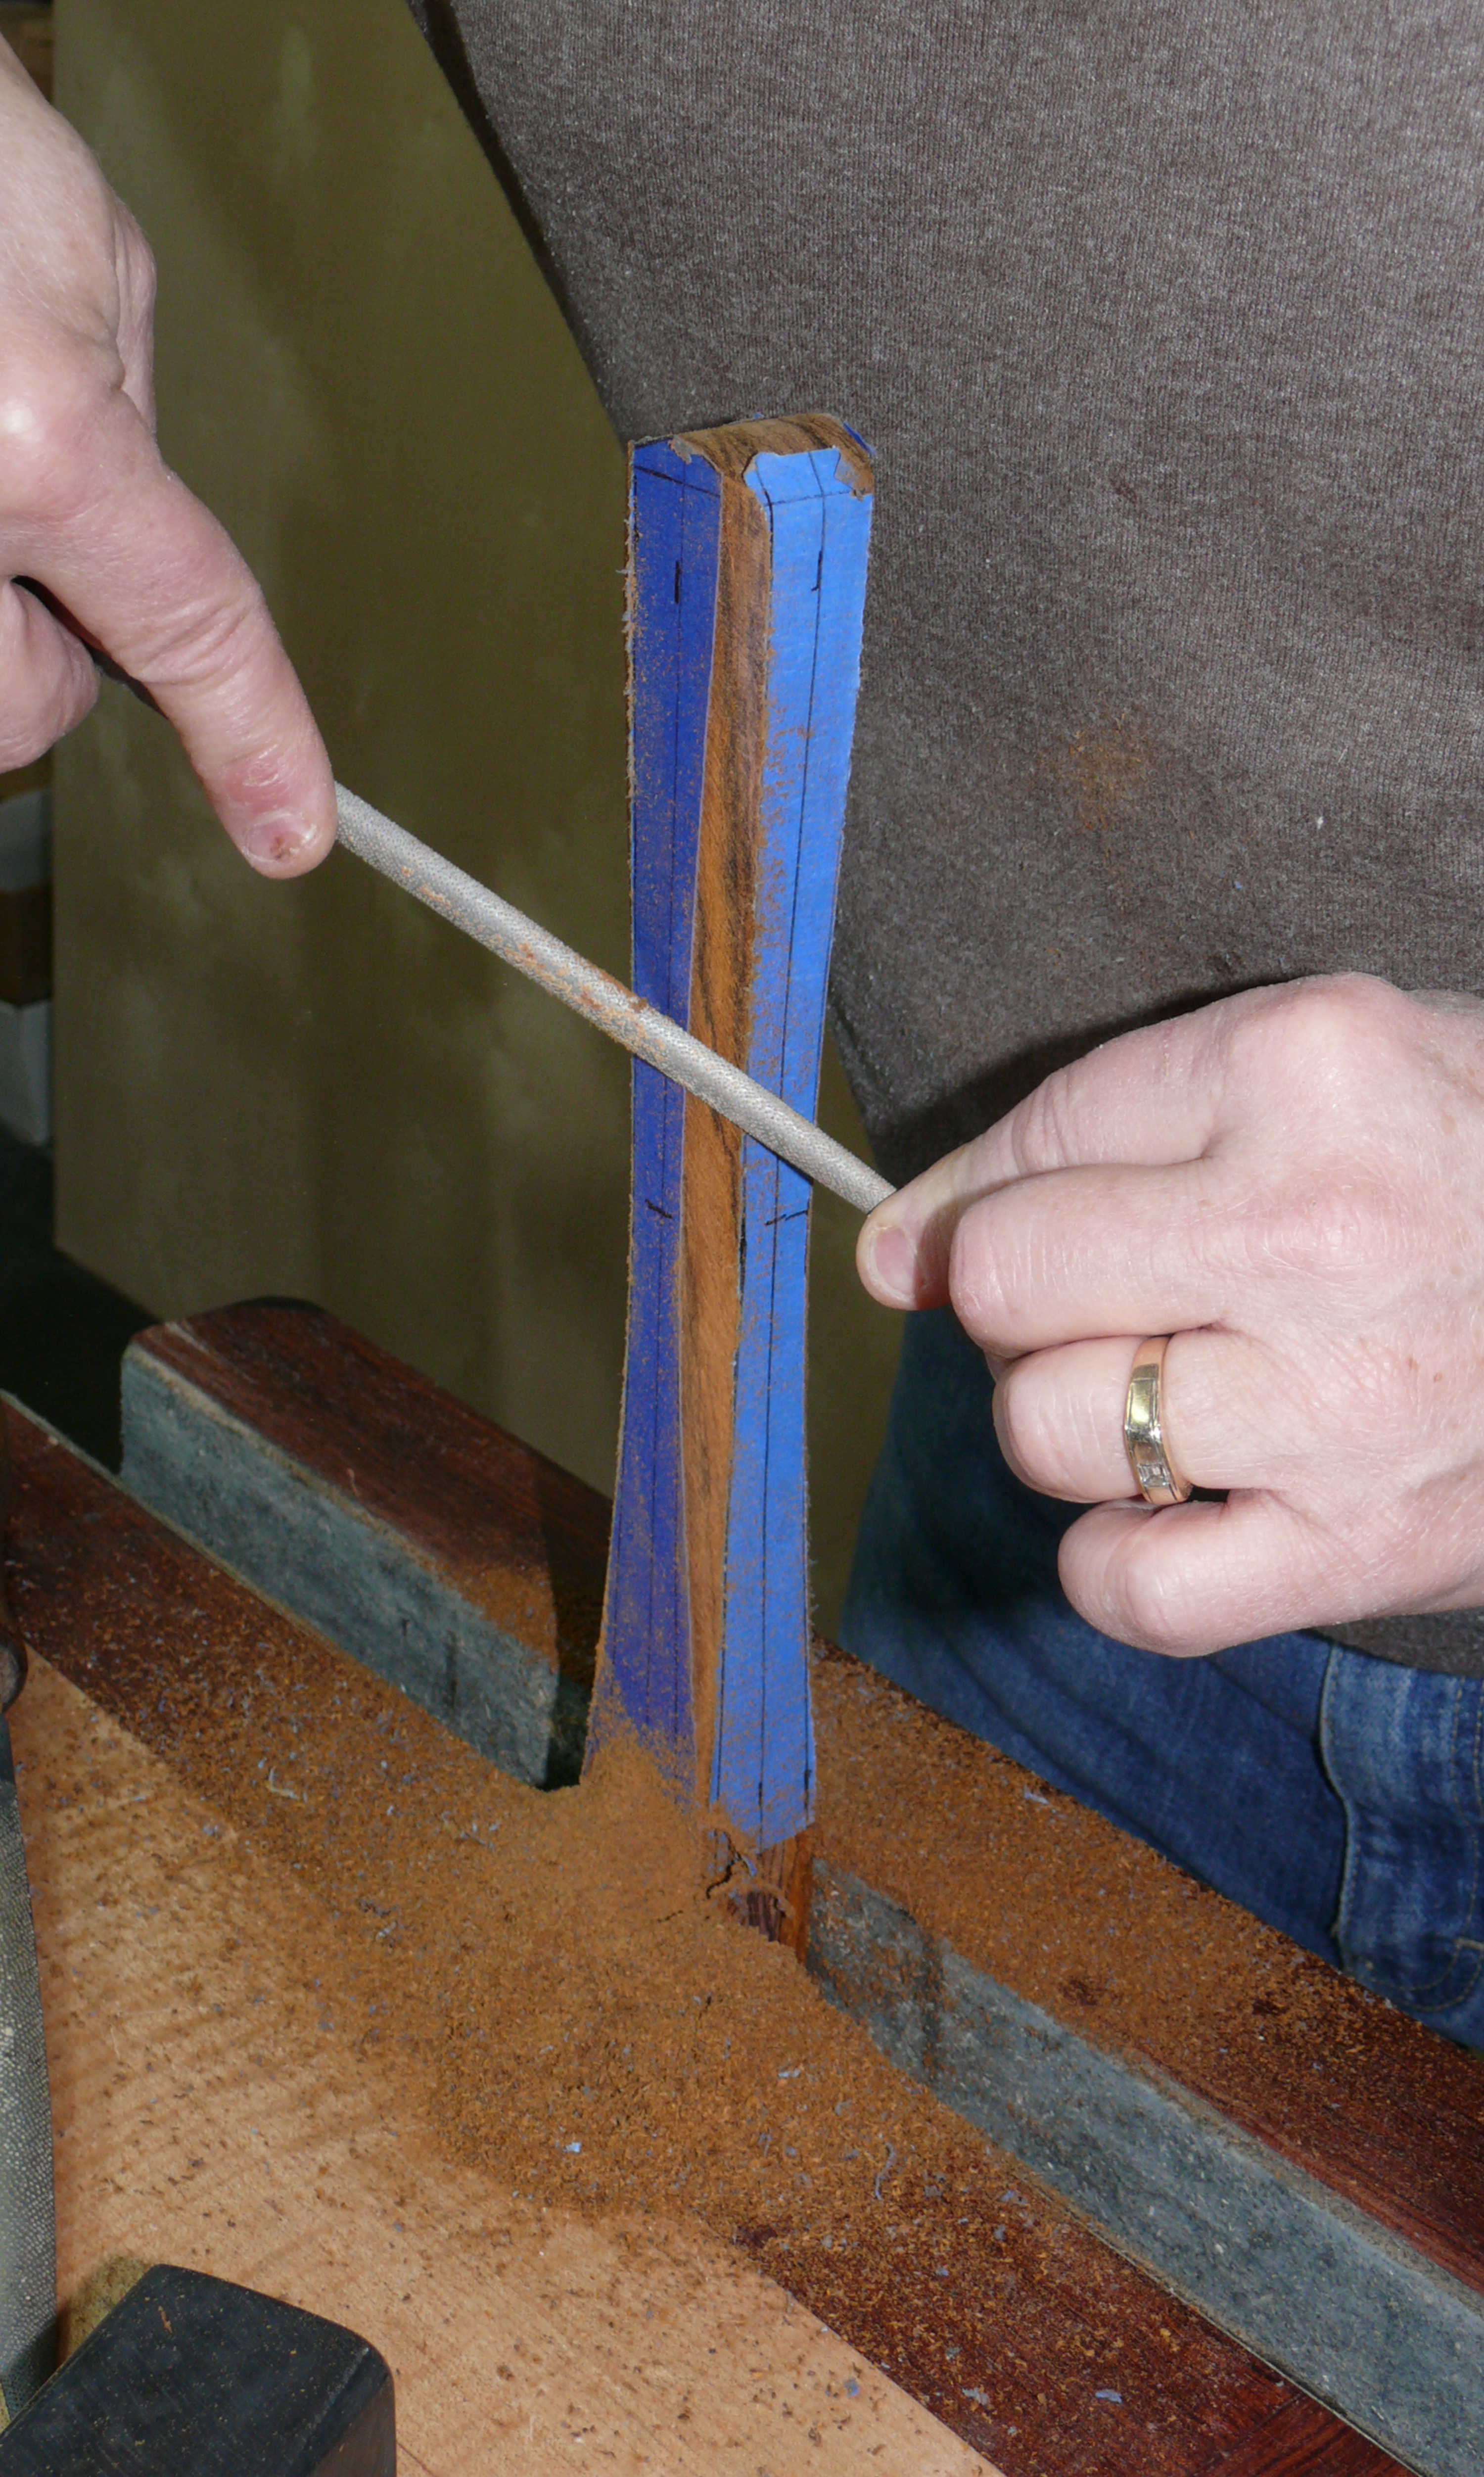
Regardless of how coarse a rasp is, the user’s cutting technique has a dramatic impact on the quality of cut. Much like carving, one must pay careful attention to grain direction to get the desired result. Working the rasp across the grain increases the roughness of the cut, removing material rapidly but increasing the risk of tearout. Following the grain produces the smoothest and cleanest cuts. Working along the grain can produce very smooth cuts that require little cleanup. Both can be effective techniques, depending upon the intended purpose. Heavy stock removal can be achieved by increasing how much you work across the grain.

Most hand-stitched rasps are handed, meaning they are designed to be used either right or left-handed. Using the rasp wrong-handed will result in a heavily scratched surface or with no wood removal at all. The general technique is to hold the rasp two handed, the dominant hand on the handle and the other holding the tip of the rasp. The smoothest cut is achieved by pushing the rasp away from the body along the grain of the piece; this direction is not always possible and practice will help to achieve the best result for the job.

Photo 10

Shaping the feet of the Policeman’s Boot Bench with a cabinet maker’s rasp

Using a rasp is an extremely tactile skill, with the feedback through the hands giving more information about the quality of the cut than simply looking at the workpiece. Generally, the smoother the cut feels, the smoother the cut is, and if the rasp is jumping and chattering across the grain, the cut will be uneven and irregular. Remarkably smooth surfaces can be achieved with semi-rough rasps by using the right technique. Like most hand tool skills, best achieved with use and practise. There are few things more satisfying than feeling a rasp cleanly glide along an edge leaving behind a perfectly feathered and consistent facet for that important project.

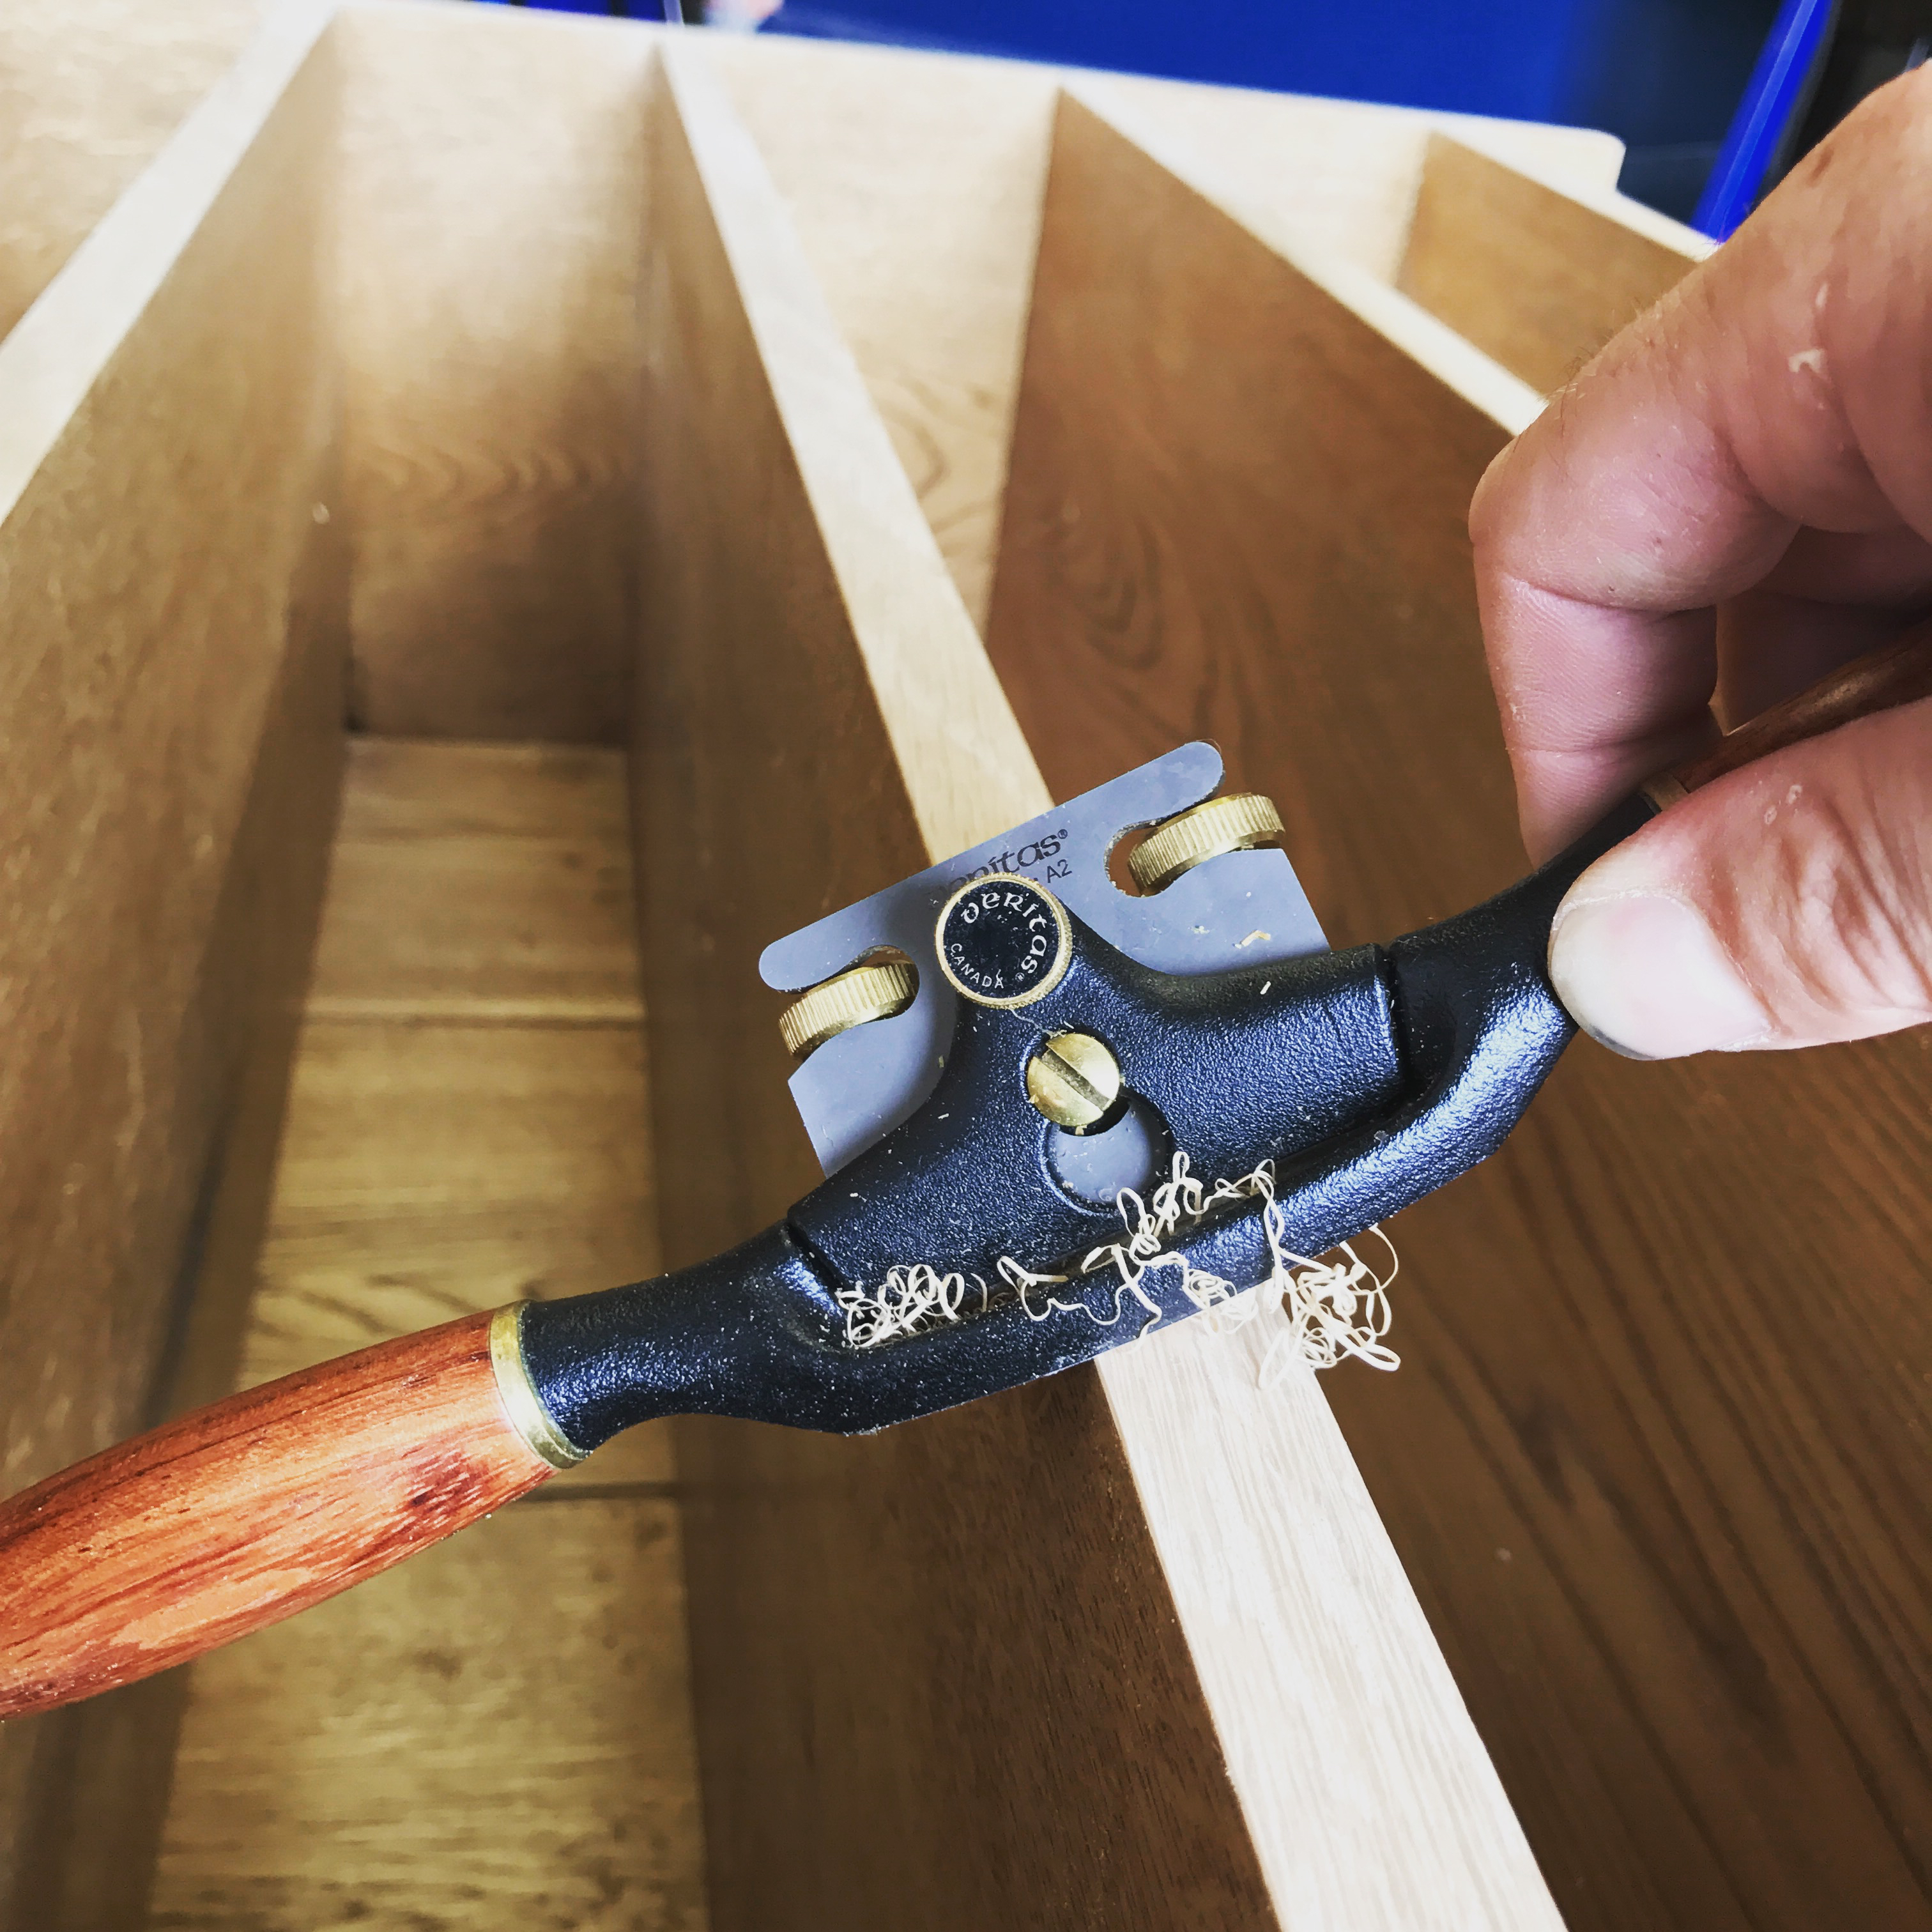
Using Rasps for Joinery

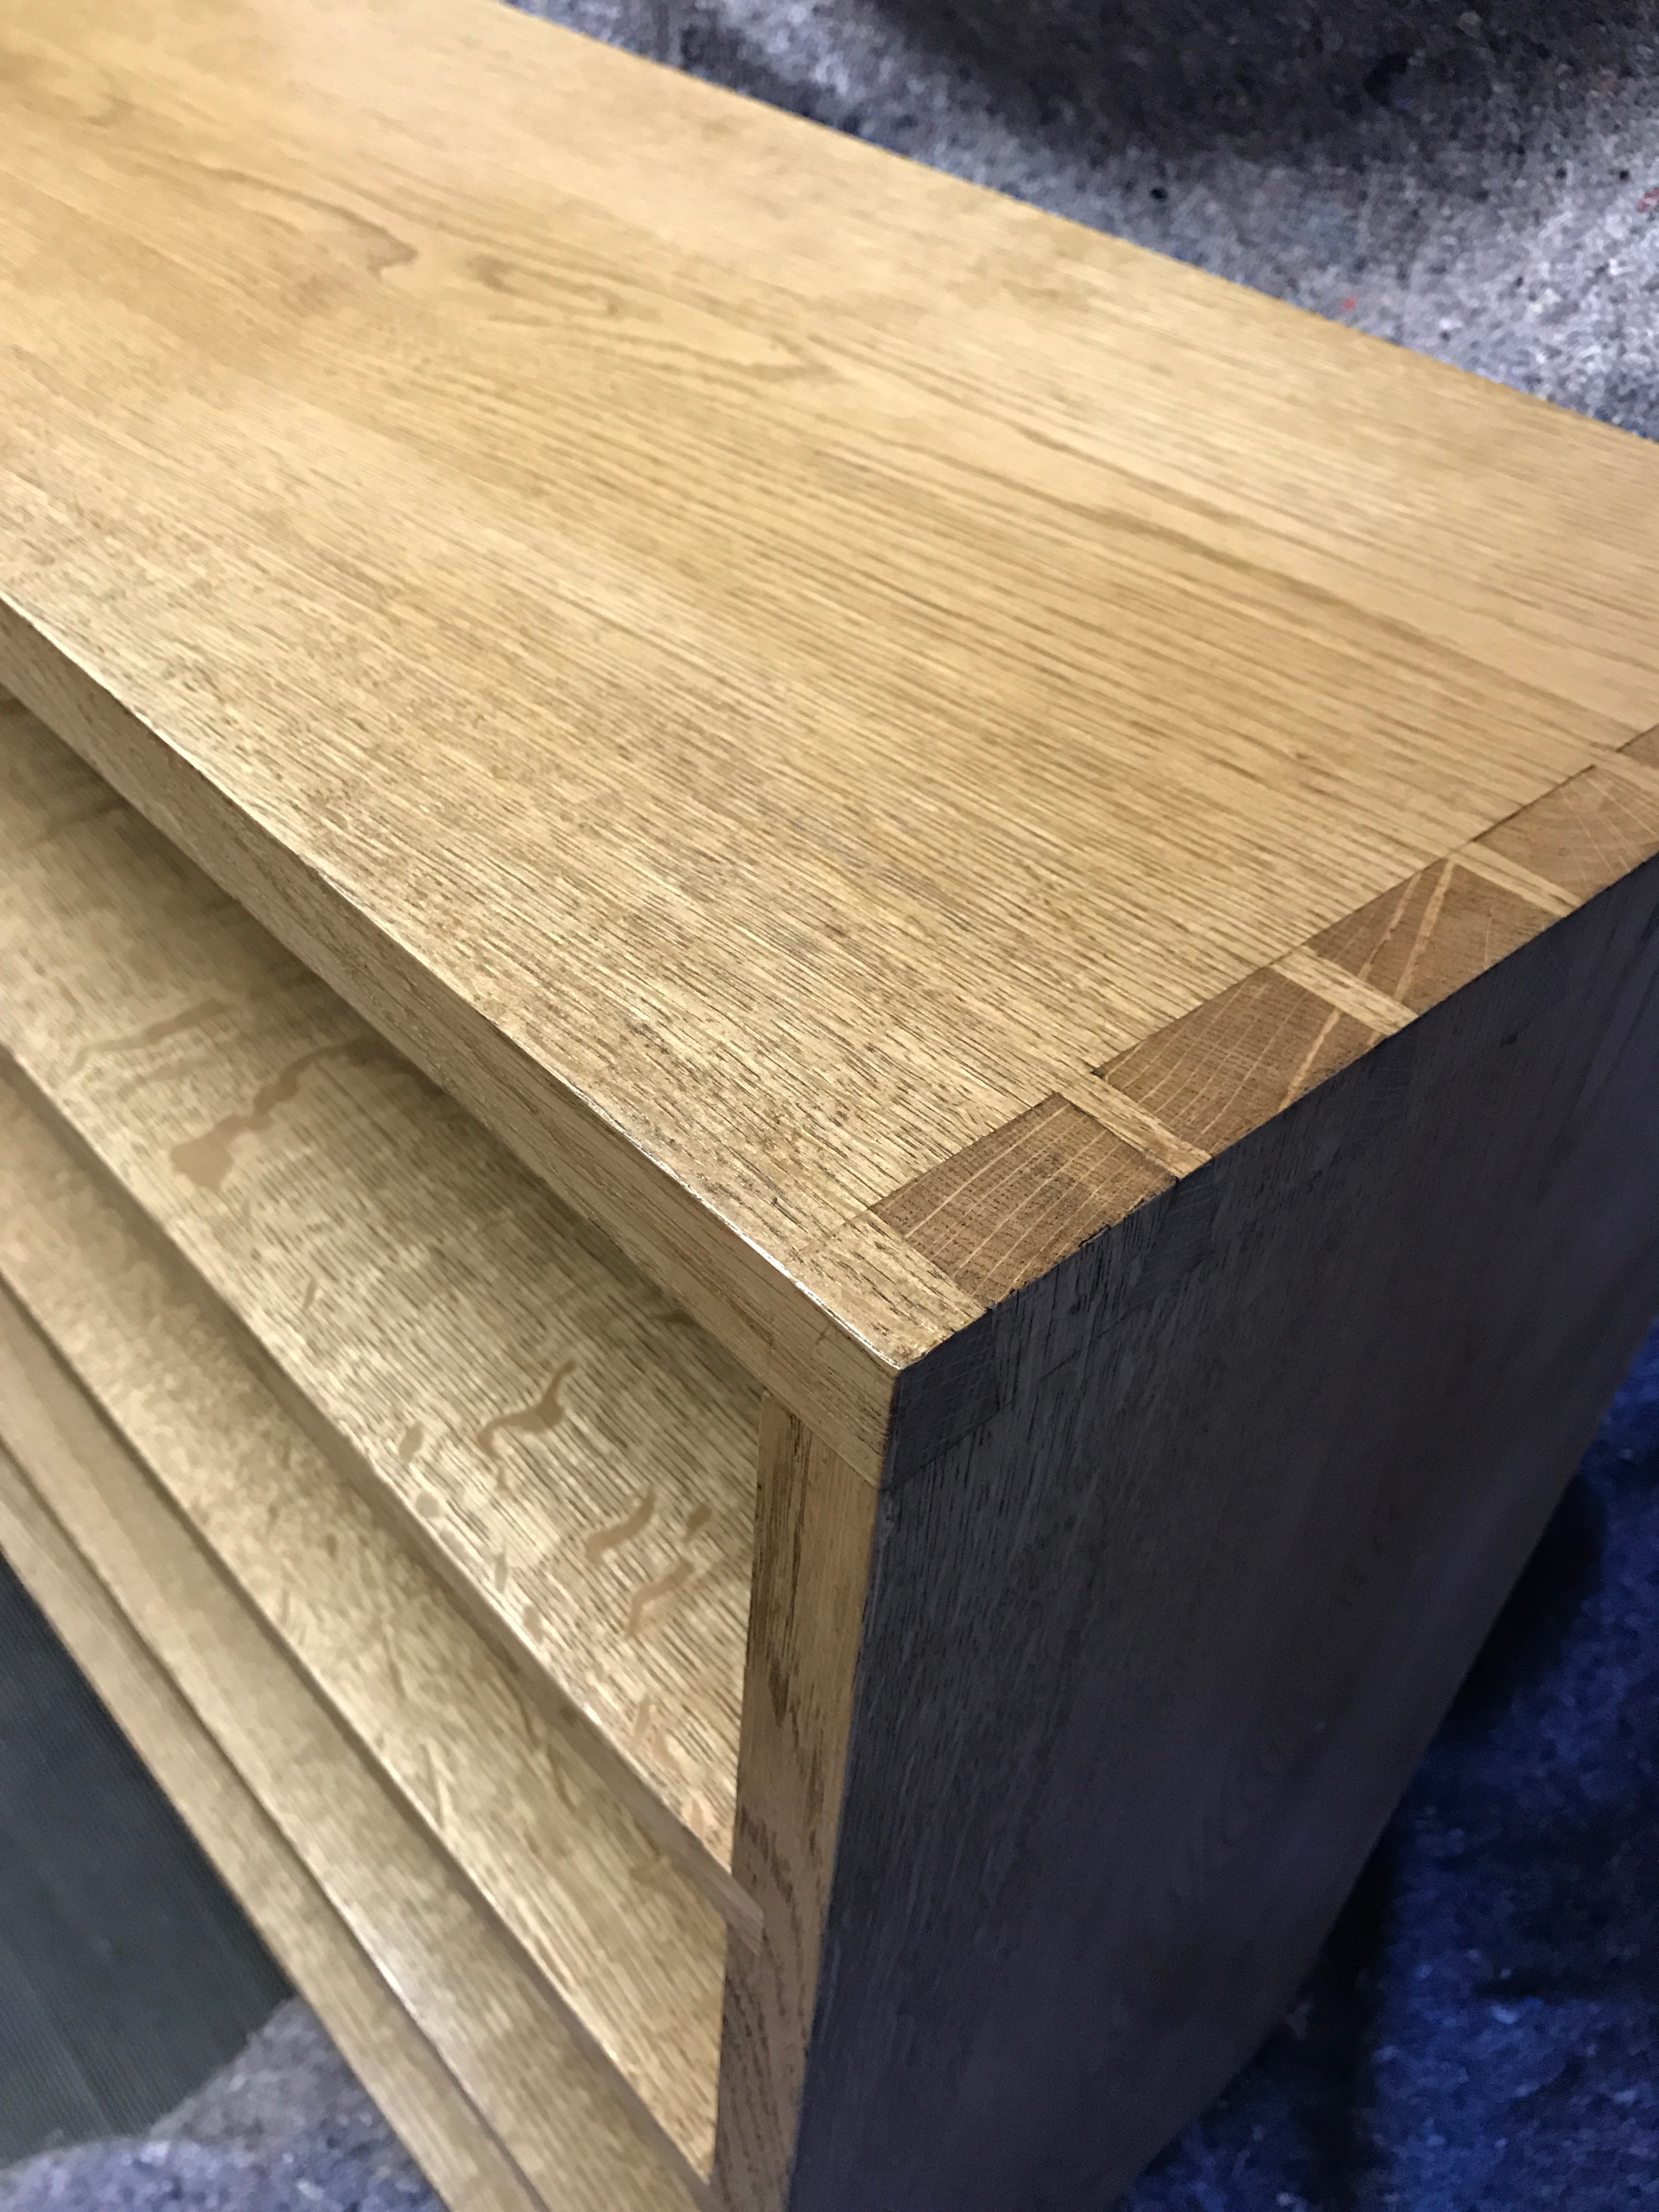
In many types of joinery, getting a good fit can involve fine-tuning the individual components. A medium or fine grained rasp can be an excellent choice for this type of work. Many joints involve flat surfaces, and the larger flat face of cabinetmaker’s rasp will register against the workpiece to stay in the correct plane. A through-mortise can be cleaned up or enlarged by gripping both ends of the rasp and aligning it with the face of the material to keep things square; sneaking up on the fit with light strokes. Tenon cheeks often need cleaning up to remove saw marks and to fine-tune the fit, once again the flat surface of the larger rasps is ideal to keep things square and in plane. Here the versatility of the rasp comes to the fore; simply by altering the force applied, one can easily control the amount of material removed for fine tuning or serious stock removal. For woodworkers who prefer to fit their tenons with a rasp, several makers offer a joinery rasp which is ideal for this application, and functions much like a planemaker’s float.

Photo 4

Large rasps are pefect for shaping tenons and other cylindrical features

Choosing your rasps

With rasps coming in so many shapes and grains, the conventional wisdom is to start with a 3-rasp set. The most versatile and useful rasp is the cabinetmaker’s rasp and is usually 12-13” long, with a flat surface and a semi-curved surface, and a medium grain finish. This rasp is perfect for general stock removal and leaves a surface similar to 80-grit sandpaper (depending on which grain you select) that is ready for final smoothing. The flat face provides a reference for smoothing and the size makes it much easier to use. If you buy only one rasp, this is the one to start with. Smaller than the cabinetmaker’s rasp, but with a similar overall shape, is the modeller’s rasp. Typically 8-10” long with a fine stitching, this rasp excels at final shaping and refining the surface left by a cabinetmaker’s rasp. The smaller size of the modeller’s rasp lets it get into small areas that may be difficult to sand and leaves a smooth surface requiring little or no clean-up. The third rasp in the typical starter kit is a medium grain rat tail rasp, for working tight radii, refining shapes, and widening holes for expansion joints. This rasp can also be used with light cuts to refine an edge, leaving a surface smooth enough to sand.

Photo 6

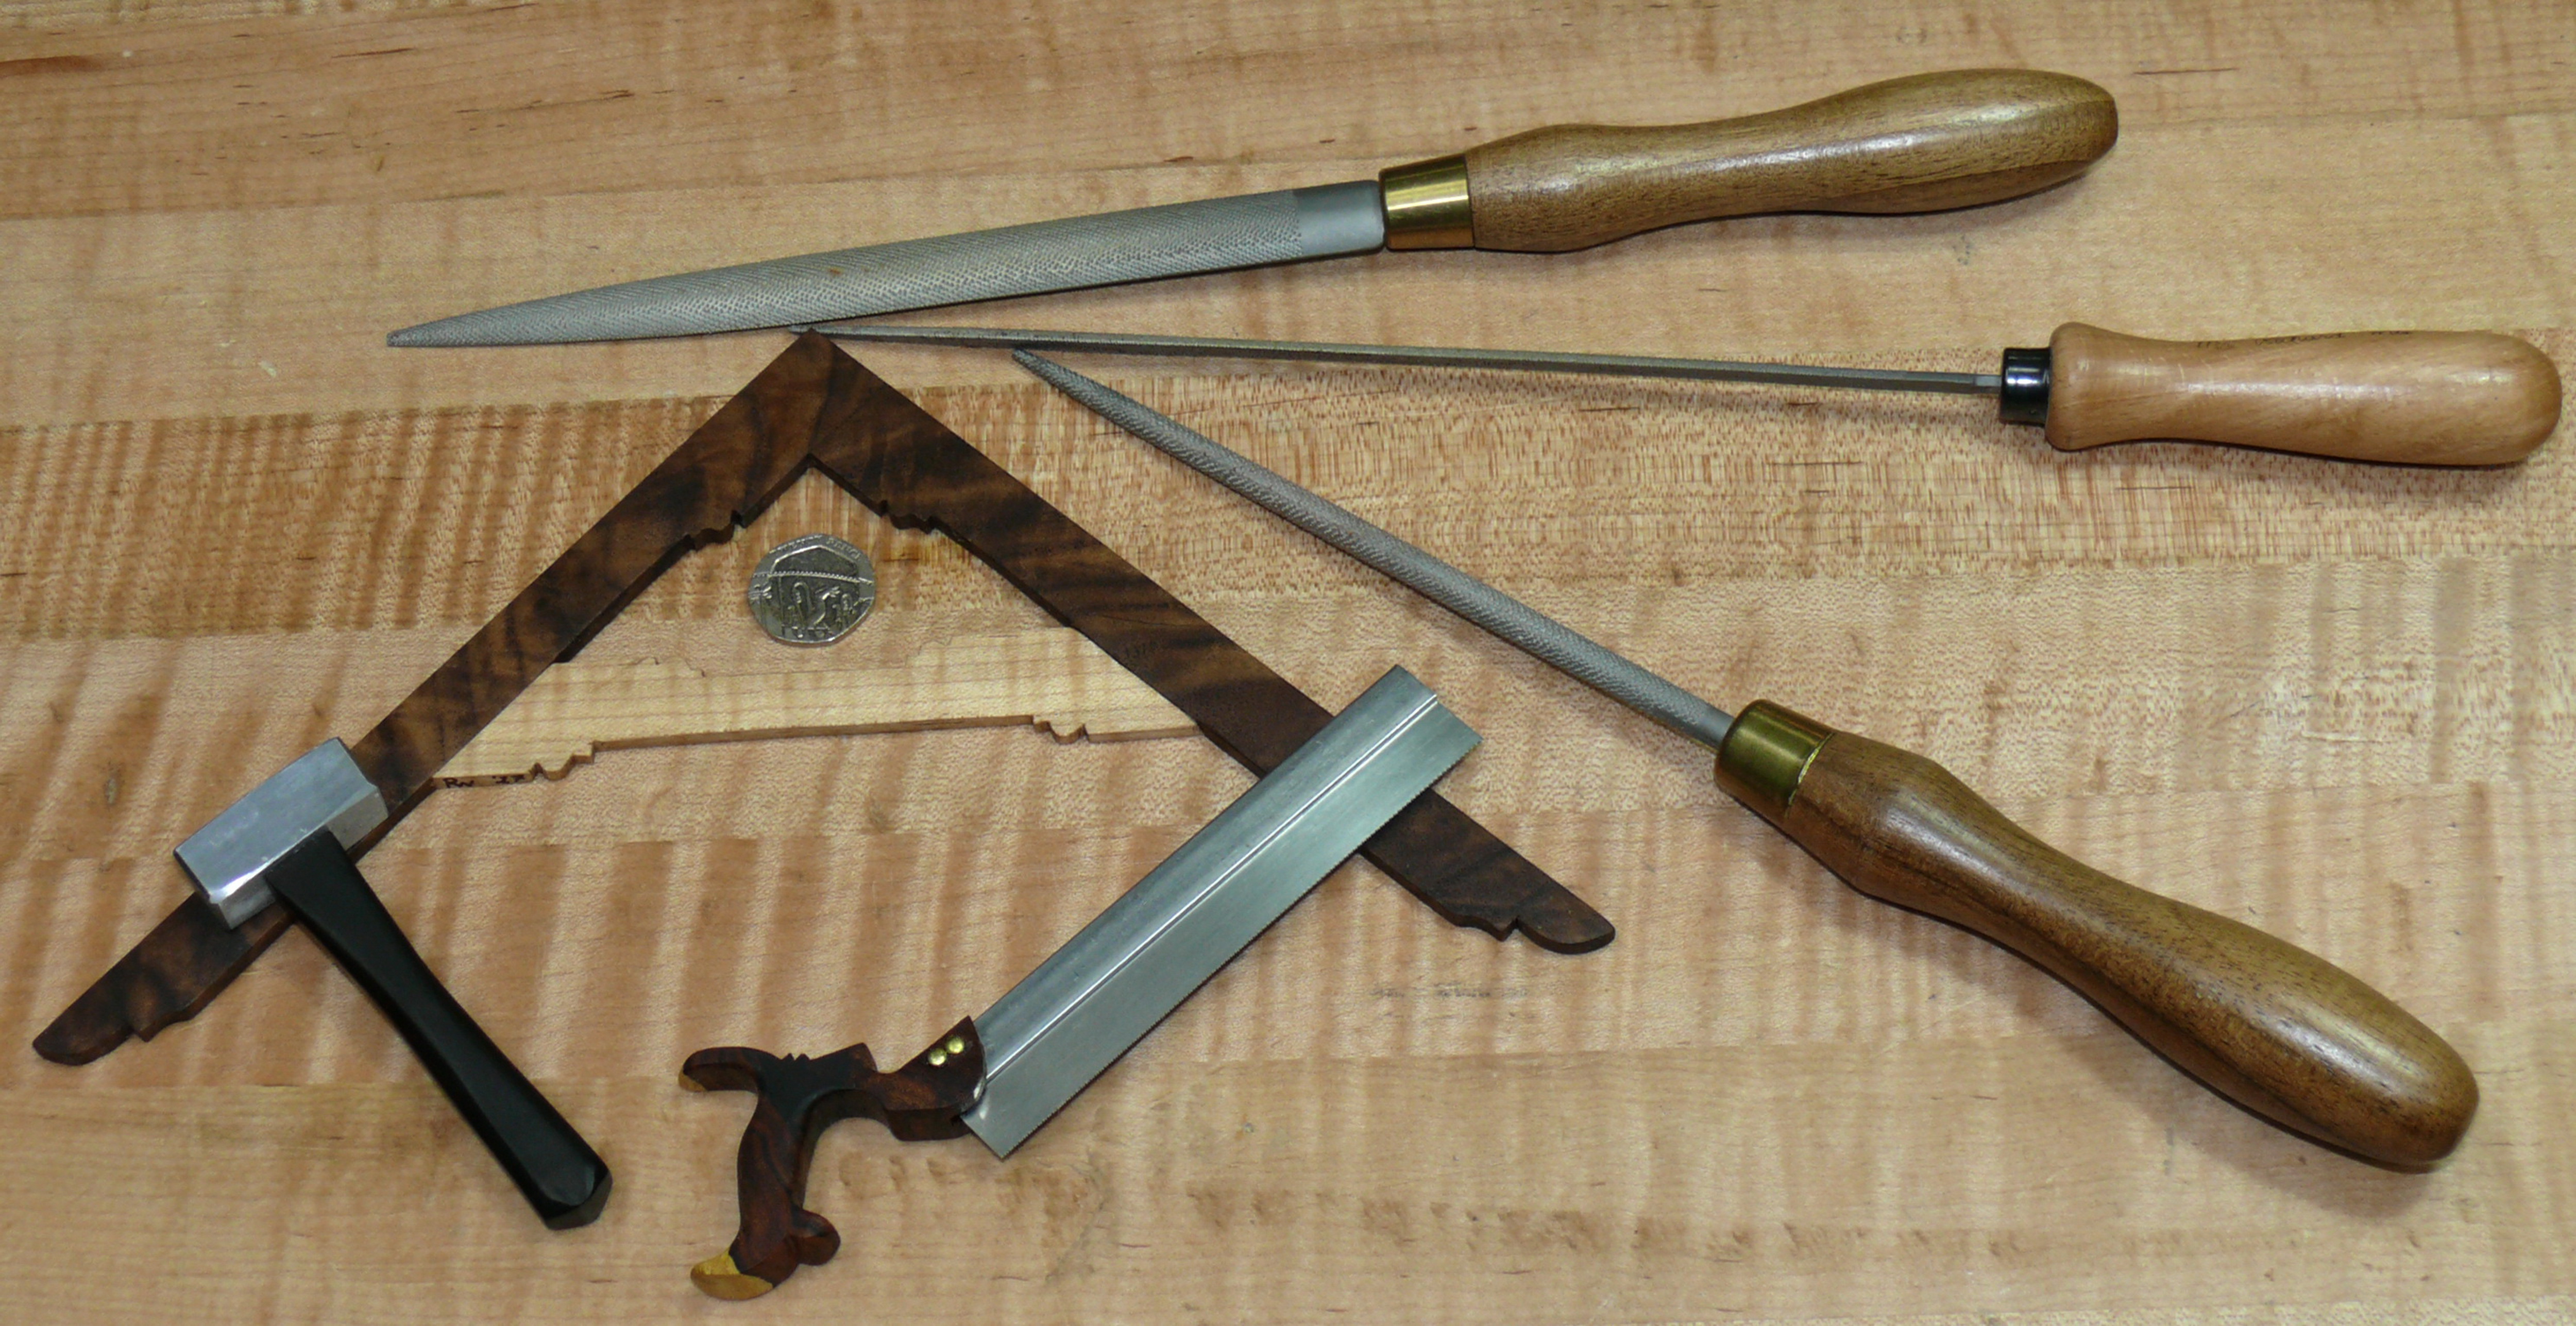
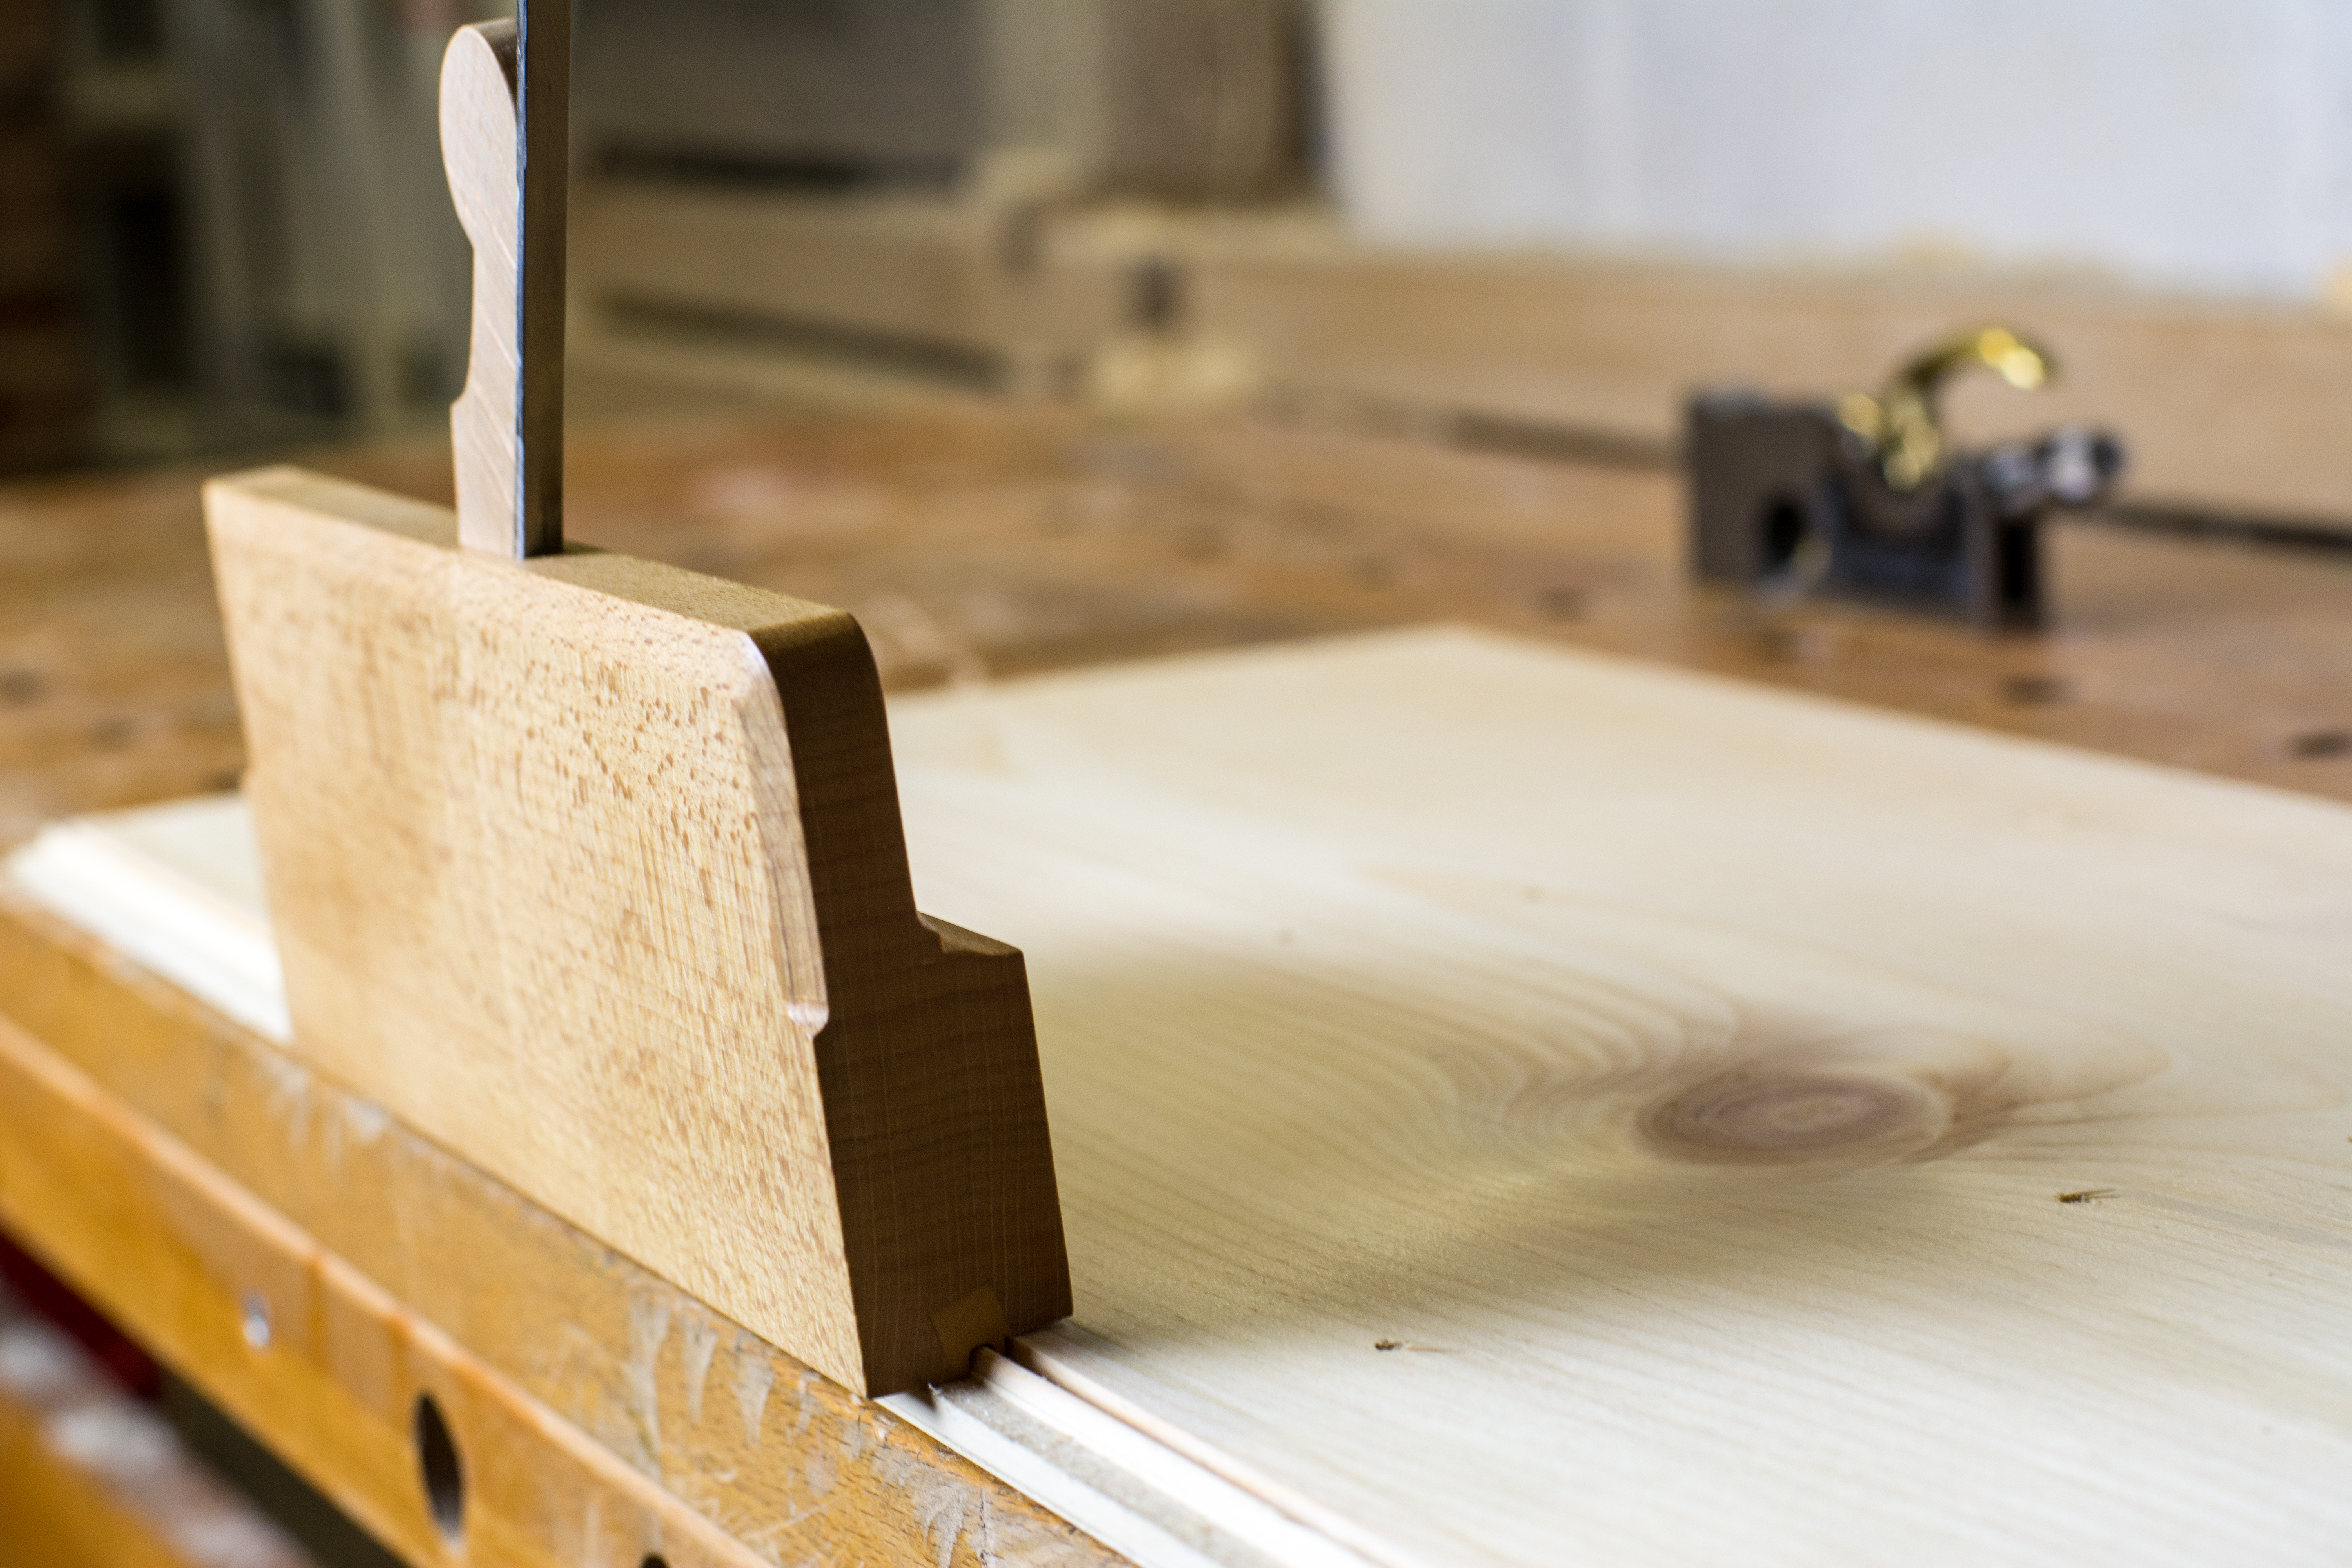
Rat tail and modeller’s rasps used to shape a miniature layout square

Properly cared for, high-quality hand-stitched rasps will provide many years of service and can open-up a whole new world of curves, flowing transitions, and precise fine-tuning of joints.

A Welsh Stick Chair for the Apprentice

In the course of researching for The Life and Work of John Brown, I’ve had the privilege to examine a wide variety of Welsh stick chairs including examples by John Brown and Chris Williams, as well as a variety of historic chairs held in the collection of the St Fagans National Museum of History (including the chair used for the cover image of John’s Welsh Stick Chair book). The chairs I’ve looked at in person have then been supplemented by those photographed in Richard Bebb’s comprehensive survey of Welsh vernacular furniture. I’ve looked at a few Welsh stick chairs now.

IMG_9323

The Apprentice sitting on the chair my grandfather made for me some 32 years ago.

Vernacular forms are rarely homogenous – regional tastes vary, together with the timber available to the makers, not to mention the skill levels of the makers themselves. There may even be technological changes which impact construction methods over time. And all of this goes double for a chair making tradition that spans hundreds of years. The historic examples Chris Williams and I have examined have demonstrated a range of techniques and styles, emphasising that the Welsh stick chair tradition was vibrant and constantly changing. Some of those early chairs have lodged themselves at the back of my mind for some time – an itch demanding to be scratched. Scratching that itch requires further research, both in terms of closer examination of some of the chairs (as well as other contemporaneous examples), and building them at my workbench. This is a long term project, and I’ll writing about the research and building the chairs as I dig deeper into it.

IMG_9553

A 90 second sketch of the Apprentice’s stick chair. Hopefully the comb won’t be as wonky on the finished piece!

One of the chairs that caught my eye was a dainty child-sized stick chair from the late eighteenth century, held in the collection at St Fagans. This five-stick chair had an unusual trapezoid shaped seat and three tapered legs, topped by a very gently curved comb. I’ve spent months trying to shake this chair out of my head, and finally had to accept that the only way to do so would be to built it. A plan began to form. When I was three or four, my grandfather built me a desk and chair set. This set, which remains to this day at my parents’ house, was a constant feature of my childhood and I spent countless hours sitting at the desk drawing and playing. With the Apprentice’s birthday on the horizon later this summer, I got to talking to Dr Moss about the stick chair rattling around my head, and about my memories of the desk and chair I’d had as a child. We agreed that an excellent birthday present for the Apprentice would be her own stick chair to go in the reading corner of our lounge, next to my Chesterfield arm chair. The Apprentice adores books and reading, so this seemed like a natural gift. Hopefully in years to come it will mean as much to her as the chair and desk my grandfather built means to me.

IMG_9545

This large oak board is left over from the Policeman’s Boot Bench, and will provide the seat, sicks and comb of the Apprentice’s stick chair

With the very kind help of one of the furniture conservators at St Fagans, I now have a detailed set of dimensions for this chair, in addition to the notes and photographs I took during my last field trip. This weekend I marked the conclusion of another trip round the sun, and the focus for the bank holiday is on family celebrations and a much needed get-away with Dr Moss. But no birthday would be complete without a brief moment of workshop time, and so last night I broke down the stock for the Apprentice’s stick chair. Rummaging through my scraps pile located a large piece of oak left over from the Policeman’s Boot Bench which will provide the seat, comb and sticks. Further digging found some oak thick enough for the three legs. A few minutes on the saw benches with my Disston D8 and Skelton Panel Saw was all it took to harvest the components, which I will leave to acclimatise for a week or so while I finish up the campaign stools. Once the campaign stools are wrapped up I will build the Apprentice her stick chair in time for her birthday. This should be a fun build!

IMG_9546

This part of the process never gets old – my 1900 era Disston D8 and the staked saw benches.

On monster dovetails, and embracing the fear

IMG_8438

Setting the depth of cut with blue tape and a small combination square

The staked work table build is pretty straight forward, and on the whole very enjoyable. I mean, if you can’t enjoy octagonalisation that means you’re already dead inside, right? But the one stage of the build which has given me the fear is cutting the sockets for the dovetailed battens. Although the task itself is not that complicated, it really is a one shot deal, with very little opportunity to remedy any errors. The sockets need to match the profile of the battens, and a tight fit is necessary to restrain any seasonal movement of the top. Because the sockets run the full width of the top, any gaps at the front of the table will be extremely noticeable. It is probably no surprise that the opportunity to ruin the top was something that loomed large in my mind when I stepped up to the bench to start cutting.

IMG_8429

My off-hand keeps the saw cutting against the side of the batten

When cutting the sockets you use the battens to guide the saw, and providing you make the cuts with care, this method should ensure that the socket matches the profile of the battens. I had originally made the battens over length by a couple of inches, and I decided to leave them at this length when cutting the first wall of each socket as this would provide a greater surface area for the saw to register against. As the front end of each batten was square, I was able to clamb the battens in place flush with the front edge of the table top, making sure that they were parallel to the ends of the top. I decided to cut the innermost edge of the sockets first, although there is no real difference in which side you cut first – the main thing is to be consistent as this helps to avoid mistakes.

IMG_8445

When the blue tape hits the surface of the table, stop cutting

As I’ve written about before, I have a (ahem) healthy nest of saws. I spent some time considering which saw would be most appropriate for these cuts, and decided to go with the Roubo Beast Master by Bad Axe Tool Works. Although my Beast Master is filled rip (and this is a crosscut operation), it had a number of significan attributes which I wanted for cutting the sockets (and not just because Mark promises it cures baldness). The robust saw plate meant that the saw would be able to withstand being pushed across 24″ of hard maple without suffering undue strain, and would hug the batten so as to cut the right slope angle. Finally, the 5″ depth of plate under the saw back means that the handle would not foul on the batten, as would happen with a shallower saw.

IMG_8490

The Beast Master leaves a crisp kerf


So, with my saw selected and the battens clamped in place, it was time to be brave and start slicing up the table top I’d spent previous weeks preparing. When making the cut, my off-hand pressed the saw plate into the batten just above the toothline, while I pushed the saw forward with the open palm of my on-hand in order to avoid tilting the saw or twisting it away from the batten, only wrapping my fingers around the handle to pull the saw back for the next stroke. Once the kerf was established, the saw cut down to depth smoothly and rapidly, and there was minimal chipping out on the exist side of the cut despite using a rip saw (all of the cuts were made from the front edge of the table towards the rear edge so that any chipping out would be on the back edge). I marked the depth of cut on the saw plate with blue painter’s tape, and once the tape hit the surface of the table I stopped cutting. The Beast Master left a crisp and clean kerf across the table.


IMG_8480

Trimming the battens to length

Because the battens are angled, determining the location of the second side of the socket takes a bit of lateral thinking, and Chris covers this very clearly in the book. I cut the battens to length using a 16″ hybrid filed Bad Axe tenon saw, and used the offcuts to mark off the second side of each socket, allowing for the set of the Beast Master. The process for the second cut was the very much the same as the first, following which I put the battens aside while I cleaned out the waste. I hogged out the majority of the waste with a 3/4″ chisel and mallet, working from both ends into the middle of the table to avoid spelching. Once I was close to the bottom of the saw kerfs, I switched to a large router plane to clean up the bottom of the socket.

IMG_8454

A chisel and mallet makes short work of cleasring out the socket

With the sockets cleaned up, it was time for the moment of truth, and I fitted the battens using a 1lb lump hammer to drive them in. The fit was good and tight without being too much of a squeeze, and with no real gaps at the front edges, which is exactly what I was looking for. As a final step, I took two fine shavings from the middle of each side of both battens, just to ease the fit a little bit (but without reducing the efficacy of the batten).

IMG_8475

Test fitting the batten.

The Policeman’s Boot Bench… part 15

After seven months hard work, the Boot Bench is finished and safely swaddled in blankets awaiting collection by the client. And while that would make for quite a pithy blog post, it does miss out the final stage of the build process, so let’s rewind a little.

IMG_6604

One finished boot bench – no filter necessary on timber this pretty.

At the end of my last blog post the wide faces of the Boot Bench had been cleaned up and given the first coat of shellac. Next I turned my attention to the front, which is mainly made up of the thin edges of shelves and casework. The process for cleaning up these edges was very much the same as for the main elements of the casework – removing as little material possible with my No.3 smoothing plane to remove the last traces of glue and stray fibres, to reveal clean surfaces and crisp joinery. Because I was working relatively narrow edges (1″ wide for the carcase, and 3/4″ wide for each of the shelves) the cabinet scraper was not appropriate for this work, as there can be a risk of rounding over the corners. Instead, the little L-N No.102 came in handy to clean-up a few areas where my smoothing plane could not reach. For planing the dado joint (where the grain of the sides is running at 90 degrees to the grain of the shelf), skewing the smoothing plane 45 degrees into the cut helped to plane the shelves and sides without any tear-out on either surface.

IMG_6545

Creating a gentle roundover on the top edge of each shelf with the spokeshave

I then gently rounded over the top edge of each shelf using a spokeshave, with three or four passes at 45 degrees to the edge of the shelf, and then three passes either side to blend in the new facet. A gentle round over like this should help to protect the edge from chipping out if the soles of shoes catch when being removed. Originally I had planned to use a scratch stock to bead the front edge of each shelf, but having spent some time looking at the Boot Bench as a whole I decided that four extra beads would (no matter how fun) be too much, particularly as the client prefers understated pieces.

There was a small knot on the front of the bottom most shelf, and instead of filling this with black tinted epoxy (as I had done for the internal knots) which would have drawn the eye to the knot, I mixed up a filler using shellac and oak sawdust, which filled the crack while blending into the timber. Once the filler had dried I brushed on the first coat of shellac to the front of the Boot Bench, and left to dry.

IMG_6547

Introducing a 2lb lump hammer to something you’ve been building for 7 months? Not terrifying at all, why do you ask?

The final touch, before applying the second coat of shellac, was to apply my maker’s mark. The stamp works best in end grain, and I selected the end of a tail, at the back left corner of the top. Although an exciting milestone in any project, it is also a little terrifying to start hammering the product of many months work with a 2lb lump hammer. Fortunately this is one of the instances where a heavier hammer provides more finesse. Instead of pounding away at the stamp to leave a deep mark (which would be necessary with a lighter hammer), the weight of the lump hammer did all of the work, leaving a crisp impression in the hard oak end grain with minimal effort and no risk of damage to the piece. This is a subtle touch – it is there for people to discover, but is still discreet (1″ wide) enough not to dominate the piece.

IMG_6627

The maker’s mark after a coat of shellac and dab of black wax

I then gently wiped down the shellac with 400 grit paper, just to remove the highspots and leave a smooth texture, before brushing on a second coat to all external surfaces. Having left the second coat to dry and harden over several days, I then returned to wax the external surfaces. Black wax is an easy finish to apply, providing you use thin coats – there is a risk of putting too much on which can be hard to buff out, and results in a blotchy finish. I wiped the wax on sparing with a lint free cloth, only adding more once I had worked the wax deep into the open grain – my aim was to enhance the grain not obscure it. Once the wax had dried I then buffed it out thoroughly with a clean cloth.

IMG_6597

When the wax was buffed out, I sat in front of the Boot Bench for 30 minutes or so, in silence, just taking in the form and detail of the piece. Every project is a labour of love, if it wasn’t then there would be precious little reason to build anything. But this build has been a hugely important process – the first piece of furniture I’ve designed from scratch, and my first paying furniture commission. Building something for someone else is always a huge responsibility (not to mention a privilege). I’m proud of this piece, and hope the client will enjoy it.

Swimming into Focus – The John Brown Book

img_3988

I spent yesterday in Hay-On-Wye for the first of many field trips for the John Brown book. Picturesque Hay, home to the renowned book festival and equally renowned (if somewhat more niche) spoon festival, is halfway between the village where Chris Williams’ (my co-author for the project) lives and Birmingham, so it makes for an ideal location to meet up and formulate a plan of attack for the book.

And we are very much at the planning stage currently. To do this book properly (which is the only way we want to do it) is going to be a huge endeavour,with a significant number of interviews with John’s friends, family, and woodworkers, not to mention field trips to locations significant either to John or to Welsh Stick Chairs, and of course the chairmaking itself. With so many moving parts, having a clear road map from here to publication is the best way to stay focused on the key threads, and to make sure that nothing important falls by the wayside.

So over the past couple of months we have been engaged in a constant dialogue about what we want to achieve, and how best to go about it. Who to interview, what to make, where to visit, and what to read. Yesterday was the culmination of that dialogue, not to mention an excellent opportunity to spend a day talking woodwork with someone who has spent over 30 years working in the woodcrafts, and who personally worked with John for many years.

Slowly The Life & Work of John Brown is swimming into focus. What has become very clear over the time that Chris Williams and I have been discussing the book, and even more so yesterday, is that is for both of us it is important that we honour and embody John’s ethos as a chairmaker. What that means is that the chairmaking section of the book must make building these fascinating chairs accessible to everyone, with an emphasis on the minimal use of specialist tools or hard to find timber. That is not only consistent with John’s Anarchist Woodworker philosophy, but will also hopefully contribute to the longevity of a relatively uncommon chair form.

Which is all very well and good, but how will we achieve this? Well, one of the ideas currently being kicked around is starting the chairmaking section not at the workbench, but at the timber yard. Timber selection can be a truly daunting experience for the inexperienced woodworker – I still remember my first trip to the timberyard, and how the choice was almost crippling. Many woodwork books tend to assume that you already have material and are standing at your workbench ready to start work, but to our minds the timberyard is where every build starts, and to start anywhere else would be omitting a key step. By having Chris Williams guide the reader through timber selection for a Stick Chair, we hope to remove one of the greatest hurdles to chairmaking.

We are also considering of building chairs with pieced and carved armbows rather than steam bent bows. While English and American Windsor chair making traditions use steam bending for arm bows, Chris Williams tells me that due to the social function of Stick Chairs there was little or no tradition of steam bending in Wales. The pieced arm bow is very striking, and relies on techniques and tools common to most woodworkers. So accessible and historically accurate. Perfect.

These snapshots are really exciting to us, and I hope that by sharing some of the processes behind the book we can encourage more dialogue about John and his chairs, and also share our enthusiasm for the project. This is just the start of the process, and plenty is likely to change as we continue to work. But as the framework for the book starts to fall into place I can see how it will hang together, and what an important contribution this could be. There’s a lot of hard work to do over the next couple of years, and I hope that you will all join us for the ride.

The Cabinet Maker at School… Part 7

IMG_3478

The great thing about milk paint is how ghastly the first coat looks…

A lot of woodworkers get indimidated by applying finish to projects, which I think is partly due to the endless variety of finishing products and solutions available, but also the vast quantity of voodoo waiting to ensnare happless forum readers. Finishing does not have to be complicated or difficult, and in fact the biggest single factor in my experience for a successful finish is having plenty of patience while things dry. But there again I’m a simple soul and have always liked simple finishes. So for the School Box there really was no choice but to go with the historically accurate milk paint, oil and wax combination.

IMG_3510

The third coat looked much better!

Salem Red by the Old Fashioned Milk Paint Co looked like a good colour, and I mixed up a batch using Chris’ instructions from the Anarchist’s Design Book. The first coat of milk paint is always a test of faith as it tends to look streaky and washed out, but with each subsequent coat things improved significantly, and by the third coat I’d built up a good density of colour while still allowing the dovetails to be visibile on close inspection. I left the School Box to dry out thoroughly for 48 hours before applying a thin coat of Liberon Boiled Linseed oil. After 30 minutes waiting time I wiped away the excess oil with a clean rag and left for 24 hours to dry before applying the wax.

IMG_3515

Boiled Linseed oil ragged on top of the milk paint provides an additional layer of protection.

So far so straight forward, but this is where things got unexpectedly… messy. When I came back 24 hours later the oil seemed to be good and dry, with no residue left on the surface of the paint. So I gently ragged on some home made soft wax (a bee’s wax, turpentine and white spirit recipe I learned from Derek Jones). But when buffing out the wax I ended up with a very streaky finish with patches of entirely matt finish in the middle of areas which remained sticky to the touch no matter how much I buffed them out. Definitely not ideal. I quickly eliminated the wax as the culprit because I had an entirely even low sheen on the interior of the School Box using the same batch of wax with no stickiness. Some reading around and talking to folk much more knowledgeable than I identified the oil as being to blame. Possibly I had a bad can which lacked sufficient driers, possibly I have angered the finishing gods in some way. Who knows.

IMG_3519

The lid, showing the streaks and matt patches from the less than successful oil/wax combination.

The good news was that cleaning up the box was pretty straight forward. I put it to one side for an evening or so in order to chill out, and then using a judicious volume of white spirit and several rags removed the oil and wax gunk and left to dry over night (again). I confess I had been a little worried that the white spirit and vigorous rubbing would remove some of the milk paint, but the underlying finish was left intact and very little pigment came away during my late night cleaning session. In fact, the grain and joinery were showing through the paint slightly better, even though the colour density was still good, so I decided to skip the oil and go straight to the wax. This time the wax covered nicely and built up a gentle sheen that really suits the box – a high gloss finish would have looked entirely out of place on this project.

IMG_3574

The finished School Box

I then fitted the hardware and stood back to admire what has been a really instructive and fun project. I’ll post a full beauty parade of the School Box next time around.

Introducing the Apprentice

In an interruption to our usual programming, Dr Moss and I are very pleased to introduce my new workshop apprentice.

IMG_1212

Grace Bronte Binnie, born at 10:29am on 13 August 2015 weighing 7lbs 14oz. Despite arriving 11 days early, both mother and baby are doing well, and I am totally besotted. Grace has already received many lovely gifts, and the picture above shows her with a rare hammer made by C Hammond of Philadelphia, sent by a very generous friend so that Grace could shatter glass ceilings and enjoy workshop time with her Dad.

IMG_1222

And now a return to our usual content…