Cut from a similar cloth

IMG_2504

If you follow me on Instagram you’ll know that I’ve just had the second limited run of Over the Wireless t-shirts printed, featuring the excellent designs Tom prepared earlier this year. The first run of shirts (printed in February) sold out within days, but demand was high enough to justify a second run. Most of this second run has also now sold, but I do have a limited selection of t-shirts left in sizes M, L, XL and XXL with a choice of British Racing Green or Cardinal Red. Price is £15 for the shirt, plus shipping (£3 to the UK or £5 to the US, other parts of the world on request).

If you, dear reader, would like an Over the Wireless tee of your very own drop me an email at kieran@overthewireless.com. Unless demand is high enough for a third run these may be the last OtW tees we have printed, so get them before they are gone!

The Cabinet Maker at School… part 1

_DPP2342

Pre-industrial techniques, modern media

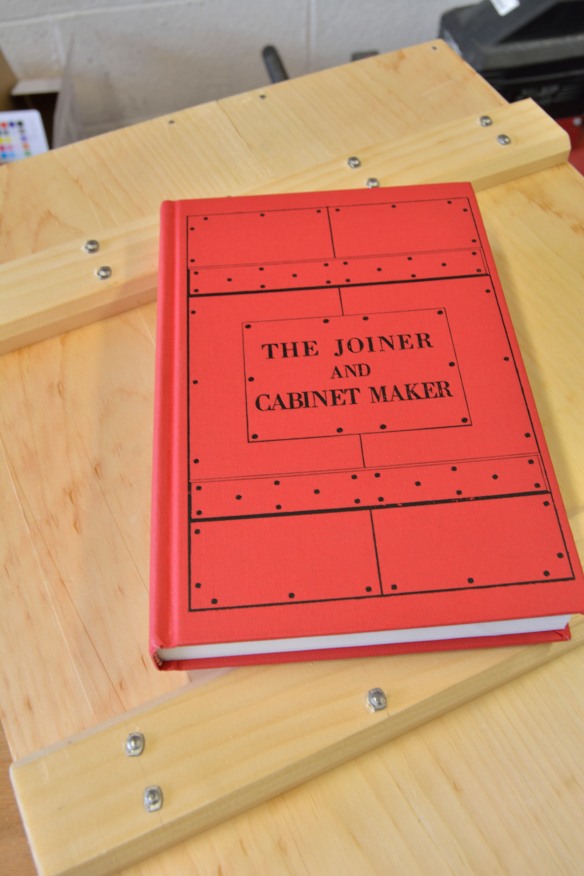
Of the three projects in The Joiner and Cabinet Maker, the School Box is undoubtedly the most iconic. A 15″ wide, 9 1/2″ tall dovetailed pine chest, the School Box reinforces the fundamental skills of accurate layout, breaking down rough stock, and efficient use of material, taught in the Packing Box project, and further builds on these key skills with the introduction of more complex joinery (dovetails, and mitred trim), installing locks and hinges, and an expanded tool list. All of these learning points are captured within what is a very manageable casework project for inexperienced woodworkers.

_DPP2344

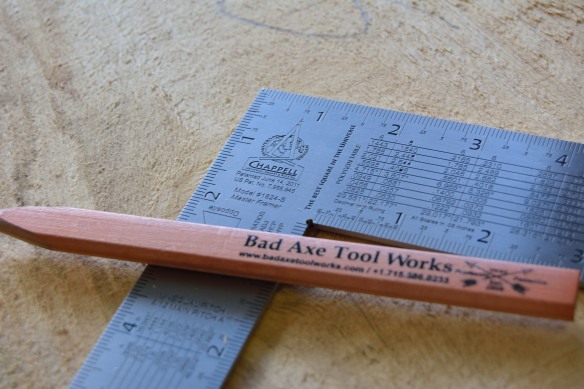
When breaking down rough lumber my layout tools of choice are my Chappell timber framer’s square and a good carpenter’s pencil. And the chalk line from the Packing Box, of course!

If I’m being honest, the School Box is the project from The Joiner and Cabinet Maker that I’ve been looking forward to the most. Today I broke down the stock for the front, back and sides, and prepared it ready for cutting the dovetails later in the week. The 12’3″ long board I used for the Packing Box was pretty much at the limit of what is comfortable to work with in my current ‘shop; my bench is 6’ long and the full length of the ‘shop is 17′ end to end. So working with 8’ long stock for the School Box was much more comfortable. For this project I’m using a 12″ wide, 1″ thick, board of Canadian Yellow Pine for the casework, and a smaller board of the same material for the moulding and trim. I started by laying out the six pieces needed to build the basic casework, making sure that there were no knots at the edge of any of the pieces, and particularly on edges which would be dovetailed. Once I was satisfied with the layout of the six pieces I marked them out using a Chappell timber framer’s square and carpenters pencil, before cutting slightly oversized with my Bad Axe 20″ mitre-box saw. Although this saw is specifically designed to work with a mitre box, I’ve found that it also excells as a general purpose large cross cut saw – the teeth filing is fine enough to leave a good clean cut behind, and the extra length means that wide boards can be trimmed to length without any difficulty.

_DPP2345

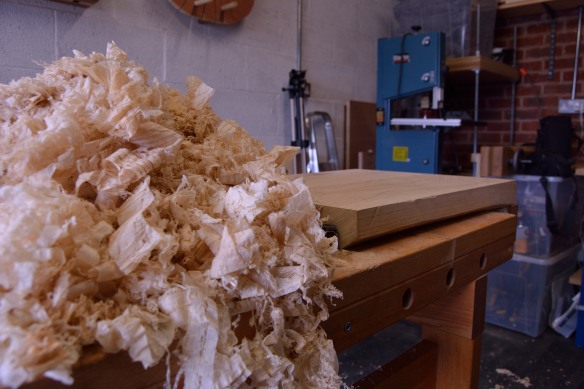
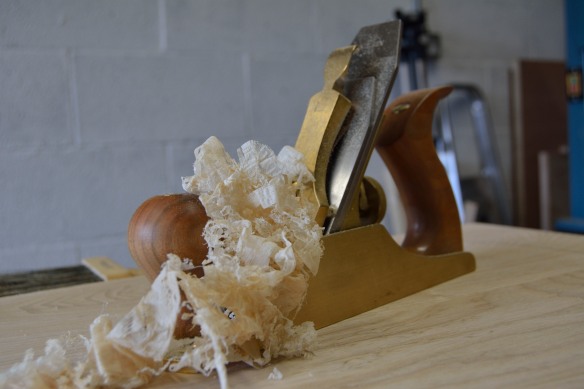
Thick shavings with a distinctive feathery edge indicate a traversing cut

One of the key lessons in the School Box is processing rough stock with hand planes. I took Thomas’ lead and used a cambered iron in my Clifton No.5 jack plane to surface each of the boards in turn, using a traversing cut to quickly remove material while retaining a good surface finish. There isn’t much opportunity to traverse when building acoustic guitars – the stock is just too thin to start with. But for furniture this technique is wonderful, and has been in use for many centuries – Jospeh Moxon described traversing in The Art of Joinery (the first English language text on woodwork, originally published in the early Seventeenth Century). Essentially, when traversing with a plane, you work diagonally across the grain of the board, rather than along the length of the board with the grain. This technique results in far less tear-out than when working against the grain, and takes advantage of timber’s inherant weakness across the grain. The result is that thick shavings can be removed without much effort, resulting in a decent surface finish. Like Thomas, I worked the face of each board with my jack plane until it was flat and clean, and finished up with my jointer (a Lie-Nielsen No.8) set to a fine cut, traversing at first and then working with the grain for the final few passes.

Having surfaced each board I then marked the final thickness on each edge with a marking gauge and thicknessed them from the rough side, leaving them just 1/16″ over thickness in case there is any cupping before I come to cut the dovetails. The Joiner and Cabinet Maker does not make too much of a fuss about the thickness of the timber for the School Box. My stock was 1″ thick to start with, but that thickness feels disproportionate for casework that is only 15″ wide, so I decided to bring it down to 3/4″ thick. This is where a traversing cut comes into its own as removing 1/4″ material, even in pine, is a significant amount to remove by hand. The traversing cut allows for a much thicker shaving that would ordinarily be taken if working longitudinally, which reduces the amount of work required – always work smarter, not harder.

I quickly fell into a rhythm of moving around the workpiece, traversing from each corner in turn as the waste material rapidly fell away and my plane approached the line.

_DPP2349

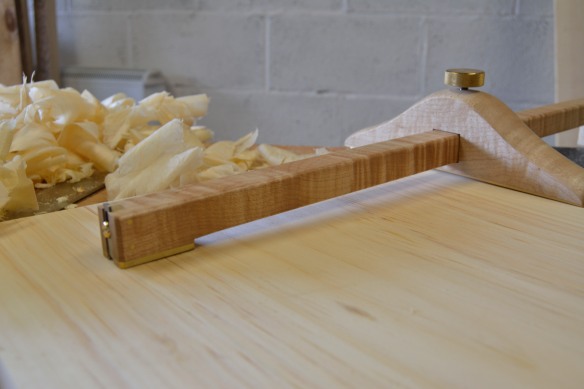
For marking dimensions on wide boards, the Hamilton Tools panel gauge cannot be beaten.

The final element of preparation was to trim the boards to final dimension, and to shoot the ends square. The boards are now stickered on my bench, and once they have sat for a day or so I will bring them down to final thickness and then dovetail the carcase. I have deliberately left the bottom and lid in the rough so as to avoid them warping – I will process the stock needed for these components once the rest of the box is assembled and cleaned up.

Don’t forget to clench

_DPP2329

I first read The Joiner & Cabinet Maker back in 2013 right as I started to broaden my focus from lutherie to include furniture making – it was the second publication by Lost Art Press I read (the first being The Anarchist’s Tool Chest). The book made an immediate impact with me; appealing to my love of history as much as that of woodwork. But more than just being a historical curio, as I digested the pages of The Joiner & Cabinet Maker it became apparent that it would offer a properly structured way to learn furniture building techniques using a minimal, hand-work focused, tool kit. Which was pretty much exactly what I was looking for at the time. I think in my very first post on this blog I mentioned an intention to work my way through the projects in The Joiner & Cabinet Maker – 2014 was going to be the year I finally got stuck into those projects, but then the Anarchist’s Tool Chest class happened (which was an incredible way to start my furniture building journey) and The Joiner & Cabinet Maker got pushed to the back of the queue again.

_DPP2313

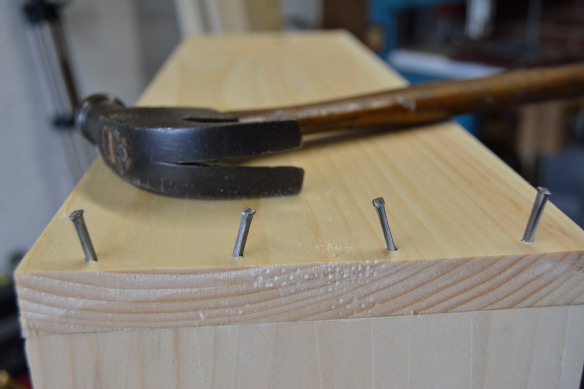
Clinching 6d nails to secure the battens to the packing box bottom

For those who haven’t read The Joiner & Cabinet Maker (and really, you should) a bit of background is probably in order. First published in 1839, The Joiner & Cabinet Maker takes the form of a story following the apprenticeship of a young lad called Thomas. We see Thomas at the very start of his apprenticeship when he builds a packing box for a customer to transport books, at the middle of his apprenticeship when he builds a dovetailed “School Box”, and finally at the end of his apprenticeship when he builds a chest of drawers. Although the identity of the author is unknown, they were clearly either a woodworker or very familiar with woodwork as the projects and tools are described with great detail and clarity. And by setting out in detail three projects of increasingly complexity, the book offers an opportunity to develop solid hand-tool techniques (and build up a tool kit) in a systematic fashion.

_DPP2316

That’s a nicely clinched bottom.

And this week, I finally tired of pushing these projects down my to do list. A trip to the timber yard yielded up the 12’3″ long board I needed to make the packing box, so I reached for my hammer and stash of cut nails and set to it. I won’t give a blow-by-blow account of how I approached this build – I followed how Thomas carried out the same project in the text, and if you want to see how Thomas builds the box then you should buy the book. What I do want to reflect on however is the very valuable learning points offered by what is on the face of it a very simple build.

The packing box is held together purely with nails – no fancy joinery, no glue. Just nails. And it is rock solid. As this is the very first proper piece of work Thomas carries out as an apprentice, it is built with a very small tool kit of ruler, chalkline, jack plane, smoothing plane, square, marking gauge, rip and cross cut saws, hammer, and either a brad awl or drill. That’s it. Oh, and Thomas only has 5 hours to build the packing box. Five hours to go from rough board to finished casework makes this one of the swiftest furniture projects I’ve come across.

_DPP2322

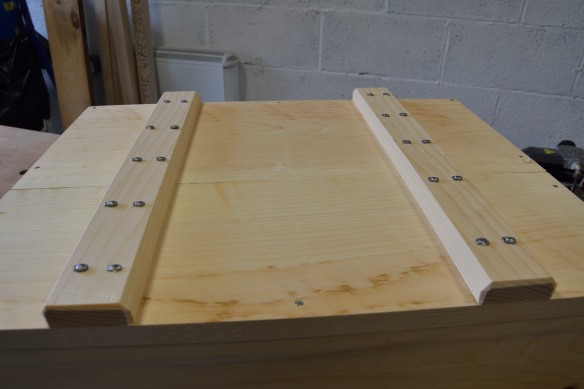
A two-piece top held together by nailed on battens. Simple, but rock solid.

So what exactly are the learning points?

Efficient use of material – Thomas (and I with him) started with a 12′ 3″ board 9″ wide and had to produce a packing box that met the customer’s measurements. The size of the box means that there is very little waste left from the board so efficient use of material, and some clever lay out to harvest the long battens, is essential.

Efficient working – five hours is not long when you have to build a complete box. I confess that I didn’t manage to complete the build in the alloted five hours (Thomas is evidently a far better apprentice than me), but that’s ok. Completing the build in five hours or less is a matter of working extremely efficiently, and not rushing. Slow is smooth and smooth is fast. Clive never tires of telling me this, and he is bang on the money.

You can make plenty with a very simple tool kit – Thomas doesn’t have a shooting board, so he has to square material using nothing but a bench vice and smoothing plane, with careful measurement. This sounds like a hard way to work, but actually it works really well and doesn’t take too long. Yes a shooting board makes things easier (especially on wide boards) but I don’t feel wedded to one anymore – I know I can do this freehand without too much bother if I need to.

Hand tool fundamentals – this project is all about accurate layout, sawing to the line (which reduces the amount of time you then spend planing stock to dimension), jointing long edges for the two-piece bottom and lid, squaring up stock, and most excitingly, nail clinching.

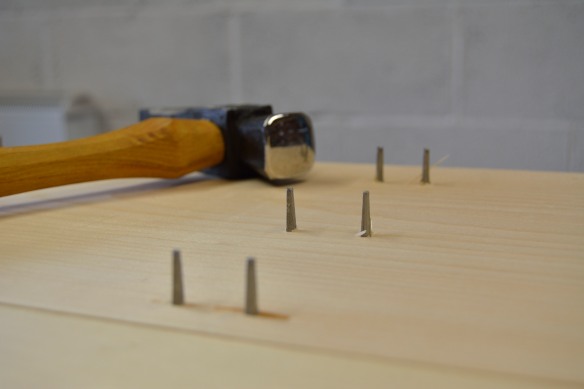
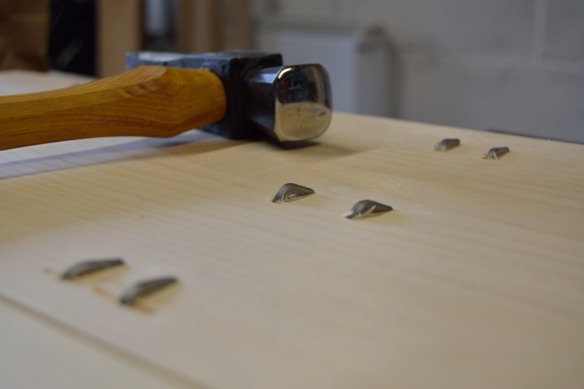
Nail clinching – This was my first time nail clinching, and one of the reasons I wanted to give this project a try. Effectively, clinching (or clenching) involves using a nail as a staple – driving it through two pieces of wood before encouraging the end to then turn back into the workpiece. This increases the holding power significantly, and is the reason why the packing box is so solid. The stock I was using for this project was closer to 3/4″ thick rather than the 1/2″ thick timber used by Thomas, and so the one change I made was in using 6d nails rather than the shorter (and thinner) 4d nails Thomas uses. The thicker 6d nails were slightly more work to clinch, but once I’d got the hang of encouraging them to change direction (aided by my new hammer from Black Bear Forge) they worked a treat. The trick, if you can call it that, for nail clinching is to find the right diameter pilot hold for the cut nails. I used tapered drill bits, and took my time experimenting with different sized pilot holes in some scrap to make sure that the nails would not split the workpiece.

_DPP2328

The butt joints on the end of the packing box are square and tight – which goes to show that a shooting board is a luxury not a necessity.

I have another 12’3″ pine board sitting in the workshop, which I intend to turn into another packing box to reinforce the techniques and learning points this project has offered. And after that, it’ll be onto the second project from The Joiner & Cabinet Maker – the School Box.

Stay tuned for more.

_DPP2310

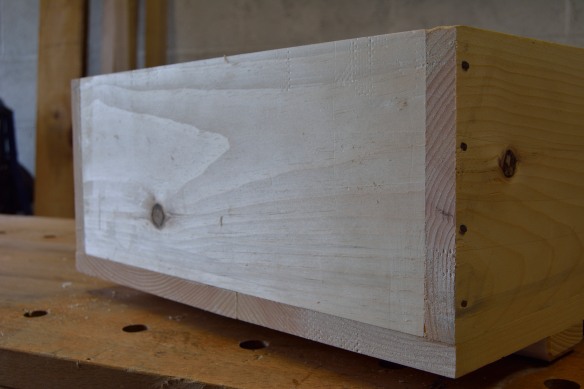
I used 4d fine finish nails to join the sides to the ends. Angling the nails as shown increases the holding power.

Suedehead – now with 100% less Morrissey

_DPP2208

There is a lot of activity in the workshop at the moment, which meant that somehow I forgot to post the last part of my series on the Moxon vise build. With the woodwork completed, and the last coat of Danish oil applied to the oak, the final stage of the Moxon build was to fit a layer of suede to the inner face of the front jaw. This suede greatly increases the clamping force of the vise, and also protects the work. Benchcrafted kindly provide as part of their kit a piece of suede large enough to cover one jaw of the vise, although if you want to have both jaws lined you’ll have to find a second piece of suede large enough yourself.

_DPP2180

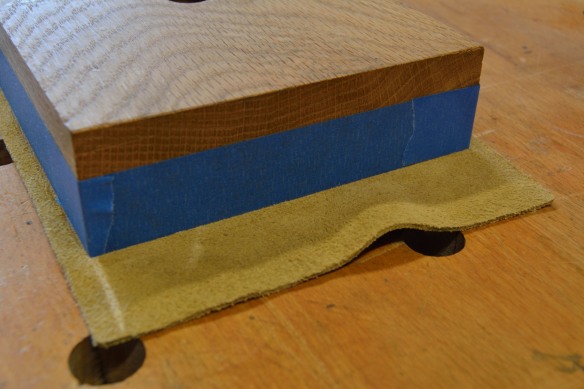
As the suede was a little oversized for my jaws, I first taped round the edge of the front jaw with blue painter’s tape to protect the finished surface from any glue squeeze out. I also lined the holes for the threaded rod with blue painter’s tape to stop them becoming gummed up with glue. I then coated the inner face of the jaw with a thin and even layer of Titebond, making sure that there were no dry spots. Although you can buy upholsterer’s leather glue, I found that the Titebond held the suede in place without any bleedthrough.

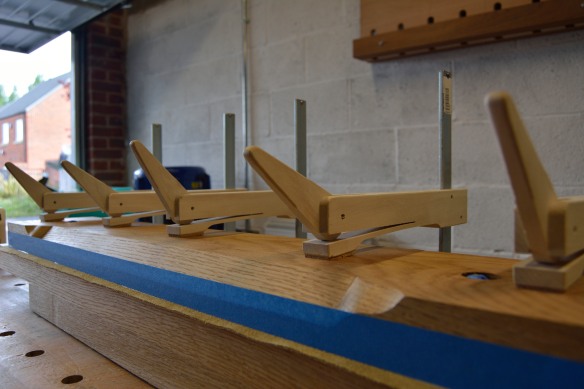
To fit the suede in place I treated it very much like I would wall paper (clearly all the decorating last year paid off) – folding the suede loosely in from the edges, and placing the middle section of material on the gluing surface. I then gently unfolded the suede a little at a time, smoothing it out with palm pressure but being sure not to over stretch the material. Once I had ensured that there were no wrinkles or bubbles, I placed the rear jaw on top of the suede as a clamping caul, and pressed the whole assembly together with wooden clamps.

_DPP2212

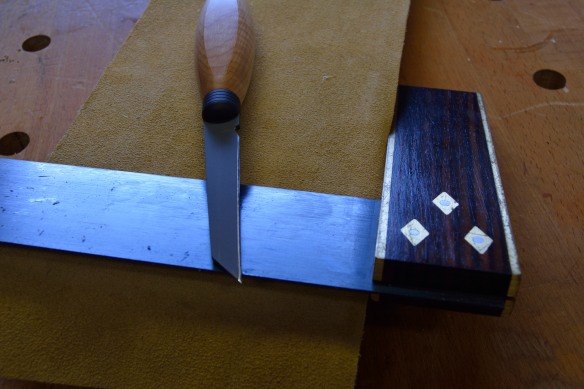
Once the glue had cured, I trimmed the excess back with my Bluespruce Joiner’s knife and a rule (for the long edges) or (tri-square for the ends). Several light passes with the knife was enough to cut through the suede and leave a clean edge, and I cut away small squares of material to allow the threaded rods to pass through. Then it was a case of re-assembling the vise and checking everything still worked smoothly. The heavy cast iron wheels glide along the acme rods, and work is held in a rock solid grip.

_DPP2219

The suede is flush to the edge of the jaw, as can be seen here.

I have a couple of dovetailing projects coming up this summer, and am looking forward to pressing the vise into use.

Dancing About Architecture… Part 2

The following is adapted from an article I wrote for Furniture & Cabinet Making (published in issue 245).
DSC_0216

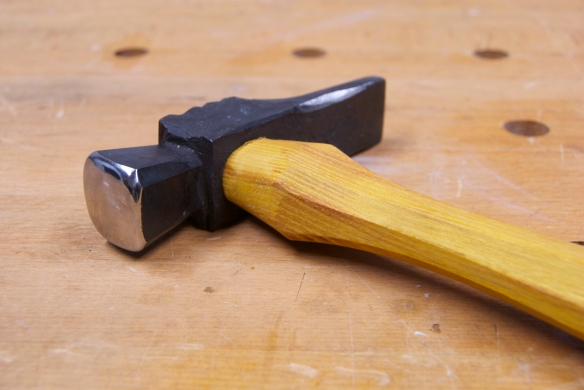
My 16oz Lancashire pattern cross pein hammer by Black Bear Forge

Are you still dancing about architecture, or have you found a new way to describe and explain what you do in the workshop? Previously I questioned whether we as craftspeople need to develop a new vocabulary to clearly communicate what we make and how we make it, to spouses, prospective customers, and non-woodworkers, without relying on the crutch of technical and esoteric terminology.

It’s… Hammer Time?

Almost immediately upon hitting “send” for my last article I found myself in the unusual position of being a customer who needed to describe a specific set of requirements in a field where I didn’t have any technical knowledge and didn’t necessarily understand the specific terminology. This experience, while initially uncomfortable, forced me to think more carefully about the communication problems I’d just written about, and to formulate strategies to overcome them.

Because, you see, I wanted to commission a custom hammer from blacksmith John Switzer of Black Bear Forge. John’s work is nothing short of incredible, and this would be my third order from him, albeit the first custom tool I’ve asked him to make me. And because I know very little about blacksmithing, I had to find a way to set out very clearly what it was I wanted from this hammer – I knew that John would be able to make me exactly what I asked for, but the challenge was giving him a precise and clear brief so that what he made was really what I wanted. This commission would live or die by how well I (the customer) was able to communicate what I wanted. It also got me thinking about hammers far more than is strictly healthy.
DSC_0226

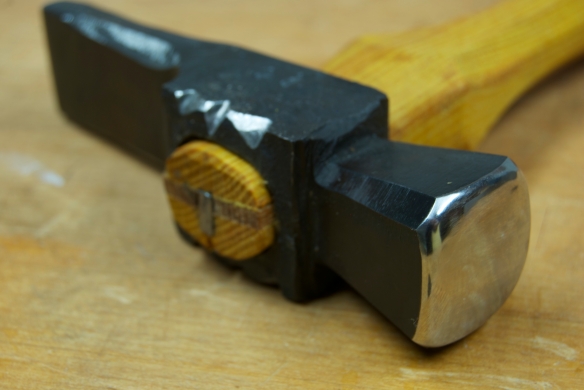
Octagonal head, with domed face and a balance of decorative file work with “raw” metal still showing the signs of forging. Just what I asked for.

Funnelling the “Ill Communication”

When it came to describing my ideal hammer to John I took the approach of using an information funnel, describing each aspect of the tool starting with the most generic description and then drilling down into more of the detail, in order to build a comprehensive picture of the hammer. The generic description was for a 16oz hammer for driving 4d and 6d cut nails in casework. More specifically, I specified a Lancashire pattern cross-pein head, with a domed face to avoid “Frenching” the work, and for the head to be of square or octagonal cross section. I also wanted some decorative file work on the head, but balanced against plenty of unfinished metal so that I could see traces of where John had forged and worked the head. The handle was to be octagonal, as I prefer the handles of striking tools to tell me by touch which way the head is facing.

This gave a clear description of every aspect of the hammer for which I had specific ideas or requirements and I also provided an engraving from a pattern book showing the Lancashire pattern head I was looking for.
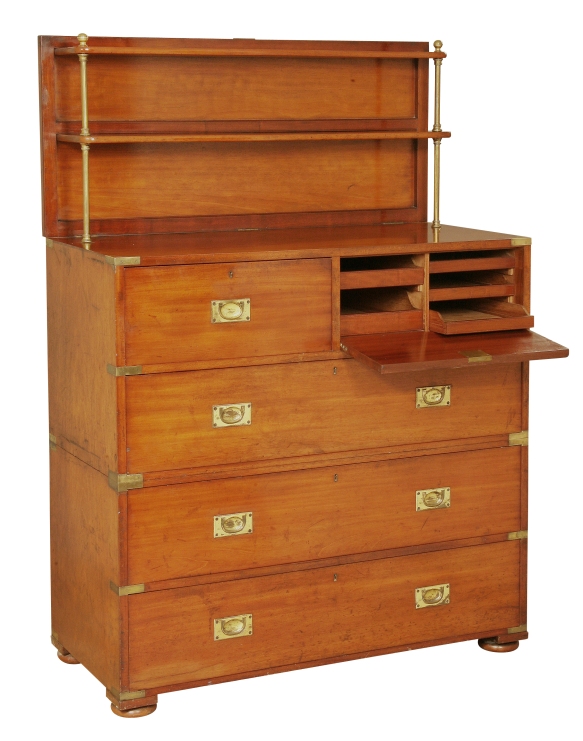
5aGilhamCoD

Campaign furniture is one of my favourite forms. But how would you describe this secretary using the information funnel?

So the information funnel works for hammers, but would I use it to discuss my lutherie with potential customers and lay people? Absolutely, and providing care is taken to avoid technical language, this is actually a very practical way of describing an object, or process, to a layperson. It sounds obvious really, but I think that we all have a tendency to reach straight for the technical terms (because who doesn’t like to wax lyrical about houndstooth dovetails, or the resultant angles of chair legs?). So, my three-point plan for communicating about what I do in the workshop now looks something like this:

  • use the information funnel;
  • avoid technical language; and
  • use pictures to discuss and illustrate the more subjective, and ephemeral, aspects of furniture or guitars.

For conversations about lutherie, where possible I also use recordings which feature similar guitar tones to the one being discussed: either common touchstones that I share with the other party to the conversation, or where we don’t have similar music tastes encouraging them to recommend records that demonstrate the sort of sound they are describing.

Taking a dive into the metaphor pool

Although very practical, the information funnel is not the only way to avoid technical language when describing furniture. I recently discussed this problem with Raney Nelson of Daed Toolworks, who explained to me that he prefers to use a more impressionistic method of communication which he describes as “finding the metaphor pool that you both share, and then drawing on it”. So how does the metaphor pool work as a means of communicating about furniture?
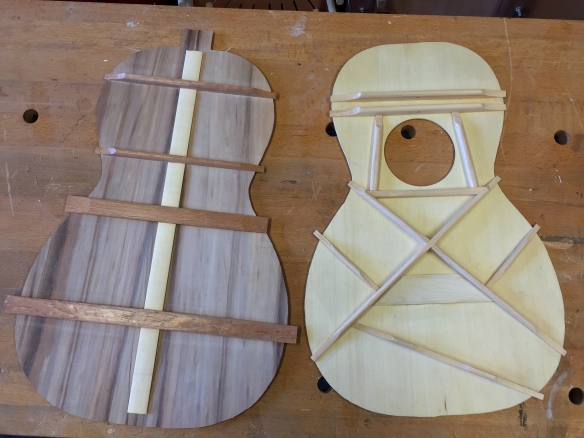
IMG_2212

This parlour guitar is braced to have a “clear, balanced, and warm” sound. But how would you use the metaphor pool to describe the same sound?

Raney suggested that the metaphor pool can work on several levels. With someone “whose background I don’t know, I can tell them that the desk (for instance) I have in mind is rough and ready, but with a sense of understatement, not in-your-face. And in the drawer details it incorporates some touches of really high refinement if you really pay attention, but without distracting from the strong utilitarianism and confidence of the piece in its function”. So far, so straightforward; but what I find really interesting about the metaphor pool method is the deeper level, where there is a common language pertaining to a field other than furniture or woodwork. Raney sets out his approach for this level of the metaphor pool where when he’s working “with someone who I know well and has a deep modern music lexicon, I can tell them it’s like Jon Spencer doing early Elvis Costello covers, but with a Jim Morrison affect. Much more Joey Ramone than Iggy, but also showing real refinement at the edges.  Sort of a Norah Jones in the details, but without losing that Bonnie Raitt authenticity”.

So while the metaphor pool does nothing to describing the actual appearance of furniture, it can be a very effective method for describing the feel of a piece and its more ephemeral qualities, which Raney believes then predisposes the other person to understanding what he has made. So the hammer I ordered from Black Bear Forge would be precise where necessary, but still raw – like Jeff Buckley dueting with Janice Joplin, an honest working tool but with some real flair, like Bruce Springsteen covering Prince.
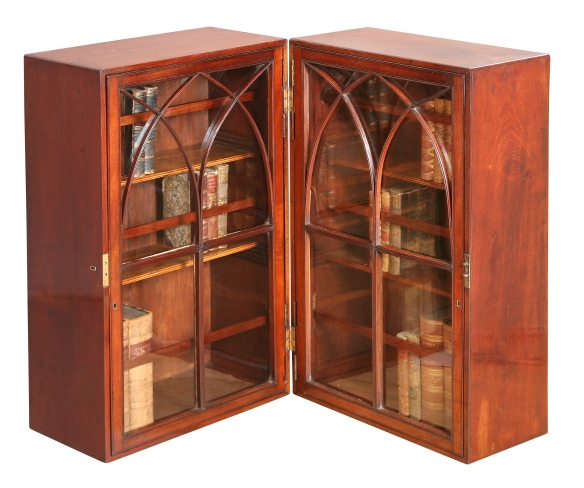
32GeorgianBookCabinet

Would you use the information funnel or the metaphor pool to describe this campaign bookcase?

No need for a “Communication Breakdown”

Although the development of a universal, non-technical, vocabulary seems farfetched, I still believe that it is an ideal towards which we should strive. Without such a vocabulary, it is incumbent upon us as craftspeople to take the initiative when describing our crafts to non-woodworkers. There are many techniques for achieving clearer communication, from the precise information funnel to the more impressionistic metaphor pool, and the benefits of improved communication are an increased understanding within conversations with non-woodworkers, and ultimately making the woodcrafts more accessible.

And the hammer itself? Well as predicted, John captured everything I had asked for, and delivered a hammer which far exceeded my expectations. The balance is perfect and the hammer drives 4d and 6d cut nails almost effortlessly, even through difficult hardwoods. The handle is comfortable and the octagonal faces give a clear indication of the direction in which the head is pointed. The contrast between the mirror polish on the face, the decorative file work, and the “raw” unfinished elements of the head make for a wonderfully tactile tool, which proudly displays the processes which made the head. My only dilemma is how long I wait until I order an 8oz version for driving smaller nails. John’s work comes highly recommended.
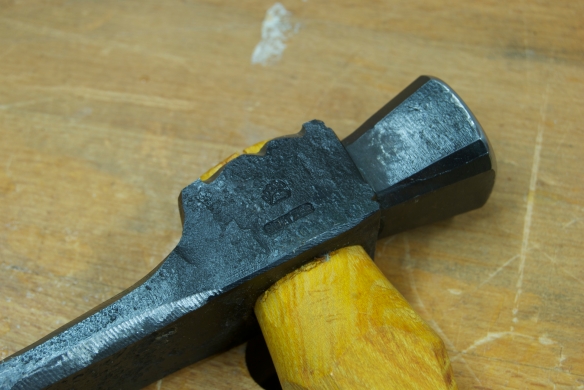
DSC_0236

The perfect balance of raw athenticity and decorative flair. Like Bruce Springsteen covering Prince?

Beneath the surface…

_DPP2274

For me one of the most exciting moments of woodwork is cleaning up timber to reveal the final surface – even when you have a good idea as what to expect wood can often find a way to surprise you with unexpect figure, colour, or interesting grain. Planing the swamp ash body for the Mysterycaster was no exception.

Once the glue had cured on the body joint I broke the timber out of the sash cramps and secured it between four bench dogs using my end vise. Whenever I worked a jointed panel I always plane the area around the joint first, to make sure that there are no unexpected problems and that the joint is solid. Even when I feel confident about a  joint, the grand reveal under a plane blade is an exciting moment tinged with tepidation – will I find unexpected horrors from the glue-up? Fortunately, working the joint on the front of the body with my low angle block plane revealed a good tight joint with no visible glue line or gaps – the only indication that the body is commprised of two pieces is the sudden change in grain pattern along the joint. The same was true of the joint line on the back of the timber, so all in all I’m satisfied with this joint.

_DPP2258_01

The front of the body, cleaned up and ready to be cut to shape.

Although I do give timber a final sand before finishing, I prefer to use the planed surface as far as possible, and so my focus in planing the front of the guitar was to flatten it and achieve a clean, and tear-out free, surface. Fortunately the front was reasonably flat, and so I skipped using a jack plane and went straight for the No.8 Jointer. Achieving as flat a front and back as possible for the guitar is important, so that they  will provide a consistent reference surface when radiusing the corners of the body later on in the build process. Setting the No.8 plane to an increasingly fine cut as I flattened the front of the guitar resulting in a gorgeous and clear surface. Using a jointer plane as a “super-smoother” isn’t practical in many instances, but just occasionally the extra work is justified.

_DPP2255

A near-mirror finish right off the plane, and wafer thin shaving.

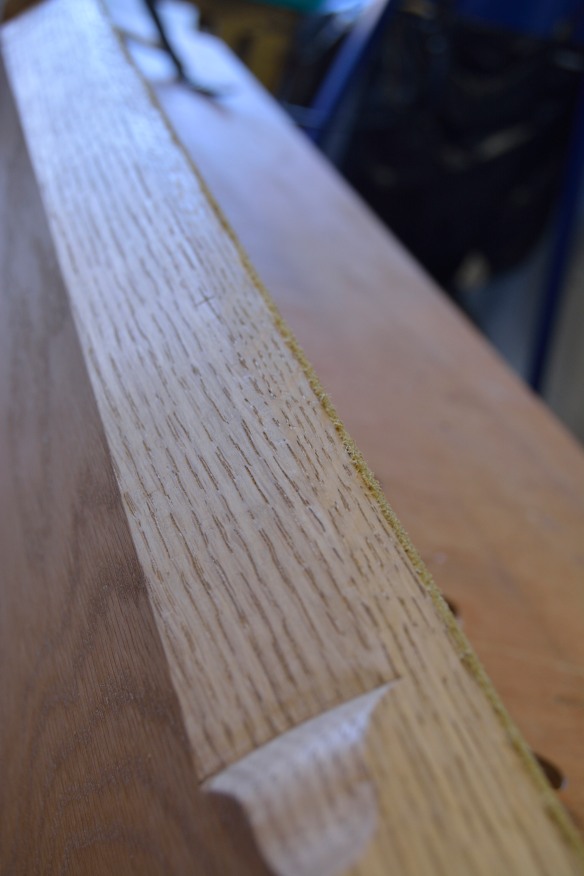
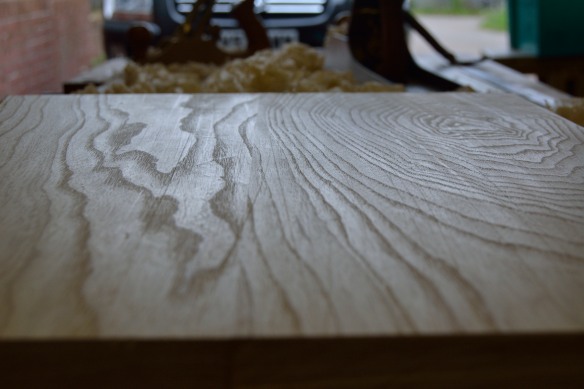
With the front flattened, I moved my attention to the back, and it was here that the swamp ash surprised me. I started by marking on three edges of the timber the thickness of the timber from the front using a marking gauge (the fourth edge was significantly bevelled on the front so I had no accurate datum line to work from). Again, as very little material was to be removed, and I wanted as flat a surface as possible, I reached straight for the No.8. Which worked beautfully on one half of the timber. However, on the other half, right where the lower bout of the guitar will dip into the belly curve, my plane uncovered some really striking rippled grain, of which there had been no indication before starting work. Even set to a very fine cut, my freshly sharpened No.8 tore out (not something which happens very often as this plane seems to ignore grain direction). My usual strategy to deal with tricky grain is to reach for a No.3 smoothing plane fitted with a mid pitch (55 degree) high angle frog. This cleaned up the difficult spots of grain, removing all tear-out easily, and then it was a simple matter of flattening the rest of the back to match.

_DPP2266

The Lie-Nielsen No.3 Smoother with high angle frog is my go-to choice for dealing with difficult grain.

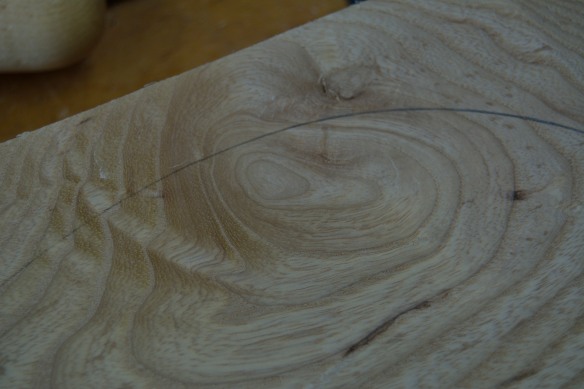
But man, that grain. That characterful and unexpected figure is a wonderful addition to the guitar – an element of visual interest which will look fantastic under a translucent butterscotch finish. For me Tele-type guitars are rugged workhorse instruments with gritty character – Keith Richards is said to have preferred Telecasters because he found the curve of the body to be perfect for hooking behind the heads of over-enthusiastic stage invaders! And I think the striking colour and swirl of the grain on the back of the guitar really emphasises this aspect of the guitar, without going as far as the bonkers knotty pine bodies some folk are currently using. So I am carefully positioning the layout of the body blank to retain as much of this figure as possible. Thank you, wonderful wood for this unexpected treat.

_DPP2275

Here is that inexpected ripple and characterful grain, which will look stunning under a translucent butterscotch blonde finish.

My Ritual

_DPP2246a

“…my blood moves, I feel alright, my ritual followed us to paradise…”
– “My Ritual“, The Folk Implosion

The following is something that has been nagging away at my hind brain for a while, and sometimes the only way to relieve an itch is to scratch it. This may be an unusual jumping off point to discuss woodwork, but stick with the history and theology, and hopefully all will become clear.

In what feels like a lifetime ago, but was really only twelve years, I was immersed in studying history, coming to the end of a Masters course and preparing a research proposal for a PhD (this was before the pragmatism of the law won out, but that is another story altogether). My focus was on the 16th century, specifically radical evangelical movements in England, north Germany and Holland – those theological experiences that took the work of Luther, Calvin and Zwingli as a starting point rather than a destination, and really ran with it to some rather unusual conclusions. What is interesting (to me, at least) about early radical evangelism is how distinct social movements were formed and justified through radical theology, enabled by Martin Luther’s conceptualisation of a “priesthood of all believers” which had far wider implications than he ever intended. Because if Holy Mother Church is removed as a mediator between the laity and the almighty, then the common folk become empowered to develop their own theology, and to ritualise their existence in ways other than the “social miracle” of Mass. Suddenly theology, and the formulation of ritual, is not the preserve of the clergy and university theologians. Instead shepherds, soap makers (that’s you, Sebastian Frank!), and other lowly folk can get in on the act. This leads to some interesting high theological frameworks, but more crucially, unique ritualisation of the life experiences of ordinary people.

This shouldn’t be a surprise – mankind have been creating ritual to understand and explain their existence since time immemorial. But it is nonetheless fascinating. But what, if anything, does this have to do with woodwork (and if you’re still reading, congratulations on persevering)? Well y’see, recently I have been reminded of my history studies as I’ve been thinking a lot about how I approach the workshop and prepare myself to work. I do my best work when my mind is entirely clear of distractions, instead of being harried by time pressures, my next article deadline, whether I paid my credit card bill, or the myriad other passing concerns of modern life. Simply put, my best work is done when the only thing on my mind is the woodwork operation I am doing at that precise moment. I’m sure the same is true of many woodworkers.

So what is the solution? Three hours spent in zen meditation before I step foot in the workshop would probably do it, but doesn’t sound particularly practical. And to be honest if I had three hours spare I’d rather spent them at my bench making wood shavings. Instead, there are simple rituals which signify the start of “workshop time“, and which (on the whole) switch off the white noise of everyday life.

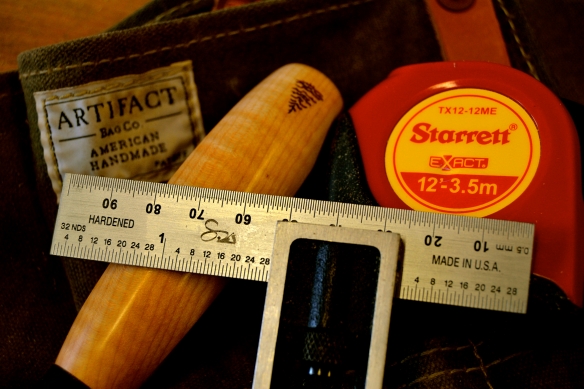
The very first thing I do, as soon as I step foot in the workshop, is to open my Anarchist’s Tool Chest – an act which exposes the tools of my craft (stop sniggering at the back) in readiness for work. I put on my ‘shop apron, into the pockets of which go my Starrett tape measure, Sterling Tool Works Double Square, and Blue Spruce Toolworks Sloyd knife. These tools are invaluable and constantly in use, so having them in my apron pocket makes for a far more efficient workflow as the number of trips to the tool chest at the end of my bench are greatly reduced. But it is more than that –  with these tools slipped into my pocket I can carry out any number of basic measuring, layout and marking tasks, which are really the fundamentals of any woodwork operation. The essential tools are now physically with me. So, with my apron round my neck I am ready to start work.

I’m sure I can’t be alone in having some small workshop rituals. At least, I hope I’m not (otherwise that would make me crazy, right?) And if you really want crazy then we could talk about the rituals I use for getting myself mentally prepared for martial arts tournaments, gradings, and significant training sessions. But we probably shouldn’t.  So what are your rituals, dear readers, how do you switch to “workshop mode”? Are there specific tools you put in your apron pockets, warm-up exercises at your bench for sawing straight, or albums you play as soon as you reach your shop?