The Policman’s Boot Bench… Part 3

The boot bench design uses a number of joinery techniques, which makes the sides quite a fun stage of the project. Through dovetails fix the top and sides together (tails on the sides, pins on the top), while the shelves are let into the sides by way of dados. Finally, the tongue and groove back boards are recessed into the sidesusing a stopped rabbet. Cutting the dovetails will wait until the top is prepared, as I don’t want to risk damaging the tails while working on the sides, but I decided to layout and cut the rest of the joinery for the sides as a short break from processing stock.

img_4690

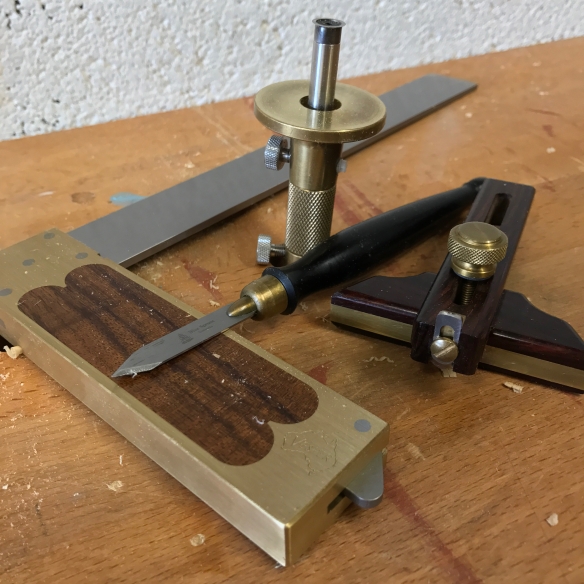
Precision tools for precision work – Vesper 10″ square, Blue Spruce making knife, and marking gauges by Glenn-Drake and Jeff Hamilton

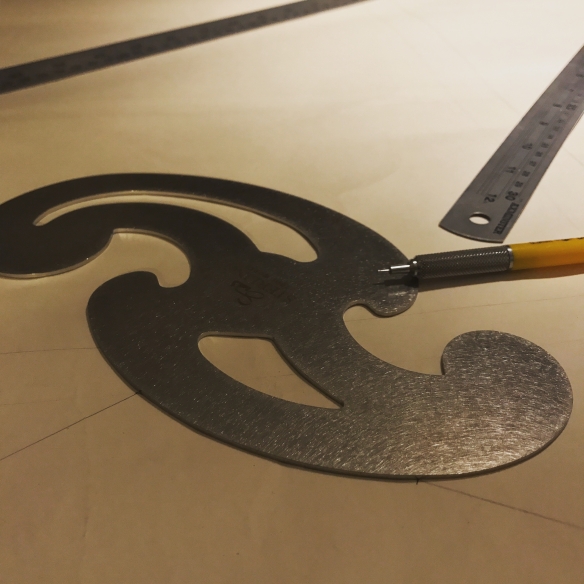
First I marked off the baseline for the dovetails, as this then gave me a datum line from which to measure the rest of the joinery. The shelves are 3/4″ thick, and let into 1/2″ deep dados. I have staggered the position of the shelves so that there is a distance of 5 1/4″ between the top two shelves (and between the top shelf and the baseline of the dovetails), and then 6 1/4″ between the third and fourth shelves. This spacing allows shoes to be placed on the top two shelves, and larger footware on the bottom two. The sides extend 3 1/4″ below the bottom of the fourth shelf, and will be carved into a cyma reversa foot detail. The stopped rabbet is 1/2″ by 1/4″ and extends from the dovetail baseline to the bottom edge of the lowest shelf.

With different dimensions needing to be marked off on different faces of the work I prefer to use multiple marking gauges, so that I can easily keep track of the measurements. All measurements were made on the reference edge of each side, extended across the workpiece using my Vesper 10″ square (which in my workshop is the final arbiter of squareness), and marked out using a Blue Spruce Toolworks small marking knife. I also coloured in the waste from each joint in pencil, just to avoid any confusion. Any time spent idiot proofing work is time well spent! To check that the joinery was correctly laid out I butted the reference edges of both sides together, and made sure that the layout lines matched for each joint (thanks to Charles Hayward for that tip!).

img_4706

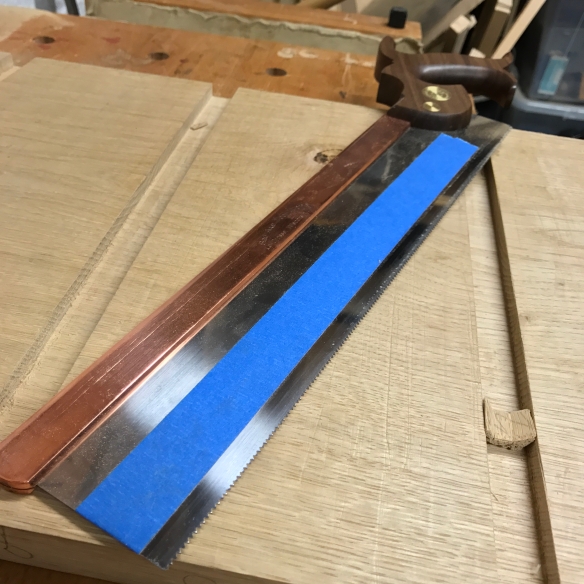
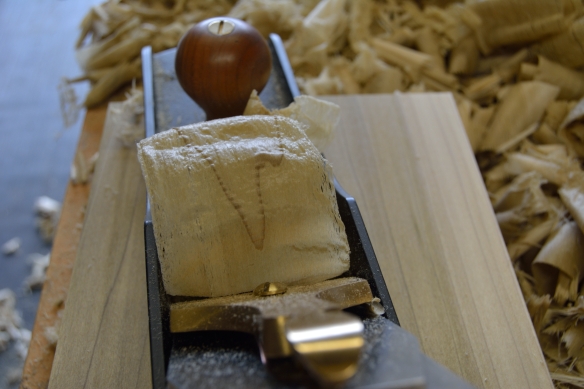
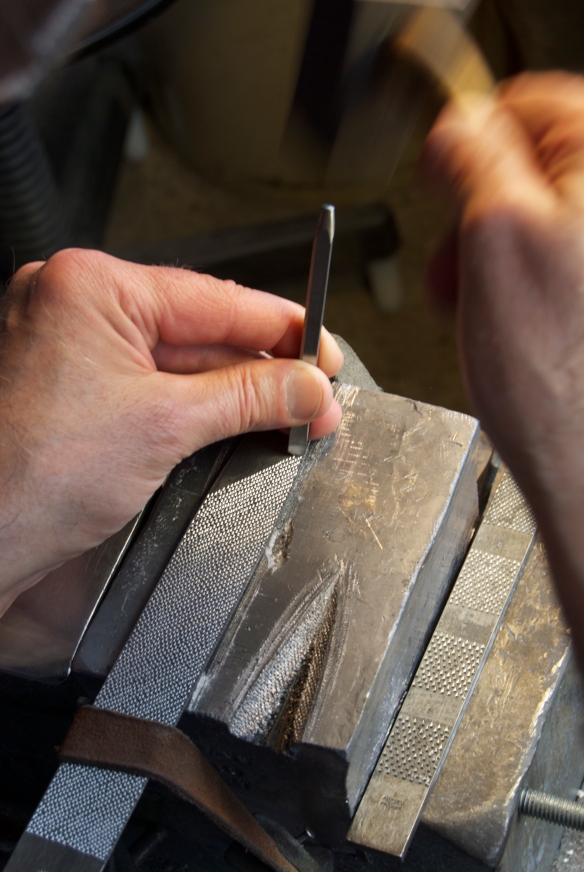
A high-tech depth stop

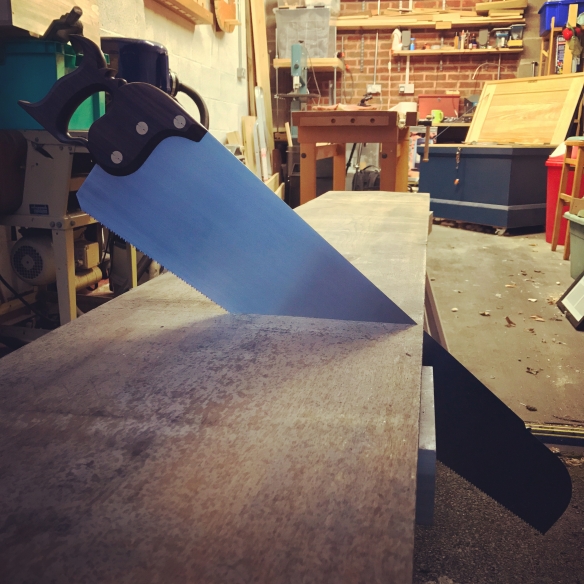
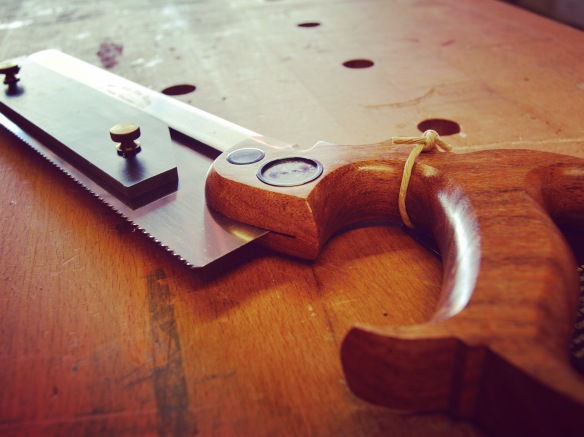
To cut the dados I deepend the knife lines with a broad (2″) butt chisel and mallet, and then pared a trench from the waste side down to the knife line – this trench guides the saw down the line and assists in maintaining a straight cut. It also ensures a nice clean surface for the joint. I cut a similar trench on the front edge of each dado down to the baseline. This project has been the first time I’ve used my new Bad Axe Bayonet in anger, and it really is the perfect crosscut saw for cutting joinery. To keep the saw in the cut initially I gently press a finger on the toe of the saw, which stops it jumping out of the trench. Once the kerf was established the Bayonet required no further assistance, and cut across the wide oak boards with ease. I’ll post a more detailed review soon. A piece of blue painter’s tape on the saw plate acted as a rudimentary depthstop (try as I might I couldn’t being myself to draw on the saw plate with a marker pen as Chris suggests in The Anarchist’s Design Book!).

_dpp3077

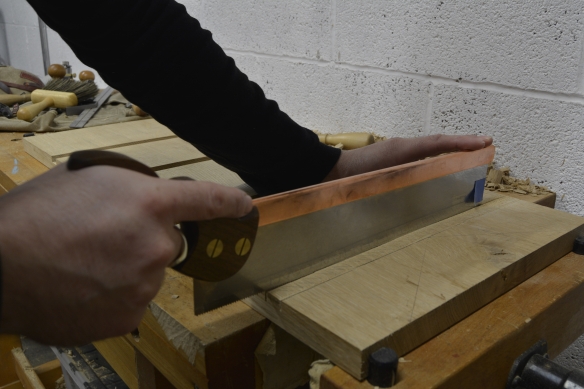
Cutting a dado – gentle pressure at the toe of the saw with your off-hand keeps the saw plate in the cut

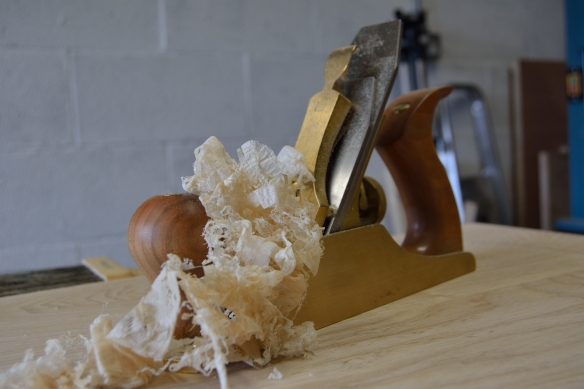
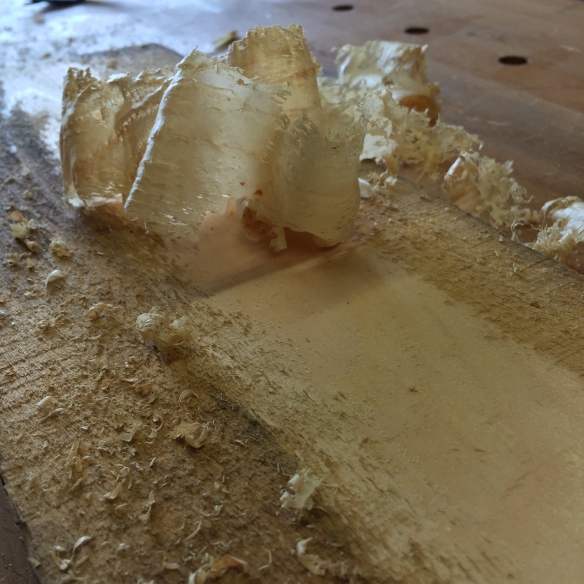
Once the shoulders of all four dadors were defined I knocked the waste out using a chisel and mallet – bevel up to hog out material quickly, and then bevel down as I got close to the base line. A couple of passes with the large router plane cleaned up the floor of the joint.

img_4714

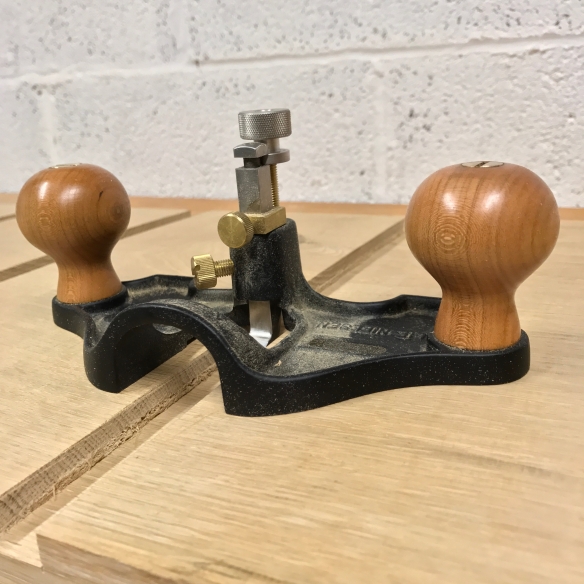
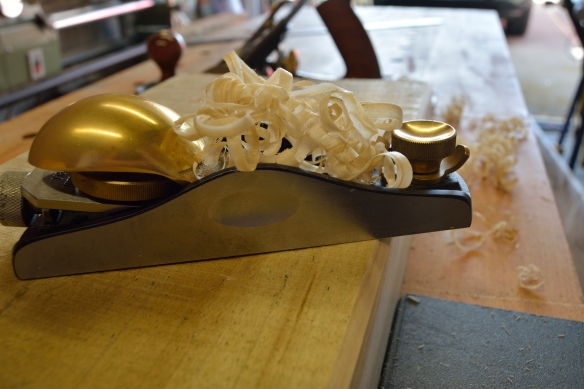
A large router plane is essential for cleaning up dado and rabbet joints

Once the dados were cut and cleaned I turned my attention to the stopped rabbet. Had a through rabbet been practical I would have reached for my skew rabbet plane and cut the joint in moments. However, a through rabbet would have resulted in a large gap through the dovetails, which is less than ideal. Instead, I made a series of deep relief cuts across the grain with a chisel, and before cleaning the bottom of the rabbet with the large router plane. Having already cut the dados to the rear edge of each side meant that the rabbet was effectively divided into a series of smaller sections, with access points at each end. This made cutting the rabbet easier, and this sequence of work is definitely beneficial.

img_4712

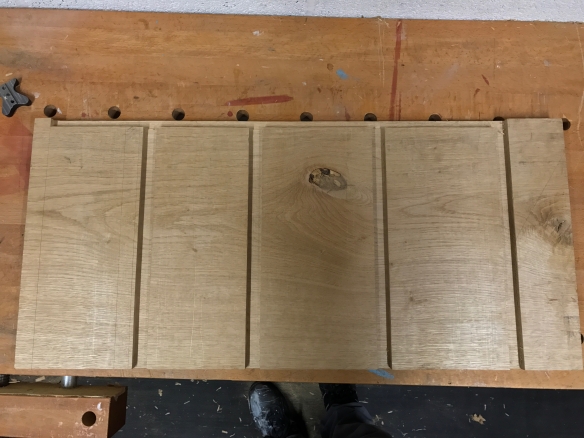
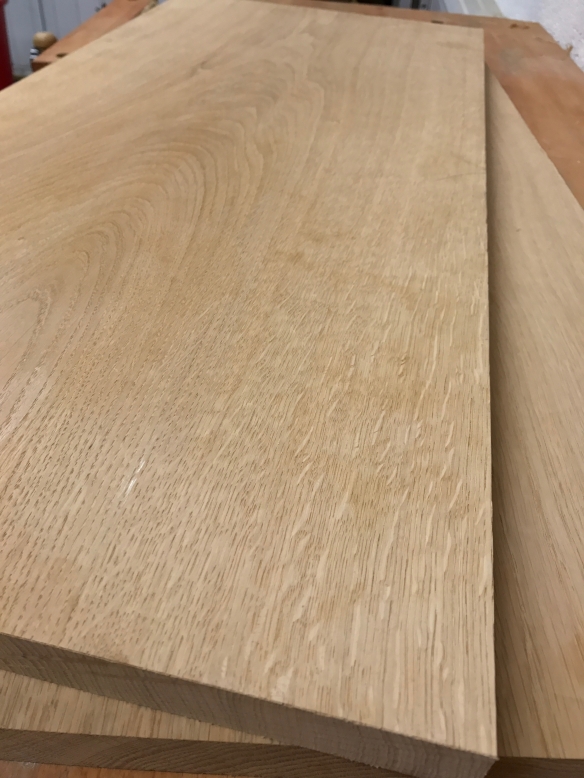
The left-hand side, with dados and stopped rabbet all cut.

The sides are progressing nicely, and so the next task on my list is to carve the foot detail before I process the top and cut the remaining joinery.

img_4711

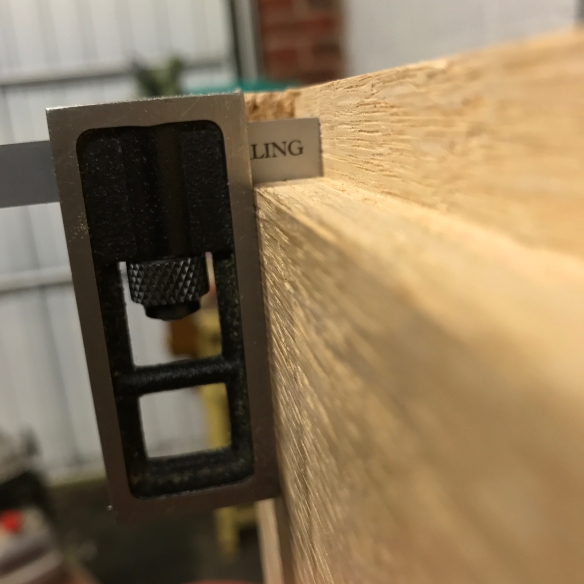
Checking the rabbet for square with the Sterling Tool Works dovetail blade.

The Policeman’s Boot Bench… Part 2

That moment when you first introduce a hand plane to a rough timber always feels like workshop alchemy to me, as the dirty and splintered outer layer is carefully stripped away to reveal beautiful woodgrain ready to become furniture or a musical instrument.

img_4639

Brushing rough boards down with a stiff brush removes any grit or dirt that would chip a plane iron

Having left the oversized stock for the top and sides of the boot bench to acclimatise for a couple of weeks, I’ve started the build in earnest and the two sides of the carcase are now processed and at final dimension. When working with rough timber my first step (before I reach for my jack plane) is to give each surface of the workpiece a good scrub with a brass bristled brush – this removes the worst of the timber yard grime and any grit that would otherwise ruin the cutting edge of my plane iron.

img_4633

A traversing cut quickly removes cupping

The oak boards were free of twist, but there was a noticeable amount of cupping which I spent time to remove, using the same historically informed handwork method I’ve written about before. Dedicating 2016 in large part to the consolidation of solid handwork fundamentals, particularly the projects in the Joiner & Cabinet Maker, has definitely paid off, and processing the boot bench timber has so far felt like second nature. Not that there isn’t always plenty to learn – despite having processed the timber for several projects last year entirely by hand, the boot bench is by far the largest casework I’ve worked on since my Anarchist’s Tool Chest in 2014, and using larger stock does take a little more effort to keep flat and true. But essentially the technique is the same – traversing cuts with the jack plane to quickly remove stock, following up with the jointer and smoother on the show face, and just the jointer on the internal faces. You all know the drill by now. And really it is nice to be working on a project of a different scale – the sides of the boot bench are 13 3/4″ wide by 30″ long, compared to much more compact dimensions for the Packing Crate, School Box, or saw benches I was working on last year.

img_4634

Moving my workbench against the wall has increased stability and means I can take a heavier cut.

As I discovered when I set to work on the first side piece, the biggest challenge was keeping my bench still when traversing the grain for a heavy cut. The added mass of the wide oak boards had my (already footloose) workbench skittering across the workshop floor. Cue an impromptu reshuffle, involving decanting exactly one half of the workshop and moving the workbench against the wall, then moving the displaced contents around. I’ve been meaning to do this for a while, partly to keep my workbench from dancing across the room as I work, and also to open up the middle of the workshop for breaking down long stock on the saw benches, but I definitely wasn’t expecting to attempt it in the middle of a work session. There is a bit of shuffling and organising left to do, but so far I’m very pleased with the workflow improvements and increased bench stability from this layout, and I will write more separately once I’ve finalised the new layout.

img_4649

No board is square until my Vesper 10″ square says so.

With the workbench relocated against a sturdy wall processing the two side pieces went pretty smoothly. This oak is beautiful – even though it is flatsawn the boards are wide enough to show some lovely medullary ray flecks at the edges as the grain turns to quartersawn. It is also very hardy stuff, and to maintain a good clean cut I found it necessary to resharpen the jack and jointer plane irons for each board. Once the sides were surfaced, thicknessed, and brought down to 13 3/4″ wide I then brought them down to final length by shooting one end square and then working the opposite end until I hit a perfect 30″. The Lie Nielsen No.51 shooting board plane and a good shooting board (I use the Evenfall Studios wide shooting board) make shooting to a precise length very easy, even on wide stock.

img_4650

This surface is straight off the plane blade. A simple coat of shellac and hard wax will look wonderful on the completed boot bench.

I’ve still got the top of the casework to process, although I may have a brief break from the grunt work to cut the joinery for the sides.

The Policeman’s Boot Bench… Part 1

There may be better ways of starting a new year than with a new project, but I’ve yet to find any. I started off 2017 as I mean to go on – spending the first day of the year in the workshop breaking down stock for my next funiture build. It all seemed very appropriate.

For this project I’ve been commissioned to build an oak side table and shoe rack to sit in a hallway. The client had a strong idea of what he wanted, but was open to some design input from me, and so we batted sketches back and forth until we reached the final specification. This was a perfect opportunity to apply the key design tenets from the Anarchist’s Design Book (a book that has had a significant impact on how I think about design), whilst meeting the specific dimensions the client wants (the piece will fit in a corner of the hall between a wall and radiator). We started with a low “boot bench” type design (and the name has stuck), although the final design did take advantage of the one dimension I could change, by increasing the height somewhat. Where we ended up was a 43″ wide, 14″ deep table with the top secured to the sides with through dovetails, while the four shelves (the client and his housemates have a lot of shoes!) are let into the sides with dados. To protect the wall behind from being marked by shoes, and to add rigidity to the piece, tongue and grooved boards will be set into a rebate and nailed to the back of the carcase.  So, dados, rebates, cut nails, and tongue and groove backboards. That definitely sounds like an Anarchist’s design!

img_4072

Rough oak boards, waiting to be turned into a boot bench

The boot bench will stand on a period tiled floor, and the client wants to make a feature of the floor as much as possible. So one of the design questions was how to give the table a solid footing without obscuring the floor tiles. My suggestion was to carve the bottom 3″ of the sides (up to the lower edge of the first shelf) into a cyma reversa foot detail similar to the feet of my Roubo bookstand build. This retains a good base for the table, but still allows sight of the floor tiles. The table will be finished with shellac and topped with a home brewed hard wax (the recipe for which is courtesy of Derek).

With the design agreed, my next stop was Sykes Timber, who were able to provide some gorgeous 15″ wide 5/4″ thick oak boards. These lay in stick in the workshop for November and December, before being broken down and moved into the house to acclimatise.

img_4507

Drawing full sized plans – I wouldn’t want to be without my set of Roubo curves by Sterling Tool Works for drawing curved parts.

Working from scaled drawings is all well and good if you’re following instructions from a design someone else has tested, but when building a brand new design I’m not happy putting saw to wood until I’ve worked up a full sized drawing. I find that making a full sized drawing gives me the opportunity to spot any design issues I’ve overlooked, and also to clarify in what order I need to carry out each stage of the build. I like rolls of lining paper for making full sized plans, as you can cut each piece to the precise length you need it, and the thick paper is quite durable. And so over Christmas I hunkered down and drew full size front, back and side elevations for the boot bench. With the drawings complete I then wrote a detailed list of each stage of work, making sure that each stage followed logically and wouldn’t complicate any stages that followed. This will be my masterplan for the build going forwards, so is worth getting right!

img_4520

Laying out the top and sides on one of the 15″ wide boards.

The moment that you start to work on rough boards always feels transformational to me – taking splintery and dirt encrusted timber in order to realise the beauty and furniture within. It can also be a somewhat nerve wracking moment – you only get one chance to make that first cut! S0 only once I was happy that the design worked, and that the dimensions would fit in the physical space the client has available, did I start thinking about breaking the oak down to size. If I’m honest, making the three cuts for the top and sides took over an hour, and even after a lot of careful checking I was still a touch nervous about cutting such beautiful stock. Having pulled the three oak boards out of their resting place, I selected the best board for the casework, and spent time laying out the top and sides so that they would run sequentially along the one board, avoiding any knots or shakes. These boards were very clear, but in any wide stock there is bound to be a couple of minor defects. Having laid out the cuts for the top and sides on one face of the board, I flipped it over to make sure there weren’t any surprises on the other side. Through careful layout I was able to place the few knots in areas where the foot detailed would be cut away, or in waste sections. The other two boards provided the four shelves. Breaking down 9′ long boards by hand definitely makes me want to build a third saw bench to support the extra length, but the two saw benches I do have worked perfectly and provided a lot of support to these wide oak boards. The Skelton panel saw is a monster, munching through the wide oak like it wasn’t even there. That saw is definitely a worthwhile addition to my tool chest.

img_4526

For breaking down rough stock the Skelton Saws cross-cut panel saw and a pair of saw benches is the perfect combination.

The stock is now safely stored in the house to finish acclimatising before I start work on the build proper, more of which next week.

Coarse, medium, and fine

The following is based on an article I originally wrote for issue 252 of Furniture & Cabinet Making Magazine.

_dpp2266

Have you selected your bench planes? In Curing Plane Addiction I made the case that you only need three bench planes, chosen on their function rather than the size number assigned to them; a smoothing plane, a jack or fore plane, and a jointer plane. For me, that set consists of a No.3 smoother, No.5 jack, and a No.8 jointer plane, although each maker will have their own preferences.

Having selected your trio of bench planes, the next question is how do you use them? Now, hand planes are incredibly versatile tools and a complete guide on all that can be achieved with them is would be ambitious for a book, let alone a single article. So here I will focus on the fundamental principles of using hand planes, which can be summed up as coarse, medium, and fine.

Some historical guidance

The same historic woodworkers and writers that helped narrow down the choice for a set of bench planes in my previous article also had plenty to say about how to use them, especially Joseph Moxon – the author of Mechanick Exercises or the Doctrine of Handy-Works (1703, and re-printed by Lost Art Press 2013). Moxon gives two tips for planing work, which despite being incredibly useful, often get overlooked: always use the coarsest tool possible for most of the work, and traverse boards. I will come back to traversing later on, but for now let’s think about Moxon’s first tip.

_dpp2673

Full width shavings from a jointer plane tell you that the work is flat

Moxon helpfully explains that the jack, or fore, plane is the first plane to touch the work, and that the purpose of this plane is to prepare the work piece for smoothing or jointing with the other bench planes. The focus when using the jack is therefore to remove the worst of any saw mill marks and other irregularities, and to quickly remove material when bringing stock down to thickness. For Moxon the other important aspect of this is that it is not necessary to use all three planes in sequence on every element of a project. He also indicates that moving straight from the jack to the smoothing is perfectly acceptable when the component needs to be smooth but not perfectly flat. Similarly, if an element of a build needs to be flat but not smoothed (because for instance, it is not going to be seen once the build is finished) then stop work after jointing, and don’t move to the smoothing plane.

_dpp2677

From left to right, the thick shaving from a traversing cut with a jack plane, a full width thin shaving from a jointer plane, and the wispy shaving of a smoothing plane.

But what are the benefits in working this way? Well, an efficient workflow is essential in all workshops, and a large part of efficiency is using the right tool for the job. This can sometimes be forgotten in the pursuit of those beautiful gossamer thin smoothing plane shavings. You can flatten a board with only a smoothing plane, but it would take an awfully long time. Instead use the jack to get most of the way there, and then reach for the jointer for the final truing of the work. The smoothing plane is then only needed for a couple of passes on show surfaces.

Processing stock by hand

Although seemingly quite a basic task, processing rough sawn stock by hand is an excellent opportunity to learn, and practise, your key hand plane skills. I recently built a pair of saw benches out of The Anarchist’s Design Book (2016, Lost Art Press), and this seemed like the perfect moment to re-visit Moxon and those all-important hand plane fundamentals.

Removing Twist and Cupping

Before you first reach for your plane it is necessary to check the work piece for cupping and twist. Cupping can easily be checked by holding a straight edge across the width, while twist can be checked first by placing a straight edge diagonally from corner to corner, and by using winding sticks. The top of my saw benches was fortunately free from twist, but had become severely cupped.

_dpp2611

The yellow poplar for my saw bench top was free of twist, but was significantly cupped

Planing work that rocks or moves about is frustrating and time consuming, so with cupped boards I tend to work the domed side first, as the cupped side will rest securely on the workbench. If you are dealing with a twisted board, then address this before tackling the cupping. Work the two high corners until they are level with the two lowest corners, by working diagonally across the board with the jack plane, from the low spots to the high corners. Once the problem corners are level with the rest of the board join them up by working both along the grain and diagonally corner to corner.

img_3343

Work the peak of the dome by working along the grain with your jack plane

Different techniques are needed for each side of a cupped board, and for the domed face you are essentially forced into working along the length of the board – it is all too easy to plane a convex curve into the work piece when working across the grain of a domed board. A jack plane set to a heavy cut will remove the worst of the dome by planing the peak of the dome along the length of the board. As the dome is reduced, work an increasingly wide section of the board, until the board is close to flat. Now is the time to move to the jointer, working along the length of the board until that face is flattened – full width shavings off a jointer plane will tell you when your work piece is flat. Depending on the project now might be the time to introduce the smoothing plane to the work piece, although for casework I tend to wait until the carcase has been assembled before smoothing.

_dpp2634

Chamfer the far edge of the work with your block plane to avoid spelching when using a traversing cut

With one face of the work piece flattened you can now work the cupped face. First, take your block plane and chamfer the far edge of the board – a few swipes should do it. Now you are ready to traverse the grain as suggested by Moxon. Starting at one end of the board plane across the width of the work piece and perpendicular to the grain, using a jack plane with a cambered blade, taking overlapping cuts until you reach the opposite end of the board. The chamfer left by the block plane will stop spelching, and as the jack plane removes the chamfer a few swipes with the block plane will renew it. Traversing the work piece in this way will remove the cupping while leaving the low middle of the board untouched, and because wood is relatively weak across its grain you can take deeper cuts than would be possible when working along the grain. Don’t worry that the surface is a little woolly; this will be removed by the subsequent planes. Just keep traversing and checking the progress with a straight edge – I tend to use the sole of the plane as this is plenty straight enough for this type of work, and is already to hand. Once your jack plane starts to remove material from the very middle of the board you know that the cupping has been removed. If the work piece is at the correct thickness then you can move directly to the jointer or smoothing plane depending on whether you need a perfectly flat, or smooth, surface.

_dpp2641

Traversing with a jack plane quickly flattens a cupped board

Thicknessing

In all likelihood, having removed any twist and cupping the work piece may need further planing to bring it down to the correct thickness. For this, you can exploit wood’s weakness to working across the grain, while adopting a technique that is a little less aggressive than traversing. As always, start with the jack plane. This time, work diagonally across the board, planing at 45 degrees to the grain, from one corner to the opposite corner. Then change direction and work back towards the original corner. One direction will leave a cleaner surface than the other, but do not worry about tear out or leaving a woolly surface at this point – the focus is on getting close to the finished thickness and on removing as much material as possible in a quick and controlled manner. As you creep up on the final thickness you can move to the jointer plane, working diagonally to start with, before finishing with shavings taken along the grain to clean up the surface. Once final thickness has been reached, you can break out the smoothing plane if necessary.

img_3349

By working diagonally across the grain you can remove very thick shavings with minimal effort, perfect when there is a lot of material to remove.

Conclusion

Processing rough sawn stock by hand is an excellent way to develop fundamental hand plane skills. It may seem that this article has been a guide on how to use your jack plane rather than all three essential bench planes, but really that is because a jack plane should spend more time on your bench than either of the other two. In my workshop the smoothing plane sees the least use of all my bench planes, not because I don’t smooth my work, but because I make my jack plane do all of the heavy lifting, with the jointer and smoother just finishing up the work. Even if you decide to rely more heavily on your jointer and smoother planes, knowing when to use them is essential to an efficient workflow. Similarly, although it may seem counter-intuitive to plane across rather than along the grain, this technique saves an extraordinary amount of time and has been used by craftsmen for centuries.

_dpp2596

The distinctive feathery edged shavings from a heavy traversing cut

Moving forwards in reverse: 2016 in review

Somehow it is January yet again. I’m not sure where 2016 went – the past 12 months have disappeared in a blur, and it seems like only yesterday that I was writing my 2015 round up. Every year goes by quicker than the last, and fatherhood has only accelerated that feeling. I’m a lot less sleep deprived than I was 12 months ago (the Apprentice has now been sleeping through the night since August) which definitely makes reflecting on the past year a whole lot easier.

First off, let’s get the important stuff out of the way. No year is complete without a mix cd of the best new songs, and a list of top 5 albums, so here are my top picks (in order):

  1. Real – Lydia Loveless
  2. A Sailor’s Guide to Earth – Sturgill Simpson
  3. Case/Lang/Viers – Neko Case, KD Lang, Laura Viers
  4. A Moon Shaped Pool – Radiohead
  5. Skeleton Tree – Nick Cave & The Badseeds

img_4301

The finished pair of saw benches

A year at the workbench

Although I didn’t set out last January to have any kind of theme to my woodworking, looking back it feels very much like 2016 was a year of doubling down on fundamental techniques, and embedding a solid handcraft practice to my work. So I built two Packing Boxes and a School Box from The Joiner & Cabinet Maker (only the chest of drawers to go now!) and a pair of staked saw benches from The Anarchist’s Design Book, as well as  Moxon vise. Little did I know how important staked chairmaking was going to become when I settled on that particular saw bench design.

IMG_3580

There wasn’t much in the way of lutherie last year – the parlour guitar was put to one side so that I could start the Mysterycaster commission, and also so that I could work on the furniture projects.I will return to the parlour guitar, and the Mystercaster is a priority for 2017. But lack of lutherie aside, I’m really pleased with the selection of projects I worked on over the past 12 months – I am definitely feeling the benefit of spending much of the past year focusing on those all important fundamental skills (although there is always more to learn, and more practice to have). An epic build like an acoustic guitar can be very rewarding, but there is something very satisfying about working through projects that take a shorter period of time. Maintaining a balance of short projects and longer-term builds is something I’m going to try and do going forwards.

dsc_0095


I didn’t manage to get to any classes in 2016, but I did take a trip to Forge de Saint Juery, which was a wonderful experience and one that I highly recommend. After nearly two years of discussion and design between myself, Mark Harrell, and Susan Chilcott, the Bad Axe Luthier’s Saw was finally unveiled, and I’ve thoroughly enjoyed testing one of the first production models at my workbench.

img_3624

The Bad Axe luthier’s saw – being involved in the design process for this has been a wonderful experience

In terms of writing, Over the Wireless more than doubled readership from 2015, and I was grateful to feature interviews on the blog with some really important members of the woodwork community, including Joshua Klein, James McConnell, Brian Clites, and Kerryn Carter. I was also honoured to write the inaugural post for the “Perfect in 1000 words” for the Daily Skep (thanks Jim!). Furniture & Cabinet Making published nine of my articles last year, including the Dancing About Architecture series, which are two of my favourite pieces of writing to date. The June edition of Popular Woodworking  also carried my feature on Karl Holtey, which was a real thrill. But the big writing development of 2016 still has to be the Life and Work of John Brown. This is a hugely important project and one that I am entirely humbled to be part of.

img_3751

So 2016 was quite eventful, although I’m quite sure that by many people’s standards that would rather quiet (and in no way do I want this round-up to appear self congratulatory).

…and the next 12 months

And now for 2017 (which  to be perfectly honest still sounds like the future to me). What does the next 12 months have in store? Well the main focus of my attention for much of the next two years will be on the Life and Work of John Brown – there is a great deal of research to do, many interviews to be undertaken, not to mention chairs to be built. But it is going to be great fun, and I’ll be posting as much as I can on Over the Wireless throughout the process. I’ve also got a number of articles slated for Furniture & Cabinet Making, and which I’ll be announcing in due course.

But what about the next 12 months at the workbench? Well, I’m going to be brave and nail my colours to the mast right now. The projects which I’ve got lined up for 2017 are as follows:

  1. The Police Man’s Boot Bench – a furniture commission I actually started today (new year, new build. It seemed appropriate);
  2. Staked Work Table from the Anarchist’s Design Book; and
  3. The Mysterycaster.

So now, if I don’t manage to complete those builds this year, you dear reader, have a full licence to tell me to get my act together.

_DPP2126

Finally, after a year of no courses or shows, I’m looking forward to travelling a little more and connecting with the wider woodwork community. So I’ll be at Handworks in Iowa this May, and then at the European Woodwork Show at Cressing Temple in September. Over the past two years woodwork has been defined for me by the community, and I can’t wait to see many good friends and readers at both events.

So, Happy New Year. And thank you to everyone who has read a blog post or magazine article, or commented on a photo on Instagram. This community is so important to what I do, and the past 12 months would not have been half as rewarding without you good people.

img_2622

Hopefully 2017 will involve more father-daughter trips to the timber yard