The Cabinet Maker at School… Part 5

Right, I’m making up for departuring from the sequence of work from the text of Joiner and Cabinet Maker, and am back working alongside young Thomas. Which means that the next stage of the build is fitting the partition to hold Master John’s marbles and other precious trinkets.

_DPP2485

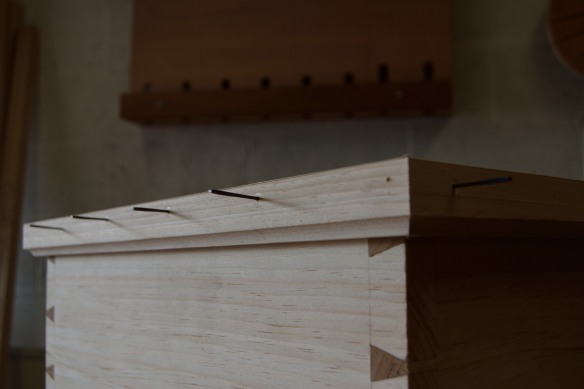
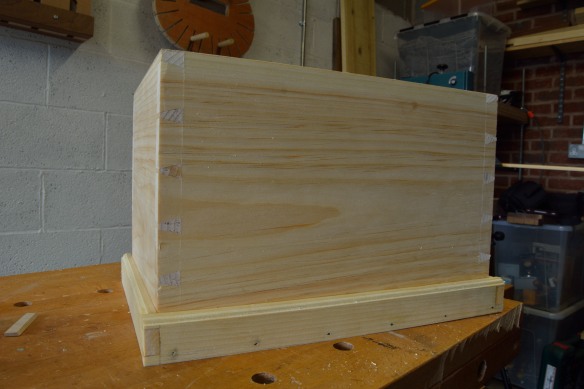
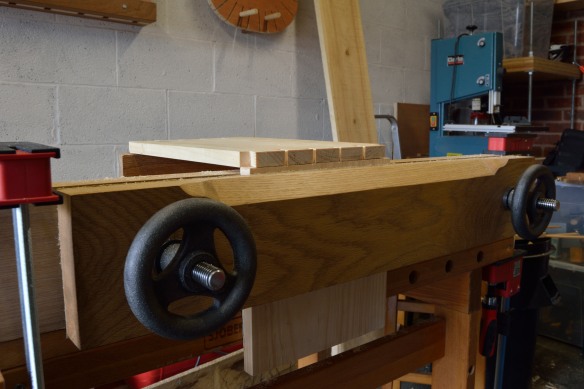
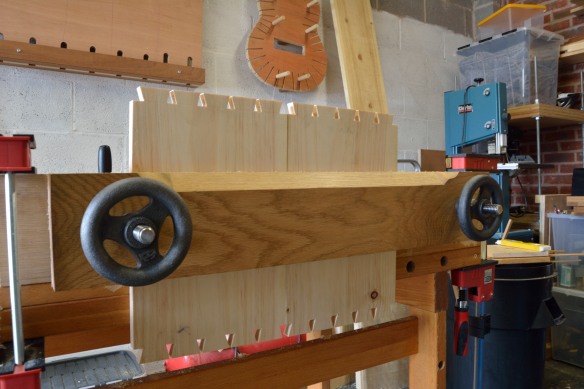
The finished partition, all ready for Master John to fill with marbles and treasures.

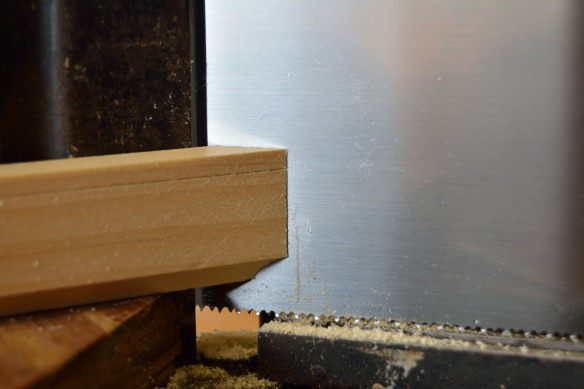
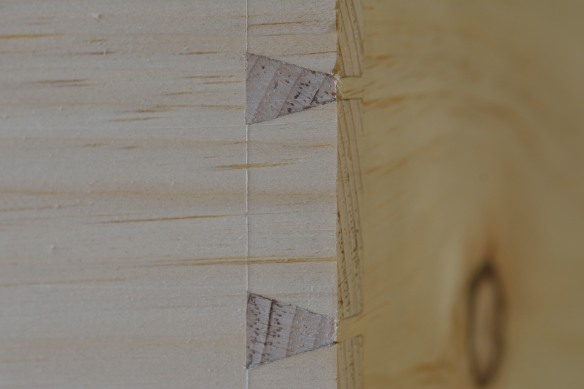
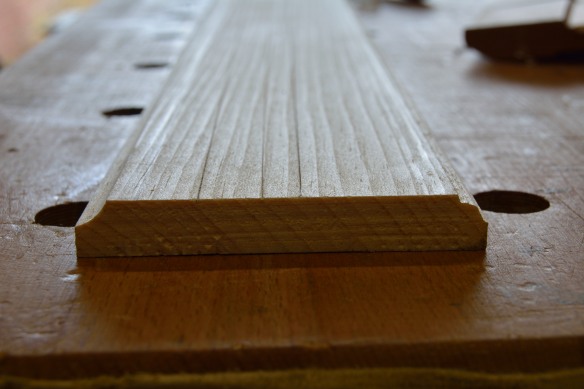
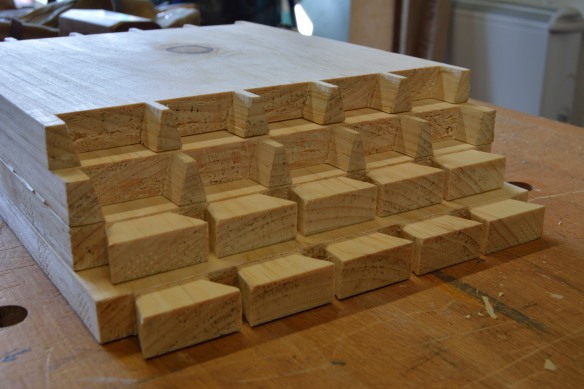
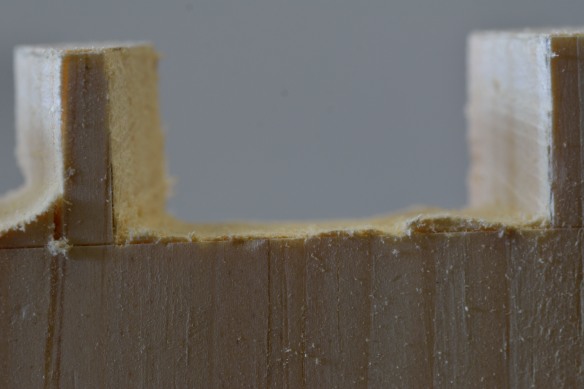
The partition introduces some new skills to the story, including cutting a stopped dado to accept the side of the partition, and then friction fitting the side and bottom of the partition. This is my first dado, and I followed Chris’ directions in the text by using a guide block to ensure that the dados on each side of the box lined up correctly. To cut the dado I used the prototype Bad Axe Luthier’s Saw – this fine cross cut saw is perfect for precise furniture grade cuts, and in my time testing it I’ve found that I reach for it far more often than the specialist name would suggest. One particular benefit I’ve found is that the fine teeth make it a very easy saw to start on the corner of a work piece, where bigger teeth can catch until a kerf has been established.

_DPP2463

This isn’t sloppy work – the overcuts are hidden from view by the partition, and are fingerprints of handwork.

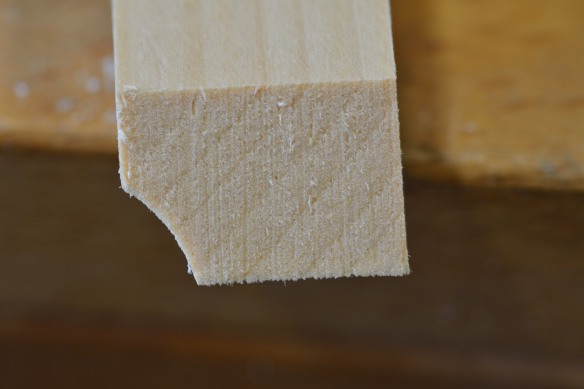
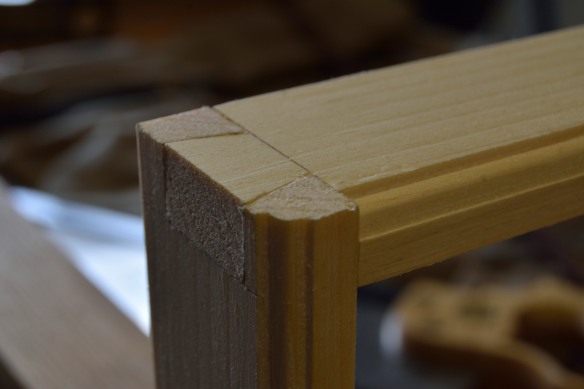
The waste was knocked out of the dados with a 1/2″ chisel and cleaned up with the small router plane, then the side was shot to length until it pushed cleanly into the dados. The bottom was glued to the side, and once the glue had cured I added 4d nails for extra holding power. Once fitted, the partition hides the overcuts at the bottom end of the dados but it pleases me to know that they are there as evidence of how I carried out that element of the build, and proof that the School Box has been built by hand. To support the base of the the partition I added 1/2″ thick cleats under each end, and these were fixed with 2d nails to the side of the carcase.

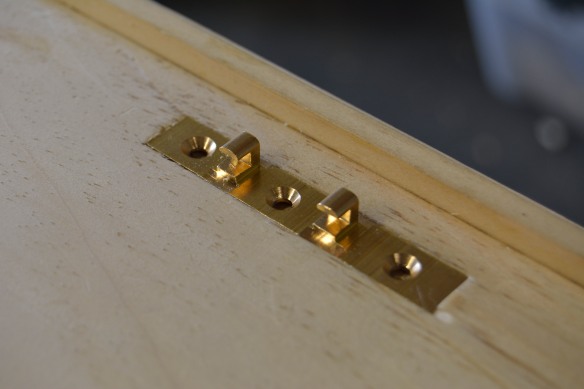
Once the partition was fitted I turned my attention to fitting the lock. When I fitted the lock to my Anarchist’s Tool Chest (a process I wrote about in detail previously) I used the same method as Thomas does in the Joiner and Cbinet Maker. Thomas’ approach is an efficient and accurate way to fit locks, so I followed his lead again here. There is no real trick for fitting locks, but accurately marking out the three mortises and cutting them in the right order, is essential for a fuss free experience. I used the small router plane to remove material for the top plate mortise, and a large router plane for the base plate and lock mechanism mortises.

_DPP2466

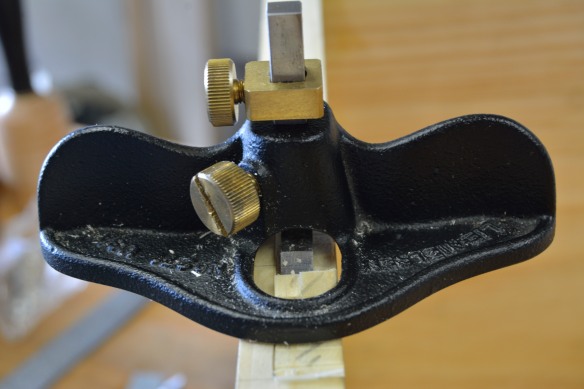
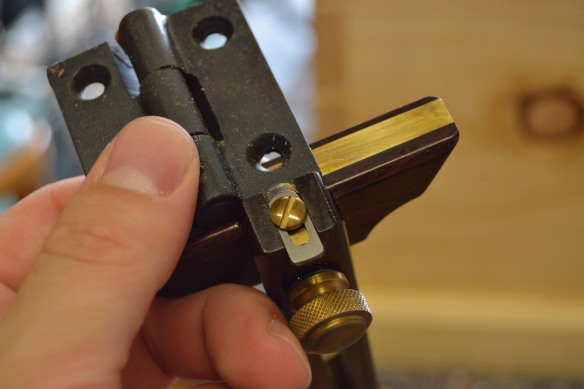
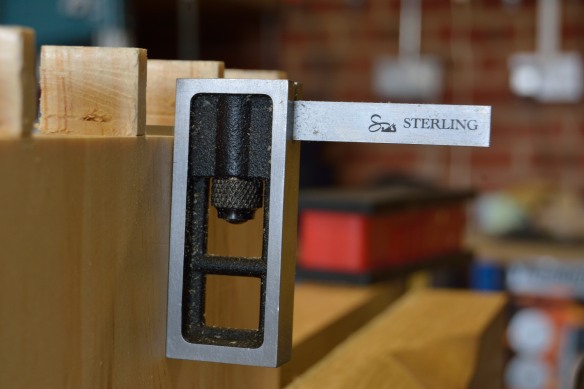
A small router plane balances nicely on the edge of the box to cut the top plate mortise for the lock.

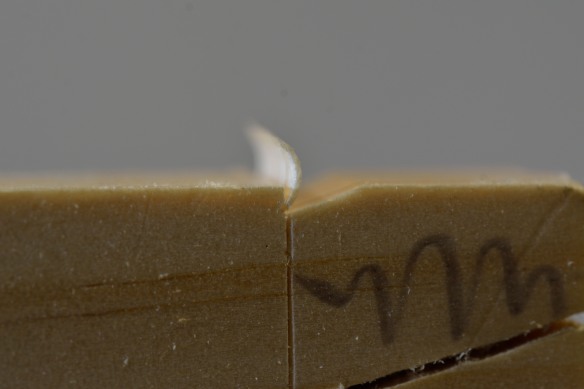
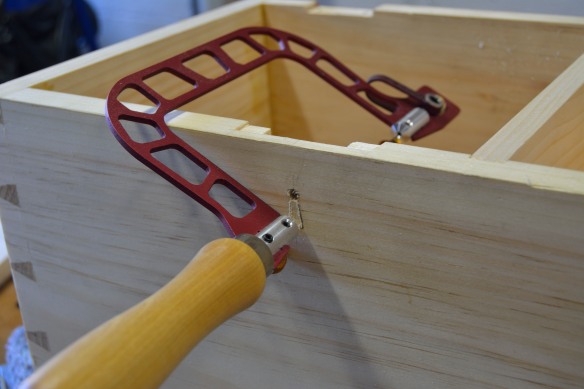
Cutting the keyhole is always a fun task, and I first drilled a hole to accept the key barrel. The escutcheon then slid over the drill bit and provided a template to sketch out the shape of the key hole, which was cut using a fine blade in a piercing saw before being cleaned up with a 13 grain rat tail rasp and needle files.

_DPP2478

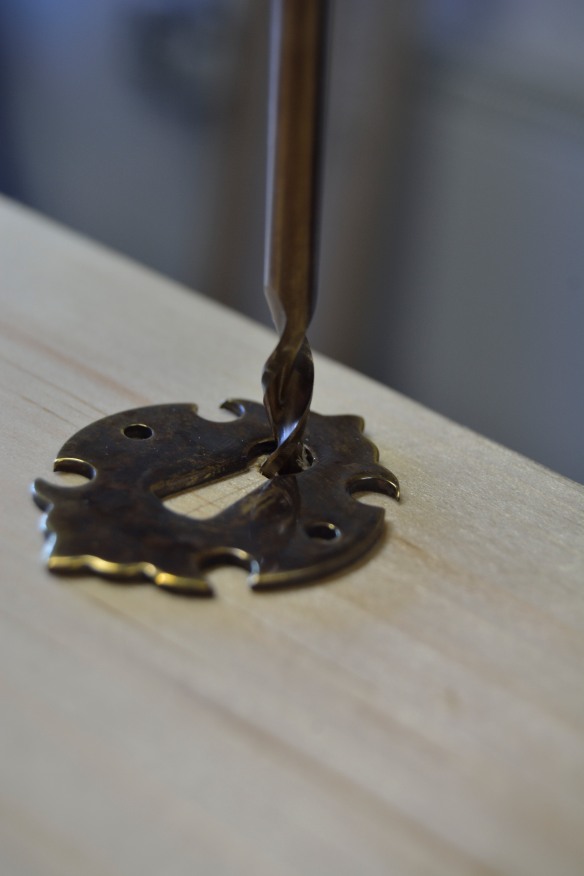
The escutcheon provides a handy template for marking out the keyhole shape.

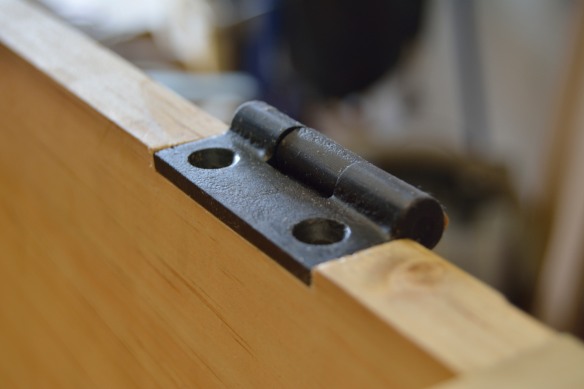
Fitting the hasp is always the bit of installing a lock I find trickiest, mainly because lid moulding makes it impossible to sneak a small router plane in to bring the mortise to the correct depth, unless you balance the plane on the moulding (yes I have done this, but it’s not much fun). Next time I build a lidded box I will hold off installing any lid moulding until after the lock is fitted! That being said, it didn’t take too much work to get a good clean mortise into which the hasp would press fit, and the lock caught smoothly at the first turn of the key (which is always pleasing).

_DPP2479

Cutting the keyhole to shape.

So all that is now left is carving the corners of the base moulding, and milk painting the completed School Box. Stay tuned for more coming soon!

_DPP2483

The Cabinet Maker at School… Part 4

_DPP2442

I’m approaching the rest of the School Box build a little out of sequence to how Thomas builds it in the text. This is mainly because having prepared the lid moulding at the same time as the base moulding, I was keen to get the lid moulding fitted. Also fitting the lid makes the School Box look pretty complete, even if there is plenty left to do!

The lid was planed to 1/2″ thickness from rough stock in the same way as the other components. With careful planning and layout I’ve managed to get everything I needed for the School Box save for the moulding out of a single plank of 1″ thick pine, and I think that one of the fundamental (if more subtle) lessons from The Joiner and Cabinet Maker is the economic use of material. The back edge of the lid was planed square and true, while the rest of the dimensions were left oversized.

_DPP2448

The depth for the hinge mortises is obtained by setting my Hamilton4″ marking gauge to the thickness of the hinge leaf

Fitting hardware is a big milestone in any project, and also a critical stage of the build – no matter how tight your joints are or how pretty the finish, if hardware is installed sloppily it is all people will notice. For this reason I prefer to install hardware when I’m fresh and relaxed. The text offers some useful guidance for the proportional spacing of hinges in casework. Unfortunately the gorgeous iron hinges I’m using are wider than the strap hinges Thomas uses, and as a consequence the proportional spacing would have landed the right-hand hinge directly over the dado for the internal partition. This would not have been a disaster, but would require the hinge to be removed before the partition is lifted out, which I’m sure would not have pleased Master John. I moved the hinges a little further apart and towards the corners of the box so that there was a 1/4″ gap between the edge of the hinge and the side of the partition. This didn’t unbalance the appearance of the hinges too much, and stopped everything getting too crowded around the partition.

Because hardware fitting is such a critical operation I find that a clean fitting rests on accurate layout. Handmade hinges often have slight variations in the width and thickness of the leaves, so once I had determined the position of the innermost edge of the hinges I set the width and depth of each mortise based on the specific dimensions of that hinge, rather than working to global measurements. This paid off, as there was a marked difference in the width of the two hinges which would have left an unsightly gap in the mortise for the narrower hinge. Once the hinges were fitted to the box I then transfered their positions to the underside of the lid, and cut the corresponding mortises.

_DPP2449

Cutting mitred corners for the lid moulding

With the whole assembly held in place by the hinges I marked out the final dimensions of the lid, allowing an overhand of 1/16″ on the front and sides. The lid was then trimmed down to size with my No.3 smoothing plane, ensuring that all the edges were square and straight. I was then able to fit the moulding to the lid. Both side pieces were left overlong, and instead of dovetailing the lid moulding (as I had for the base moulding) I followed the text and mitred the corners. The one advantage I have over young Thomas is that thanks to my good friend Ethan I have a mitre box (which apparently formerly belonged to Ron Bontz – hopefully some of his magic will rub off on my work!) which I’ve fitted out with a Bad Axe mitre saw. This combination makes angled cuts a cinch, and the saw leaves an incredibly clean cut which needs no further work.

_DPP2452

Because every blog post must include macro photography. This joint is straight off the saw – perfectly clean and ready for glue, no planing required.

With the moulding trimmed and mitred all that remained was to fit it to the lid. Hide glue can act as a lubricant before it tacks, and to stop the moulding sliding across the lid I pushed 4d headless cut brads through pilot holes in the moulding so that they poked through into the lid, essentially acting as locating pins. The front run of moulding was glued and nailed to the lid, while the moulding returns were glued only for the front inch and mainly rely on nails to hold them in place – this is to allow for any seasonal movement in the lid without splitting the moulding.

_DPP2454

Using 4d headless brads as locating pins while gluing the moulding in place.

Next up will be the internal partition, and then fitting the rest of the hardware before applying milk paint.

(All about the) Base Moulding

The Joiner and Cabinet Maker… Part 3

You know, I think young Thomas may disapprove about this instalment of my work through The Joiner and Cabinet Maker. Having faithfully followed the text so far (apart from my decision to cut the dovetails tails first, of course), I’ve made a couple of changes to the design this week. Nothing substantial, but some satisfying tweaks to the asthetics of the School Box.

_DPP2434

If only every morning could start with strong coffee and moulding planes

In my last post I’d dovetailed and glued up the carcase. Once the hide glue cured I cleaned up the exterior of the casework with my No.3 smoothing plane. Cleaning up dovetails is always an exciting moment, as you get to see exactly how well fitting your joints are, and whether there are any unexpected gaps. Given that this is my first dovetailed project since I finished the sliding trays for my Anarchist’s Tool Chest some 18 months ago I’m pretty pleased with the dovetails on the School Box – they aren’t perfect, but they are perfectly respectable. And the carcase is dead square, which I’m very pleased with.

_DPP2414

Not perfect, but not too shabby either

A box without a bottom isn’t much use, so I cut the next piece of pine to slightly larger dimensions than the footprint of the box, and planed the rough stock to 1/2″ thickness before attaching it with hide glue and 4d fine finish nails.

_DPP2419

One of the elements of the School Box I’ve been looking forward to the most is the base and lid moulding. I don’t get much opportunity to use moulding planes in my lutherie, (although my Philly Planes beading plane has seen some good use recently on the Moxon vise build) and I’m always happy to find opportunities to develop new skills. The text calls for a chamfer on the base and lid moulding, but I thought this would be an excellent opportunity to break out the moulding planes and do something a little more elegant.

_DPP2431

Lid moulding on the left, base moulding on the right

Moulding is easier to plane while stock is over-wide, as the thin strips needed for moulding (1 1/2″ for the base, and 1″ for the lid) are difficult to hold down unless you have a sticking board. I’ve not had opportunity to made a sticking board yet (that is another task for the to-do list) so I prepared a 1/2″ thick piece of 3″ wide stock to use for both sets of moulding. For the base moulding I used the 3/8″ square ovolo plane I bought from Patrick Leach earlier this summer, and for the lid I reached for my No.6 Round by Philly. Then runs of moulding were planed onto opposite edges of the stock, and then ripped to width with the trusty Disston D8 before being cut to the lengths needed to wrap around three sides of the box.

_DPP2437

Dovetailed base moulding – I will carve the corner transition once the glue has cured

While I was deviating from the text I decided to make one final change (sorry Thomas!) – Thomas mitres his base moulding, but I was in a dovetailing mood, so cut a single tail in each of the side pieces with the pins on the front piece. The moulding was fixed in place using 4d headless cut brads, as well as hide glue on the front piece and the front inch or so  of the side pieces – leaving the side pieces mainly secured by just nails will accomodate any seasonal movement of the bottom without splitting the moulding.

_DPP2439

School Box with the bottom and base moulding fitted.

Next it is on to the lid and internal partician while I wait for the hardware to arrive from White Chapel. There is still a fair bit to do on this project, but the end is rapidly coming into sight!

The Cabinet Maker at School… part 2

_DPP2394

After breaking down the rough stock and flattening it all by hand, the next step for the School Box is to dovetail the carcase. I’ve written about dovetailing before, and I followed the same process for the School Box. Although I don’t intend to rehash that step-by-step guide again, there are a couple of points I will flesh out.

I suppose that had I been following the text from the Joiner & Cabinet Maker to the letter I would have cut my pins first. At some point in the future I will have a concerted attempt at getting to grips with cutting pins first, but not today. I learned to dovetail by cutting tails first, and that way makes a great deal of sense to me. As I’ve barely cut any dovetails since I finished the sliding trays for my Anarchist’s Tool Chest in December 2014, I thought I would use the School Box as an opportunity to refresh my preferred dovetailing method. In other respects I did broadly follow this section of the Joiner & Cabinet Maker – like Thomas I used five tails per corner, with the tails on the front and back of the box and the pins on the sides. I did however use a more striking 1:4 slope for my dovetails, as I find the strong slope to be very attractive.

_DPP2373

Laying out the pins

Two experiences dramatically improved my dovetailing over the past couple of years.

The first was attending the Anarchist’s Tool Chest course with Chris Schwarz, partly because Chris’ way of teaching dovetailing is excellent and demystifies the whole process with clear, useful, techniques. But also because a five-day dovetail death march is the sort of intensive learning experience which always improves technique. The second experience is using the Moxon vise. This is the first opportunity I’ve had to press my Moxon into service, and having the work piece raised off the bench by an extra 5″ definitely makes for a more pleasant and comfortable experience. More importantly the increased height improves sawing ergonomics, which makes for a more accurate saw cut. I’m looking forward to experimenting further with the Moxon and will write more fully about the benefits of the vise once I have logged more bench-hours on it. One final observation for now is that the Moxon also helps create a really efficient workflow when fine tuning the joint – having a full 24″ between the threads meant that I could have boards in the vise at the same time for final paring and clean up, which allowed me to work my way along two edges before flipping the boards over and cleaning up the opposite ends.

_DPP2371

The Moxon has sufficient capacity to hold two boards simultaneously, for efficient fine tuning.

To get a good tight fitting dovetail I aim to saw on the waste side of the pencil line of the pins, rather than on the line itself – this gives a tiny amount of additional material which will compress to fill the joint. In contrast, sawing bang on the line can remove too much material and result in a gappy joint. The difficulty I used to find with this is that the line becomes distracting, and my saw hand wants to cut on the line rather than against it. To encourage the saw to cut against the line, I press the tip of a finger nail into the knife kerf on my pin boards, and run the saw plate against that nail. In the photo below, you can see that the right hand side of the knife kerf has been removed by the saw, but that the remainder of the kerf (and of the pencil line) remains – this is what I’m looking for when I cut my pins.

_DPP2381

I may never tire of workshop macro photography

The more waste you can remove with a coping saw from between the pins, the less there is to chisel away, which makes for a more efficient dovetailing experience. I’ve been trying to be more daring with how close to the base line I cut with my coping saw, with the target being a clean cut just above the base line without bruising it (as shown in the picture below). My chisel can now drop straight into the kerf of the base line and pare away what little waste remains, for a nice quick fit.

_DPP2380

Be daring with your coping saw cut, and there will be minimal waste to pare away with your chisel

One of the keys to a good fitting dovetail is to ensure that there is no junk left between the pins or the tails, and that the baseline has been pared so that it is perfectly perpendicular to the face of the joint (a little undercutting in the centre of the joint is also ok). The Sterling Tool Works Double Square when fitted with the fine dovetail rule is an excellent way to check that the baseline is in good order, as well as confirming that the edges of your tails are parallel.

_DPP2385

Finally, to remove the half-pin from the tail board, paring a ramp from the waste to the baseline will guide a fine carcase saw to remove the waste with no paring needed to clean up that part of the joint.

_DPP2360

Once the joints had been cut and cleaned up I knocked each corner together individually to check that the fit was not too tight, and that the tails wouldn’t crumble or the boards split. The joints were then coated in hide glue which I’d warmed in a mug of hot water, and knocked together using the leather covered face of my 24oz Blue Spruce Toolworks joiner’s mallet. The assembled box was then put to on side so that the glue could cure.


Prying open my design eye

I have a confession to make. When it comes to furniture, there are gaping holes in my design vocabulary, and my understanding of furniture design is not as strong as it is for lutherie. This is only natural, given that my entry point to woodwork was building acoustic guitars, but it is far from ideal.

I’ve been thinking about design a fair bit recently, and have been working on prying open my design eye – to expand my design vocabulary both in terms of how I approach working up designs, but also how I interrogate the designs of others. The Dancing About Architecture series (which you can read here and here) are part of this train of thought, and I hope to write more over the coming months about design. When I talk about design vocabulary I don’t mean the nuts and bolts or practicalities of making furniture – dovetails, mortise and tenon etc. Instead, what I mean by design vocabulary is more the form of a piece, the lines, proportions, materials and stylistic elements which give shape and character to a piece of furniture.

So far, prying open my design eye has involved two strands – the first is to improve my furniture design abilities, while the second is to expand my design vocabulary. In terms of the first strand, I’ve just finished reading the excellent By Hand and Eye by Geo Walker and Jim Toplin, and am about to delve into the worked exercises in By Hound and Eye by the same authors.This element of my design education is something I’ll write about at more length separately.

IMG_2265

By Hand & Eye and a bottle of good single malt got me through the dark winter months.

For the second strand, I’ve been trying to absorb as many different forms as I can, and my focus throughout this design self-education is deliberately aimed at furniture. Because I came to lutherie as a musician, and as an avid music lover, I have to a good degree internalised an understanding of guitar design as well as the cultural connotations of those designs (although there is always more to learn). I fully understand why I respond to different guitars – why  I consider the Fender ’59 Black Guard Telecaster to be the finest production guitar ever made, why the Rickenbacker 360 is to me pure perfection, or what it is about the two-tone green curves of a Gretsch Double Anniversary that I find achingly cool.  In stark contrast, because I have come to furniture building much later, and without those decades of cultural absorption, I feel I know a lot less about furniture design and the associations (or cultural baggage) of those designs. And because at this point I’m interested in internalising furniture forms rather than construction techniques, I’ve been ignoring joinery and construction methods, unless these are part of the express form of the piece.

IMG_0728

When I designed Esmerelda I drew on over a decade of playing guitar and being an avid music lover – the tight waist, small square shoulders, and rounded lower bout echo pre-war guitars by Gibson, while the internal bracing reflects more modern practices. 

What has been interesting about the process so far is that as I have cast around my net to research and absorb furniture I’m not familiar with, I’ve found it much more useful to look at designs of pieces that I find challenging or aesthetically uncomfortable than I have to look at furniture styles I respond positively to.

For instance, I know that I like campaign furniture, 17th century carved oak furniture (as popularised by Peter Follansbee and Jennie Alexander), Greene & Greene furniture, and I’m on the verge of building my first piece of staked furniture. Oh, and Windsor rocking chairs, because to be tired to rocking chairs is to be tired of life. That seems like a reasonably diverse base from which to start. I could probably, at a push give some explanation for why these furniture styles appeal. With campaign furniture, I like the clean lines, the robust feel the pieces evoke without being hulking, the practical solutions to the issues of withstanding tropical climates and being portable, and of course the beautiful brass hardware. My grandfather was a Major in the Indian army during the Second World War – he was the most recent in a line of Scottish working class men in our family who became professional soldiers and who served in the Indian sub-continent. So I also find an emotional resonance in campaign furniture.

5aGilhamCoD

Campaign furniture is one of my favourite forms – this piece really resonates for me.

But when I look at pieces I like, I find it hard to dig too deeply into what appeals about the form. In contrast, when I find a piece that challenges me or which I find uncomfortable, I find it much easier to critically approach the form and ask exactly what it is that I do or don’t respond to. When I started this exercise I did what countless woodworkers before me have done, and took a broad survey of Arts and Crafts furniture. And actually, because Arts and Crafts was such a broad church, this has provided me with an excellent starting point to approach a rich tapestry of different design languages., because European, British, and American designers found a bewildering number of ways to apply the central tenets of the movement. So the survey then becomes a way to examine how a central design philosophy can be used to create wildly diverging pieces (seriously, contrast Rennie Macintosh with Gustav Stickley, and then contrast them both with Greene & Greene).

DSC_0210

My take on the finest production guitar ever made – the Fender ’59 Black Guard Telecaster

I think this is an interesting and valuable exercise – it is all too easy to stick with the comfortable and the familiar, which from a design perspective can be a mistake. Because if you have a small design vocabulary then not only might you be missing out on something that would completely re-frame your experience, but also there is a danger that your work becomes an echo chamber in miniature, constantly repeating the same limited motif or design elements. That is not to say that as makers we have to actually build in many different styles – there is absolutely nothing wrong to dedicating your work time to just one style or furniture form. But having a wider frame of reference, and internalising a variety of furniture forms, gives a richer understanding and more diverse array of design options at the workbench or drawing board. And if nothing else, that wider vocabulary may simply allow a maker to articulate why they prefer the furniture forms or styles they focus on. Which is no bad thing.

My design vocabulary is starting to grow, and I want this critical evaluation exercise to become a regular and sustainable part of my experience as a maker. Which means constantly looking at different furniture forms, including those that are more removed from my current sphere of experience, both in terms of more historic forms (because history will always be a powerful lure), and also non-Western forms. Time to look up some Japanse furniture forms I think…