Roubo Is Coming… Part 13

One of the reasons I originally wanted to build a Roubo workbench was the iconic leg joint – a double tenon which extends through the top, and where the outer-facing tenon is shaped as a sliding dovetail. The joint has practical purposes, as it doubles the surface area of the joint (for additional strength), and a double tenon should resist twisting out of alignment. But fundamentally, that joint excites me, both in terms of executing it, and seeing it on the workbench every time I enter the shop. As I’ve written before, this build is more akin to timber framing than to furniture (and is far removed from the lutherie I started with), and that double tenon joint has become for me an expression of skilled handcraft (providing of course that I don’t botch the joint, right?).

DSC_1062

Laying out the tenons

In contrast to the undercarriage, where I cut the mortises before the tenons, with the jeg joinery I decided to cut the tenons first. This way, I can then do a dry fit of the complete undercarriage and layout from that the position of the mortises on the slab top.

The first stage of joinery, as always, is laying out the joint, and Roubo poses us a choice – do we want to cut the joint as he describes it in the text, or as it is illustrated? The difference is the location of the rear tenon, which Roubo describes as being flush to the rear face of the leg (effectively as a barefaced tenon), but in the illustration is placed more centrally with two shoulders. Roubo explains that while most benches are built with the rear tenon flush to the rear of the leg, he considers that it would be best to have a shoulder either side of this tenon. I decided to follow historic French workbench builders, rather than implement Roubo’s suggested improvement.

DSC_1065

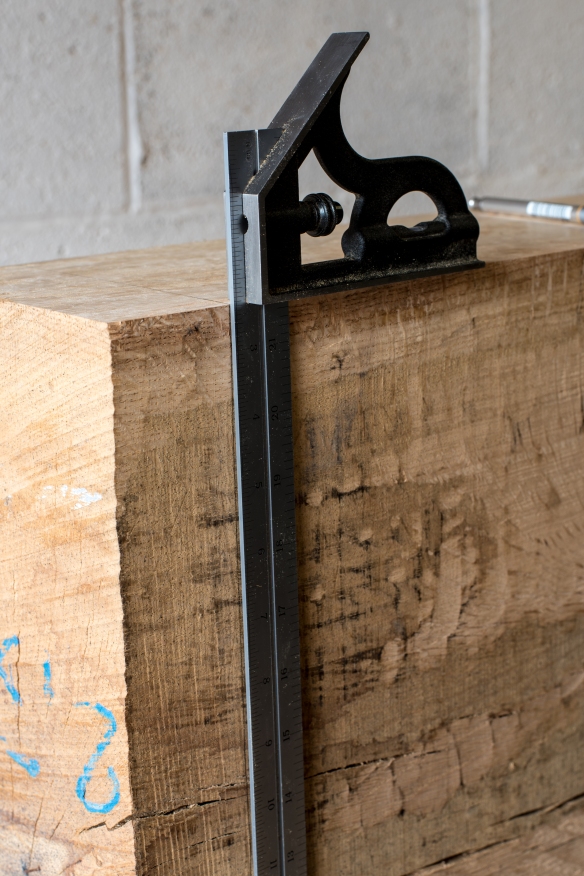
Laying out the dovetail slopes

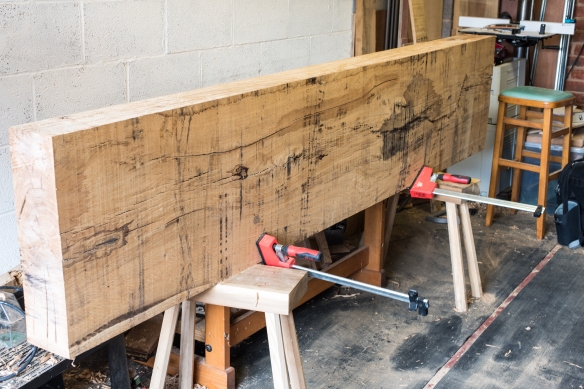
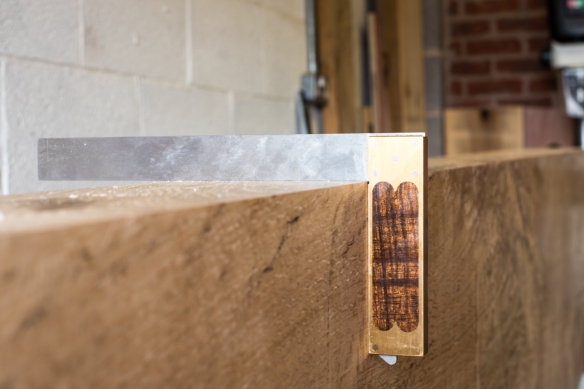
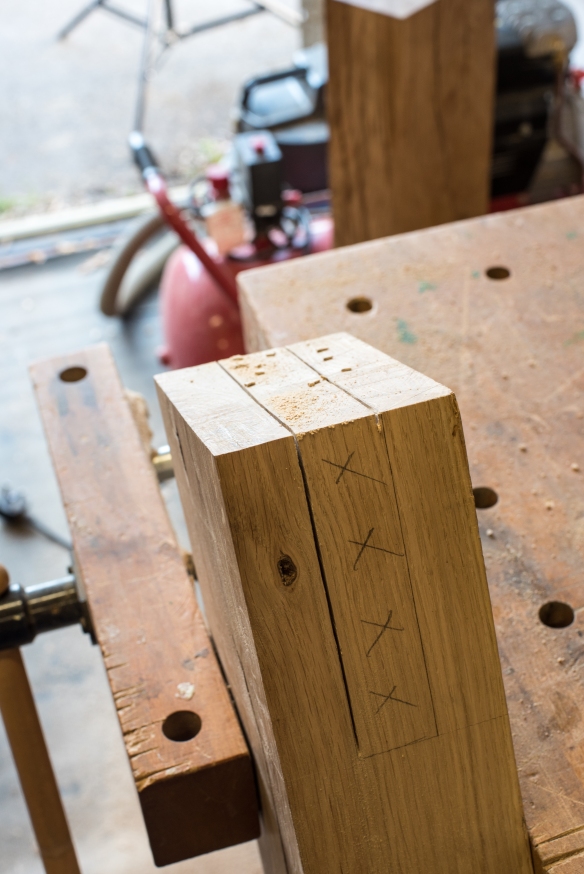
To layout the joint I divided the thickness of the leg into three equal parts, and struck lines on the end grain and both sides with the Hamilton Toolworks traditional marking gauge. The baseline for the joint was measured from the end of the leg and then transfered to all four faces of the workpiece with a marking knife and Vesper 10″ square. Because the top of the slab has not been flattened yet, there is some variation in the thickness of the slab, and the baseline of the joint was taken by measuring the thickness of the slab at the locations of each leg joint and then adding a hair to the thinnest dimension.

DSC_1093

Cutting a notch into the waste side of the layout line provides a clean starting point for the saw

The final element of the layout was to mark the slope of the sliding dovetail – I set a sliding bevel to 60 degrees and struck lines from the rear corner of the dovetail to the face of the leg. An easy way to check that the dovetail is on the correct face of the workpiece is to make sure that the mortise for the short stretcher is on the opposite face – if you have dovetails and mortises on the same side, then something has gone wrong!

DSC_1077

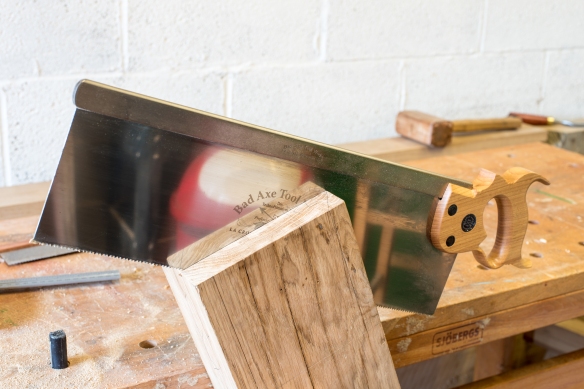
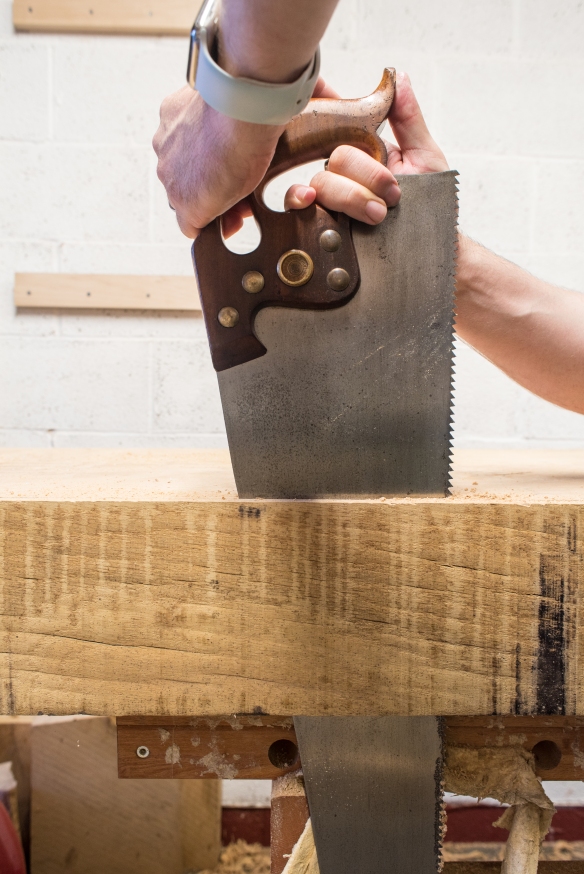
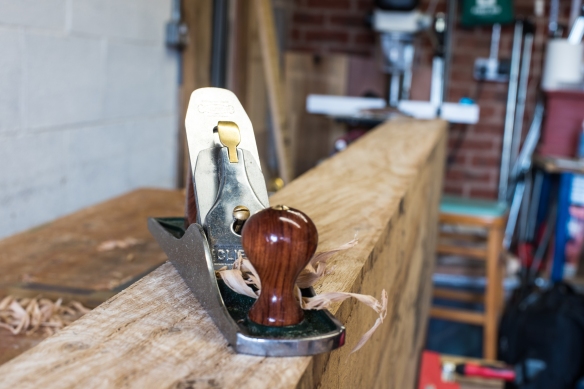
Big joinery requires a big (and accurate) saw. Enter the Roubo Beastmaster by Bad Axe

Cutting the joinery though 6 pouce thick oak is heavy work, but straight forward. This build was one of the reasons I bought the Roubo Beastmaster tenon saw from Bad Axe – at 5″ plate depth and 18″ long, it is a timber framing saw with the precision required for big joinery. A good handsaw would also work for cutting this joint, although I personally find backsaws easier to use in this sort of application.

DSC_1078

Here you can see how the first two cuts have been made to the lefthand layout lines, and now I make the cuts against the righthand layout lines, turning the leg in the vise after each cut.

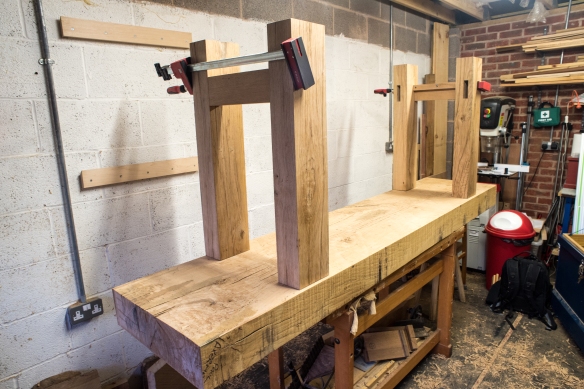
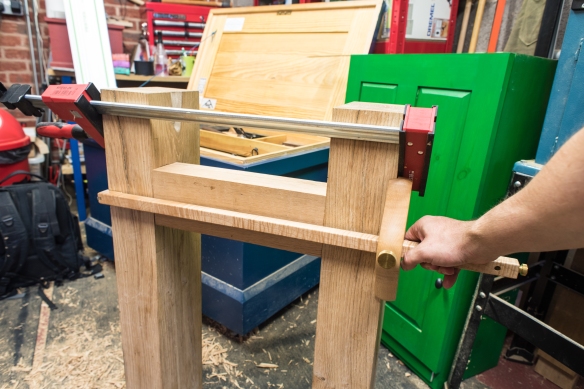
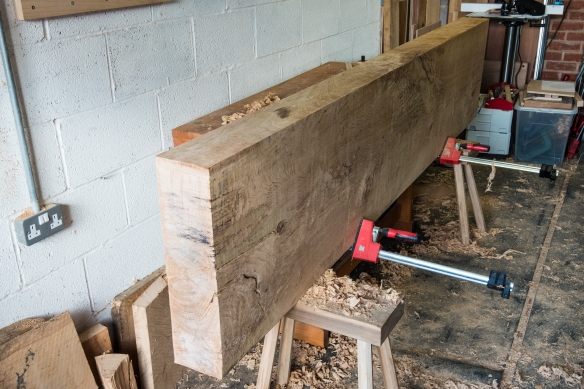
Cutting the joint is similar to cutting the tenons for the stretchers, albeit on a bigger scale and with a few additional nuances. The leg was placed on a block of scrap to elevate it above the top of my Sjoberg bench, and secured in the vise at an angle. Essentially the job is to remove the waste between the two tenons, and then cut the slope of the dovetail.

DSC_1084

Cutting the shoulders of the dovetail slopes

I find it easier to make all of the cuts to one side of a layout line before switching to cutting the opposite side of the next line, and so that is what I did here. Starting at the corner nearest me, I cut against the lefthand layout line until the saw hit the baseline and the opposite corner of the joint. I then rotated the leg 180 degrees in the vise so that it was facing the otherway, and then cut to the lefthand yout line on the opposite side. This meant that half the cuts had been made to each side of the joint, and I could now make the next two cuts against the righthand layout lines. With this second pair of cuts, the saw kerf had already been established across the end of the leg, so it was a case of starting in the corner nearest me and working down the remaining layout line until the baseline was hit. I then stood the leg vertically in the vise, and cut straight down to remove the triangle of waste that remained in the base of the cut. The slopes of the dovetails were then cut with the same saw, and the shoulders cut with the Bayonet.

DSC_1089

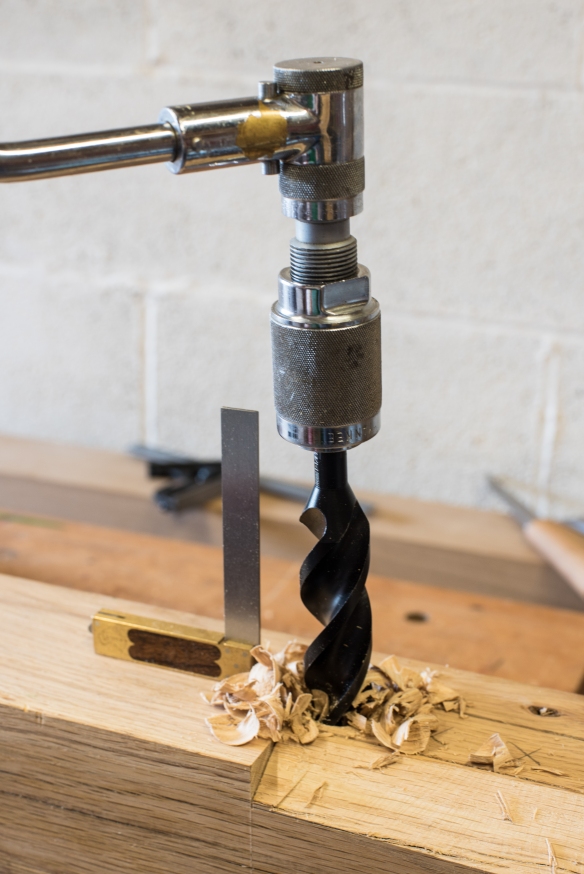
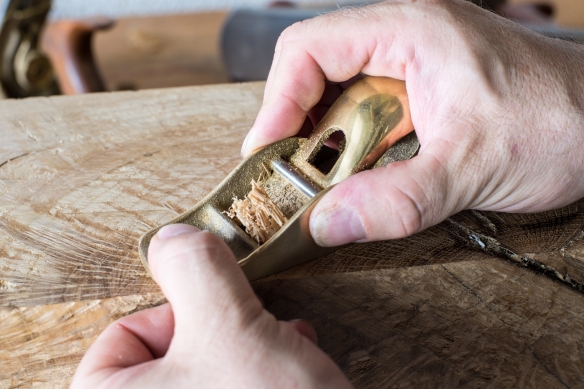
Drilling out the waste with a Woodowl bit and brace

Now, you could chisel out the waste from between the tenons, but that sounds like a lot of work. Much easier is to drill out the waste, which I did with a 1 1/8″ Woodowl auger bit (the largest bit I have) in my North Bros brace, getting as close to the baseline as I dare. As beefy as it is, the Roubo Beastmaster did not quite have enough depth under the sawback to reach the baselines of the tenons (which are 5 3/4″ deep), and so a small webbing of oak remained. I knocked this out with a mortise chisel and mallet, and the waste block dropped out of each joint.

DSC_1092

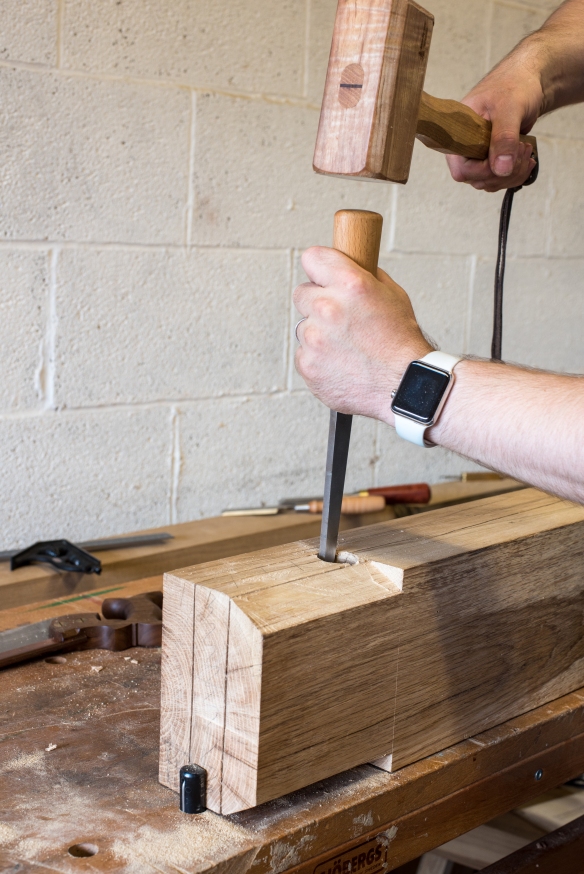
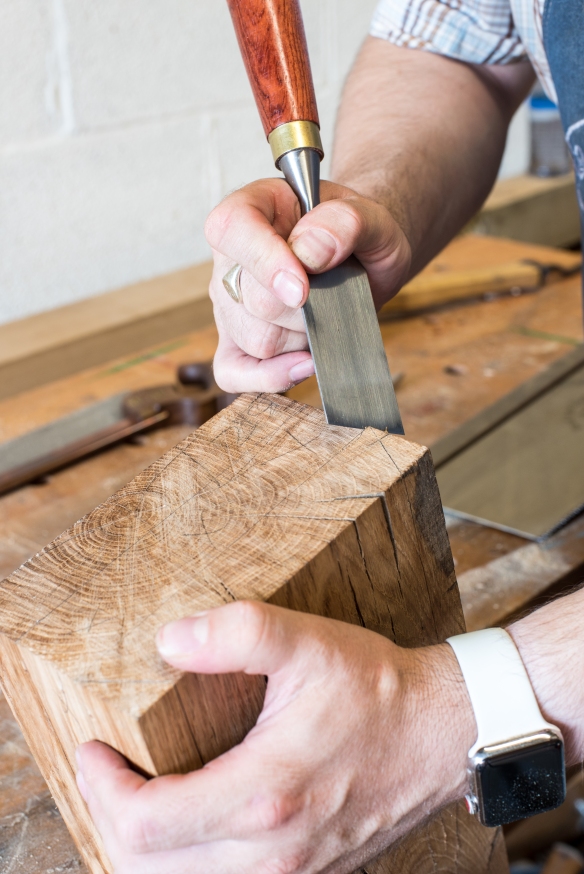
After drilling out the majority of the waste, the remaining webbing is removed with a mortise chisel.

There is a little bit of clean up to do on the tenons, mainly cleaning up the baseline between the tenons, and also a spot of paring on a few of the dovetail slopes. But this is a major step forwards with the bench, and as soon as my slab-moving team are next available we will move the slab into position to layout the double mortises and get the second half of this joint cut.

IMG_4160

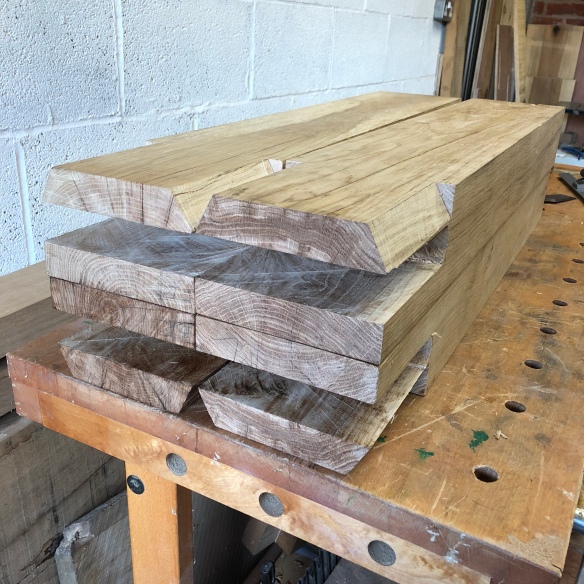
Four legs with the joinery cut

Roubo is Coming… Part 12

DSC_0991

With the legs assembled I could check the final width of the slab

The slab is now processed on five of its six surfaces, with only the top left to flatten (which will wait until the bench has been assembled). The final surface to be cleaned up in this stage of the build was the rear edge of the slab, and this the one area where my approach to the build has created a little extra work. In his book, Chris recommends processing the slab first, so that the stretchers are cut to suit the final size of the slab. However, because I decided to limber up for this build by preparing the undercarriage first, I had to size the slab to suit the stretchers. To be honest, this was not too much extra work, and given the time it has taken to get this far into the build, I’m glad I didn’t work on the slab when I first started, as it would likely have moved again in the intervening months.

DSC_0992

Direct measurement from components reduces the risk of error

The rear edge does not need to be square, or super flat, but it does need to be of the same width as the legs and short stretchers. Whenever possible, I prefer to avoid measuring, and so to test how close the slab was to final width, I assembled the legs and short stretchers, and placed them in position on the slab. I’ll admit that this was also for my own curiosity and to get a sense of the scale of the bench. With the legs in situ, I could see that the slab was 11/16″ too wide – not a huge amount in the grand scheme of things, but more than I could want to remove with a jack plane from a 6″ thick, 102″ long slab or pretty truculent oak. Instead, I decided to rip the waste off with my 119 year old Disston D8 handsaw.

DSC_1001

Ripping the slab to width. Yes this felt like work, but with patience it is possible to accurately cut 6″ thick oak by hand.

To provide a line to cut to, I set my panel gauge to the width of a pair of legs (still no measuring), and struck a line down the slab. When cutting 6″ thick timber, the key is to go slow and steady, and to keep the saw plate lubricated with plenty of mutton tallow. I used an overhand ripping grip for most of this work, alternating occasionally to lay down a guide kerf by sawing at a shallow angle to the top of the workpiece.

IMG_4027

The waste has been ripped off

Once I had ripped the waste off, I rotated the slab (with assistance from my ever-helpful slab moving team) so that the freshly cut edge was facing up, and the slab was resting on the saw benches (in the same position as when I worked the front edge). The rear edge is not bang on perpendicular to the underside of the slab, nor is it dead nuts straight. But it is within perfectly acceptable tolerances for this surface. I spent a few minutes cleaning up the area where the rear legs are situated with a jack plane, so that these are perpendicular to the underside, as this will make for an easier layout when cutting the leg joinery (the next stage of the build).

DSC_1025

Tuning the area where the leg joinery will be cut

The slab is now ready for the leg joinery to be cut, which means that we will be moving it back into storage while I cut the double tenon on the legs. The build is continuing to progress smoothly, and I am aiming to assemble the bench shortly after I get back from teaching at the Lost Art Press storefront in September.

DSC_1027

The slab is processed on all surfaces save for the top, which will happen once the bench is assembled.

Roubo Is Coming… Part 11

So far every step of the Roubo build has been spent on processes which directly contribute to the structural integrity of the bench, or which affect its usability. And it has all been great fun. Sometimes though it is nice to do some work that has no bearing on how a project functions, and is purely about decoration. So, while the slab was in the right position, and the weather made for a nice evening in the ‘shop, this week I inlayed the plaque that Jenny Bower engraved for the bench. This was really enjoyable work – most of my inlay experience is for irregular, and much smaller, shaped pieces for guitar inlay. The large and regular sized of the plaque was a nice change of scale, although the processes are very much the same.

When I originally commissioned Jenny to engrave the plaque, my intention was to inlay it in the vise chop, where it would be prominently displayed. While that is still a good location, it did occur to me that the vise chop could conceivably be separated to the bench in decades time. So I decided instead to inlay the plaque to the face edge of the slab top, to the left hand end of the bench where it would be seen every time I entered the shop.

Having determined the final location, I placed the plaque on the slab and traced round it with a marking knife, using several passes and light pressure to cut a clean line without pushing the plaque out of position. Crisp inlay requires a clean edge to the recess, and I like to deepen my layout lines with a wide chisel (in this instance a 2″ butt chisel) and a sharp rap from a mallet. I then pared a shallow tough into the layout line, using the same chisel, and working from the waste side outwards. This is similar to preparing a “first class cut” for joinery, and helps to prevent any cutting tools straying over the edge of the inlay recess.

With the edge of the recess cleanly established, excavating the recess was easily done with a large router plane, working down the depth incrementally until the plaque was sitting just a hair below the surface. The corners of the recess were a little tight for the large router plane to reach, but a No271 router plane with a spear-tip blade reached into those with little trouble (collecting the unusual blades for this tool does occasionally pay off, even if 95% of the work is with the standard square tip blade!).

A test fit of the plaque showed that it pressed into place nicely. The brass, and Jenny’s outstanding engraving work adds a touch of personalisation and class to this monolithic bench. The workbench should outlast me (and in all likelihood the Apprentice’s grandchildren), and so knowing that my logo will be carried into the future in this way is very humbling.

Roubo Is Coming… Part 10

DSC_0634

In position, and ready for the reference face to be trued up

After flattening the underside of the slab, the next surface to be processed is the edge which will face outwards when in use. This edge needs to be both straight, and perpendicular to the underside, to facilitate laying out the leg joinery, and because it will be a clamping surface when the bench is in use. With the help of my slab-manouvering assistants, the slab was moved onto my saw benches with the rear edge resting on the saw benches, and clamped to my Sjoberg workbench so that (what will be) the top of the slab was facing the workbench, and the show edge was facing upwards. The staked saw benches I built from the Anarchist’s Design Book are the unsung heroes in my workshop – they are constantly in use and are so versatile that only a fraction of their time is spent being used as saw benches. They have proved to be invaluable for this build, and have even taken the weight of the slab (which is a 4 person lift) without complaining.

DSC_0731

I never thought my No8 would look small, but this project does so

Planing a 110″ long, 6″ wide, edge is very different to jointing a furniture-sized board, and a clear plan is needed if you are to work efficiently and avoid chasing your tail. My plan was to get the long edges straight and flat, and then make adjustments as necessary to bring the edge to a clean 90 degrees from the flattened underside. Before I reached for any planes however, I checked the edge with a 50″ straight edge to see what I was working with. Halfway along the slab was a large knot where a branch had grown. That knot was a fair amount below the surface of the slab, and the edge of the slab had a gentle concave curve, the apex of which was located at this knot. A light swipe with a plane showed that the grain reversed around the knot, so that on each half of the slab the grain flowed from the end towards the knot.

DSC_0712

A sharp low angle plane is perfect for cleaning up wild grain

While this created extra work than if the slab had been closer to flat, it also suggested a straight forward solution. I worked the curve out of the edge, working from each end towards the middle of the length, using my No5 set to a rank cut. Once the curve had largely been removed, I moved to the No8 jointer to get things really straight. The grain around the knot was swirling and generally uncooperative, although moving to a low angle block plane tamed things quite easily. I am sure some folk would have flipped the slab over to avoid this knot, however I decided to stick to this orientation of the slab because the crotch wood, now it has been cleaned up, is really quite striking and will add a nice visual feature. On a practical level, turning the slab around is no trivial matter, and also requires my team of willing helpers to be available, which would slow down progress of the bench build for several  days. So in this orientation the slab will stay.

DSC_0715

It ain’t square until Dr Vesper says its square

Now that the edge was flat and straight I was able to check how close to perpendicular it was to the underside. A few spots required fine tuning, and for this task I quite like a No3 smoothing plane. Set to a fine cut, the smoothing plane is small enough to subtle adjustments to localised spots, which is exactly what I needed here.

DSC_0734

Marking the ends of the bench top

With the reference side and faces processed, I was able to remove the excess length. I deliberately ordered a slab longer than I needed so that I could trim any horrors found at the ends, and this meant that there was just over 8″ to remove to bring it down to the 8 pied a roi final length. The slab was in the perfect position to trim the ends, and so I struck a line with a 0.9mm pencil and 24″ combination square, and then cut to that line with a coarse filed cross-cut saw. The surface left by the Skelton Panel Saw is very good, so I will likely leave the trimmed ends as they currently are, without any dressing from a plane.

DSC_0738

The Skelton Panel Saw is basically a meat-powered chain saw, but cutting a 6″ thick, 23″ wide slab still felt a lot like work.

There is one small task left to do while the slab is in its current position, and then it will be time to flip it over and dress the rear edge. Which means that most of the work on the slab is done for now, and soon it will be time to cut the iconic leg joinery – an operation I am really looking forward to.

DSC_0742

The slab is now trimmed to length, and just needs the rear edge dressing