A quick lathe stand (and a cautionary tale)

IMG_0905

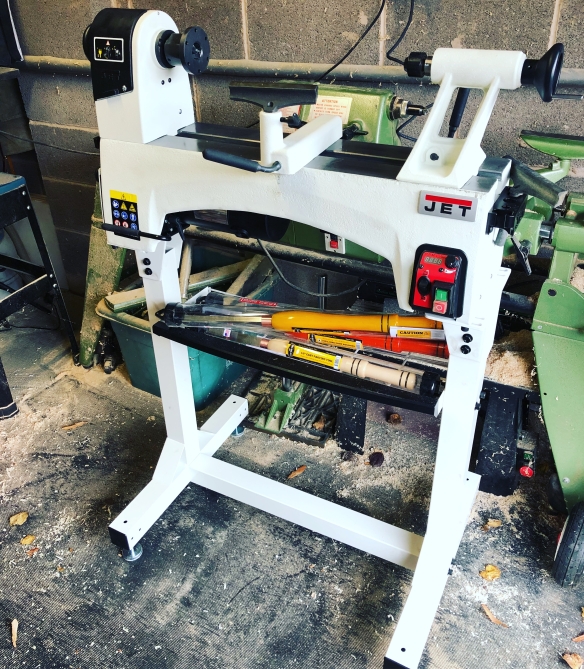
The lathe fits nicely on the Jet stand, but there’s no way to attach the stand extension if you hjave the extended lathe bed!

Last October I ordered a new Jet 1221vs lathe and bed extension. The Shopsmith had been a great first lathe, but I was after something more compact, and also at a much more comfortable height. After much indecision I decided to order the stand and stand extension Jet make specifically for the lathe – while it was extra financial outlay, I’m time pressured in the ‘shop at the moment, and building jigs or shop fixtures is something I generally don’t enjoy that much. So I decided to take the quick option and get a stand which I assumed would be good to go after following the assembly instructions.

IMG_2380

That turned out to be a bigger assumption that I realised, because Jet have at somepoint in the past couple of years changed the design of their lathe stands, and neglected to inform Axminster (with whom I placed the order), or in fact any of their other UK stockists. After a frustrating evening of picking through the various parts, and reviewing conflicting sets of instructions, it turns out that Axminster stock the “new” style Jet stand, but the “old” design of the stand extension (and the stand extension is an essential purchase if you have the bed extenstion for the lathe). Rather unhelpfully, these two design iterations will not fit together without drilling and tapping new holes, which is not what I want after spending a decent amount of cash on a readymade solution. To be fair, Axminster were fantastic and kindly arranged for a courier to collect the stand and provided a full refund within days of my initial query. But that left me with a lathe and nowhere to put it. I called round every other UK Jet stockist, and they all reported the same stock issue, so this may be a consideration if you’re thinking of ordering a Jet lathe.

IMG_2429

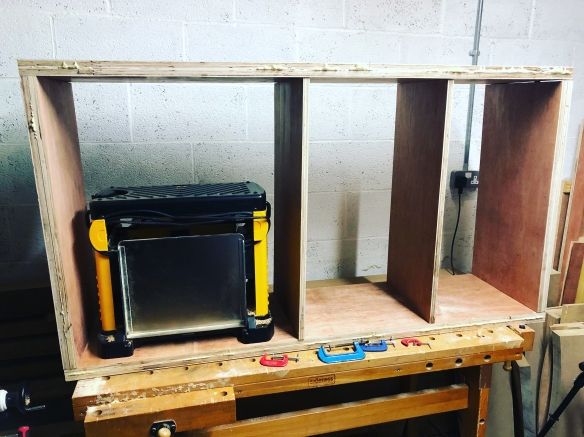
Dry fitting the internal dividers before assembling the stand

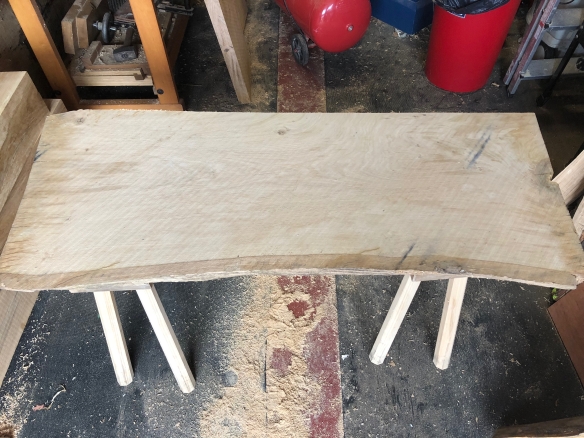
After several months of resting the lathe on my saw benches, I’ve got to the point where I need to reclaim some floor space for working on the larger elements of the Roubo bench. I played around with several ideas for suitable lathe stands, and while Rich was visiting for the Midlands Woodworking Show, we got talking about solutions. The key criteria for the lathe stand were that it had to offer mass and rigidity (no one wants a lathe dancing across the floor), to provide storage for my Dewalt thicknesser and other workshop kit (you can never have too much storage), and be quick to make.

IMG_2415

This build is held together with a bucketload of PU glue and 10mm dominos

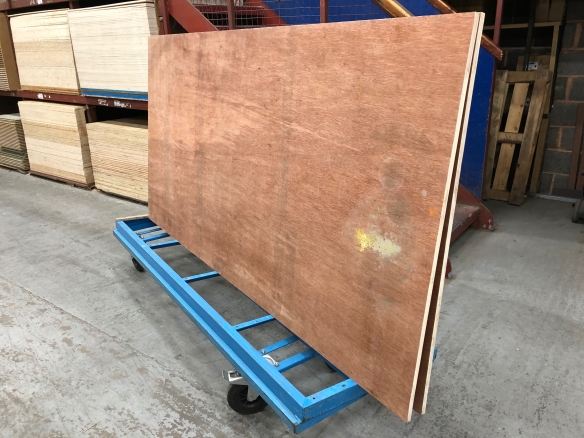
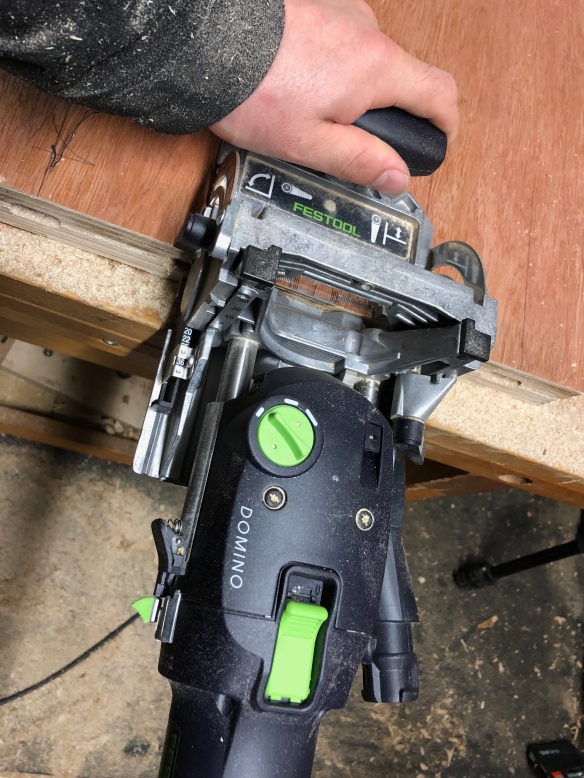
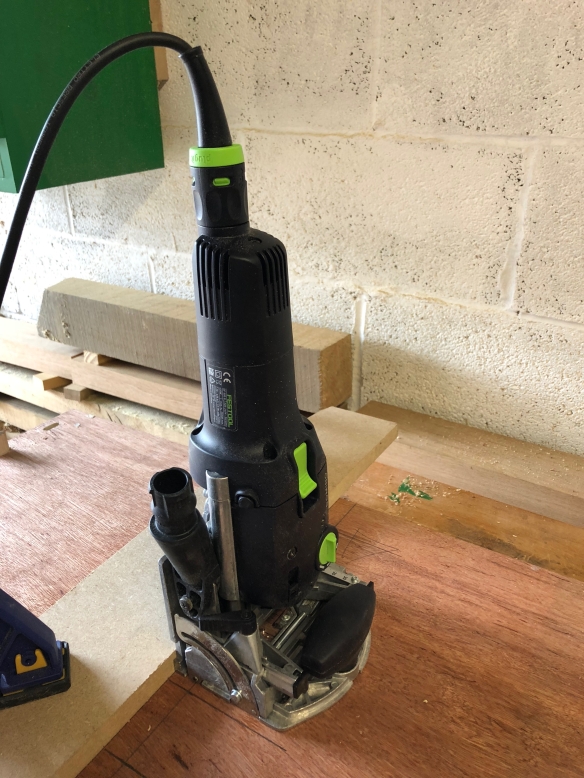
We quickly came up with a 34″ high, 60″ long and15″ deep cabinet which could be made by laminating two layers of 3/4″ ply to achieve suitable rigidity, and the following weekend I found myself ordering more sheet material than I’ve ever bought in one sitting. There is nothing elegant about this build, but it has been a quick and effective way of solving an immediate storage problem. The ply was laminated using a bucketload of PU glue (horrible stuff, but perfect for this application), and the casework was then assembled using 10mm wide dominos. While I prefer handtools, the Festool Domino is a wonderful machine – intuitive to set up, dirt simple to use, and super effective.

IMG_2483

Cutting the domino slots for the dividers

To reinforce the casework and prevent the top sagging, I fixed horizontal backboards of 3/4″ ply to the rear edge of the top and bottom, again using dominos. A base of 1×2″ pine was rescued from my scrap pile, and fitted using more PU and a pneumatic nail gun (another great problem solver for workshop fixtures and DIY).

IMG_2513

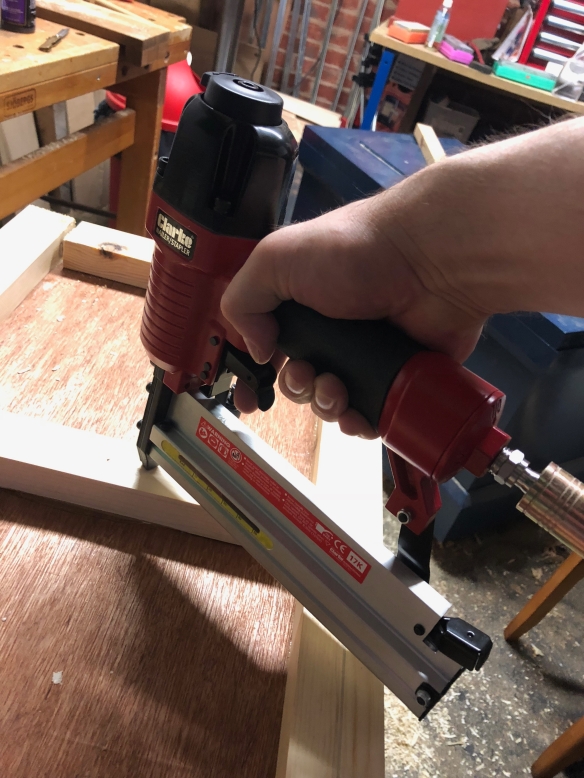
Fitting the base – more PU and a nail gun

The build only took a few evenings, and the most painful stage was actually decanting half of the workshop so that I could move the rubber flooring out of the way of the cabinet. The lathe fits comfortably on the stand, and so far there is no sign of any sag or movement under the weight of the machine. Storing the Dewalt in the cabinet adds further mass, and the two narrower compartments will be fitted with shelves and drawers on an as-needed basis. The only remaining work will be to clean up and paint the cabinet, and to drill mounting holes so that the lathe can be bolted to the top. I’ve not yet decided whether to fit a pine face frame – it would smarten the unit up plenty, but also add a reasonable further time investment to what is at the end of the day a workshop fixture. If you have strong opinions on face frames, then cast your votes in the comments!

IMG_2525

Roubo Is Coming… Part 6

_DPP8208

Cutting a small notch to the waste side of the layout line gives the saw a good starting point

And then there were two! Both leg sub-assemblies (each consisting of a pair of legs connected by a short stretcher) are together and looking good and square. I’ve also cut the tenons for the long stretchers and roughed in the corresponding mortises with the bit and brace. All that stands between me and a completed undercarriage is a fair amount of chisel work to pare the remaining four mortises square. So the end of this stage of the build is coming into sight.

_DPP8205

Cutting the tenons on the long stretchers – establishing a good saw kerf all the way round the tenon will guide the saw

Repeating any process results in efficiencies and more accurate techniques. Cutting the tenons is quick work with a decent tenon saw, even in oak, so there is not much time to be saved on this process. There have been improvements in accuracy across these eight tenons. Accuracy is something that you develop with muscle memory and educating your eye, and while the first set of tenons didn’t require much in the way of tuning, with the second set I’ve been riding the layout line much more comfortably and accurately. Where tenons have needed a little tuning, the large router plane has provided an efficient and repeatable way to remove any inconsistencies or bumps from the tenon cheeks.

_DPP8213

Paring the baseline for a “first class cut” on the tenon shoulder

My work hasn’t involved too much mortise and tenon construction to date (the Anarchist’s Tool Chest, and Saw Cabinet are the standout examples), but this is a really useful and enjoyable joint to use, and now that I’ve tuned my eye in, I want to keep cutting big beefy tenons. Fortunately there is still the joinery to secure the legs to the bench top, so I’ll be getting more practice at oversized mortise and tenon joinery later in the summer (with an added Roubo-flavoured twist).

IMG_2533

For a burly and aggressive timber framing saw, the Bad Axe Roubo Beastmaster leaves a remarkably clean surface

Next I will be pressing on with the remaining four mortises, and fitting the vise hardware before turning my attention to processing the slab top. There’s still lots to get done, but slowly a bench is emerging from this pile of oak.

_DPP8218

To completed sub-assemblies – the long stretchers will connect these into a complete undercarriage


Roubo Is Coming… Part 5

After several months of work, this is the moment when the various components of the workbench start to come together and look like something. There’s a great deal of distance left to go, but I now have the makings of a workbench undercarriage.

_DPP8190

Marking the tenon shoulder with the Vesper 4″ square and Hamilton marking knife

Cutting the mortises for the short stretchers was enjoyable but slow work, so I was looking forward to swapping my chisels for a tenon saw and cutting the second half of the joint. This is much faster work, even accounting for fine tuning the joint. When I laid out the mortises I had locked my marking gauge in position, and it will stay at that setting until the undercarriage is completed. I laid out the bare faced tenons with the marking gauge, and then scribed the shoulders with a square and marking knife, before shading in all of the waste with a pencil.

_DPP8181

The Roubo Beastmaster is the definition of controlled aggression – it ploughed through this 3″ oak tenon like the Apprentice ploughs through chocolate brownies

To cut the tenons I reached for my Bad Axe Roubo Beastmaster tenon saw. This build was one of the reasons I originally ordered this saw, and at 18″ long with 5″ depth saw plate it is a substantial tool. The key to cutting any joint is to establish a saw kerf to guide the saw through the entire joint, and cutting the tenon cheeks takes three cuts. First I set the stretcher at an angle so I can work to the layout lines on the end of the stretcher as well as one side. This keeps me cutting straight on both vertical and horizontal planes. I start at the corner nearest me, and keep sawing until I hit the far corner of the tenon end and the baseline on the side facing me. I then flip the tenon over and work down to the baseline on the newly exposed face, using the saw kerf along the end of the tenon to guide me. Once I hit that baseline, I place the stretcher vertical in the vise and cut out the triangle of waste that remains above the baseline.

_DPP8194

After making the first cut, turn the stretcher over and cut the second side, using the existing saw kerf to guide you.

Once the cheeks are cut, I cut the shoulders (this time with a Bad Axe Bayonet saw, filed hybrid – this is my “do everything” utility saw, as I’ve written before). The tenon shoulders are a “first class cut” and so I keepen the knife line with a wide chisel and pare out a small trench to guide the saw. Placing a finger gently on the toe of the saw prevents it from jumping out of the cut, and I saw down to the layout line until the waste pops out.

_DPP8202

Cutting the shoulders with the Bad Axe Bayonet

Placing the tenon in the corresponding mortise helps to identify if there is any tuning or further material to be removed. A broad chisel helps to remove any small humps from the tenon cheek, but to be honest if you have cut the tenon carefully you shouldn’t need too much tuning. Gently chamfering the corners of the tenon helps it to slide in smoothly without any junk in the corner of the mortise (often the hardest parts to clean out) fouling the fit.

_DPP8186

Chris Vesper says this is square, which is good enough for me

Once I had a pair of tenons cut I did a test fit with a pair of legs, checking for square with my Vesper 10″ square (the final arbiter of square in my workshop). I now have two subassemblies of legs connected by short stretchers, and next will be to cut the mortises and tenons for the long stretchers.

_DPP8183

One of the two completed sub-assemblies. Now to cut the joinery on the long stretchers and connect them all up.

Slab Life

IMG_2400

Two very large oak slabs, waiting to be turned into something useful

I’ve had two large oak slabs sitting in the corner of the workshop since January – the product of a fruitful research trip last autumn to Whitney Sawmills and St Fagans. The slabs are 50″ x 45″ and 2″ thick, and take up a monstrous amount of space, so I’ve been biding my time to cut them down into usable sizes and reclaim some much needed floor area. After several evenings of cutting mortises for the Roubo bench, I felt it was time for a couple of hours doing something different, and decided to breakdown the slabs. As I’m planning on doing a full dry-fit of the Roubo undercarriage soon, having some clear space in which to assemble the legs and stretchers will definitely make like easier.

_DPP8173

Key tools for working with rough lumber – a timber framing square and pair of thick gloves

The first thing I do whenever I break down rough stock is work out how to efficiently harvest the parts I need, along with any useful spares. This was no different, although the size of the slabs did present a few different challenges. The oak was purchased for a special project I’ll be starting work on very soon (more about that soon), but I also knew that I’d have plenty of spare left over for other things. So, having marked out the critical components I needed for the main project, I reviewed what spare material I had.

_DPP8166

Tracing the outline of the seat for the settee – I did this on both slabs before deciding which would be best

As can be seen from the photos, the slabs are roughly “Y” shaped, from where the trunk had forked in two directions. The right-hand stem of one slab had been whispering suggestions of being turned into a two-seater Welsh stick chair. As a project, that really appeals particularly given the gentle concave curve to the edge of the slab which would work nicely as the front of the seat, and I can shape the rear edge to match. That focus on letting the material dictate the proportions and form of the chair is something which early Welsh stick chairs really emphasised. To make sure I had enough material available for the seat I rigged up a pair of trammel points to a long ruler, and traced along the edge of the slab to establish where the rear of the seat would fall.

IMG_2405

The Disston D8 and staked saw benches are how I cut up stock for ever project

The slabs were large and heavy enough to require rolling around the workshop instead of carrying. That being said, placing a slab on my pair of staked saw benches was rock solid while sawing. I ripped the settee parts off one slab, as well as the components for the main project off both slabs, using the Disston D8. The slab was still reasonably wet (24%) which meant that sawing it by hand was not as heavy going as it would have been if the timber was dry. The remaining sections were then crosscut to size, and stickered to dry out a little more before I bring them into the house.

IMG_2406

The settee seat blank. The back edge will ultimately be curved to match the front.

A Gift for the Apprentice

_DPP8072

The Apprentice’s very first tool

As I’ve written about before, I don’t always find it easy to navigate the tension between the (deeply rooted) need to stand at my bench and make things, and with the desire to be the best father I can be. Family time is the most important thing in the world, and even though I make sure that I prioritise being with the Apprentice and Dr Moss, there are definite moments when I feel guilty for being at my workbench. I’m also realistic enough to know that not pursuing woodwork (which feels more of a vocation than a pass time) is not a viable choice, and so I carve out pockets of time to be in the ‘shop and am grateful for a supportive and encouraging spouse.

While I was at the Midlands Woodworking Show I also decided to use woodwork trips as an opportunity to do something tangible for the Apprentice. She has been showing an increasing interest in the workshop, and really enjoyed helping me on the boot bench last autumn, and so I’ve resolved that everytime woodwork takes me away from home I will pick up a tool for the Apprentice to use in the ‘shop with me. The criteria are that the tools need to be high quality, and ones which will last for a lifetime, or at least as long as she’s interested in using them. I’d been giving thought to the most appropriate starter tools, and Mortise & Tenon Issue 5 had a very helpful article on exactly this subject. So, for her first tool I picked up this delightful spokeshave by Lee Valley – it is perfectly sized for a soon-to-be-four year old, very safe, and I knew that she’d like the look of the decorative casting. After honing the iron, and sanding some flashing from the inside edges of the handles, it was ready to go.

IMG_2300

Making shavings with the Apprentice

Last weekend the Apprentice ventured into the ‘shop to use her spokeshave for the first time, and we spent some very happy minutes rounding the edges of a piece of scrap pine. I’ll never pressure her to come into the workshop, or to do woodwork, but the door will always be open to her, as will a small collection of her own tools. This moment probably meant 10,000% more to me than it did to her, but I confess that I was a very proud dad. So I’ll take that as a win.