Just a 12-string beauty pageant

When Gareth was in the workshop a couple of weeks ago we managed to find time to do a photoshoot of Esmerelda as well as the Policeman’s Boot Bench. I’ve wanted to have set of high quality photos of Esme for some time, so was delighted to see what Gareth had done. One of the benefits of getting a photographer in to take photos is that they bring a fresh perspective and spot details or angles which you (as the maker) can often overlook. So it was with this shoot.

_DSC9138

Esmerelda – super jumbo sized 12 string acoustic guitar

_DSC9168

The body shape was inspired by pre-war era Gibson guitars, with a large rounded lower bout, tight waist, and small square shoulders.

_DSC9145

Inlay of morther of pearl, black pearl, gold pearl, green abalone, and red abalone, on cocobolo headstock veneer.

_DSC9146

The Indian rosewood fretboard is developing some nice character after a decade of playing

_DSC9148

Rosewood/ maple/ rosewood soundhole decoration, and cocobolo bridge, on European spruce soundboard

_DSC9154

Mahogany neck, with a rosewood grain filler, coat of shellac, and waterbased lacquer

_DSC9165

Indian rosewood back, with maple and rosewood binding to match the soundhole decoration.

The Policeman’s Commission

My workshop has felt very empty since the Policeman’s Boot Bench was collected by the client a couple of weeks ago. I was delighted when the client sent me a photo of the Boot Bench in situ, and even more so when he very kindly sent the following (unsolicited) testimonial with the suggestion that I post it on the blog. Long standing readers have had plenty of discussion this year about the Boot Bench from my perspective – now it is time to hear about it from a different vantage point.

SONY DSC

As the (now ex-)policeman alluded to in many blog posts on Over The Wireless, I felt bound to exercise my Internet-given right of reply about the build. For anyone thinking of using a craftsman for a specific piece of work, I hope this provides some insight into the experience.

As the client, the process has been fascinating, and unexpectedly gratifying. I came to commission this build basically because the furniture market wasn’t giving me what I wanted. Two years ago I bought my own house in a slightly shabby part of the East End of London. I have been doing it up ever since. It’s a Victorian terrace with a long, narrow hallway – an awkward space for storing shoes. For whatever reason, the British furniture market does not do shoe storage very well. You either get horrid IKEA plastic trays for the wall, a monstrous church pew/bookcase hybrid from a ‘posh’ (read: overpriced) retailer, or a flimsy Argos open-frame that achieves an anti-TARDIS effect: taking up egregious amounts of space whilst storing very few shoes. With no good options, I mulled for some months. Then whilst griping to Kieran about the perennial First World problem of unsatisfactory shoe rack choices at his daughter’s first birthday last year, I realised with a start that I was chatting away with a skilled amateur furniture maker.

SONY DSC

I floated the idea of the build, and a commission was rapidly and enthusiastically agreed. The process was pretty simple. I had in mind, after many months of internet scouring, a rough vision of what I wanted. During September I drew up detailed sketches of front, side and base, including proposed dimensions, and passed them to Kieran. He responded with a request for photos and measurements of the space in which the piece would sit, to help in judging dimensions, materials and finishes – in particular as the boot bench would sit next to a radiator. He then suggested some fairly mild adjustments: less dainty feet, deepening the dimensions to accommodate bigger shoes (such as his own), a shift in style from country kitchen to Arts & Crafts, and the addition of a back panel to protect my hallway wall from scuffs. I was generally satisfied, but asked that the feet lift (to expose my prized encaustic tiled floor). I also rejected a suggestion of decorative nails to secure the shelves, as it was out of keeping with the style of the existing furniture in nearby rooms. The result was an elegant, practical piece that will work in many different settings as I move over the years.

From October it was over to Kieran for by far the greater part of the work. Every weekend for the following nine months I had the pleasure of prose and photos describing the latest progress on the build. First came heavy planks of wood, which I had the chance to see in person on a visit in December. These were left to acclimatise to the environmental conditions of the workshop. Then work started in earnest on New Year’s Day, and out of the rough lumber came unexpected geometry: smooth planes and clean lines, neat grooves for the shelves, and lastly sharply toothed dovetails. Kieran kept consulting where needed, such as when I requested a deeper curve to the foot detail for aesthetic reasons.

SONY DSC

In February, Kieran sent me out a sample board of waxes and shellacs – unremitting professional that he is. I had seen pictures of the sample board on my phone, and had one choice in mind of black wax and a reddish shellac, which would lend the wood a warm, grainy look.  In hindsight it would have been an error to choose without seeing the samples in person first as I surprised myself with my choice of a black wax and blonde shellac. These coats created a strong contrast, showing off the grain but maintaining the underlying cool tone of the wood. I was also able to visualise properly for the first time how the hallway would hold together visually: invaluable.

Spring saw the delicate process of fitting together all those carefully prepared boards, and the transformation from lines on a page to a three-dimensional object. My role in this period mainly consisted of frantically opening each of Kieran’s weekly updates, and thinking of new ways to express my excitement at each new development. In fitting the backboards, Kieran managed to sneak in an element I had ruled out: the decorative nails, which I had thought too chunky and visually out-of-keeping with other furniture in the house. I still think the original call was right, but I am glad of the cheeky addition at the back. It added interest to a part of the object that would otherwise be relatively dull, and will remind me of the build process every time I move the boot bench. Kieran is a fan of subtle gestures like this – such as the roughly scalloped underside of the shelves, and the out-of-the-way placement of his maker’s mark.

SONY DSC

I should warn and confess other readers that it has been something of a torment to have our joint vision realised so gradually. But, like a good TV series, it has been worth the wait for each installment. And, knowing Kieran’s busy family life and career, it has been touching to see the regular commitment of his spare time. That’s one thing to bear in mind with an amateur commission: it does take time. From that initial conversation to collection was exactly a year – of which seven months was building time, and the rest was faffing on my part. I would estimate that the build time would equate to about three or four weeks’ work if done full-time (although there were additional deliberate delays to allow the wood to adjust to its environment). As a generally impatient person, the waiting was difficult but not unbearable for me.

SONY DSC

And a few weeks ago I was finally able to achieve catharsis after months of anticipation: I rented a car and drove up to collect the boot bench while attending another gathering at Kieran’s house. First order of business on arrival was to view the boot bench in person. I was very, very satisfied to finally be able to see, walk around, touch, examine and test the weight of the thing. It has an unexpected solidity, and is a surprisingly tactile experience. After allowing other guests their own viewing, several of us carefully hoisted it into my boot, where I swaddled it in blankets. No longer bound to this build, Kieran took an expansive turn and began discussing more furniture to come from his workshop – including a more complicated variation on the boot bench for his own hallway. I meanwhile made an early exit, so I could get home at a reasonable hour and make use of my heavy-lifting housemates.

With the boot bench finally in position, my hallway has gone from messily cluttered to a state of butch elegance. The careful consideration of shape, proportion, material and finish have made the space substantially more functional and beautiful. My housemates have also stopped the boot-rack related banter (it’s a shallow seam to mine). The final seal of approval came this weekend from my mother, who dressed and photographed the boot bench for me – and said she’d be tempted to make a commission of her own.

Don’t fret, just keep slotting – the Bad Axe Luthier’s Saw on test

_DPP3922

The new Bad Axe Luthier’s Saw

I find it hard to believe that I first floated the idea of a dedicated luthier’s saw to Mark Harrell three years ago, in many ways it feels like the conversation started much more recently than that. Slotting fret boards for guitars (and other fretted instruments) is one of the most critical stages of a build, determining whether the instrument will intonate properly. For all of the jigs on the market to help locate the cut at the correct point of the fret board, I’ve never understood why, or been satisfied with, the proliferation of cheap saws to make these most critical of cuts. And so I decided to reach out to the best saw maker I know and see if he was interested in giving luthiers a high quality saw which could handle fret slotting duties as well as other fine cross-cut work.

_DPP3916

That conversation ended up lasting two years as specifications were circulated, adjusted, and ideas tested. We welcomed good friend and fellow luthier Susan Chillcott to the conversation, and continued to work through exactly what the specification for a fret slotting saw would look like. A protoype arrived on my workbench in March 2016, followed by the first production model in August 2016. And testing continued.

This is a test (this is very testing)

The best way to really get to grips with a tool is to live with it and test it on real life projects and in as many different applications or circumstances as possible. And here is what I found interesting – although the Bad Axe Luthier’s Saw was intended for fret slotting and other fine lutherie work, I’ve found myself reaching for it repeatedly for furniture work too. The depth stop was a real boon when cutting out the stopped dados in my School Box, and again came in handy when defining the tenon shoulders for the legs of my staked saw benches. So although this is marketed as a “luthier’s saw”, it is far more versatile than that, and is perfect for anywhere that a very fine furniture grade cross cut is desirable.

_DPP3923

The Primary Mission

And yes, it slots fret boards too. Far better than any of the cheap (read: disposable) fret slotting saws I’ve used in the past. Mark’s skill in sharpening saws is no secret, and the luthier’s saw has been sharpened to perfection. The saw has that familiar Bad Axe balance of aggression and precision, requiring only a couple of strokes to cut to the appropriate depth for fret wire, and despite the aggression it still leave behind a complete absence of blowout on the exit side of the kerf. In fact, this saw leaves the cleanest kerf I’ve seen on a fret slotting saw, by some measure. And that hammer-set kerf has been dialled in to deliver a 0.022″ kerf for most modern fretwire tangs. On a precision tool like this, getting the fine details right is the difference between a saw that works, and something that looks pretty but will stay on the shelf. Bad Axe have got all of the details right, and this saw is a workhorse which will stay in my tool chest until I’m ready to hang up my apron for the final time.

_DPP3915

Slotting a maple fret board

The open tote feels identical to my Bad Axe dovetail saw, and fits the hand perfectly with no hard transitions, flats or corners to cause fatigue, leaving you free to concentrate on the cut and not on the saw. Mark also did a great job on improving the plastic depth stop used by other fret slotting saws. The Bad Axe depth stop is substantially thicker than the plastic alternative used by other manufacturers, which gives a greater surface area to register on the workpiece, and instead of standard acrylic commonly seen, uses a Polyethylene polymer with a high lubricity. The difference is instantly noticeable – when you bottom out of the cut the depth stop glides across the work piece without catching or scuffing, preventing the saw from sinking deeper and leaving no mark on the work. The brass thumbscrews cinch down authorititvely and in many months of testing I never felt the deth stop slip in use.

_DPP3906

There are many ways to slot a fretboard, and many jigs which claim to make life easier. I recently took the plunge and ordered a fret slotting jig from Tony Wright, an engineer and luthier of 28 years, and the brains behind Necx Products and Lakestone Guitars. This is the same jig as we used in Totnes, and is the perfect pairing for the Bad Axe Luthier’s Saw. Most jigs rely on a guide board and locating pin arrangement to deliver the saw at the right location for each fret slot. This ties the user to just the scale lengths the jig manufacturer supports, and also requires additional cost (not to mention storing additional guide boards) if you want to build to a different scale length. In contrast, Tony’s fret slotting jig uses a vernier scale and a free moving carriage to move the saw along the fretboard, so any scale length can be cut without the need for additional accessories.

_DPP3904

The vernier scale enables the user to precisely locate the saw for each cut

As a combination, this really cannot be beaten. The fine gearing of the carriage assembly on the jig means that the Bad Axe saw can be positioned by increments of 0.1mm before making the cut. When you have an incredibly precise saw, you only get the benefit of that precision when you can be targeted about where it is deployed. Having moved the carriage to the right location the carriage locks down tight with a large brass knob, and the cut can be made. All in all, a fret board can be cut with absolute precision in little more than 30 minutes.

_DPP3903

The carriage locks down to prevent the cut from wandering

European Woodwork Show

I will have the Bad Axe Luthier’s Saw and the fret slotting jig with me at the European Woodwork Show next month, as well as a supply of fret boards. If you would like to have a go at slotting a fretboard do stop by and say hello.

The Luthier’s Saw is now on the Bad Axe website and is available for order.

Disclosure: I assisted Bad Axe in the design and development of the Luthier’s Saw, and my sole payment for that work is the saw pictured above. I receive no commission or payment based on future sales of the saw, and no payment  for writing about the saw. All content on Over the Wireless about the Luthier’s Saw is my own unbiased opinion.

The Policeman’s Boot Bench – glamour shots

Two weeks ago photographer Gareth Partington spent an evening in the workshop for a photo shoot of the Policeman’s Boot Bench and Esmerelda. I’ve been meaning to build up a portfolio of my work for some time, and Gareth’s photography is fantastic (seriously, check out the portraits on his site), so I was very pleased when he agreed to take photos for Over the Wireless. The photos of Esmerelda will follow in a separate blog post, but for now, here is a beauty pageant for the Policeman’s Boot Bench.

_DSC9069

The Policeman’s Boot Bench.

_DSC9022

Dovetails and dados. For this piece I wanted to emphasise simple but effective joinery as well as clean lines.

_DSC9039

The shelves are orientated so that the most attractive quartersawn grain and medullary rays are at the front edge.

_DSC9059

Tongue and groove backboards with a simple 1/8″ bead. Simple and classy.

_DSC9080

The confluence of several features – dovetails, rose head cut nails, and my maker’s mark.

_DSC9084

The foot detail came out really nicely, and gives a real lift to the piece. And the best thing? It’s all simple pre-industrial geometry.

_DSC9083

Rose head cut nails fastening the backboards to each of the shelves.

_DSC9090

And dressed. Featuring a selection of mine and Dr Moss’ shoes.

_DSC9127

I’m not sure the Policeman will be using shoes quite like these…

An update on stickers and tees

IMG_2504

The next print run of Over the Wireless t-shirts has just landed, and pre-orders will be shipped out tomorrow. I currently have sizes L to XXL in British Racing Green, and M to XXL in Cardinal Red. Prices are £20 including shipping within the UK, £25 including shipping to the US, and shipping to other locations on request.

img_1208

OtW decals are also in stock, in two designs. A pair of decals (one of each design) is £3 including postage in the UK, or $5 including postage to the US. Other locations (as always) on request.

If you would like to have the OtW logo displayed about your person or tool chest, and would like a t-shirt or decals, then drop me a line in the comments or at kieran@overthewireless.com. I can never guarantee that we will do another print run (although I hope to be able to) so if you’ve been holding on for a tee, now is the time.

Breaking the Mould(ing) – Matt Bickford in Interview

It is inevitable that whenever you interview someone for a magazine column there is plenty of material that gets left on the cutting room floor. Fortunately there are no word limits on blog posts (although maybe there should be?) and so it is always possible to revisit the additional material in a later post. What follows is the full, unabridged, interview I conducted with wooden plane maker Matt Bickford for Issue 260 of Furniture & Cabinetmaking.

03

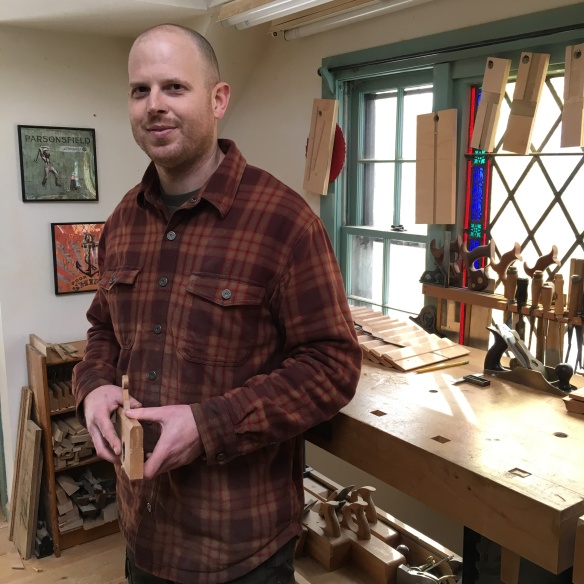
Plane maker Matt Bickford

  1. Alongside Larry Williams of Old Street Tools, and Philly Planes here in the UK, you are one of the first modern makers of wooden moulding planes, and hollows and rounds in particular. What prompted your interest in moulding planes?

There are many (and more) people out there that have included the versatility that these tools afford into their work. These tools offer what machinery simply cannot. Like the ability to use simple fore, try and smooth planes manages every width and length of stock available, the ability to manipulate simple moulding planes like hollows and rounds, which have always been what has allured me, offers the same idea of infinity. The internet, god bless it, has just brought us out of our basements, garages and sheds to share our discoveries together.

07

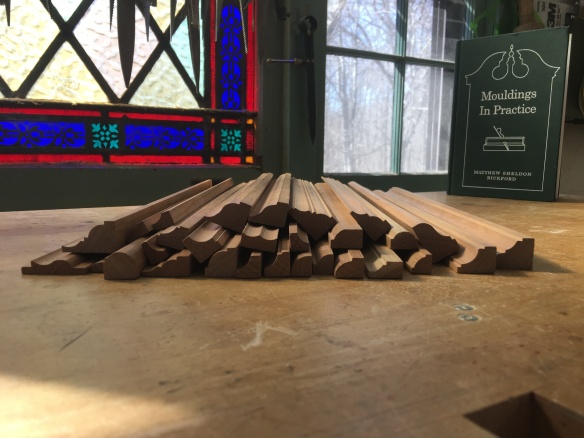
Moulding profiles, and a copy of “Moulding in Practice”

Along with Larry and Don, I may be one of first modern proponents of new planes and what properly made new planes afford the end user. If you purchase an old Stanley plane from a garage sale and immediately put it to wood you may conclude that old tools are substandard to the machinery and technology of today. In that same manner, if you pick up an old wooden plane and immediately put it to wood you will likely conclude the same. The jump in performance that can be achieved with tuning an old Stanley plane versus the exceptional quality of a new Lie-Nielsen plane can be achieved with wooden planes. Maybe the difference in knowledge and ability is due only to the amount of published literature or megabytes that have been dedicated to the two: metal planes get a lot of attention, wooden planes have not yet been funded the same. The same jump, or evolution, can be achieved. After all, likely the same issues are at stake. The differences are, I imagine, the perceived knowledge. I have certainly followed Larry’s lead in this respect.

Truth be told, Larry and his DVD introduced me to the idea of making my own planes. Prior to this video I had never considered making my own in the same fashion that, when I was twenty, I never considered making my own chair.

01

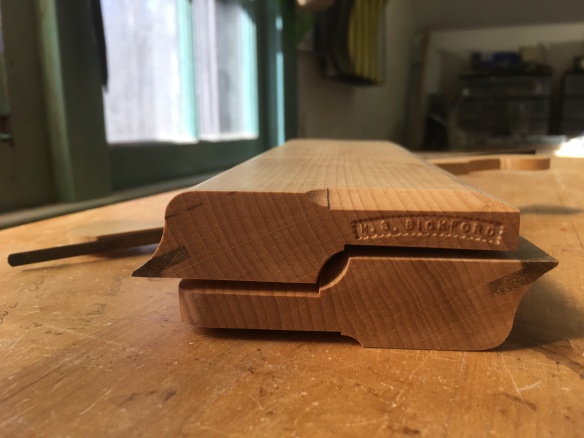
Complex moulding plane by Matt

I became aware of the absolute versatility that hollows and rounds afford through the internet, but I did not gain the ability of being able to use them through this same medium. Larry suggested that they could do anything. I then purchased an antique set and failed, failed and ultimately learned in my basement. Don McConnell’s DVD confirmed my technique. Ultimately, teaching people refined my procedure, of which I may be a modern proponent. Using this type of tool to create predictable and desirable results is not straight forward when holding the tool for the first time. The process, however, can be straight-forward. Hopefully my book helps in this regard.

So, in answer to your question, what prompted my interest in this type of tool is the idea of ‘infinity.’ With a basic set of hollows and rounds I am able to make every moulding profile that I may want, so long as the profile is straight (curved profiles are done with carving gouges and scrapers.) The projects that I choose are neither dictated nor decorated with the selection of router bits I may own, regardless of size. I can produce any moulding with the tools in my shop; I’m 20 minutes to 2 hours away from completing 8 feet of any profile.

12

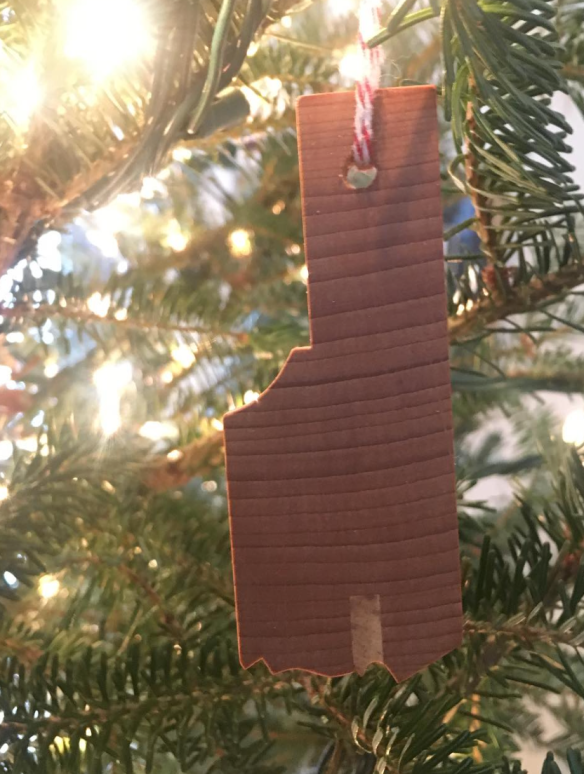
Moulding plane Christmas tree decorations

  1. Your book for Lost Art Press advocated using a small set of hollows and rounds rather than complex moulders. How did you reach this approach? And can you explain the benefits of such an approach?

Let me start with this: complex, or dedicated, moulding planes have two major advantages over modern machinery. The first advantage they offer is that the sheared profile the plane creates does not need to be sanded, it removes the most tedious aspect. By not needing to sand you also do not risk the likelihood of dulling the sharp corners or drastic inflections that profiled planes encourage.

Additionally, antique complex moulding planes are not bastardized interpretations. Depending upon how far into this subject you may travel, know that today’s router bits are manufacturers’ interpretations of other interpretations of original mouldings, a progression of refined curves. There has been a lot that has been lost in the progression (read regression) of profiles. Complex moulding planes are, however, similar to router bits and shaper knives in one respect: they produce a single profile quite uniformly.

02

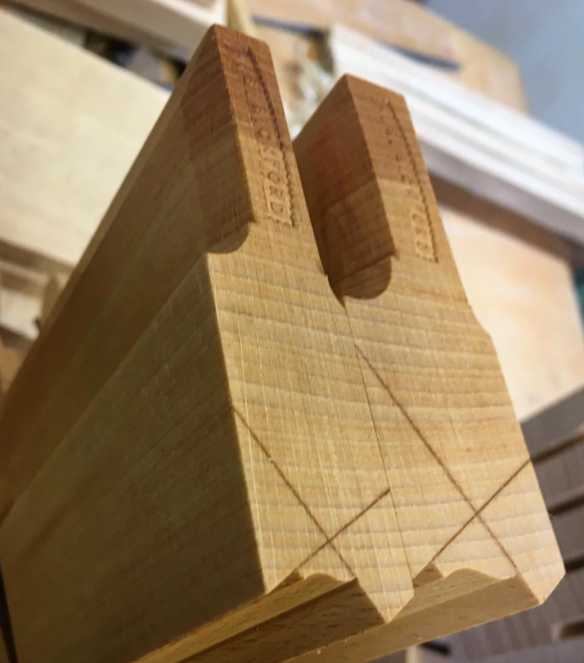
Pair of complex moulding planes

Hollows and rounds offer the idea of infinity. Any moulding profile is a series of flats, convex and concave curves. A set of hollows and rounds produces a varying number of progressing radii. Using this progression together allows an endless amount: the larger the set, the closer to infinity, everything.

In terms of a smaller set, most of our work does not include the entire range of moulding profiles. Those of us that make architectural crowns will likely not need the same set as those of us that make pieces that stand upon other pieces (i.e. mantle clocks, spice or bible boxes.) A smaller set of planes will likely afford the end user his necessary range. The necessary range, of course, may vary. My interests tend to fall in the even 2-10 range. (2s create a radius of 2/16ths of an inch, 10s create a 10/16th radius with the numbering system to which I ascribe.)

  1. To the beginner, hollows and rounds can be a little daunting. Can you explain your techniques for unlocking the versatility of these tools? What do you find inspiring about these tools?

Hollows and rounds have neither a fence nor a depth stop. It is the lack of these two features that allow the versatility that these tools both provide and encourage.

It will be difficult trying to explain the technique that I follow without a few dozen images. The process is straight-forward, but needs illustrations like my book. I started to illustrate this process in my blog and, ultimately, this led to my book.

17

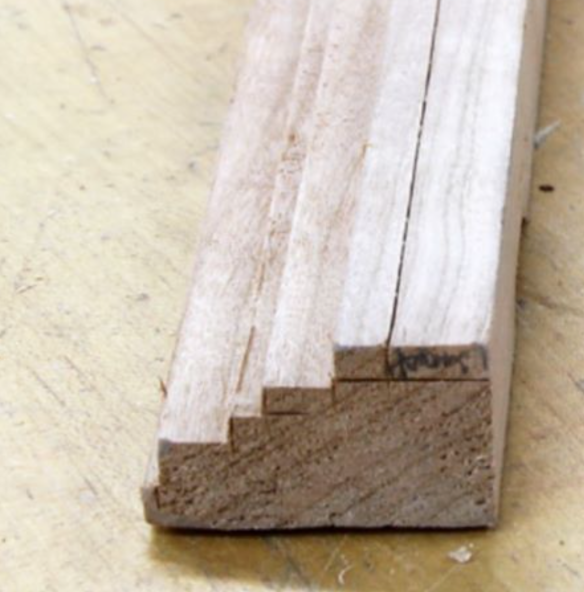
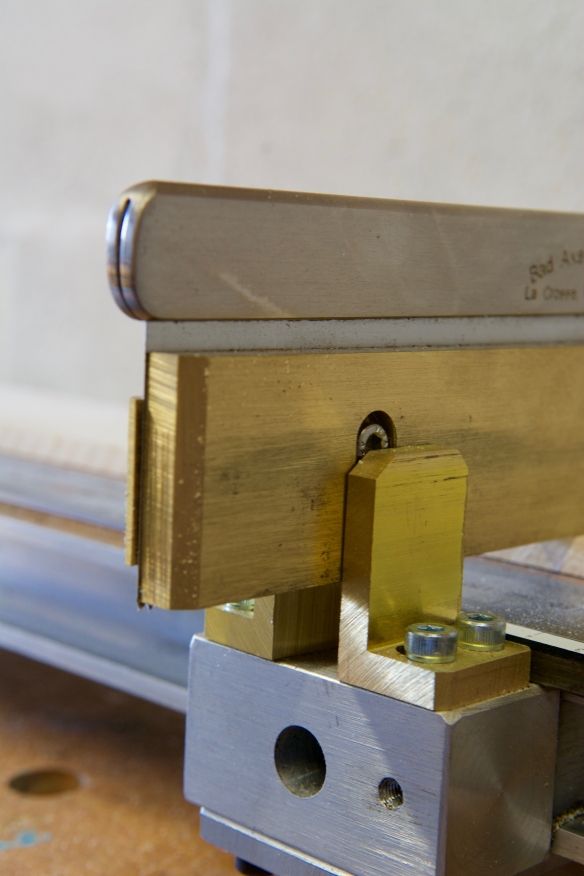
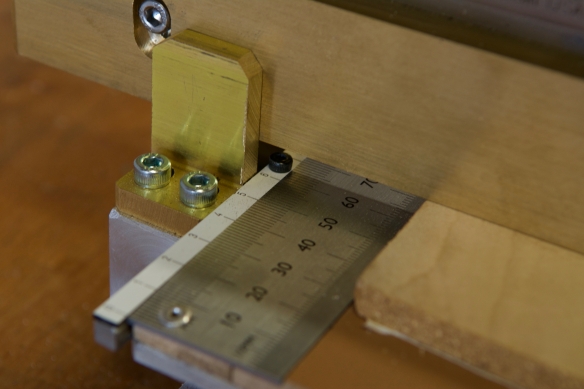
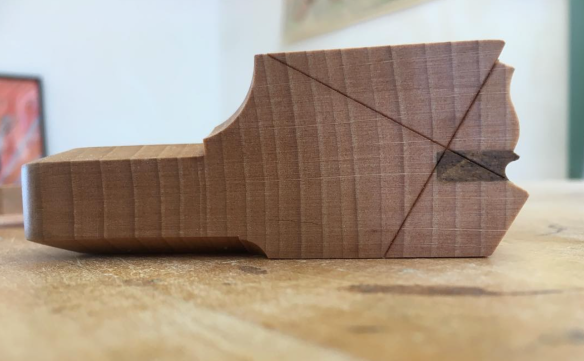
Matt’s method for using hollows and rounds starts with using rabbets and grooves to rough in the profile and steer the planes

In short, the real key to successfully using these tools is to give the plane two points to register upon instead of just one. As an example, trying to hold a hollow upon a corner at a uniform angle and uniform point upon the plane’s sole in order to create a convex profile is essentially impossible, but it is much easier than doing the same with a round to create a cove. Giving the plane two points to register upon instead of just one steers the plane, taking the place of the fence. It also gives a gauge for progress and replaces depth stop.

My blog and my book intends to illustrate a straight forward series of steps to follow to create something both desirable and repeatable.

16

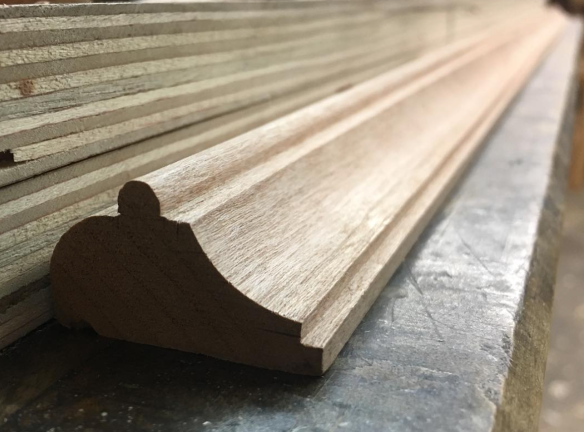
A completed run of moulding

  1. It can be a big leap to go from furniture maker to tool maker. How did you make this leap? What prompted you to start making planes?

I was a hobby woodworker for many years. When I started making things out of wood I started copying grain direction, then proportions, curves, carving, etc. I had settled on a series of router bits to decorate my edges that I considered my own. This set was comprehensive and when I needed something larger than what I owned I pieced a few together to create the dimensions I needed. I was spending a lot of time copying all of these features, then I made a sacrifice with the moulding that I regretted prior to making it, but I had settled upon my set and pushed forward.
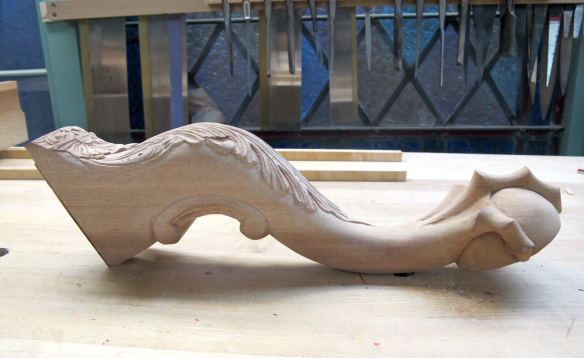
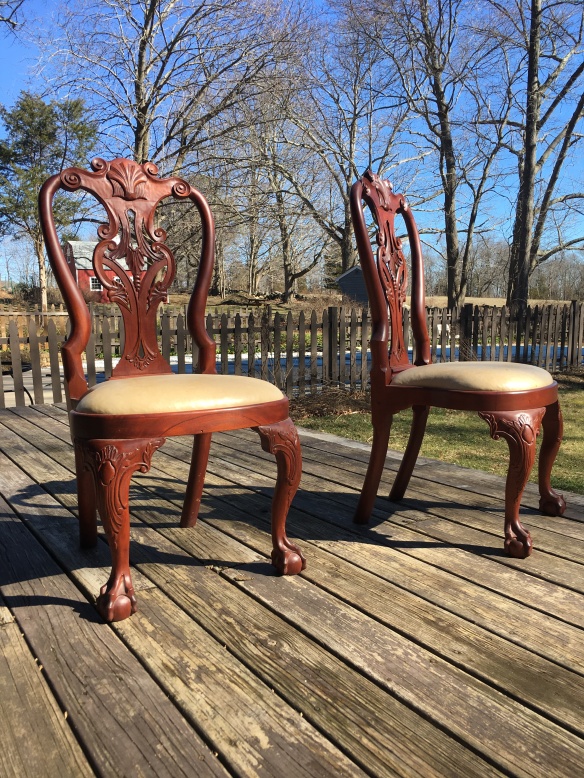
13

Carved leg by Matt

Finally, I went in search of other options. I was tired of making sacrifices and, through Larry’s writing, became aware of another option. I purchased an antique set of planes that, regardless of how long I spent with them, disappointed. When Larry came out with his DVD I decided to make my own. The first planes that I made for myself worked better than any antique that I tuned and also gave me the knowledge to tune any antique that I purchased.

How did I make this leap into making planes? It kind of just happened.

  1. What is the element of plane making that you find most satisfying?

I technically make 18th-century British reproduction planes. These planes represent the point where all of the technology was in the tool but none of the machining process had yet been taken out. These tools, despite the fact that they are a piece of steel and two pieces of wood, represent a significant amount of technology.

04

A pair of snipes bill planes by Matt

I am still fascinated by the amount of technology included in these seemingly simple tools. The final product that I create will never change and I am satisfied by the small changes I make in an effort to stream-line the process.

Every plane that I make (and I have made thousands) I still consider the best that I have ever made. I am fascinated by what the planes can do, how the planes perform, and the possibilities that these tools encourage.

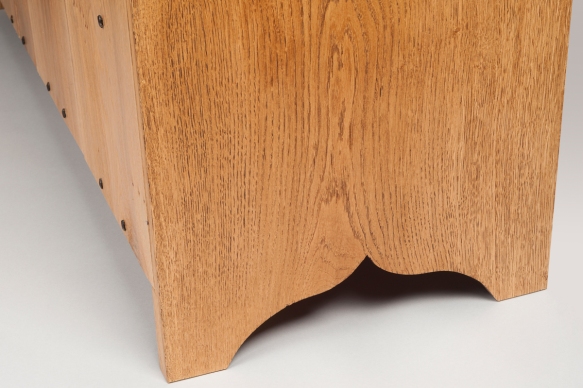
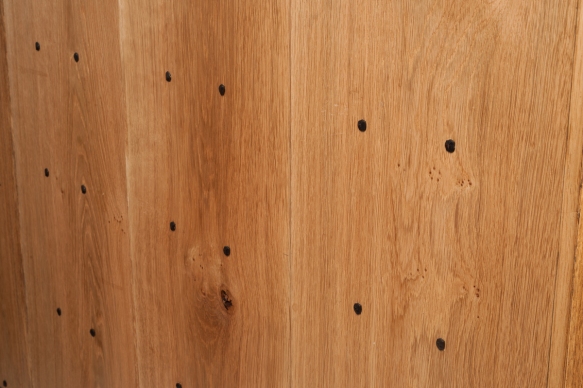
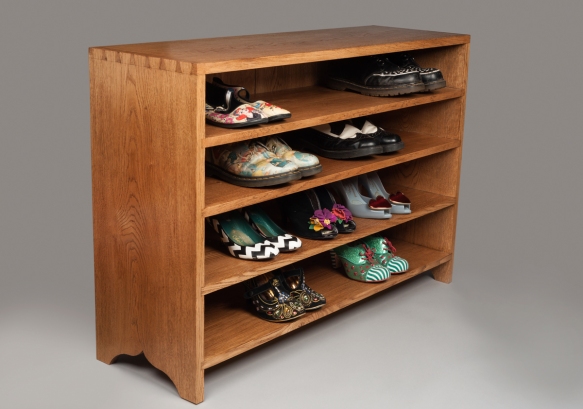
  1. You’re known as a plane maker, and for the book you wrote for Lost Art Press. But you are also a furniture maker. What sort of furniture do you build? Are there specific styles which you particularly enjoy building?

I make furniture as a hobby, which is difficult once you are working wood throughout the day. My friends, who are also professional woodworkers, and I started a woodworkers’ guild. We meet one night each week at my friend’s shop where we work on projects for ourselves. This encourages us to continue making things we want to make and to push our own limits.
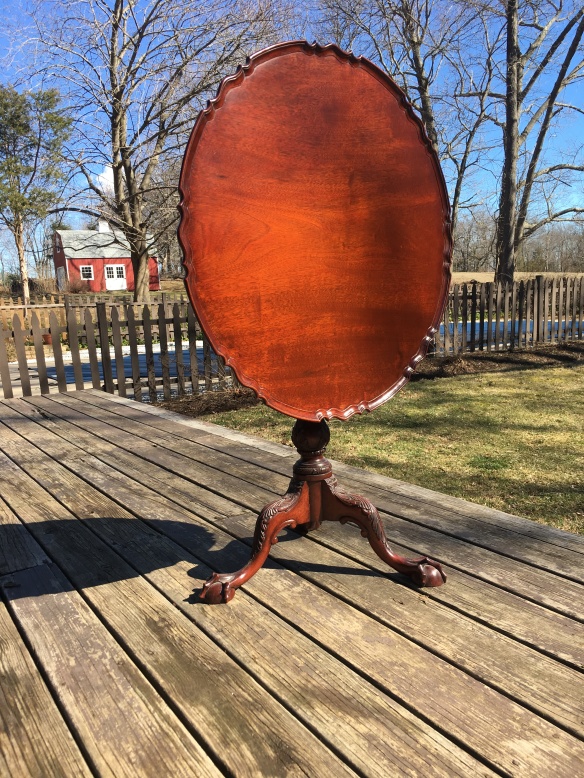
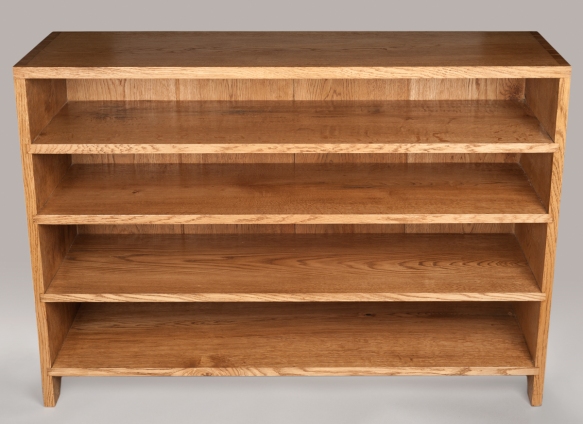
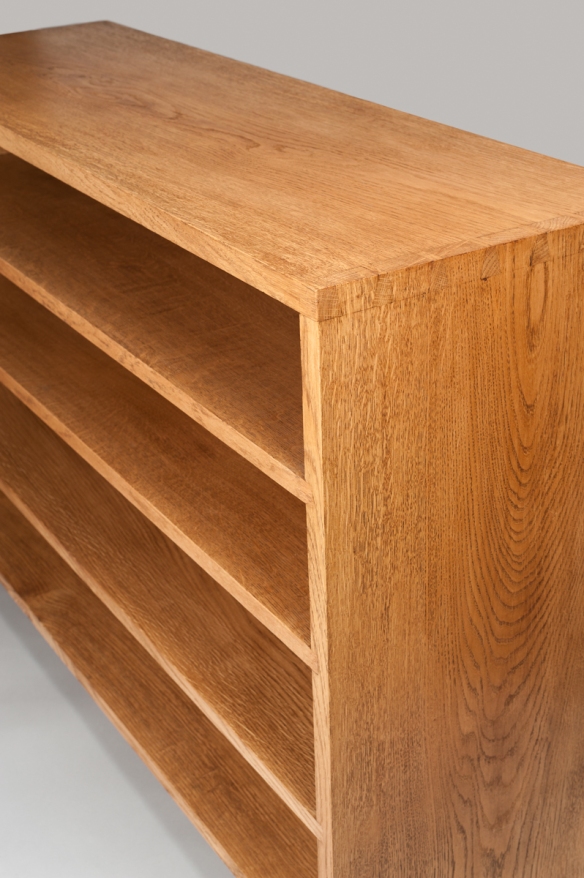
08

Table by Matt

I have always been attracted to Queen Anne and Chippendale furniture. My parents had reproduced examples throughout our house growing up and I like the idea of potentially making things as good or better. I tend to like carving. The pieces that I make must have carving or I will not be interested. Once I am done with the carving I will not likely finish it (see the corner of unupholstered furniture in my basement). The mouldings and moulding planes are just a supplement. It’s kind of silly to make a sacrifice in the piece’s appearance in low-light when spending so much time casting shadows with carving in full light.

14

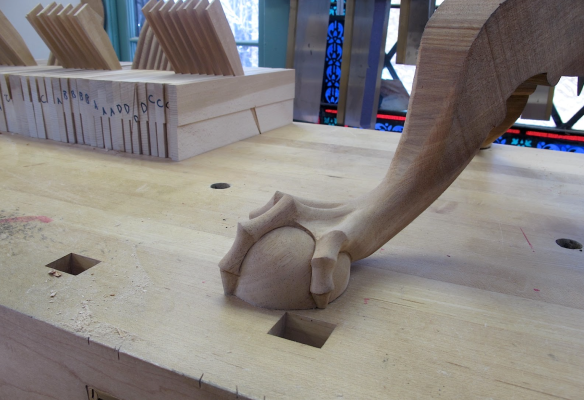
A ball and claw foot Matt is carving

  1. You’ve been posting photos of really interesting moulding runs to Instagram recently. Where do you get your inspiration for moulding profiles?

I like to think that I am good at recreating some things. My imagination with the ‘new’ has not yet been set free because I am still fascinated with recreating the old. Most of the things that I have made have, to varying degrees, been recreations. I’m still in love with the idea that I can make what others already have.

  1. If you had one tip for aspiring tool makers, what would it be?

My advice is for aspiring woodworkers, not necessarily tool makers: see what has been done, consider what has been done, try to make it. You may have no desire to put pad, trifold, or ball and claw feet in your living room; you may not want turned, cabriole or ogee bracket feet; you may not want waist, base or crown moulding, but seeing and considering how each of these treatments have been included into others work will give you an idea and an inspiration into your own work. Look at what has been done throughout the centuries and consider the conclusions of the past, even if you do not include it in your own work. A lot of inspiration is out there, and it is all relevant. This same logic applies to making tools.

10

“All inspiration is relevant”

  1. For woodworkers just investigating moulding planes for the first time, what limited set would you recommend?

A simple set of hollows and rounds is ideal. These planes are easy to rehabilitate, sharpen, maintain and, despite the ambiguity, to use. Hollows and rounds are extremely versatile and encouraging. Dedicated planes are fun to use but they are one-trick-ponies. Two pairs of hollows and rounds give the end user the ability to make scores of moulding profiles, the ability to make base mouldings that compliment waist mouldings that compliment cornices. A few pairs will offer the end-user so many options and, once mastered, confidence.

Confidence seems to be one thing that many of us lack. Starting a project is the hardest part. Completion just seems to happen.

06

If you are looking for specific suggestions: I am often asked what pair of hollows and rounds to get first. With two pairs you will be able to do by far more than twice as much as you can do with one pair. Not only will you be able to make the same profiles in two different sizes, but you will also be able to mix and match the profiles. With one pair you can make 30+ different profiles. With two pairs you can make well over 100. With two pairs you will recognize the true versatility that these planes allow and encourage.

If you do not know what sizes you want but there is a certain profile you want to execute, find the included radii and you will have the answer. Otherwise, I often recommend getting a pair of #4s and 8s (they cut a radius of 4/16ths and 8/16ths, respectively) if you’re starting with profiles included on pieces that come up to your waist; 6s and 10s are a good size for somebody that makes mid range furniture (chest of drawers). Both will likely be included in the largest highboys, secretaries, case clocks and your final set.

  1. How did the book for Lost Art Press come about?

I used to go to woodworking shows and demonstrate the tools that I make. I was able to introduce and inspire woodworkers with the ability of the tool but my explanation did not always translate into their work. Six months later I would see the same people and was told that, despite fully understanding the process we previously discussed, they had forgotten.

15

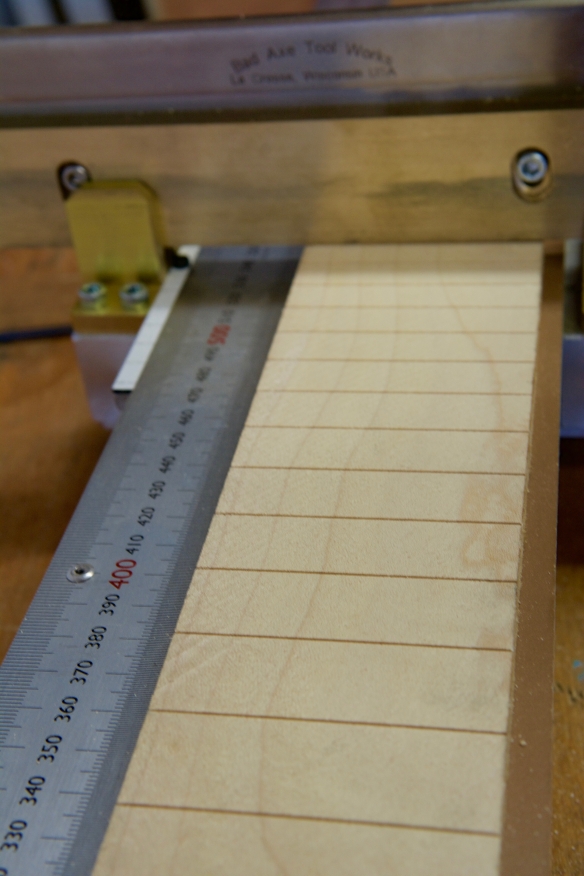
Profiles examples roughed in and ready for planing

I had started writing a pamphlet to hand out at the shows that I attended to people who seem inspired. This turned into me deciding that I would just put all of the information online, which I do through my blog. Chris Schwarz, the proprietor or Lost Art Press and who was very encouraging since the start of my business, read my blog for awhile and liked my approach and writing. I told Chris that I had essentially already started the process when he asked me if I had considered writing a book. The book then happened.

You did not ask this, but I have always been extremely proud of the book because I wrote every word in it. I have friends who have written articles and books. They produce a series of sentences that are then edited into the publisher’s words. Chris offered many suggestions but gave me full control over the book. He did not rewrite my sentences. He took out commas, broke up run-on sentences, comma-splices that are likely included here, and highlighted repetitious phrases, but the words are my own. Each of the books that Lost Art Press produces is unique in this respect: you seem to get the authors’ thoughts but the publisher’s directness. Each word in the final product has meaning and moves the narrative forward.

05

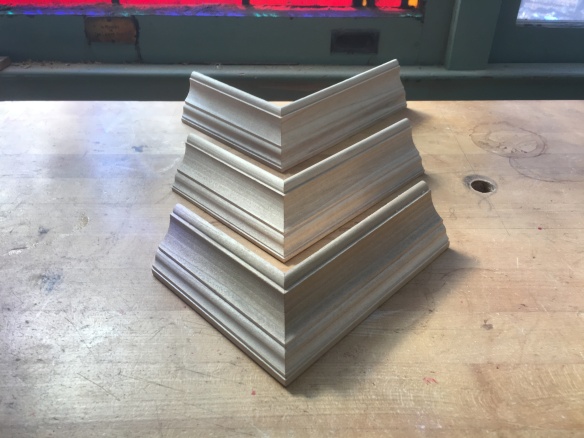
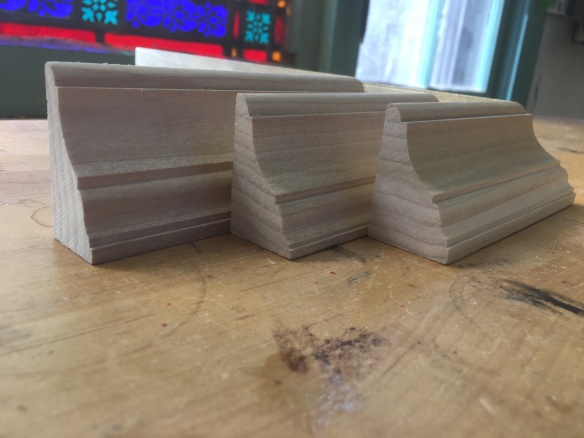
Moulding profiles cut with simply hollows and rounds