Issue 256 of Furniture & Cabinet Making is now in print. For this issue I was privileged to interview artist Jenny Bower about engraving and her approach to craftwork, including her focus on “unnecessary embellishment“. Also featured is an article on scraper sharpening by Jim Hooker, and a decorative dovetail tutorial with David Barron.
Monthly Archives: March 2017
For heritage quality workshop aprons, look to Texas
I’ve been wearing an apron in the workshop for 3 years now, and although I worked quite happily for a number of years without the benefit of an apron, I can’t imagine working without one again. As I’ve written previously, putting on my apron is part of a ritual which signifies the start of a day in the workshop, and helps to clear my mind of anything but the task waiting for me at the bench. Beyond the psychological or ritualised aspects, a good workshop apron brings physical benefits – pockets to hold essential tools, protecting your clothes from damage and workshop abuse, and acting as a snug barrier to stop stray folds of cloth getting caught by machinery.
My final tool purchase of 2016 was a new apon from Jason Thigpen at Texas Heritage Woodworks. At the time it felt like a real luxury – my original apron is a fine example of a handmade garment and still has plenty of life left it in, but having two of Jason’s outstanding tool rolls (a chisel roll and auger bit roll), I couldn’t help but want a matching apron decorated with my Over the Wireless logo. Luxury or not, I ordered an apron from Jason anyway, and just before New Year’s Eve it arrived. And you know something? The moment I tried it on, I knew that this new apron was not a luxury at all. I do try not to write too many tool reviews as I think it’s far more interesting to write about what I’m using the tools to make. But sometimes you find something special that just deserves to be written about – wearing the new apron from Texas Heritage was one of those moments.
Jason offers three options for aprons – the “classic” full length apron in either waxed or unwaxed canvas, and a shorter “nail” apron, all of which are then customisable with a number of further design options. Those options include for the classic apron three chest pocket configurations, three lower pocket options, a choice between smooth or hammered rivets, and logo or name embroidery. All aprons come with double stitching for longevity, a wide selection of fabric colours, and choice of two sizes catering for most body types. If that sounds like a bewildering number of choices, Jason’s website clearly explains the choices and makes selecting your perfect apron a cinch. I dare you to have an apon desire that the multitude of choices offered by Texas Heritage do not satisfy, but if somehow you manage to do so, Jason offers a custom service so he can probably meet your specific apron needs.
For my new apron I selected a waxed navy blue canvas with hammered rivets, the “full” chest pocket configuration, and closed lower pockets, all topped off with the OtW logo in white stitching. So far so stylish, but why does the Texas Heritage apron stand head and shoulders above any workshop apparel I’ve previously tried? Firstly the fit and finish is outstanding. The stitching was crisp, particularly the OtW logo (stitched by Jason’s wife Sarah), and the rivets were perfectly peened with a gorgeous hammered finish. The apron fits perfectly too – it is snug but not constricting, and after a few minutes of work I forget that I am wearing it. Similarly, the lower pockets have good holding capacity but remain nice and snug to the body.
Essentially, the apron becomes a second skin in the workshop. This is large part, I think, to the strap design. Thanks to an old shoulder injury sustained during martial arts training, I am prone to back and neck pain. My old apron used a neck strap which definitely aggravated this injury – there’s nothing like hanging heavy weight waxed canvas from your neck for prolongued periods of time to contribute to back pain. In contrast, the Texas Heritage apron has no neck strap, and instead uses two shoulder straps which cross the body using a metal hoop. This system means that the weight of the apron is distributed across the whole of your back and shoulders for a much more comfortable wearing experience, and as a result I’ve been walking away from my bench at the end of the day feelng much healthier. The waist strap is secured in place with a clasp rather than ties, which avoids any faff trying to tie knots behind your back. Finally, the lower pocket flaps do an excellent job of keeping shavings and saw dust out – there is nothing worse than digging through layers of hamster bedding in your pocket while looking for a tape measure.
I’ve been wearing the Texas Heritage apron for 3 months, and it has taken a beating while I’ve been working on the Policeman’s Boot Bench; man-handling 15″ wide 110″ long oak boards to be cut to length, extended planing sessions as I’ve processed the timber by hand, and cutting plenty of joinery. Through all that it has felt comfortable, and never hindered my movements. Although it no longer looks out of the box fresh, it is developing the pleasing character of an apron that sees regular use, and I can’t wait to see how it continues to age over the coming years.
Rabbet, Rebate (Rabbit)
All of the recent talk about dovetails skipped an essential stage of building The Policeman’s Boot Bench. When I started to design this piece I wanted to draw on the principles in The Anarchist’s Design Book, and to embrace simple and robust joinery I’d not previously had the opportunity to use in anger. So the shelves are let into the sides by dados, and the tongue and groove backboards fit into rabbets (or rebates, depending on which side of the Atlantic you reside). I use a shallow rabbet on all of my tail boards when dovetailing, but I’ve not used more substantial rabbets as a joinery technique before. The design of the boot bench really lends itself to this approach, and I have enjoyed expanding the armoury of techniques available to me.
Once the top was flattened and brought down to thickness I was able to cut the through rabbet to take the ends of the back boards. This rabbet is 1/2″ wide and 1/4″ deep, and runs along the back edge of the top. The Veritas Skew Rabbet plane makes short work of this sort of task, and it only took a few minutes before I had a dead square and flat 43″ long rabbet. I’ve found that this plane can be fussy to set up so that it is cutting square and true, but time tuning it is well spent. In use, the most important thing to do is to avoid tilting the plane – I find this is easier if I position my body so that my head is above and slightly to the right of the plane. The right hand then pushes the plane forwards and my left hand pushes the fence into the workpiece.
In contrast to the rabbet in the top, the rabbets in the end pieces are stopped at one end. This is because the back boards terminate level with the bottom shelf rather than running to the floor. Before cutting these rabbets I cut the dados for the shelves, and marked off the baselines for my dovetails. This established both end points for the rabbets, and also delineated the waste into sections between each dado. I cut the stopped rabbets with a large router plane, as this does not bottom out when cutting stopped grooves like the skew rabbet plane will, although it is a slower process. Although I initially stopped the rabbet at the dovetail baseline, I did need to extend it a little more when assembling the dovetails to allow a good fit between the haunched tail and the rabbet in the tail board.
The final rabbet was my customary shallow (1/16″) rabbet along the tail boards. This rabbet assists in accurately transferring dovetails to the pin board when cutting the joinery, and only takes a couple of swipes with the skew rabbet plane.
A dovetail photo diary
I’ve written about how I cut dovertails previously in some detail, and to be honest my method has not changed in the nearly-three years since I took the Anarchist’s Tool Chest class with Chris. I’m dovetailing the Policeman’s Boot Bench at the moment, so rather than recount a detailed step-by step of how I dovetail (because the internet definitely need another how-to-dovetail blog post) here’s a photo diary of the first corner for the boot bench.
One Saw to Rule Them All?
I have a confession to make. I think I might have a saw problem. By which I mean, I definitely have a saw problem. Specifically a back saw problem – in my tool chest you’ll find only the regulation issue two hand saws (a 1900 era Disston D8 rip, and the majestic Skelton Panel crosscut). But you’ll also find more than the three essential back saws. Now, on the whole I’ve managed to follow the principles in the Anarchist’s Tool Chest and have resisted the lure of buying unneccessary hand planes, or endless sets of chisels. But when it comes to back saws, well, Daddy has a saw problem.
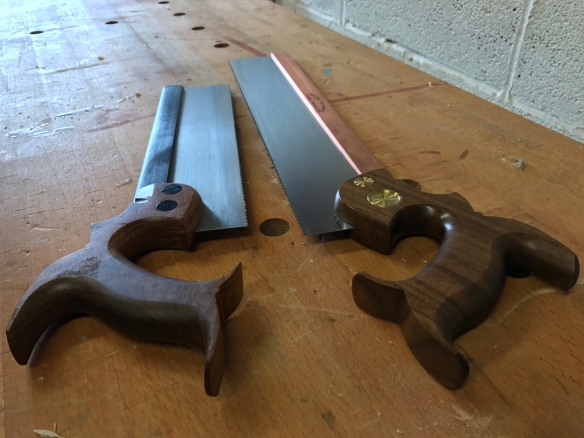
The interesting thing about having a healthy collection of any one type of tool is that I find it prompts questions about how necessary each iteration of that tool is, and whether you could live with far fewer. And I spent plenty of time in the workshop before I owned a decent back saw, so it is possible to do so – not that I’d want to relinquish all (or any) of my saws. Each of my back saws sees heavy use, so they are necessary and I’m not about to thin out the herd. But still, the question of what a more compact kit would look like is an interesting one. Recently I think I may have found the answer. For context, my nest of saws contains the following back saws, all made by Bad Axe Tool Works: 10″ dovetail, 12″ carcase, 16″ tenon, 20″ mitre, luthier’s saw, and most recently, the Bayonet. So hardly the stuff of legendary excess. Like I said, a healthy collection.
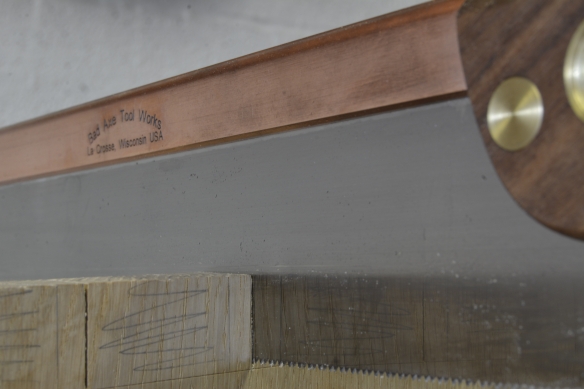
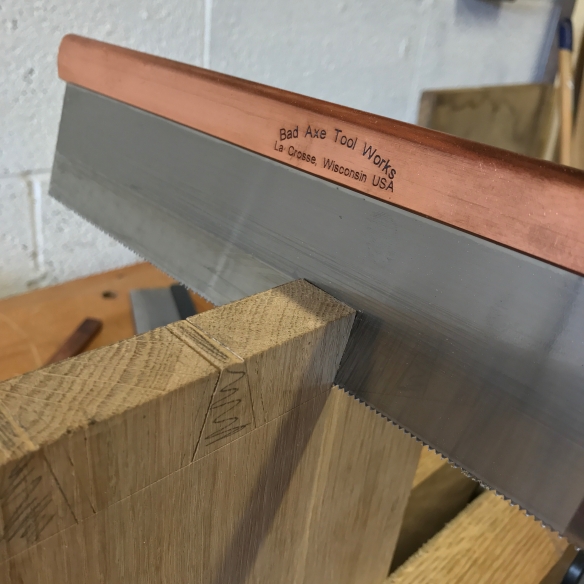
I’ve been using the Bayonet as my sole back saw on the Policeman’s Boot Bench and the more time I spend with this saw, the more I’m convinced that it is not only the perfect first serious saw for the woodworker building their nest of saws, but also the foundation of a compact yet highly functional set of saws. For the uninitiated, the Bayonet is a 14″ back saw which Bad Axe bill as being a “precision carcase saw“. The 0.18″ gauge saw plate is 2″ deep at the toe, canting to 2 1/2” deep, and comes with a Disston style open tote. I had mine filed with Mark’s “hybrid” filing for cross-cut and rip sawing, and tricked out in a very pretty copper back as a loving tribute to the Apprentice’s flame coloured hair.
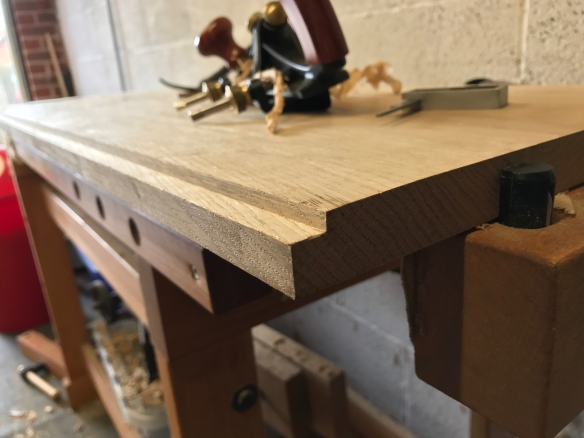
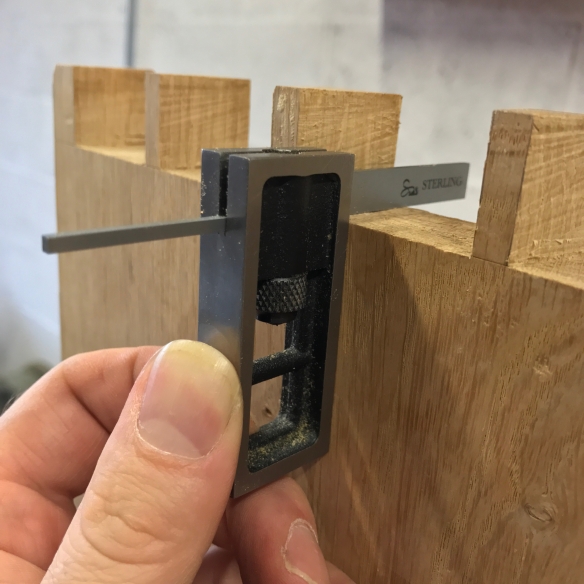
The initial reason I ordered the Bayonet was to cut the dados to let the shelves into the Policeman’s Boot Bench. The Bayonet was designed to cut all manner of carcase joinery, and so it shouldn’t have been a surprise that it excelled at this task. And yet, the ease with which it cut 1/2″ deep dados in 14″ wide oak was astounding. Not just because the saw is sharp (although it is – the guys at Bad Axe really know how to sharpen), but also how effortlessly an accurately it did so. This goes beyond simple sharpness, and is a matter of some very clever design. The shallow saw plate, together with a carefully judged hang angle of the tote, puts your hand much closer to the workpiece. The result is a saw that dives into the work aggressively but with real exactitude, for a high precision cut. It sounds simple, but there is something verging on alchemy with the plate depth and hang angle on this saw.
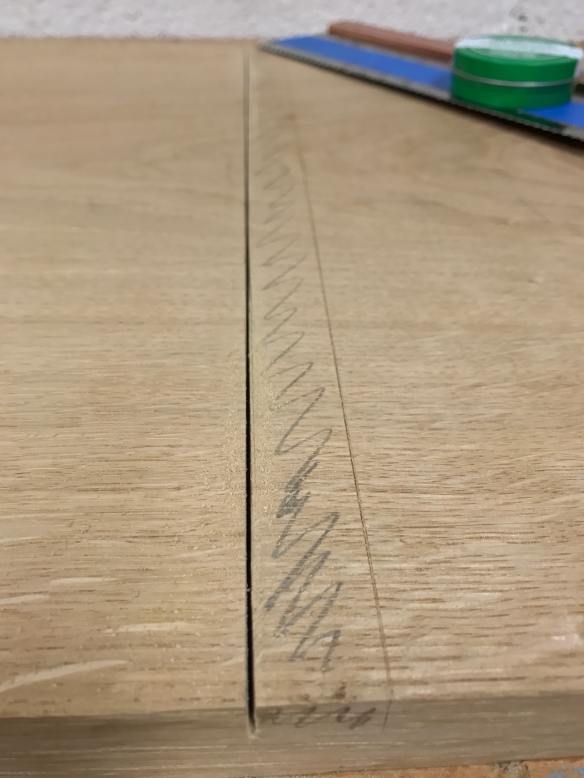
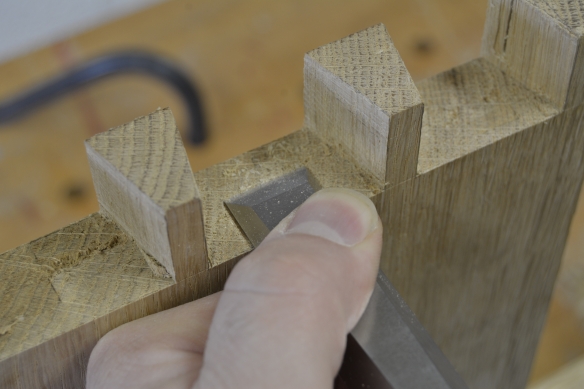
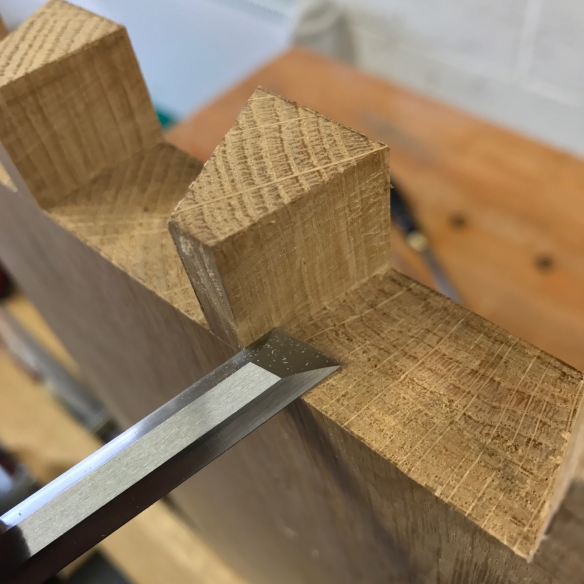
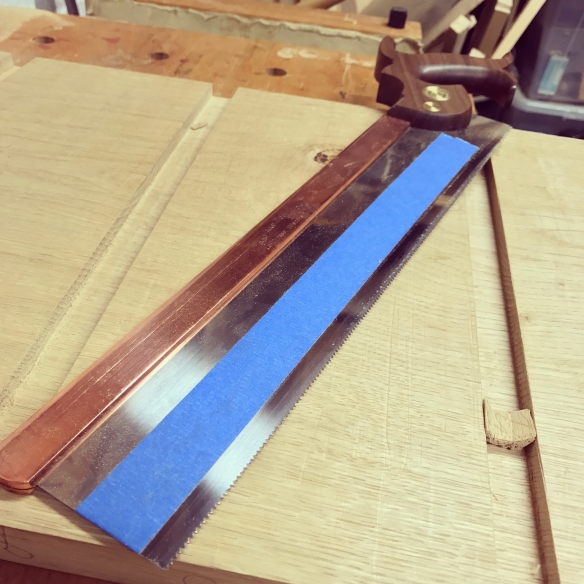
One risk when cutting across wide boards with a lightweight saw is that the saw can jump out of the cut until a kerf has been established. I’ve yet to have this happen with the Bayonet, which I’m sure is due to the lower centre of gravity created by the saw plate depth and hang of the tote. It has become a cliche to say that a saw tracks the line like it is on rails, but in the case of the Bayonet it is absolutely true – the first time I left a whisper thin, arrow straight, kerf across a 14″ wide board I was speechless.
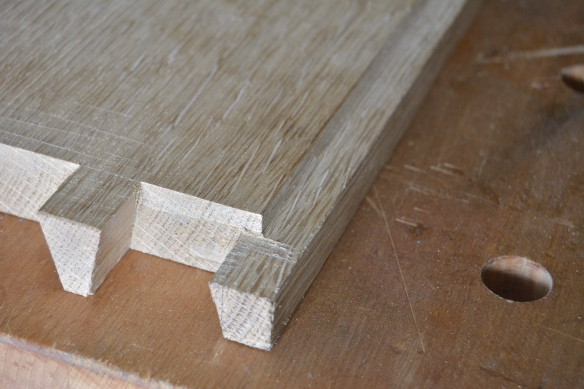
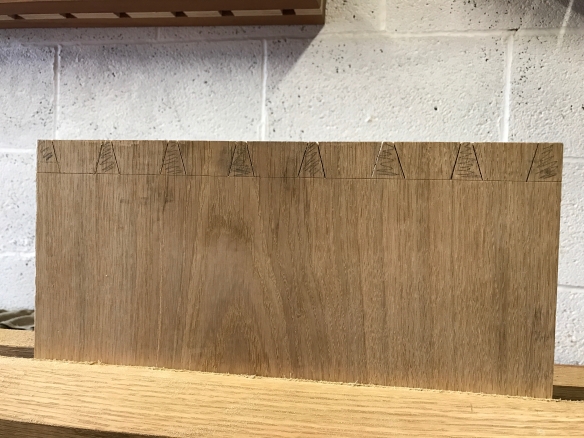
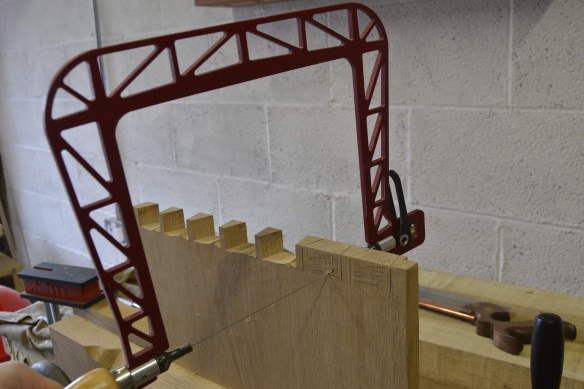
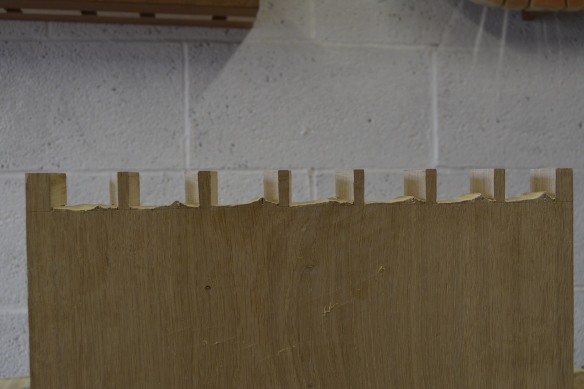
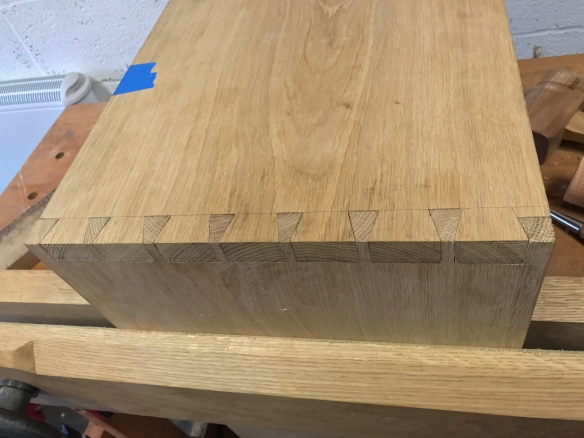
Having given the Bayonet extensive testing as a crosscut saw, I started to wonder how it would fare as a dovetail saw. Conventional wisdom is that a hybrid filing will be slower in the cut than a dedicated rip saw. This may be true, but in a head to head test with my 10″ Doc Holliday dovetail saw, the extra 4″ length of the Bayonet mitigated against any loss in speed from the hybrid filing. The extra length also benefits accuracy when splitting those layout lines, as most inaccuracies in sawing originate from the change in direction of the saw. By reducing the number of strokes needed, the potential for a wobble in sawing motion is reduced and the saw stays on line. Cutting dovetails with a 14″ long saw does require some slight adjustment to posture and body position, but with those taken into account I tested the Bayonet by cutting the tails for the Policeman’s Boot Bench. The saw left beautifully crisp kerfs in 1″ thick oak, and the saw was noticeably faster than my dedicated dovetail saw. The extra real estate on the saw plate also acted as a more efficient heat sink, which reduces the risk of overheating when making a number of repeat cuts and so keeps the saw plate free of heat related warping. I did not gang cut my tails as I often do, but I am sure that the Bayonet would have been able to take dovetails in a combined thickness of 2″ in its stride. In fact, the only discernable disadvantage I could find was that I had to be more careful when approaching the baseline as the extra length of the saw did increase the risk of overshooting.
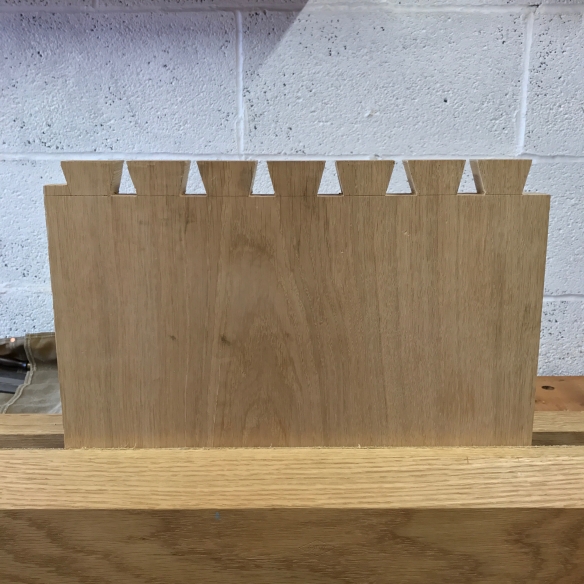
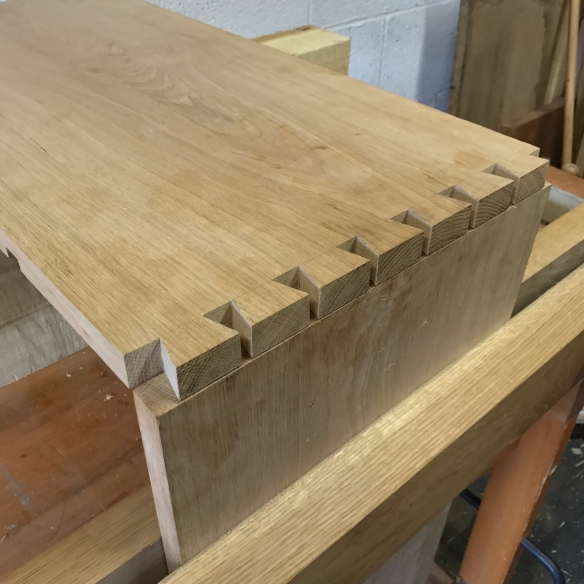
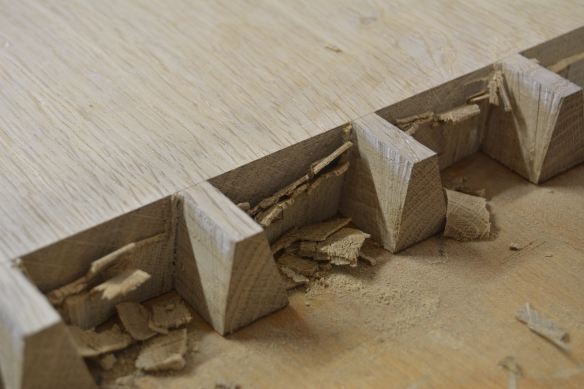
Will my existing carcase and dovetail saws be redundant? Not at all – they have other attributes which are beneficial for specific work, and for stock of 3/4″ thick or less the 10″ dovetail saw would be much more appropriate. But if I were looking to buy my first back saw then the Bayonet would be it – being able to cover rip and cross-cut joinery with one saw makes it a very cost efficient purchase, and means that the beginner would be able to handle whatever work they wanted to do without the need to save for a second saw in the a different filing. Similarly, the Bayonet makes for a very compact travelling nest of saws, as only a larger tenon saw would be needed to cover all bases. For classes or shows I’m certain that I will just be packing my Bayonet and 16″ tenon saw from now on. In short, this could well be the one back saw to rule them all.
Mark has also uploaded to the Bad Axe site a comprehensive knowledge bank covering all manner of saw care and maintenance, which can be viewed here. Even if you’re not in the market for a new saw, this page is well worth a view as it represents an invaluable distilation of Mark’s quite considerable knowlede, and a temendous gift to the woodworking community.