Woodworking with Thomas Jefferson

underhill_atc_img_1197

Roy emerging from the Anarchist’s Tool Chest. Picture courtesy of Lost Art Press.

New English Workshop‘s curriculum for 2015 is an embarrassment of riches, featuring classes with Jeff Miller, Chris Schwarz, Tom Fidgen, Peter Follansbee, David Barron, and Roy Underhill. That is an awful lot of woodworking excellence packed into only 3 weeks next July!

I am thrilled, not to mention super excited, to announce that I will be taking the Woodworking with Thomas Jefferson course with Roy. Expect daily updates from the course here and on Instagram.

Lock, stock, and… tool chest?


photoLast weekend I fitted the lock to the tool chest, and this was another new experience for me. As the Anarchist’s Tool Chest doesn’t go into much detail in how to go about fitting the lock I decided to follow the detailed instructions in The Joiner and Cabinet Maker, for a historically accurate hand tool method.

The half mortice lock I fitted required two different mortices to be cut into the front of the tool chest; a shallow mortice for the back plate, and a deeper mortice for the lock mechanism. Before I started laying out these mortices I determined the centre point of the front, after which I used a marking gauge to the position of the shallow mortice on the top edge.

DSC_0197Having cut the mortice for the top plate, I was able to hold the lock against the inside of front and press the lock pin into the pine, the resulting dent showing where I needed to drill the keyhole. Because I wanted the keyhole to be dead straight through the upper skirt and front of the chest, I cheated and prepared a guide hole in a piece of scrap on the drill press. Having clamped this in place I then drilled the pinhole using an egg beater hand drill.

DSC_0203In The Joiner and Cabinet Maker, Thomas (the apprentice) uses a rat tail rasp to shape the rest of the keyhole. I don’t at present have a rat tail, so I roughed out the rest of the keyhole with my coping saw, and cleaned up with a series of fine files, checking the shape of the hole against the key and also the escutcheon. Once I was happy that the keyhole matched the shape of the escutcheon hole and allowed the key to slot into the lock it was time to cut the mortice for the lock mechanism.

DSC_0198I defined the edges of the deep mortice using my 12″ carcass saw, and the back edge with a 1″ chisel dropped into the kerf left by my marking knife. The waste was then removed with chisels and cleaned up with a small router plane. With the lock mechanism fitting snugly into the mortice I was then able to mark out the final dimension of the shallow mortice for the back place.

DSC_0200The back plate mortice was cut in much the same way as the deeper mortice, save that the ends of the mortice were cut with a 0.10″ razor saw rather than the carcass saw (which would have left too wide a kerf). Guide holes were then drilled for the screws which hold the lock in place.

DSC_0206I then turned my attention to fitting the hasp. The back of the hasp has two prongs, which I used to determine where the hasp should be placed on the lid. With the hasp attached to the lock, I lowered the lid and have it a gentle tap, so that the prongs dented the inside of the lid. It was then a case of laying the hasp on the now detached lid so that the prongs mated with their corresponding dents, and marking round the hasp with a marking knife. I then cut a shallow mortice to accommodate the hasp and screwed it in place, testing that the catch pins slid into the lock correctly.

DSCN2827All that remains for the first stage of the build is to sand and paint the chest, after which I can start thinking about the internal fit out.

“…If you liked it you should have put a lid on it…” Part 3

I think one of the hardest things about woodwork is not cutting the perfect dovetail, or fitting the bridge of an acoustic guitar to the soundboard using only a block plane (no sandpaper, thank you very much), although both of those tasks can be difficult. I think one of the hardest things is identifying the most appropriate tolerance to work to for each specific operation, and to acknowledge when something is good enough even though it might not be absolutely perfect. I’m not saying that we should ever stop pushing ourselves, that each project we build shouldn’t be better than the previous. Far from it. But not everything has to be perfect, especially if we take into account the rest of the project, its intended use, and the fact that we learn a lot less by spending endless amounts of time futzing with a single aspect of a project rather than finishing it and moving onto the next one using the experience and skills we have just learned. I’m not saying be slap dash, but know which battles to fight, know when to knuckle down and get something absolutely perfect, and when to say good enough really is good enough. Or, to put it another way, to maintain perspective.

There is of course a reason I mention this now. At the end of my last post, the lid had been fitted to the tool chest, and the gap between the dust seal and the upper skirt was consistent (about 0.5mm) save for the corner at the back right hand side (which was just over 1mm). And I should have left it like that. Because objectively, this is not a piece of fine furniture – it is a tool chest which will live in my workshop, and although I take pride in my work and want this to be finished to a good standard, it will no doubt take a beating over the years. So leaving the lid with a slightly bigger gap at one corner would have been the smart thing to do (although it would not have offered up much of a narrative for this blog). Instead, I decided to start trimming the dust seal and the upper skirt to eliminate the high points and reduce that pesky gap at the back corner. Having patiently trimmed the dust seal with my block plane, fitted the lid, marked off the high spots, then trimmed some more, the gap is now consistent across all three sides. So, mission achieved. But the time spent on improving a very small aspect of the chest which I’m not going to see very often, was definitely disproportionate.

DSC_0193

Anyway. Once I had recovered from obsessing over the gap between the dust seal and upper skirt, it was time to finish installing the hinges. The dust seal was left over length on both sides of the lid so I cut this to length with my carcass saw, cutting a bevel that started 1″ on the top edge of the dust seal, and finishing flush with the lid on the bottom edge. This bevel will act as a crude stop for the lid until I fit a chain between the lid and chest.

DSC_0189

With the hinges installed on the lid, I placed the lid on the chest and marked the position of the hinges against the back of the case. I then detached just one of the hinges from the end of the lid (in case there were discrepancies in length or thickness between the three hinges), and morticed the case in the same way as I had the lid, defining the ends of the mortice with a 0.01″ razor saw, removing the bulk of the waste with a 1″ chisel and then cleaning up with a small router plane (see my previous post for more detail on this). The router plane does not respond well when taking too big a bite out of this difficult timber, so the chisel work to remove most of the material was crucial, allowing the router plane to clean up the bottom of the mortice to final depth.

DSC_0192

I repeated this process for the hinge at the other end of the chest, and fitted both hinges to the chest and lid to check that everything moved smoothly without any wracking.  With everything working as it should, I then removed the lid and cut the mortice on the case for the middle hinge. One tool which I have found invaluable for installing the hinges is an automatic centre punch. I use the Starrett 819 punch, which operates with only finger pressure, allowing me to hold the hinge in place with my spare hand. I only wish I had this tool when I was installing all of the hardware on Laurie.

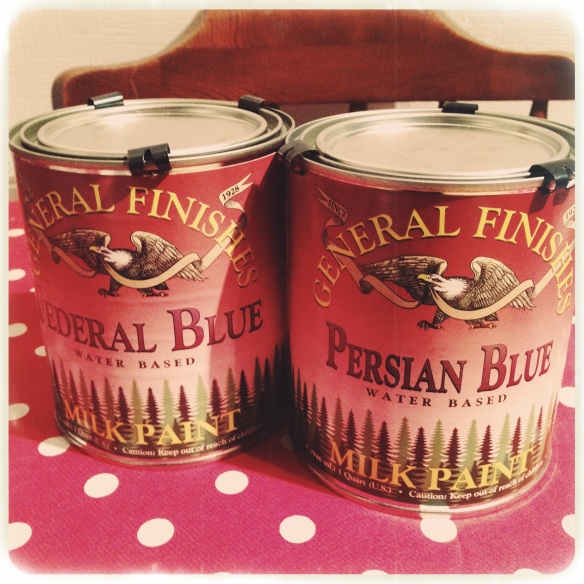
The three hinges move smoothly with no sign of wracking, so this stage of the build is now complete. Next on my to do list is installing the lock, which will be another new experience. The end of the main build (less of course all of the internal fit out) is in sight, so it was very exciting when my milk paint order arrived this week.

photo

“…If you liked it you should have put a lid on it…” Part 2

DSC_0186

The lid for my Anarchist’s Tool Chest is progressing nicely. Yesterday evening I glued up the dust seal, with able assistance from the apprentice. I don’t have enough sash cramps to clamp the dust seal as thoroughly as I would have liked, so while the glue was still wet I pinned the dust seal using 4d cut nails from the good people at Tools for Working Wood.

photo

The apprentice looking at her handiwork

This morning, I broke off the clamps and set about fitting the lid to the case. The chest was slightly too wide to fit inside the dust-sealed lid, so the first order of business was reducing the width of the case above the upper skirt. This was done with a large shoulder plane, taking equal amounts of each side of the case to take down the width equally.

DSC_0180Once the case was down to size I test fit the lid. There was a good fit between the dust seal and the case, but there was a significant gap (4mm) between the lower edge of the dust seal and the upper skirt, as shown in the photo above. So, it was time to break out the trust No.5 bench plane and take the upper edge of the chest down to height (planing is one of my favourite operations in the workshop).

DSC_0182

Once the top of the chest had been taken down, there was a good fit between the dust seal and upper skirt. Next up was fitting the hinges. This was a new process for me, so I followed Chris’ instructions in The Anarchist’s Tool Chest closely. First, and with the lid still on the chest, I measured where the hinges would be and marked one edge of each hinge on the lid and the case with a single stab of a marking knife.

DSC_0183

Then, having removed the lid from the chest, I laid out the rest of the hinge dimensions on the lid. Having two separate marking gauges is beneficial for this, as the width of the hinge leaf needs to be scribed on the lid, as well as the thickness of the leaf on the back edge of the lid. I defined each end of the hinge using a 0.010″ razor saw (which I usually use for slotting guitar nuts), and the back edge with a 1″ chisel dropped into the kerf of the marking gauge line. I then scored the waste both along and across the grain, and then popped the waste out. The bottom of the mortice was then cleaned up with a small router plane.

DSC_0184

With all three hinges fitted to the lid, my next task will be to fit the hinges to the chest.

And Now in Print!

photo

Back in July I hinted at some big announcements. One is still on the pipeline, but I am pleased to announce that as of this month I am a contributing writer to Furniture & Cabinet Making Magazine. My inaugural column, regarding hand tool heritage, appears in issue 224 (published today), available in all good newsagents as well as ebook format (celebratory glass of beer not included).

If my scrawlings aren’t sufficient to tempt you, this month’s edition also features a fascinating article about the life of Henry Disston written by Mark Harrell of Bad Axe Tool Works (seriously, it reads like a long-lost story by Dickens), and a Q&A with Tom Fidgen. So some heavy weight stuff.

This is going to be a regular column for F&CM, and I am currently putting the finishing touches to my next article. It goes without saying that I would love to hear any feedback from folk who have read the first column.