Curing bench plane addiction

img_3870

Issue 250 of Furniture & Cabinet Making hits the shelves this Friday, and carries my guide to avoiding plane addiction when selecting your set of bench planes. This promises to be a fascinating issue, as it contains my good friend Anne’s account of her visit to the Homestead Heritage Craft Village in Waco (Texas),  as well as an excellent feature on Bill Carter (one of the greats of English plane making), and an interesting twist on Tom Fidgen’s valet project by Matt Morse.

Octagonalise all the things

Or the Anarchist’s Saw Bench… part 2

We’ve been taking a much needed vacation in Italy for the past week, which involved introducing the Apprentice to great pasta, and also her first trip on a plane, so the saw benches are not yet finished. Before we flew out I did manage to progress the legs for the first saw bench however. To be honest, I’m not sure I have the right mindset for production work and even though I’m building a pair of saw benches I decided to work up the legs for one bench at a time. This approach means that when I come to making the legs for the second bench I should hopefully be able to apply any lessons learned, or avoid pitfalls identified, from the first bench.

img_3727

The legs for these saw benches have a tapered octagon cross section, which is at its widest point at the floor. The top end of the legs terminates in a conical tenon. There are two ways to establish a tapered octagon – you can either plane a straight octagon and then taper it, or you can plane a tapered square cross section and then octagonalise it. Charles H. Hayward wrote that octagonalising a tapered square is the best way to approach this task, and who I am I to argue?

_dpp2700

Laying out the octagons using simple geometry

The stock for my legs was slightly oversized, and I laid out the octagons at each end of the legs taking this into account. Laying out the octagons sounds a little like proper maths at first, but using a good compass and some old-as-the-hills geometry means that there is no need to remember angles or do anything funky with numbers. Simply scribe a circle at the end of each leg for which the diameter corresponds with the width of the octagon. Use that circle to draw a square, and then set your compass so that with one point at the corner of the square the other point scribes an arc that passes through the centre point of the circle. Do that from every corner of the square, and each point where the arcs hit the sides of the square is a corner of the octagon. Which sounds complex, but only takes 5 minutes to sink in even if you are as numerically challenged as I am.

img_3703

With the octagons laid out at both ends of every leg I planed the legs to a tapered square cross section, removing most of the waste with my No.5 jack plane before truing everything up with the No.8 jointer.

_dpp2719

Octagonalisation in progress

Octagonalising the tapered square is then simply a matter of removing the corners from the square cross section, working to the layout lines on the end grain of each leg. Although you could mark the facets of each octagon along the sides of the legs, that adds an additional step to the work and I’m not sure whether it would really make planing to shape any easier. To be honest, no one is going to measure each face of the octagon to check that they are all perfectly equal, so if the legs look good they are good (with apologies to the legendary Joe Meek). You can make a wedged jig to hold the legs while octagonalising them, but I found that cinching each leg between two bench dogs worked just as well.

_dpp2734

One batch of octagonalised legs.

Again, I used my No.5 to remove most of the waste, truing up with the No.8 just before I hit my layout lines. I found that takling a heavy cut with the jack was beneficial, particularly for the first couple of strokes at each corner, as this removed the aris of the workpiece and left a ledge of sufficient width on which to balance the plane accurately.

img_3750

Lovely thick ribbons off the No.5 jack plane

Behind the scenes at Auriou Toolworks

img_2840

Paulin Causse, Michel’s great uncle, and one of the second generation blacksmiths at Forge de Saint Juey

If you picked up a copy of issue 249 Furniture & Cabinet Making then you will have seen my feature on Auriou Toolworks. Forge de Saint Juery is a fascinating place to visit, and I walked away with far more photos than would fit into one magazine article. So here are some of my favourite shots that didn’t make it into the article.

dsc_0092

Stitching the teeth for a rasp is an exacting and precise process.


img_2877

Anvil and hammer for heavy duty black smithing


dsc_0119

Shaping the tang with a drop hammer


dsc_0108

Grinding the edge of a Chris Pye carging gouge


img_2900

Michel and myself


img_2805

Saint Juery is only a short drive from Albi, home to this beautiful 13th century cathedral (now a UNESCO world heritage site)

Getting to Know… Kerryn Carter

It has been a while since the last “Getting to Know” feature on OtW, and I’m very pleased to feature in this instalment a woodworker who has not only taken a long hard look at how to preserve the woodcrafts, but then acted to foster engagement and enthusiasm amongst the next generation of woodworkers. Community is topic that is constantly revisted as part of the “Getting to Know” series, and I am constantly fascinated by the different ways in which we as woodworkers experience our international community, and how we find ways to contribute to, and express, that community. Kerryn Carter, the subject of this month’s feature, has certainly given a great deal to the community, and is a great example of how we can all make the woodcrafts accessible and relevant to the next generation of craftspeople.

So, without further ado, let’s get to know Kerryn Carter.

img_2934-1

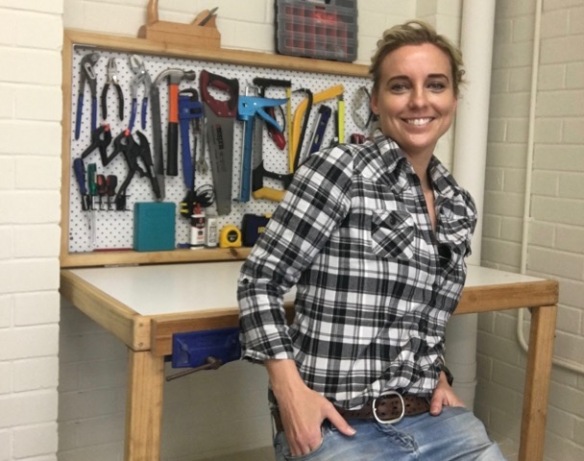
Kerryn Carter of The Tool School

1. So many people complain about the decline of ‘shop class, and the lack of woodwork education in schools, but very few do anything about it. Where did the idea for Toolschool come from? And how did you go about setting it up?

The decline of shop class is an interesting one. I see a total contradiction between the beautiful work exhibited at wood shows of high school students and the disappointing first hand accounts of what shop class actually entails for most students. I have come to conclude that these exhibited student works are the happenstance of 2 factors: a school has access to tools, machines and materials despite the funding and insurance issues that plague most schools and the students have access to an incredible teacher(s). The skills that woodshop students gain these days seems to me can vary widely depending on those factors.

Once you acknowledge that shop decline is a “thing” and combine it with the digital age where kids are living their lives on screens you see that woodshop faces some serious challenges. I think those challenges are not insurmountable.

How? The age of handmade and learning practical skills (part of the Maker Culture) has returned. The appreciation of something that someone has made without the assistance of a factory in China is coming back into mainstream culture and I often use Instagram and Youtube and Cable television as evidence. There is sustained interest in how furniture and things are made because the doors to peoples workshops which were once closed are now open and the audience is invited right up to the machine or the tool that makes the thing.

The age of handmade I think has also been given a massive super boost by the DIY culture. And yes i think we owe a debt to those reality shows that put DIY on the map.

As a result, awareness of the Maker Culture is on the rise and some of those who are noticing are parents. Those parents are keen to start teaching their children practical skills as early as possible but most are unable to because they don’t have the skills themselves. So suddenly the child of a handy parent has an advantage. That is really where I come in. The kids of parents who are not handy are sent to my “school”.

What I really do is this….I teach children up to high school age. I hope to give them some real skills, love and determination to take whatever card they are dealt at their high school (in terms of tools, machines, materials and teachers) and make the most of it. Do I want them all to become woodworkers? Not necessarily. I count my success in seeing a child become and adult who is unafraid of picking up a tool and using it to help themselves.

Where did the idea for Toolschool come from? Toolschool came from having my kids in my own woodwork shop (like almost every other kids woodwork teacher!!). I found that (as most woodworkers find) that they pick up skills quickly and with a bit of guidance can go a long way to making something. Stuart Faulkner who was my woodwork teacher for 4 years saw what I was doing with my own children and suggested that I teach other peoples children.

How did I go about setting up Toolschool? I read every childrens woodwork book on the market. I picked up a lot of tips but they still left me a bit cold in terms of the actual projects they were making. I realised that I had to compete with Minecraft and Angry Birds and quite simply a cooking utensil stand and a herb container was not going to cut it. So I spent (and still spend) a large amount of time coming up with the project ideas themselves to compete with my digital rivals. I also use a lot of 2 handed tools because 2 hands on tool = no hands near blade.

img_2011

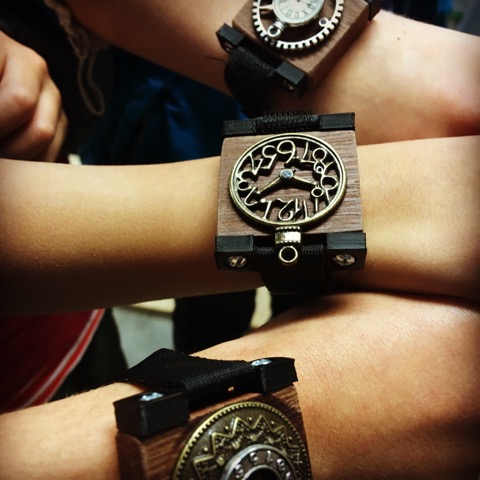
Steam-punk wooden watches made by Toolschool students

2. Making things by hand can be so satisfying, it is afterall one of the reasons we work wood. How do the kids respond as they pick up new skills or complete a project? And what sort of projects do you cover to enthuse them?

I make my classes fun but you can get that at soccer or art classes….at the end of the day its hard to compete with going home with an item you have made yourself to use in everyday life like a bag tag or magic wand or fighter jet or boat that really floats or a fishing rod or raft you have learnt to lash. Fun is a factor but its really in the area of self fulfilment that kids really respond to. It goes like this…I teach them how certain tools are used, they use those skills to make something, they decide exactly how they want the project to look, the completed project is self fulfilling and reinforces the value of the skills just used. Just to reiterate the actual projects themselves are key to my school success. Boring projects mean bored kids no matter that the skills taught are cool.

img_2165

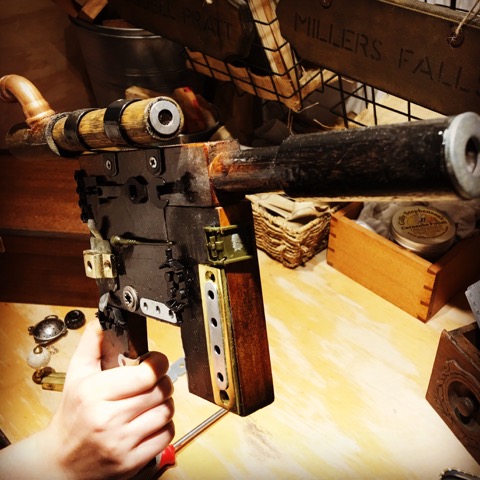
Who doesn’t want to make Han Solo style wooden blaster?

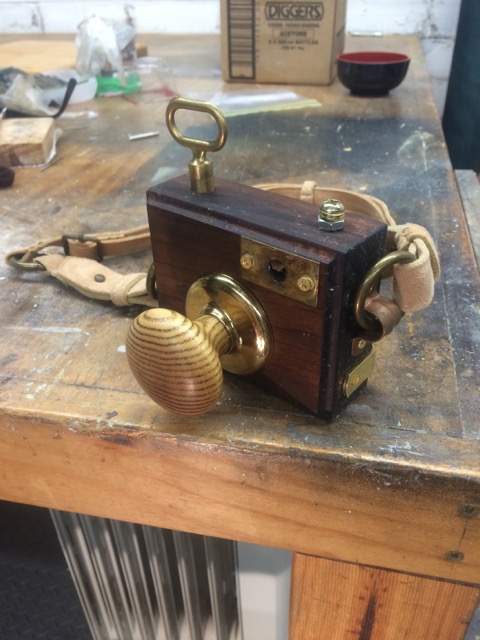
3. As well as teaching woodwork you’re a dab hand at upcycling (the retro garage bedroom was amazing!), and a talented carver – the mini acanthus leaves on the mallet build, and the carving on your Fenderette, were wonderful, so you’re clearly drawing from a wide skill base. What is your woodworking background – how and when did you start woodwork?

I grew up in my Dads woodwork shop seeing an endless procession of furniture walking out the door. I always dreamed of being a woodworker myself. He told me I had to be a “white collar” professional before he would teach me woodwork (he was a boilermaker by trade and wanted to see me “do better than him” if you like). So for the large part of a decade I was an accountant and then a lawyer. My father died suddenly while I was still a lawyer. I began learning woodwork with Stuart Faulkner 2 weeks after my fathers death. Stuart had just finished a stint as the head of fine woodwork at the Sturt School of Wood in Mittagong (just outside of Sydney) and was looking for private students. I have not worked as a lawyer since my fathers death but am still considered to be a practising lawyer. I transplanted my fathers workshop into my garage and conservatory and have built on it over the years. I stayed with Stuart for 4 years. I am now on my own and rely on woodworking magazines such as The Wood Review and Lost Art Press and instagram for learning new skills.

img_2022

In terms of upcycling I have always had an interest in upcycling discarded furniture for 2 reasons. First I have a love of paint effects and how easy it is to transform boring white poly into something that wows people. Second I must be a greenie at heart because I hate seeing even a boring white poly piece of furniture (and broken even) wasted and unloved.

In terms of carving that was probably “upcycled” too…I learnt traditional chiseling skills while with Stuart Faulkner so I took those skills and after a few Youtube tutorials I tried my hand at the Fenderette. I will say this to you Kieran, only after I saw the initial results of my carving did I decide to go public with the carving attempt!! I must be a coward!! But I didn’t want to have a mega carving fail in front of the entire woodworking community!!! lol!! The Woodworker Journal from 1901 was excellent as a source of encouragement as carving was so mainstream in those days that the author had no fear whatsoever in encouraging anyone with a gouge to attempt a large scale carving. The Fenderette was the perfect beginners carving project in reality because all mistakes (of which there were plenty) are at foot level and never see direct light due to the design of the top.

img_3449

Kerryn’s hand carved Fenderette

4. Ensuring the survival of the woodcrafts is a preoccupation for many woodworkers, and one that relies on teaching skills and engaging the next generation. As someone who is at the forefront of introducing young people to woodwork, what advice would you offer woodworkers who want to share woodwork with their children, nieces and nephews?

I have 5 tips!!  1. Safety is paramount (glasses, shoes, sunscreen) 2. No fingers near moving blades…none ever! 3. Always use a vise I find a Workmate good but anything to stop kids from having to support a workpiece. 4. I don’t ever measure for square (and it follows that almost everything I make does not rely on perfectly square) 5. When I can I let the kids guide what we make…its my job to decide how to make it….. oh and an extra bonus tip 6. Always slightly overestimate to a kid how long a project might take (expectation management is still important).

img_1027

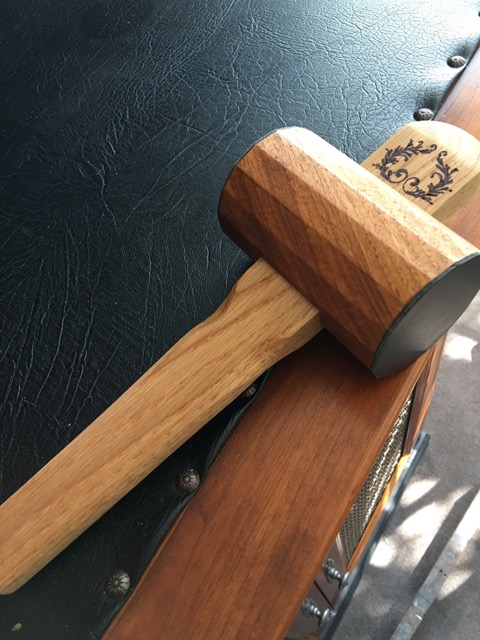
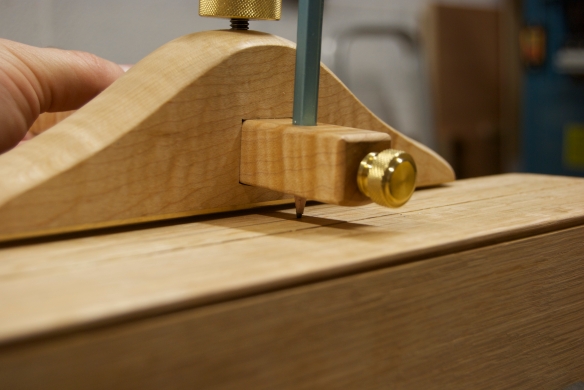
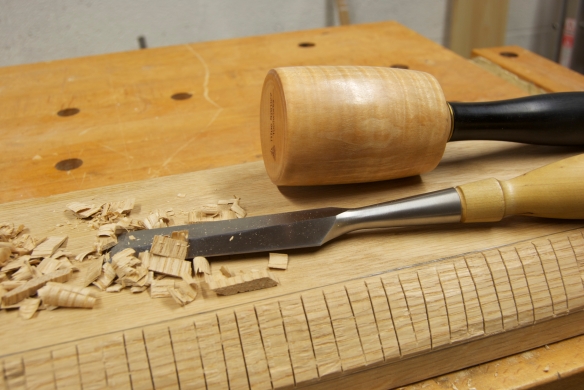
Mallett with hand carved acanthus leaf detail

5. As well as being active on Instagram you recently started adding Youtube content – what is next for Toolschool? Do you have plans for further developments?

Lots more great kids projects. There is a book coming and it will share with everyone my project designs and tool kits and methodologies for how to teach kids woodwork. Youtube is really being set up as a teaching tool where I will give kids woodwork pointers via video. So yes Youtube is certainly there and I do love the format although i seem to be extremely unpopular!!! Thats ok though because I want a permanent record of my work and I am happy to have it there.

img_3017

6. Finally, when can we expect to see a Toolschool hammer juggling tutorial on YouTube

Lol whoa I have never thought of having a hammer flipping tutorial! The hammer flipping is a fine art that I learnt while standing in my workshop contemplating life. It never fails to horrify people.

img_3001

Kerryn will be attending Woodworking in America on 16-18 September in Kentucky. Do say hi if you see her there.

Handworks 2017

  
Last week Benchcrafted announced Handworks 2017, once again at the historic Amana Colonies in Iowa. This will undoubtedly be one of the highlights of the 2017 woodworking calendar. I’ve not been able to get stateside for previous Handworks events, but I’m very pleased to say that I will be attending in 2017 where I’ll be covering the event for Furniture & Cabinet Making magazine, and also helping out on the Sterling Toolworks stand. 

Who else will be attending? Drop me a line in the comments box below if you’ll be there.

No Tongue Twister

The following is based on an article first published in issue 248 of Furniture & Cabinet Making magazine.

_DPP2126

Stopped chamfers are a recurring form in both architecture and furniture, and are used to add decoration as well as reducing the visual weight of a component. There are a number of ways to terminate a stopped chamfer but one of the most elegant, to my eye at least, is the use of a lamb’s tongue carving – effectively an ogee-shaped transition from a sharp corner to the flat of the chamfer. I recently built an oak “Moxon” style twin screw vise, and decided that a lamb’s tongue chamfer would not only add to the functionality of the vise but also add a touch of visual interest. Here is how I went about it.

Layout

The first step is to layout the chamfer on the work piece. Because the oak jaws of my vise were quite thick I went for a wide chamfer of 20mm from the corner of the work piece. It is important to mark out the edges of the chamfer using pencil rather than a cutting gauge, as the layout marks from a cutter will cut below the final surface of the chamfer and remain visible on the finished work. Next, strike safety lines 2mm inside each edge of the chamfer – these can be marked out with a bladed marking tool rather than a pencil.

DSC_0124

Laying out the chamfer with a panel gauge

It is now time to layout the lamb’s tongue. For repeatable curved parts I prefer to make templates out of 2mm thick plywood. For the lamb’s tongue, I made a half template showing the curves as they would be laid out on one side of the work – the template can then be flipped over to lay out the other side of the lamb’s tongue.

For the template mark out a rectangle the length of the lamb’s tongue, and as wide as the distance of the chamfer from the arris of the work piece (in my case 20mm). Now divide the template in two by striking a line across the width to identify where the ogee will transition from a concave to convex curve. My template was 45mm long by 20mm wide, and the transition point was 22mm from the tip of the lamb’s tongue. I used French curves to draw in the curves of the lamb’s tongue, but you can also use a compass, or even draw in freehand, if you prefer. Once you are happy with the curves cut the template to shape – several light passes will make cutting smooth curves easier than a single heavy cut, and the final shape can be fared up with some 220 grit sandpaper.

_DPP2133

Templates are essential if you want to layout repeatable curves

Use the template to transfer the curves to both sides of the work piece, at each end of the chamfer.

In the rough

Most of the material for the chamfer can be removed quickly and easily, allowing you to spend more time working on the detail of the lamb’s tongue. Using a fine carcase saw – I used the new Bad Axe Tool Works Luthier’s saw – first make a cut to define where the chamfer will transition into the lamb’s tongue, but be careful not to cross the safety lines. Then, cut a series of relief cuts along the chamfer between the two lamb’s tongues – my relief cuts were roughly 10mm apart. Again, make sure that the relief cuts touch the safety lines but do not cross them. The relief cuts allow most of the waste to be knocked out easily using a chisel and mallet. Because you are working on two faces of the work, it is easier to hog off the waste from one side while the work piece is in the vise, and then to clamp the work to the bench to remove the waste from the other face.

DSC_0132

Relief cuts make removing the waste a quick and easy process

Once you have removed the waste down to the safety lines, swap the chisel and mallet for something a little more refined. I used a spoke shave to work the chamfer down to final depth, but a Stanley No. 65 chamfer plane (or modern equivalent) would be perfect for this job. The lamb’s tongue will block the sole of the spoke shave from reaching the very ends of the chamfer, so pare the ends of the chamfer level with a broad chisel, riding the back of the chisel on the finished par of the chamfer. I find levelling the ends of the chamfer to be easier once the lamb’s tongue has been carved, and it gives me a final opportunity to adjust the transition from the tongue to the chamfer.

DSC_0137

Knocking out the waste from the chamfer

Carving the lamb’s tongue

If you are carving lamb’s tongues at both ends of the chamfer then one will be carved with the grain while the other is carved against the grain. To make life easier, start by carving the tongue that follows the grain, and then move onto the opposite end.

DSC_0140

Carving the lamb’s tongue

To carve the lamb’s tongue, start at the chamfer end and pare the waste away with a broad chisel held bevel down. Once the majority of the waste has been removed you can carve the tongue. I find it easiest to start at the tip of the tongue. With the chisel still held bevel down, gently scoop out the waste down to the pencil lines, taking care not to bruise the convex portion of the tongue with the corner of the chisel’s primary bevel. On narrow sections of the lamb’s tongue you can carve the full width of the tongue in one go, checking to make sure that the chisel is hitting the lines on both faces of the work. If the widest sections of the tongue are wider than your chisel, work the each edge of the tongue down to the line, and then remove the material in the middle until a consistent flat connects both faces of the work. Any tool marks can be removed with fine rasps – I use a 13 grain, 7” modellers rasp – and 220 grit paper wrapped around a piece of dowel.

DSC_0141

Levelling the end of the chamfer

If you have not yet levelled off the ends of the chamfer, now is the time to do so.

A Stitch in Time

IMG_3684

Back in April I took a trip down to the South of France to spend a day with Michel Auriou at Forge de San Juery. Today the October issue (249) of Furniture & Cabinet Making magazine lands in all good highstreets, and carries a four page article on my visit and interview with Michel.  Also included in this issue is an excellent article on grain painting by my good friend Martin Green.