What this bench was made for

DSC_2605

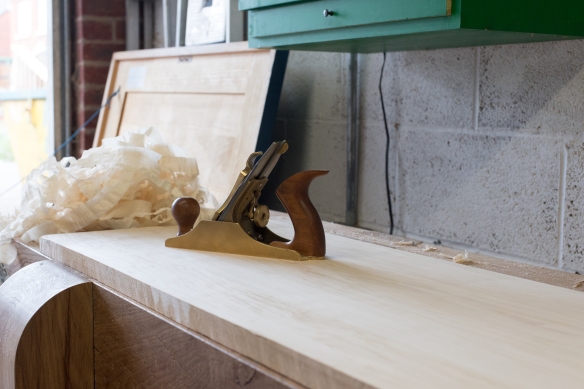
Traversing large boards has never been so enjoyable as it is on the Roubo bench

I’m finding my rhythm with the boarded bookcase project, and enjoying the process. In particular, it is fascinating testing the capabilities and functionality of the Roubo bench as I work.

DSC_2599

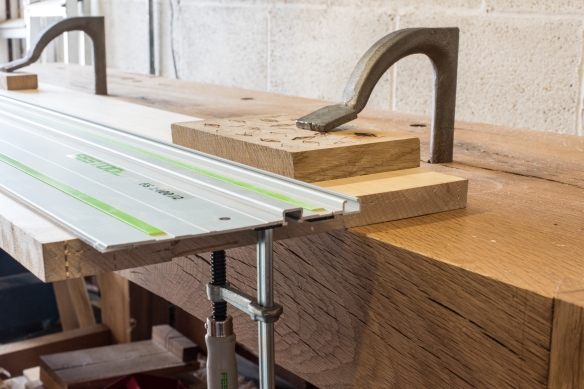
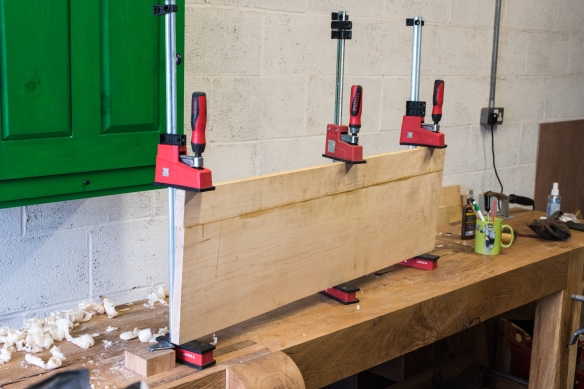
Holdfasts and track saw – combining technologies across centuries for an efficient workflow

This week I’ve been processing yet more maple, which involved working on several faces of the board. As a test, I also decided to see how the bench fared with a hybrid woodworking approach. After all, the design arose at a time when woodworkers were using hand tools exclusively hand tool, but how does it function when power tools are introduced into the mix? I don’t use power tools all that much, but I do have a few which I find useful to keep around, including a Festool tracksaw. Ordinarily I prefer to reach for my Disston D8 when ripping stock, but as a test I set up the tracksaw to rip one edge of the maple panel straight before planing it. Getting a rock solid set up was much easier on the Roubo than my old Sjoberg, and the two Crucible holdfasts held the workpiece in place with the edge to be cut hanging off the edge of the bench. This set up was quick to set up, stable, safe, and allowed for easy operation of the tracksaw – a win by any reckoning. I’m sure that holding workpieces for work with the Festool Domino (which I find indispensible for shop jigs and some other work ) and the router (which I honestly try to use as infrequently as possible) will be as straightforward and dependable. So the Roubo seems to be a solid choice for the hybrid woodworker as much as hand tool purists.

DSC_2590

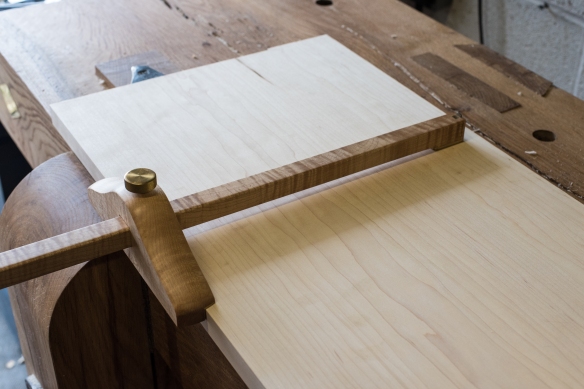
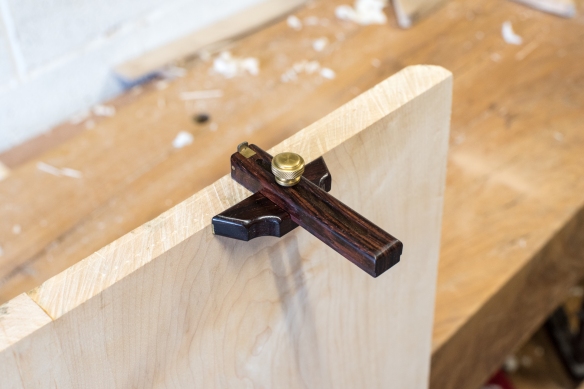
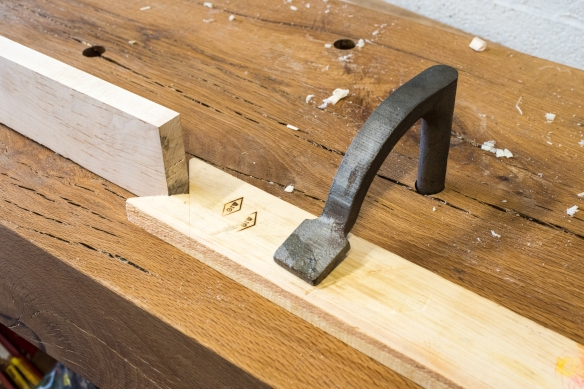
Making the width of the board with the panel gauge – working into the planing stop holds the workpiece steady

The planing stop is also very versatile. While the main function is to hold workpieces in place while planing, I have found it is also very useful for steadying the work while using marking gauges to strike lines. Today I made use of the planing stop for this purpose with the workpiece in two orientations – firstly striking the width of the panel using the Hamilton Toolworks panel gauge, then to gauge the thickness of the panel, with the workpiece stood on it’s side, supported with a does’ foot at the back end. This is much quicker than securing the workpiece in the leg vise. Less time fixing the workpiece in place means a smoother and more efficient work flow.

DSC_2600

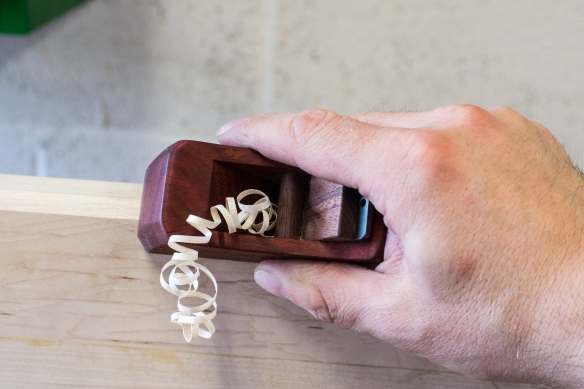
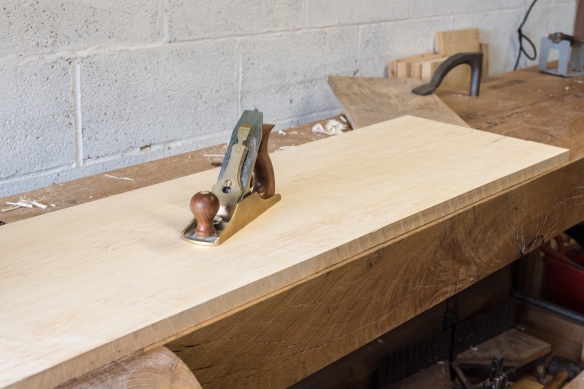
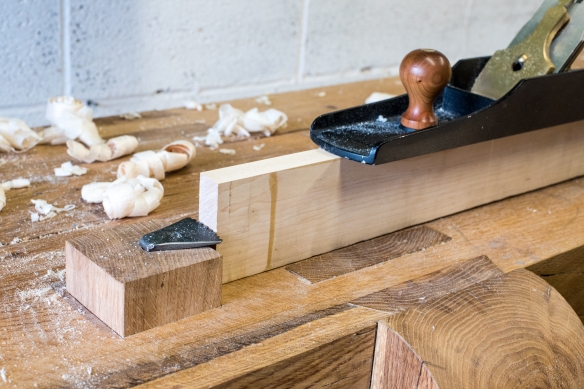
I don’t use this sweet Krenov style block plane by my buddy Jim McConnell as often as I should – here I’m bevelling the far side of the board to avoid spelching when taking a traversing cut

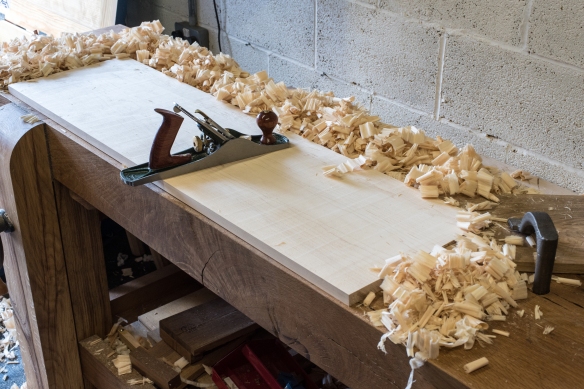
I was also struck by how much the Roubo bench offers a solid working experience when traversing the maple board with my No5 jack plane. While this is a very standard technique in my work, I never got the work holding on my old Sjoberg bench to co-operate when taking heavy traversing cuts – the tail vise just wasn’t up to holding workpieces for traversing, and after a few strokes the work would start to wriggle across the benchtop. Which was both frustrating and an impediment to steady work. In contrast, a single holdfast and the planing stop was enough to secure the 47″ x 13″ maple panel in place for an extended session of traversing with no movement whatsoever despite taking a heavy cut. This is what this bench was made for, and it excels as a planing bench.

DSC_2606

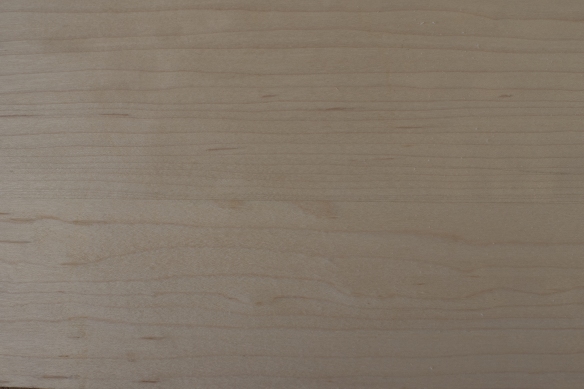
Traversing removes the bulk of the waste efficiently, and leaves a wonderful texture. If this were the underside of a shelf I’d leave that texture and call it done, but as this is the side of the bookcase I’ll dress the surface with a smoothing plane for a clean and smooth surface.

I’ve almost finished working the two sides of the bookcase, following which I’ll have an opportunity to see how the bench performs for cutting joinery. I fully expect there is nothing I can throw at this bench which it cannot handle.

Enjoy the Ride

DSC_2564

Smoothing the outside surface of the second side piece

If I’m being honest, I was in a hurry to get the bookcase underway and finished. Partly because I’m tired of picking a path between boxes of books that are in sore need of a home, and also because following on from over a year of building the Roubo bench I was looking forward to progressing (and completing) a furniture project in a shorter time frame.

DSC_2574

Marking off the thickness with a Hamilton Toolworks small marking gauge

Every project, and every process, has something new to teach you, even if it is something you’ve built many times before. And after spending time at the bench cleaning up the panel I glued up last week, I’m taking a different view of the project – I’m going to slow down, and enjoy the ride. Part of this is because the maple I’m using demands a slower approach. It is lovely material, with some subtle quilting. But it is as hard as any material I’ve ever worked, and prone to nasty patches of tearout. Those properties don’t really facilitate working at pace. Very sharp irons, and high cutting angles, are the order of the day. But also, as Clive is fond of saying, slow is smooth and smooth is fast. Working at a slower pace actually gets things done, and without the frustration or needless mistakes that creep in when you’re pushing against a tight deadline. So, I’m slowing down and enjoying work on a project that is markedly different to the bench and chair I built last year. Slowing down also means I’m more receptive to the lessons this project will offer.

DSC_2571

That glue seam looks ok

I’m already feeling the benefit – I’ve not quite finished dimensioning the panel that will become the second side of the bookcase, but I’m much more content with my progress, and I’ve enjoyed working it a whole lot more. The shelves will be quicker in any event, because I will leave the underside with the rough scalloped tecture from the jack plane, while the sides need to be finished on both surfaces. But get the sides in good order, and everything else will follow from them. Settling into a different rhythm after the bench build may have taken a few weeks, but it’s good to be back in furniture making mode, and I’m enjoying using the Roubo bench. The extra length of the benchtop has already proved to be beneficial, as the bookcase sides would have stretched my old bench to full capacity. As it is, the Roubo can handle work of this scale with plenty of room to spare. It was also gratifying to see that the glue joint that had me chasing my tail last week turned out ok in the end – perseverance paid off.

DSC_2572

I also reconfigured the workshop layout so that the tool chest is at the end of the bench, where it is more accessible

Parallel Skills In Action

One of the articles I’m most proud of is the piece I wrote on parallel skills for issue 227 of Furniture & Cabinetmaking over five years ago. A concept I’d encountered through my martial arts training with Clive Elliott, parallel skills are something I’ve found equally useful in all my creative endeavours, including woodwork and playing musical instruments. And the deeper I’ve been drawn down the historic-woodwork rabbit hole, the more benefits I’ve found to a parallel skill approach. So imagine my delight last week when I received an email from Guy Windsor.

IMG_6998

Clive demonstrating how to improve my dovetails through a blood choke. Remarkably, this photo was taken on my stag-do. Happy days.

Guy is a scholar of historic martial arts, with an emphasis on historic swordmanship. He’s also a woodworker, and has written a fascinating blog post on the parallels between the study of historic martial arts and traditional handwork in the woodcrafts. This feels like an even wider application of parallel skills – what can the study of other disciplines teach us? I’m looking forward to finding out, and will certainly be tuning into Guy’s blog as a regular reader. I heartily recommend that you do the same!


You can spend money or you can build skills

“Skill is equal parts muscle memory and knowledge.”

“You can spend money or you can build skills.”

“Bloggers only show their best work.”

These have been the thoughts circling my mind while I’ve been at the ‘bench today working on the boarded bookcase, and I thought it would be useful to discuss them here. Not least because yet another description of edge jointing boards would not make for gripping reading, and also it wouldn’t be particularly representative of this week’s work. So instead, let me offer some thoughts, with edge jointing those maples boards as a backdrop.

DSC_2558

Skill is equal parts musckle memory and knowledge – it’s why you can’t learn to build furniture (or anything really) solely by reading or watching Youtube, although I’ve found research and reading to be an invaluable part of the building process . At some point you simply have to get into the ‘shop and make some shavings, to translate the research into muscle memory. Muscle memory takes time and practice to develop, and it can also atrophy if not  constantly. And here’s I found myself – I learned a huge amount from the Roubo bench build, including new techniques and approaches. But I’ve not prepared an edge joint for glue up since October 2018, and boy can I tell how long it has been. The knowledge is still there but the muscle memory has faded, and while it will come back with some hard work, I’ve found myself chasing my tail with the next panel glue up for the boarded book case. Getting those two edges square and straight today seemed beyond me, as the edge tilted one way then the other despite my best efforts. And so the frustration mounts because I know I can do this (the three-piece maple top for the staked desk has two long glue joints, which are barely visible).

DSC_2562

You can spend money or you can build skills – I’m going to admit it, there were moments today when I wondered how much a 6″ spiral head jointer would cost and whether I had room for one in my ‘shop (the answers are: “£1,119 from Axminster“, and “no I definitely don’t have the space“). Stepping away from the bench for a moment to finish my coffee, I reminded myself that it is easy to see new tools as being the answer to finding a technique difficult, but new tools also require new techniques and skills (and there are few things I dislike more than setting up machines). When I started my journey in the woodcrafts at the Totnes School of Guitar Making back in 2007 I was focused on gaining the hand skills I needed, not spending my way out of difficulty. There are very good reasons to buy a jointer, but a frustrating day trying to get a good joint is not one of them. The acquisition of skills is still at the heart of what I’m trying to achieve at the bench, and so I’m going to focuse on nailing these edge joints to the standard I have in the past.

Bloggers only show their best work – it would be wonderful to pretend that everything goes perfectly everytime I’m at the bench, and not to write about the mistakes or difficulties. But that would be disingenuous, and I’ve aways tried to be honest in my writing here. After all, to err is human (to really stuff up takes a power tool). I think there is more benefit in showing the difficult stuff and the times that work does not go to plan. Today I stepped up to the bench expecting to nail this edge joint, and it owned me for several hours. It was a humbling experience, but keeping the ego in check is good for the soul.

DSC_2563

Ultimately I did achieve the tight joint I was looking for, and got the panel glued up with Titebond hide glue. I’m determined to bring that muscle memory back, and so the next few weeks will be spent working on the remaining three panel glue-ups before I move on to any other stage of the build. Focusing on the process will help to revive that all important muscle memory, and will keep me humble in the meantime.

One other useful learning experience in an otherwise frustrating day was trying another workholding method on the Roubo bench. Normally I would hold work to be edge jointed in the leg vise, but for the narrower board I rested it on the bench and held it with the planing stop and a does’ foot and holdfast. This method wouldn’t be appropriate for very wide panels, but for narrower boards such as this (3″ wide) piece it was very effective. This bench still has a great deal to teach me.