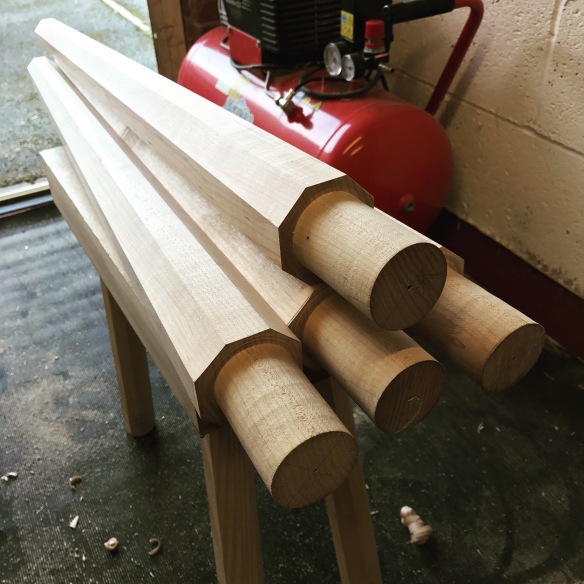
Parallel Skills In Action

One of the articles I’m most proud of is the piece I wrote on parallel skills for issue 227 of Furniture & Cabinetmaking over five years ago. A concept I’d encountered through my martial arts training with Clive Elliott, parallel skills are something I’ve found equally useful in all my creative endeavours, including woodwork and playing musical instruments. And the deeper I’ve been drawn down the historic-woodwork rabbit hole, the more benefits I’ve found to a parallel skill approach. So imagine my delight last week when I received an email from Guy Windsor.

IMG_6998

Clive demonstrating how to improve my dovetails through a blood choke. Remarkably, this photo was taken on my stag-do. Happy days.

Guy is a scholar of historic martial arts, with an emphasis on historic swordmanship. He’s also a woodworker, and has written a fascinating blog post on the parallels between the study of historic martial arts and traditional handwork in the woodcrafts. This feels like an even wider application of parallel skills – what can the study of other disciplines teach us? I’m looking forward to finding out, and will certainly be tuning into Guy’s blog as a regular reader. I heartily recommend that you do the same!


A Different Type of Lamination

DSC_0131

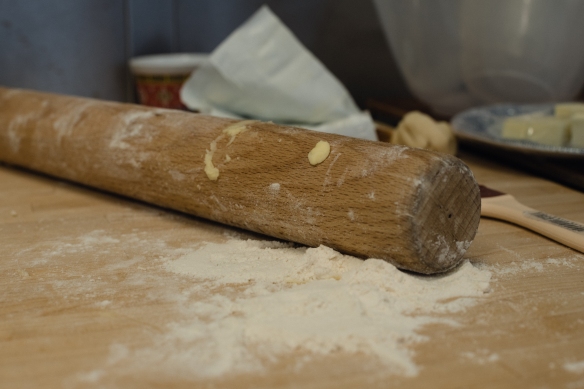
I’ve written before about the parallels I’ve found between different handcraft traditions, and the particular familiy resonance that baking holds for me. Dr Moss surprised me this year by booking me onto another baking class for my birthday, this time a full day viennoissorie course at Loaf. This is the first time I’d ventured down to Loaf, but the quality of the bread they bake and sell means that it will be far from my last trip. There must be something in the air in Stirchley which encourages traditional handcrafts. Loaf were at the forefront of encouraging a community and rejuvenating what was previously a very tired stretch of the Pershore Road. JoJo Wood moved in a few doors down when she established Pathcarvers, and suddenly there is a hub of creative endeavour in an unlikely location. One of the things I love about living in Birmingham is the rich history of ingenuity and industry – in the nineteenth century Birmingham was the city of a thousand trades, and the plethora of traditional and independent crafts taking place around the city currently speaks to that same work ethic and passion to make.

DSC_0135

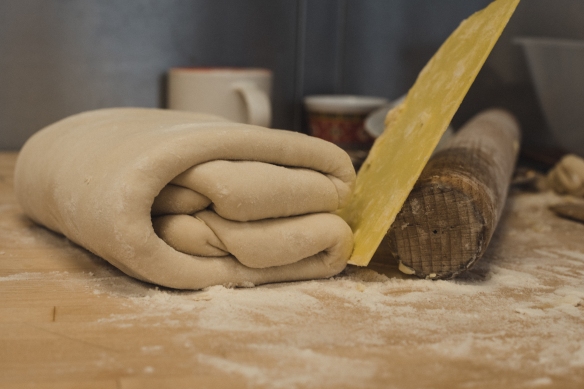
Laminating the dough

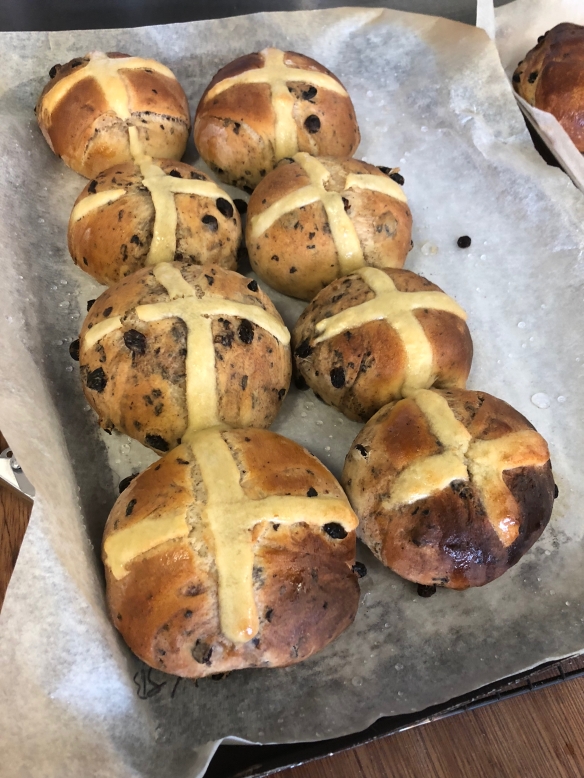
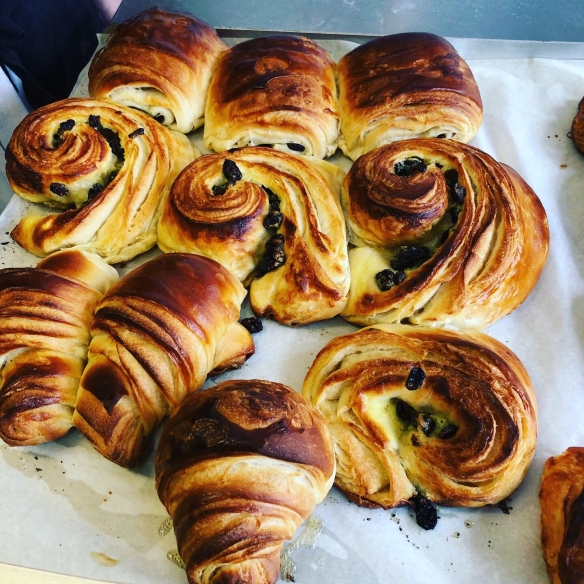
The class itself was fantastic. A full day provides an opportunity to deep dive into technique and approach each stage of a bake in real detail. For the uninitiated, Viennoissorie is the use of laminated and enriched doughs, and the day involved baking croissant, pain au raison, pain au chocolate, brioche, and hot cross buns. Yes, breakfast the next day was very enjoyable ( I do wonder if this was Rachel’s motivation for booking me on the class?)! I’d wanted to bake hot cross buns for a long time, as one of the stories I remember most vividly from my grandfather’s bakehouse was that they would be so tired of making tens of thousands of hot cross buns at Easter that every year, the last hot cross bun baked at Easter was placed on a nail and left there for the next twelve months.

DSC_0137

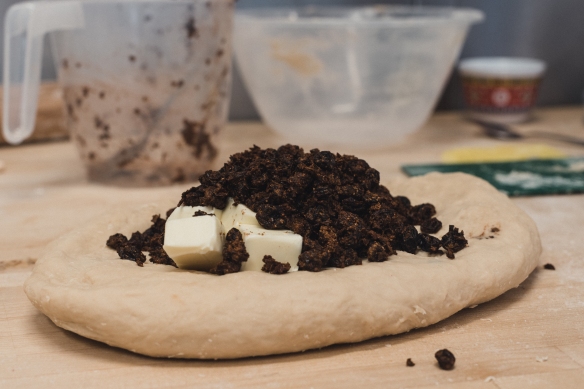
Things are about to get messy – folding in the fruit for the hot cross buns

If kneading dough is similar to planing timber by hand, then preparing laminated dough and assembling viennoissorie is joinery for bakers. There is plenty of opportunity to work the dough by hand, and to develop an understanding of your material as you prepare it, which continues as you assemble and fill the pastries. This is a type of baking I’d not previously tried, and I had assumed that laminated doughs would be fiendishly difficult. I shouldn’t have been concerned, as instructors Neil and Martha were incredibly knowledgeable and patient, and broke each stage into easily understood instructions and tips. The class was well paced, so that we were never rushed, and had plenty of time to experiment and work through the different tasks, but also that no one was left waiting for the next instructions. Our hard labour was rewarded by seeing trays of freshly baked pastries come out of the oven. we were also well catered for during the day, with plenty of Loaf’s own freshly bread provided for pre-class breakfast and lunch.

IMG_3115

Hot cross buns

The class concluded with a tour of Loaf’s bakery, and the opportunity to see how a bustling professional bakery is set up was fascinating. If yo uare in the Birmingham area and want to learn some new baking skills, then Loaf comes highly recommended. I will definitely be returning for future classes!

IMG_3137

Applying Body Mechanics to Octagonalisation

All of the legs for the staked worktable are now octagonalised, and I spent a couple of hours today making them pretty – final smoothing to remove a few spots of tearout, plenty of time with an eraser to remove stray pencil marks, and refining the fit of the tenons. Finalising the tenon size was a good opportunity to revisit the lathe and get a spot more turning practice in.

IMG_8214

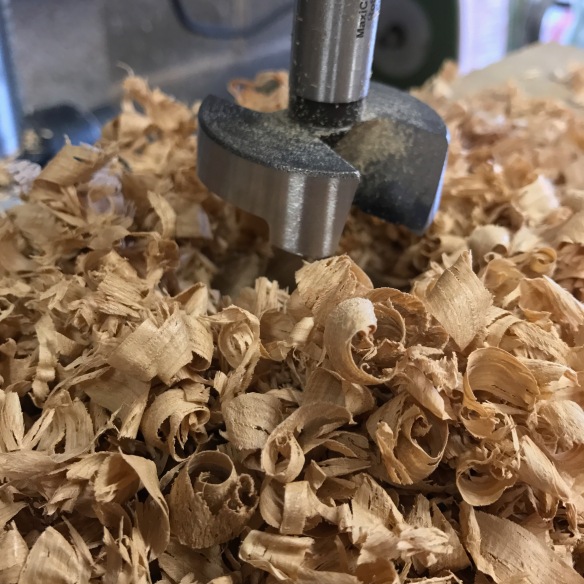
The 50mm maxi-cut bit by Colt is a monster, and chewed through this oak rapidly while leaving a very clean finish and no splintering on the exit side.

When I originally turned the tenons I had been quite cautious and left them a touch oversized, which also abetted by wear to my “go block“, the corners of which had become burnished and slightly widened when checking the still-spinning tenons. So I prepared a new test mortice in some scrap oak left over from the Policeman’s Boot Bench, and took the barest shaving off each tenon until they all fitted smoothly without any slack. I also took the opportunity to clean up the shoulder of the tenon. Ideally I would like to turn a gentle cove into the shoulder, but my turning kit currently extends to one tool (the Easy Wood Rougher) and until I order the Easy Wood Finisher that particular shape is outside of my grasp. Instead, I made sure that the shoulder was clean and square to the tenon, with no stray bumps or unslightly catches.

IMG_8217

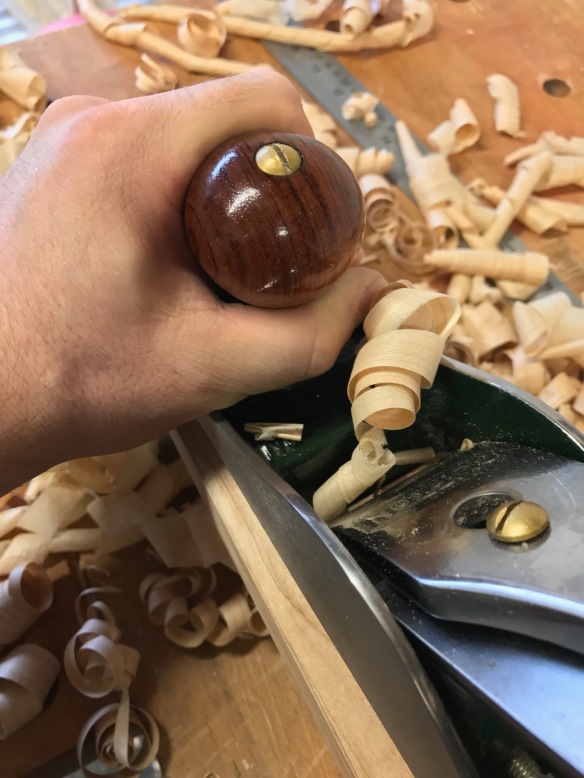
My standard grip for traversing boards and heavy stock removal is no good for octagonalisation – placing the off-hand on top of the bun raises the centre of gravity and encourages the plane to wobble during the stroke.

One of the advantages of performing a repetative task, such as octagonalising a set of four legs, is that it provides the opportunity to review technique and make incrimental changes towards efficiency. An aspect of woodwork that I find constantly interesting is the impact of body mechanics – the way that posture, including hand and foot placement in relation to the tool and the workpiece, will influence the outcome of a technique (for instance, cutting to a line, or planing a square and straight rabbet). Body mechanics have been a constant focus throughout my martial arts training, particularly when training with Clive, and that emphasis is something I find increasingly useful at the workbench. Octagonalisation is a case in point.

IMG_8215

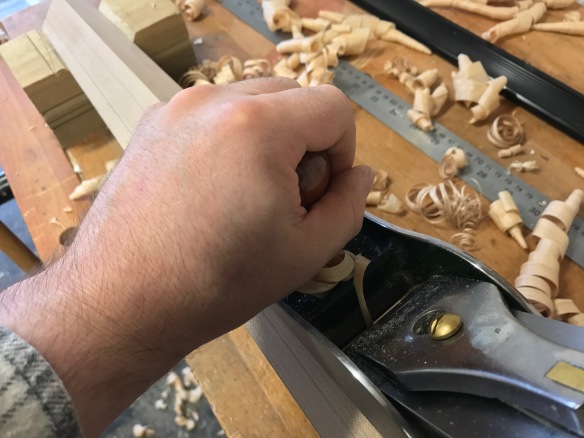
This jointing grip helps hold the plane steady when removing the corner and establishing the facet. My fingers are pressed against the face of the leg to centre the plane on the aris of the workpiece.

When octagonalising the table legs, I found that my standard off-hand grip for planing wasn’t providing the control or comfort I wanted. Mainly this was because the initial strokes find the plane balanced on the aris of the workpiece, which makes holding the plane in a constant orientation to the leg difficult until the the facet is established. My standard grip works well for traversing boards with the jack plane, as it provides downward pressure to keep the plane in the cut, especially in ornery timber. But for octagonalisation it meant that the centre of gravity was too high and the plane was prone to wobbling.

IMG_8218

I transition to this grip once the facet has been established. Keeping the hand low to the plane body lowers the centre of gravity and keeps the plane in a constant orientation to the workpiece.

Instead, I established the facet by dropping my hand to the sole of the plane, mimicing the grip I use when jointing an edge – the thumb grips the side wall of the plane and the fingers curl under the sole to provide a fence to register against the workpiece. Once the corner is knocked off and the facet established, I shifted my thumb so that it was curled around the base of the bun while the fingers gripped the front edge of the bun – this kept the centre of gravity low for stability, but provided more power behind the plane stroke for rapid stock removal. After a few facets transitioning between these grips became second nature, providing a comfortable and precise way to carry out the operation.

IMG_8221

Four legs octagonalised, and made pretty. These are ready to be fitted to the sliding battens.

When I started octagonalising the legs I did not think much abut the plane grip I was using. Starting with a jointing grip, and transitioning between the two hand positions, occured insinctively in response to the feedback from the tool and the need to stabilise the plane on a narrow surface. Just as the projection of a plane iron is adjusted throughout a planing task (for instance, backing off for a finer cut as you near your layout lines), I would suggest that body mechanics are not static but also evolve throughout an operation in order to reflect to the changing state of the workpiece. I’m sure there are plenty of other examples of how body mechanics influence woodworking technique – I’ve previously written about how posture can contribute to effecive use rabbet planes and tongue and groove planes. But what are your favourite body mechanic tips for woodworking?

Any Way You Slice It

For my birthday in May, Dr Moss booked me onto a bread making course at the Harborne Food School. The Food School opened a year or so ago right next to our favourite coffee shop, and the course list offers a wide variety of classes for all ability levels and areas of interest. And so it was inevitable that we would eventually start taking classes there. Despite baking quite a bit (at least before The Apprentice was born – there hasn’t been a huge amount of free time since) I’ve never made bread by hand. Given family history (more of which further down in this blog post) this is an omission I’ve long wanted to address, but haven’t really had the opportunity. The bread making class took place in July, and was a wonderful (and educational) evening in which the processes and mechanics of making high quality bread by hand were laid bare in an accessible and very enjoyable format. Which is all very well and good you say, but what exactly does this have to do with woodwork? At first blush not a great deal, but this class set some ideas in motion which have been slowly coalescing and bouncing round my mind ever since. 


But first, the class itself. Over the course of three hours we were instructed in how to make white and wholemeal loaves entirely by hand. Two batches of white dough were turned into a plaited loaf and batch rolls, while the wholemeal was baked into a loaf for slicing. As a final task we made pizza dough for cooking an in-class dinner, chatting about cooking and the best kept secrets of Birmingham’s restaurant scene while eating pizza we’d made ourselves and waiting for our bread to cool from the oven. The camaraderie and shared passion for food created a wonderful atmosphere, and instructor Charlotte gave very clear instructions and explations for the techniques and methods demonstrated. When it comes to traditional crafts there really is no substitute for hands on learning, and this was the perfect introduction to something I’ve wanted to try my hand at for as long as I can remember. I’m now on the waiting list for Advanced Breadmaking (focaccia and ciabatta ahoy!), and one of the very first things I did after the course was to book the Good Doctor onto a sushi making class for later this month. I fully expect that we’ll both be taking many more classes at the Harborne Food School over the coming years.

At some point during the class, as kneading the dough created a hypnotic rhythm, I started to reflect on the similar threads that link breadmaking to woodwork. It is, unsurprisingly, all about heritage. Heritage in terms of both skills and family history. 

Maple, not dough. But the  process of taking a gossamer full-width saving is surprisingly similar to that for kneading delicious bread.

Kneading that dough by hand, shaping it, and then baking until properly cooked, reminded me a lot of the time I spend at my workbench. The proximity you gain to your material by working by hand, without machines acting as intermediaries, gives rise to an understanding of how the material is being worked, and when it is ready. Touch and feel tell you as much (sometimes more) than your eyes, and the process becomes one of thinking with your fingers as well as your mind. The more time I spend at my workbench the more I think that this state is where I am most truly content – working with a combination of both hand and mind to arrive at something useful that I have fashioned myself out of basic raw materials. There is also a sense of self-reliance common to both woodwork and cooking. Sure, you can buy bread readily and cheaply. But the act of choosing to make it yourself out of good quality ingredients (free from the multitude of artificial elements found in commercial bread) speaks, I believe, to the same sense of aesthetic anarchism that motivates many of us to build the furniture we need. A small act of refusing to be someone else’s consumer, and to make the things we need. Maybe I’m over-playing this a little, but I still get the delicious bread at the end of it, so either way I win something.


Using those same traditional techniques to knead and bake the bread I found also brought me one step closer to my grandfather, and to the heritage of his chosen craft. I’ve written about my grandfather before (also here). When I was growing up he was the main woodworking example I had to look up to. But he was also a third generation master baker. If you read local history books about Birmingham in the nineteenth and twentieth century, many of them will mention T Mountford and Son, a bake house found on the Lichfield Road at the junction with Sutherland Street. That was the bakery started by my great-great-grandfather, at which three generations worked. My grandfather had left school at 14 to work in the bake house, and continued to do so until the shop closed in the 70’s (due, I believe to a compulsory purchase order by the council to widen the Lichfield Road). Even in his 80s, my grandfather had the strongest hands of anyone I’ve ever known, from a lifetime of kneading dough. And so during that hypnotic slap-stretch-roll of kneading the dough at the Harborne Food School, I found a wonderful sense of peace, and feeling that I was working as my grandfather had, not to mention the earlier and generations I’d never known, very much as I do when I’m at my workbench. 


Although traditional bread making doesn’t really translate to how I approach my workbench, that sense of self reliance and continuation of traditional skills in order to create things of use, is incredibly powerful. And it is a mindset that influences an increasing amount of my life.

Day 5: Saint Roy’s devilish brand of “Irksome woodworking”

And so this is it. The New English Workshop class of 2015 is dismissed. This week has been a whirlwind of fun, skills learned, tall tales told, and a vast sense of community felt. I’m struggling to believe that this course (which I have been looking forward to since last November) is already over, as the time has just flown by.

My completed projects (trapped nail not pictured)

My completed projects (trapped nail not pictured)

But let me backtrack a little, to the final day of the course. Roy had designated Friday as a day for irksome woodworking, the purpose of which is purely to annoy other people. And so he had a couple of fun projects for us to work on with this aim in mind.

IMG_0957

Before we delved into irksome woodworking I managed to find a few minutes to finish yesterday’s patch box with shellac, a touch of hard wax, and then a swift burnishing using a polissoir made by Don Williams. This was my first experience using a polissoir and I am totally converted; I can very easily see this being my go to finish for future furniture builds.

IMG_0964

With the patch box finished and full of mutton tallow substitute, Roy set us up with two irksome projects; the classic trapped-nail-in-a-block-of-pine, and a rising dovetail test joint. The trapped nail is a nice easy introduction to irksome woodworking, and although quite a frivolous piece still made good use of core skills like accurate cross cuts, pairing out waste, and layout. I won’t say anymore about this project in case it spoils the puzzle for any readers.

My test rising dovetail.

My test rising dovetail.

The rising dovetail was a different kettle of fish entirely. This is the key joint for Roy’s infamous Mystery Mallet, and one which I was keen to try out. I must have been getting a little tired and dim by this point of the course, as the layout for the rising dovetail did wrinkle my brain somewhat. But I think this is a joint that will come with practice, and the unusual layout method, as well as cutting an unfamiliar joint, are definitely worthwhile skills to master.

IMG_0959

I’m still reflecting on this course, and suspect that the ideas and lessons learned will continue to percolate for some time. But as an immediate impression, is of a week spent developing more parallel skills, and covering a considerable amount of ground, in a relaxed and entertaining environment. It goes to show, I suppose, that skills based learning (as distinct from project based learning) doesn’t have to be dry at all – with the right teacher it can be a riot of laughter and bafflement in equal measure.

IMG_0825

Myself and fellow Anarchist Tool Chest survivors at the start of this week’s course.

The sense of community on this course has been huge; from the guys at New English Workshop, the instructors and assistants (Roy, Chris, Deneb from Lie-Nielsen, and of course Jamie Ward from Warwickshire College), and the participants on both Chris’ bench building class and the Followers–of–Roy, it truly has felt like a large family.

Particular mention must go to my four fellow survivors from last year’s Anarchist’s Tool Chest class, and the camaraderie and kinship has been wonderful. So to fellow Anarchist’s Susan, Matt, Matt, and Rory, and the non-Anarchist’s we were lucky to work with this week; thanks guys. I’m already looking forward to doing the next class with you all!

Day Two: “Mother has all the prettiest tools”*

IMG_0875

My completed Roubo bookstand.

The Roubo bookstand is to all intents and purposes complete. There is a little more cleanup to do, and maybe some shellac to apply, but I think we can call it as finished as any project on a course can be. The bookstand is a really fun, if challenging project, and the more I think about it the more I think it is a really useful route to learning a range of new skills. There is cutting some funky shaped mortises (the curved front edge definitely makes things more interesting), accurate layout so that the hinge actually rotates, re-sawing to split the leaves of the stand, and laying out the decorate curves using dividers and clever geometry (very much in the vein of George Walker and Jim Toplin). That’s a pretty sweet set of skills from only one modestly sized piece of timber!

DSC_0689_2

The mortised and carved hinge, ready to be separated.

Today started off with chopping the remaining mortises, and fairing up the curved shape of the hinges. We then separated the hinges, first by establishing a kerf at each side using a toothed cutter in a marking gauge, and then a fine coping saw blade (fed through a 1/16” hole drilled in the corner of each hinge).

DSC_0695

With the hinges separated, it was a case of splitting the leaves using a large (and very aggressive) rip saw. Which obviously wasn’t terrifying at all. Teasing the leaves apart is a matter of some delicacy, and I will wait until I write my full Roubo Bookstand post to describe how we went about this. But once the leaves were separated we cleaned up the show surfaces (leaving the inside surface of the legs in the rough as a mark of authenticity). The decorative curves for the legs and top were scratched out using dividers and simple radii to create flowing curves, and then cut with a coping saw. I may do a spot of clean up with a rasp when I am back in my own workshop, but these looked pretty good straight off the saw.

DSC_0698

Re-sawing the legs to split the leaves. See, not a terrifying way to imperil nearly two days work at all.

Finally it was a case of testing the bookstand, for which I used my copy of Joiner & Cabinetmaker (which Chris and Katy very kindly signed for me – including the iconic sock monkey emblem!). I’ve really enjoyed building the bookstand, and am looking forward to building some more of these in the near future (just as soon as I have tracked down a big enough bow saw).

Testing the bookstand with one of my favourite Lost Art Books.

Testing the bookstand with one of my favourite Lost Art Books.

Tomorrow we are starting with a morning of surprise metal work, before moving on to pinch sticks and Roy’s catch box project. So more wonders, curiosities, and skills await. I’m looking forward to it already.

*This post is named after a quote by Roy Underhill referring to the tool collection of my good friend and fellow Anarchist Tool Chest survivor Susan Johnson.

Day One: Saint Roy’s suitcase of delights

What a first day on the course. It is hard at this point to know exactly what to write about, because unlike last year’s very focused Anarchist’s Tool Chest class, Woodworking with Thomas Jefferson is a little more… sprawling in nature. The overarching theme however is easy to spot; Roy’s unbridled enthusiasm for spending time (and facilitating) whatever we are interested in.

IMG_0851

Myself and Roy Underhill

The main focus of today was building the iconic Roubo bookstand (which has been on my project list for several years), but we have also had a crash course in sharpening handsaws, the use of passer drills, and a brief glimpse into what can only be described as Roy’s suitcase of dlights. It looks like the rest of the week will be working on mitre shouldered rising dovetails, Roy’s infamous Mystery Mallet, a sample easel from Jefferson’s five-book rotating lectern, and anything else that Roy can think of.

It occurs to me that the best way to think about this week is not in terms of the projects or “outputs” to be built, but as an opportunity to build up a new set of parallel skills, some of which I may never use again, but all of which will undoubtedly make me a better woodworker. And that is super exciting, given all of the time I have spent thinking, and writing, about parallel skills in the past year. Being less output driven than the ATC class I took last year means that there is more opportunity to just soak up the skills on offer and follow some interesting rabbit holes. Roy is an incredibly charming and knowledgeable teacher, as well as being just as funny as he is on the Woodwright’s Shop, and seriously enthusiastic. So much enthusiasm. So much.

IMG_0837

Roy demonstrating the Roubo bookstand

As I mentioned, the focus of today has been on the Roubo bookstand. I don’t intend to give a blow-by-blow account of building the bookstand right now (I will save that for a future entry), but for the uninitiated the project is a folding bookstand made out of a single split piece of hardwood (in this case 9” wide, 1” think mahogany). A hinge is carved into the stock, and then the thickness of the stock split in two so that the two pieces can rotate on the carved hinge. Seriously clever stuff. So the bookstand has thus far involved cutting a dado to allow access for a bow saw for splitting the thickness of the stock, (surprisingly!) bow sawing the stock (which is very different to any other type of handsaw work I have done previously) before, and carving the hinge from both sides of the work.

Using a bow saw to split the mahogany stock for the bookstand.

Using a bow saw to split the mahogany stock for the bookstand.

I can’t wait to get back into the workshop tomorrow morning and see what else lies in store for us!

On the endless layers of simplicity (or, why the dovetail saw is mightier than the sword)

IMG_0775

It was with some horror that I realised only two weeks before my course with Roy Underhill that I’ve barely cut any dovetails this year. This has mainly been due to losing workshop time because of the move, and then focusing on the parlour guitar and my Furniture & Cabinetmaking articles. But even though I know I can cut a half-decent dovetail (thanks to last year’s dovetail death march with Chris Schwarz) I thought I should get reacquainted with my dovetail saw and put in some practice before the course with Roy.

And then I had a slightly better idea. Because you see, it is always worth stripping a technique back to very basics, and revisiting the fundamentals, regardless of your current skill level. This is a training technique I have always found to be very beneficial (and enjoyable) in my martial arts training. Leave the complex techniques alone for a few minutes, take something simple that you know off by heart and break it down to its constituent parts, dissecting exactly what happens at each stage of the technique. So instead of diving straight in to those practice dovetails, I decided to spend a couple of nights running through the Night of 100 Cuts exercise. Now, I wrote about this exercise back in June last year, but in a nutshell it involves practicing each of the 5 cuts you use in a dovetail (square on and straight down, angled left and straight down, angled right and straight down, square on and angled left down, and square on and angled right down) in isolation. So 20 repetitions of the first cut, followed by 20 of the second cut, and so on.

And here is the interesting thing about repeating this exercise for the first time since the Anarchist’s Tool Chest course. When I first started using the exercise last year I thought it was all about training that all important muscle memory of what dead plumb actually felt like, and how that compares to a 1:4 angle slope for cutting tails. And yes, that is an important part of the exercise. But I think it goes beyond that. Much like when I start breaking down my favourite joint manipulations in martial arts training, this week I have found Night of 100 Cuts to be an opportunity to focus on each aspect of each cut. So what are my feet doing? Where is my centre of balance and weight distribution? How am I orientating my upper body and shoulders in relation to my sawing hand? How am I gripping the saw (like I’m cupping a baby bird, as you asked)? What is my left hand doing? All the same questions I would ask when breaking down a wrist lock (apart from the cupping action, we rarely cup in the dojo).

And then, how do all of the above change when I move from cutting the left edge of a tail (square across the board, downward slope to the right) compared to cutting the left edge of a pin (angled to the left across the board, straight down)? To what extent does my posture, stance, and movement change between the five cuts? It becomes a forensic examination of the technique from the ground up.

Building things is always more fun than practice cuts or practice joints, but practicing a high number of repetitions of each cut, safely away from a real life project, means that you can analyse and adjust each element of your technique, and understand what effect your stance and posture have on a particular cut.

Of course the ultimate aim is to not have to think about any of this, just to step up to the board and cut row after row of perfect dovetails right off the saw (what in Jiu Jitsu we refer to as “mushin”; a clarity of mind in which the body can react without higher thought processes interfering). But to get there, the mind has to do a lot of thinking, and the more we progress and understand a technique, the more I think it is possible to get out of a seemingly simple exercise like Night of 100 Cuts. Because as our understanding and skill level increases, we become more sensitive to the nuances of a given technique or operation.

Simplicity, it would appear, is onion-like in its layers.

DSC_0438

Community is… the Solution

What follows is an expanded version of the article I wrote for issue 232 of Furniture & Cabinetmaking.

Jamies Ward, course leader at Warwickshire College

I’d like to suggest two common challenges that beset modern woodworkers at one time or another (and which I have certainly encountered as I immerse myself in woodwork crafts).

Firstly, many woodworkers place great stock in traditional techniques or ways of thinking about the craft, and seek to place their work in the context of classic designs and traditions. This is certainly true for me, and I wrote in issue 224 about the personal significance of the heritage and history in hand tool work, and how this shapes the way I approach my craft. And it is undoubtedly important to have regard to the past when we build, but what happens if we are too focused on the woodwork of the past and what the dead guys built or wrote? Is there a danger that we won’t pay attention to the craftsmen and women around us, today, and those that are yet to come?

Secondly, is there a propensity to become too isolated in our own workshops, and fail to connect with other crafts people around us? To see our work in the wider context of what others are building? Having recently moved to a new city, this is something that has been on my mind recently, and it has taken me a while to develop local contacts with whom to discuss furniture making or lutherie.

Community is… the solution

Lest this all sound too bleak, I am happy to report that there is an easy antidote to being too focused on the past, and of being too isolated in our respective workshops; the international community of woodworkers. Not a cult (despite the alarming tendency for facial hair in some members), but an expanding network of craftspeople across the globe who in many ways have become a modern substitute for the medieval guilds and the mechanic’s societies that followed. The community is not something I went in search of. But when I stumbled across it, I found woodworkers with a wealth of very different experiences, unified by a passion for the various woodwork crafts, and intent on sharing knowledge and preserving skills.

Jason Thigpen of Texas Heritage Woodworks

This willingness to share information, discuss experiences, and most importantly, to encourage and inspire each other, is life affirming and so valuable. This is a community that inspires each other to build and to push the limits of our skills, that commiserates over mistakes and celebrates each others’ successes, that shares knowledge and solves those knotty problems which would otherwise keep us up half the night trying to devise ever move complicated solutions. The community doesn’t just work for the transmission of knowledge, but also to enabling new entrants to woodwork. For instance, in 2014 Chris Schwarz announced that he would be delivering beginners classes to young people and made a plea for old or unused tools with which to equip the “junior anarchists” on these classes. Chris tells me that he has been overwhelmed with donations, and is still cataloguing the enormous volume of tools he has received. This is community spirit in action!

Chris Schwarz of Lost Art Press, surrounded by tools donated for the “Junior Anarchist” classes.

Community is… where you look for it

Chris Kuehn of Sterling Tool Works

So where do you find the international community of woodworkers? This is actually a lot easier than it sounds. Eight years ago, when I took my first steps in learning how to build musical instruments, I knew only one other luthier and no one, save for my maternal grandfather, who built furniture. Now it seems like new woodworkers are everywhere I look, in large part thanks to the Internet and particularly the advent of social media. So read and comment on woodwork blogs (bloggers love nothing more than receiving comments), or write a blog about your own workshop experiences. A special mention must also go to Instagram, a picture based social network. The ability to upload a snapshot of your work, or what is happening right now in your workshop, gives an immediacy that words alone rarely offer.

Fellow luthier Sue Johnson

If you prefer real life contact with fellow humans, then woodwork classes are the perfect way to make connections with likeminded craftspeople (and a great opportunity to develop your parallel skills, as I wrote about in issue 227), either enrolling on a class as a student, or teaching one. Organisations such as New English Workshop offer an excellent range of short courses, while evening classes can still be found at some educational institutions.

Mark Harrell of Bad Axe Toolworks

Community is… the future, and the future starts with you

Crafts and specialist skills always engender a sense of community, and I am not trying to suggest that the community of woodworkers is a new development. But the decline of many educational woodwork programmes and woodwork trade organisations means that traditional crafts based community structures are increasingly obsolete, while the rise of the internet has given rise to a more international form of community. As one person who contributed a picture to this article remarked, the industrial revolution tore the traditional craft communities apart, but the internet has started to put us back together.

Phil Edwards of Philly Planes

Equally, I am not blind to the risk of many woodwork crafts dying out, nor of the challenges in preserving traditional skills. But the more I engage with the international community of woodworkers, the more I am convinced that these risks will be overcome, and the challenges will be met. Because under the stewardship of a community which cares passionately about preserving traditional crafts, and does so much to foster an appreciation and enthusiasm in the crafts, the skills and work which we all care about really do have a future. And this is a truly egalitarian community where every contribution, by every craftsperson, is valuable and valued. Simply by building something, and talking to other craftspeople and aspiring makers, you can contribute to the community and ensure the preservation of the craft for the next generation. And really, isn’t that what we are all trying to do?
Alex Primmer of Classic Hand Tools

“But this is the way we’ve always done it…”

Despite the recent silence on the blog, I have been very busy in the workshop building projects for two forthcoming articles for Furniture & Cabinetmaking. In the meantime, the following post is a based on my article from issue 230 of Furniture & Cabinetmaking, and a follow up to the Parallel Skills article I wrote in issue 227.

01All crafts have specific ways in which to carry out certain tasks, based on tradition and the tools and techniques commonly available, and in issue 227 I discussed the benefits of looking outside our usual projects to take advantage of the problem solving and techniques found in other disciplines. As a luthier by training who has now embarked on learning the joiner’s craft, I mentioned a couple of lutherie techniques which can be equally useful for furniture building. Since the article was published, several people asked about the lutherie techniques I touched upon. Here I’ll explain why what may seem like specialist techniques for a nice craft have wider applications.

Go Bars – reaching the spots other clamps can’t

Go bars are the luthier’s secret weapon, and provide a versatile clamping system when precise pressure is needed. Essentially, strips of strong and flexible wood are bent into a space too small for them, so that the pressure is transferred into the components being clamped. The most obvious use of go bars in the luthier’s workshop is gluing internal braces to acoustic guitar soundboards and backs, as the clamping force needs to be applied along the full length of a brace while the work piece is held in a cradle matching the radius of the braces.

02

Go bars can be used for a great number of tasks, and furniture makers can also take advantage of the ability to provide clamping pressure to areas where traditional clamps will not reach. For example, when gluing runners or other internal fittings to a carcase, using go bars will allow you to glue up without the use of either clamps, nails or screws (thanks to Derek Jones for this tip).

03

Equally, when planing the outside of a carcase flat, the weight of a plane can cause deflection, preventing the plane from reaching the middle part of the panel. Placing several go bars inside the carcase will support the panel and make flattening and smoothing external faces significantly easier.

If you want to make use of go bars for more traditional clamping tasks, then you will need a go bar deck. This can be as simple as you like, and is in essence a base and a ceiling between which the over-long go bars are fitted. The workshop where I trained built the go bar deck so that the bars pressed against the shop ceiling. In contrast, my current deck is portable, with an adjustable ceiling made of four layers of 25mm thick plywood glued together and supported above a deck of the same quantity of plywood by locking nuts on 20mm diameter steel rod at each corner. The work piece is placed on the deck, the ceiling adjusted to the correct height, and bars of oak bent at the points where clamping force is required. The go bars I use are generally made of oak or ash, 20mm wide and 3mm thick, but other species of hardwood will suffice.

Jointing thin panels

Jointing edges for glue up is a familiar task for all woodworkers. Plane both edges flat and square, apply glue and clamp up. Easy. And for work of the typical thicknesses encountered in most furniture builds this is all it takes. But if you need to joint very thin boards, of say, 5mm (the typical starting thickness of timber for an acoustic guitar soundboard) then the work is likely to spring out of the clamps as you apply pressure. Similarly, the thin reference surface makes balancing the plane in a constant orientation to the edge tricky.

Many people seem to view long grain shooting boards as training wheels for novice woodworkers, but for jointing thin stock the long grain shooting board is invaluable as it holds the thin edge in a constant orientation to the plane.

IMG_0275

With the edges jointed, we come to one of the key jigs in my workshop; the soundboard gluing jig. An article on how to build one of these jigs will be coming in a future issue, but put simply this is a deck of 25mm thick plywood with hardwood beams on two sides. One beam is fixed at the edge of the deck, while the other is held with bolts which move along slots routed through the deck. The jointed work is placed on the deck and butted up against the moveable beam, and close to (but not touching) the fixed beam. Once the joint has been glued, clamping force is applied by inserting hardwood wedges in the gap between the fixed beam and the work, through the slotted deck. Each half of the work is then clamped to the deck to prevent it springing out.

06

Because the wedges slide through the slotted deck until they catch on the work, the outside edges of the work piece do not need to be parallel to the gluing surface, or even straight. This jig therefore allows irregular shaped timber to be glued without issue, as well as wedge shaped work where thin outside edges are presented to the clamps.

Sharing information, growing parallel skills

The more traditional joinery I do the more I discover techniques which improve my lutherie, and I hope that the lutherie techniques discussed in this article will prove to find use in joinery and furniture making. If any readers have other techniques which would be of use in different disciplines, please do let me know – let’s share our knowledge and grow each other’s parallel skills.