Staked Desk Beauty Shots

Gareth’s photos of my staked worktable are now up on the Portfolio section of Over the Wireless. Every blog post, or magazine article, I’ve penned in the past 12 months has been written at this desk (in fact, I’m sitting at it right now), so I’m pleased to have some high quality beauty shots of the finished piece. Yet again Gareth’s photos are beautiful, and he has honed in on the details wonderfully.

A project from the Anarchist’s Design Book, the desk is not only really enjoyable project but also a really practical and attractive piece of furniture.

The Autumn of Maple and Pine… part 2

_DPP6658

Scrub plane in a mountain of maple shavings

One of the joys of revisiting a furniture form you have previously built is the opportunity to explore the effect of small changes to either (or both) the process of building the new version, and also the design of the finished piece. This can either be intentional changes in design or process, or prompted by the material at hand. When I broke the maple seat blank for the Surprise Chair out of the clamps I decided to try a slightly different process for the build than I had for the Apprentice’s Stick Chair, and also to take a different approach to some of the design aspects.

_DPP6800

Laying out the leg positions using the pattern for the Apprentice’s Stick Chair

Fundamentally this chair will be to the same design as the Apprentice’s Stick Chair – the same leg and stick angles, dimensions, and seat shape. But what I want to achieve is a different feel for this chair. With the Apprentice’s Stick Chair I deliberately went for softened lines, irregular facets on the legs, and a slightly folk craft feel which leant itself well to the oak I was using. The maple I am using for the Surprise Chair suggests crisper lines, with regular facets and chamfers. This has in large part been an idea prompted by the seat material. The oak I had for the Apprentice’s Stick Chair was 1 1/8″ thick in the rough, and finished out at 1″ thick, which meant that I did not have any depth to play with for chamfers on the seat. The maple stock for the Surprise Chair was 2″ in the rough, which meant that I had plenty of spare material to play with when it came to chamfers.

_DPP6806

Drilling the leg mortises.


After cleaning up the top surface of the seat, I thicknessed the seat to 1 5/8″ thick using the Lie-Nielsen Scrub plane before shaping the seat. The scrub is the perfect tool for this sort of operation – it removes material at a rapid (but controlled) rate, and also leaves a delightful scalloped surface texture. With the seat at final dimension and shape, I flipped it face down on the bench and laid out the location of the legs and sight lines using the pattern I made from the Apprentice’s Stick Chair. After clamping the seat to a sheet of sacrificial ply, I drilled the leg mortises using a 1 1/8″ Wood Owl bit in my 1923 North Bros brace. Previously I had drilled the stick mortises for the Apprentice’s Stick Chair once the chair was legged up, but I was in a drilling mood (brace and bit makes for a very addictive method of boring holes) so I turned the seat the right way up and laid out the stick positions using the same pattern before drilling them with a 1/2″ Jennings pattern bit in my brace. I won’t know for sure until I’ve made the sticks and fitted them to the seat, but it did feel like drilling to consistent angles was easier with the seat clamped to the workbench instead of being on it’s own legs. So this is a process change which I may adopt going forwards.

_DPP6808

Chamfering the underside of the seat

Now came the fun bit – chamfering the underside of the seat. The historic chair I have based this build on had a seat of 1 5/8″ thickness in the middle, with edge chamfers down to 1 1/8″ at the edges, so I decided to follow that example. I laid the chamfers out with my Bern Billsberry pencil gauge, and planed the three straight chamfers with the Lie Nielsen No.62 . The curved chamfer on the rear edge of the seat was cut with a Veritas spokeshave. As a final touch, I then chamfered the two front corners of the seat.

_DPP6816

My favourite element of the seat so far – intersecting chamfers and lines

As I mentioned earlier, this is fundamentally the same chair as the Apprentice’s Stick Chair. But already I am seeing how small design changes can have a significant impact on the overall form. Next for this build is making the legs, and while I will be using  the same leg dimension as for my previous chair, I am thinking of tapered octagonal legs instead of the hand-rounded approach I used last time. That should support the deliberate clean lines of this chair, and I am looking forward to seeing how the octagonal legs interface with the chamfers on the underside of the seat.

_DPP6820

The contrast between the smooth chamfers, clean lines, and textured underside of the seat makes for a very tactile seat.

Staked Work Table – in situ, in pictures

_DPP4173-2

A vintage compass (from 1904) sits on the corner of my desk. The lif of the compass is engraved with “The Road Not Taken” by Robert Frost.

As soon as a project is finished and installed, most of my attention tends to switch to the next build on my work bench. The staked desk is a little different, in that I’ve been sitting at it most evenings this week catching up on various items of work. And it has been wonderful to spend some quality time working at the desk – I’m sure this is a piece of furniture that will age well as I spent many hours, and years, working at it.

_DPP4178-2

A confluence of components – the top, batten, and leg all coming together.

One of my favourite post-completion stages is always taking detail shots of the completed piece. Gareth is booked for a photo session in April, so there will be new additions to the Portfolio section of OtW in the near future. But in the meantime here are some detail shots I took of the desk in situ.

_DPP4213-2

The finish on the top worked very well. Plenty of protection, and the figure is emphasised without becoming distracting.

_DPP4208-2

Maker’s mark on the left hand batten.

_DPP4209-2

Facets!

_DPP4211-2

More facets. This time one of the back legs.

_DPP4181-2

Left hand batten.

_DPP4179-2

This is my favourite detail – the leg tenon entering the batten. Just a little hint of the, compound angles, and lovely facets. I could look at this element of the desk all day.

Pretty Up

As every project nears completion I start to think about what finish will be the most appropriate given the timber selection, the location of the project, and the intended use. Some woodworkers have a favourite finish that they reach for as a matter of course, but I’ve never found that one magic finish. Sure, there are finishes which I really like for certain timbers or applications (water based lacquer for acoustic guitars, shellac and black wax for oak, milk paint for pine), but there is no one finish which I instinctively reach for. The benefit of being somewhat restless when it comes to finishing solutions is that I’m always open to trying new products or combinations.

IMG_8643

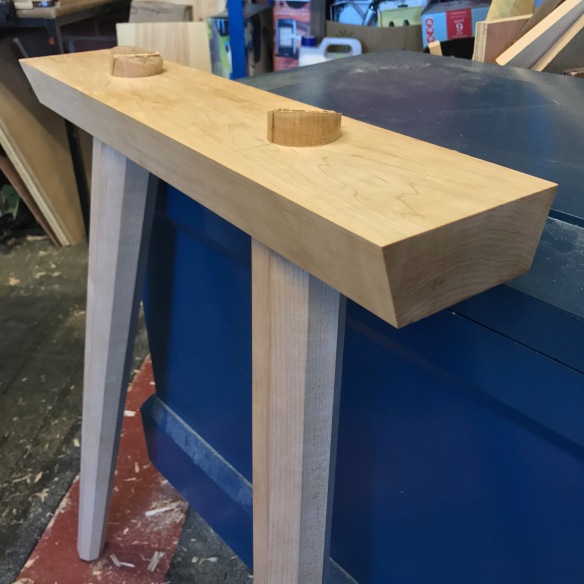
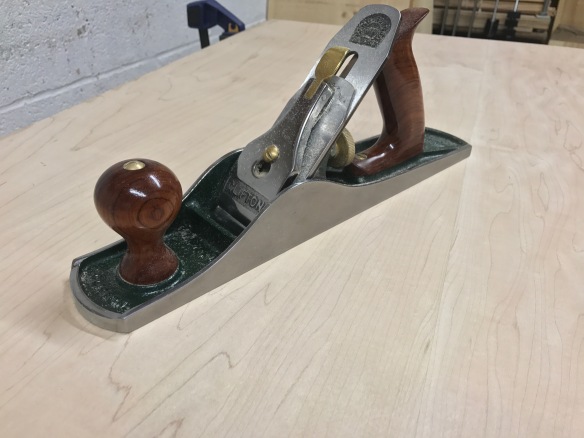
The completed work table in situ. Maple, sea foam green, and teal. All the hallmarks of a vintage Stratocaster!

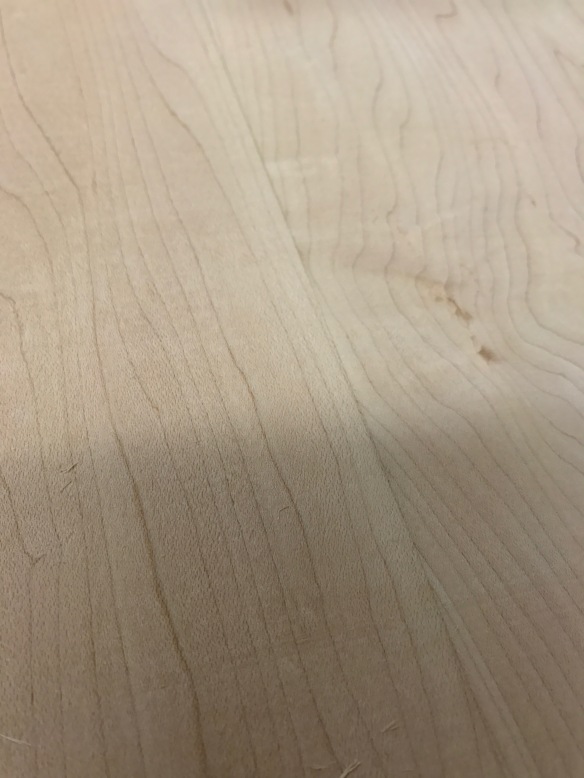
For the staked work table I planed up an offcut of the top as a sample and divided it into quarters. I like to have a couple of options to choose from, and with my sample board prepared I tried varying combinations of blonde shellac and hard wax, blonde shellac and Osmo Polyx, and a choice of either Osmo Polyx or Osmo Raw directly onto the maple (with no shellac). What I was looking for was a finish that subtly displayed the figure of the maple, but which did not add a high sheen – I will spend a lot of time working at this desk and don’t want to be distracted by light reflecting off a high gloss finish or by the figure becoming too loud.

IMG_8642

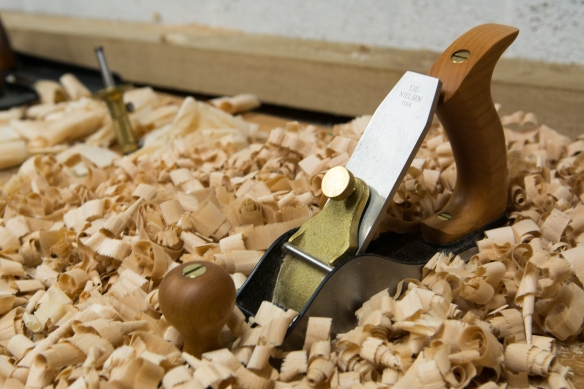
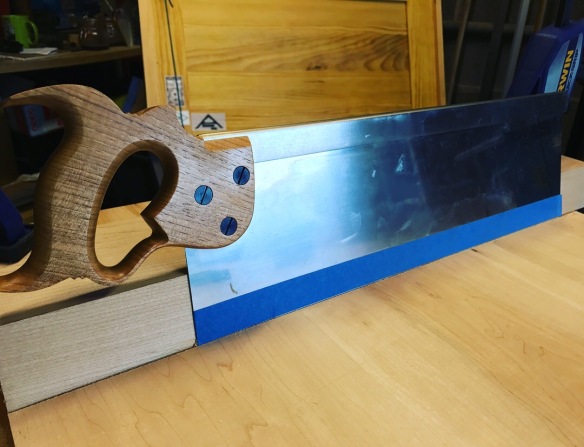
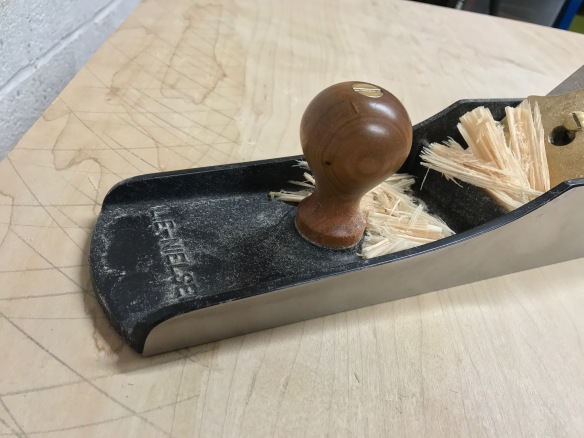
Applying shellac with a rubber

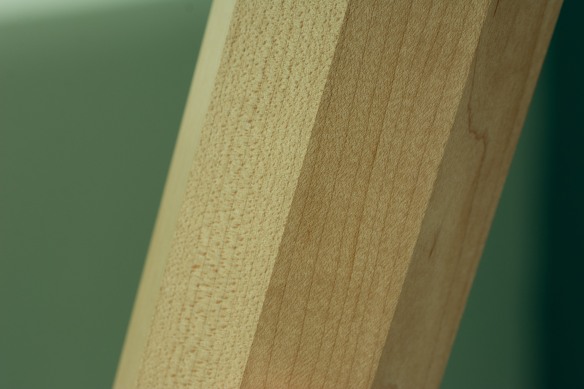
After living with the sample board for several weeks I decided that a base coat of blonde shellac with a top coat of Osmo Polyx matt would achieve my desired criteria. The shellac lifts the subtle curl of the maple top but never becomes too brash, while the Osmo adds a low-sheen protective layer which will ensure the longevity of the desk.

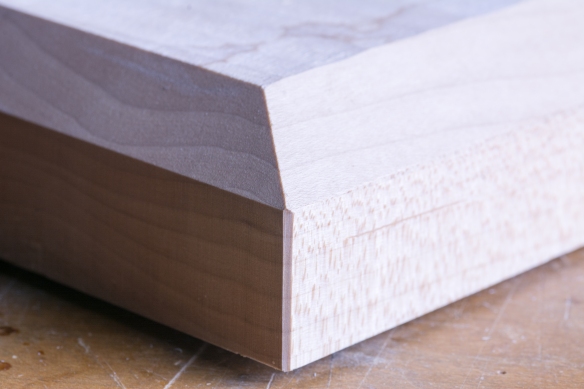
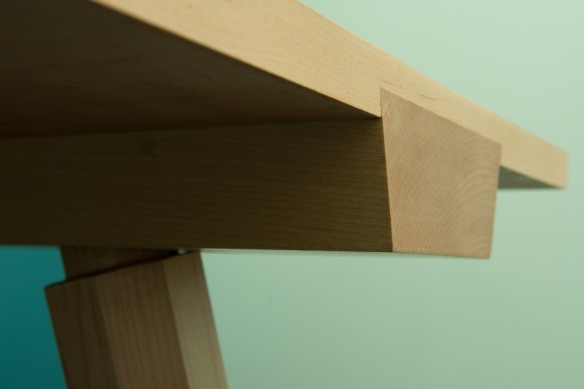
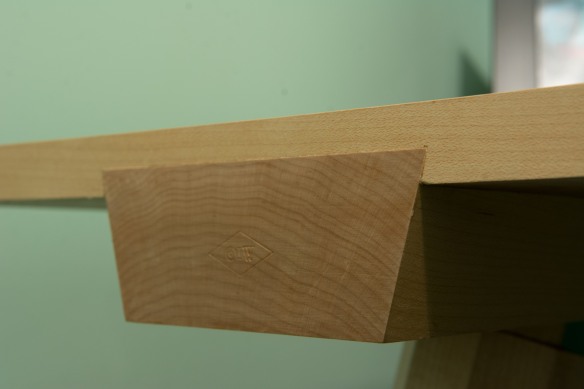
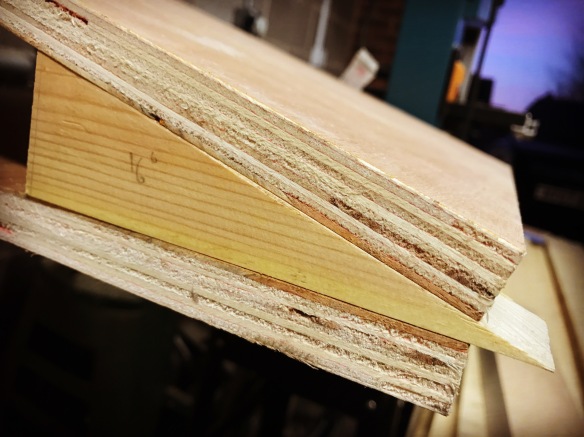
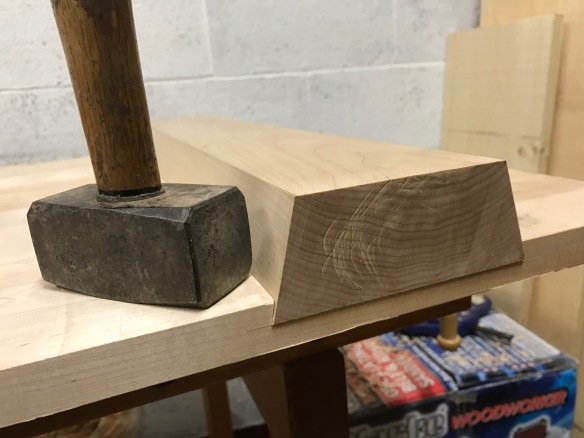
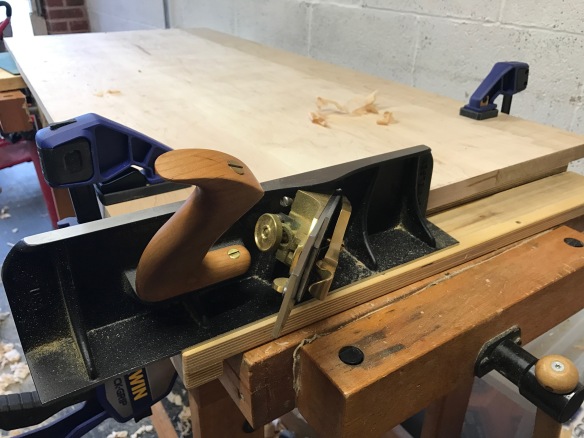
Before I applied the finish I spent some time checking the assembled desk and making pretty; cleaning up glue squeeze-out from the batten sockets, flushing up the front of the battens with a smoothing plane, and removing any last traces of tearout with a cabinet scraper. Finally, I broke the sharp corners of the desk top with 220 grit sandpaper. This last step is both for my comfort (maple can take a wicked sharp edge when planed) and to reduce the risk of the aris breaking in use.

IMG_8648

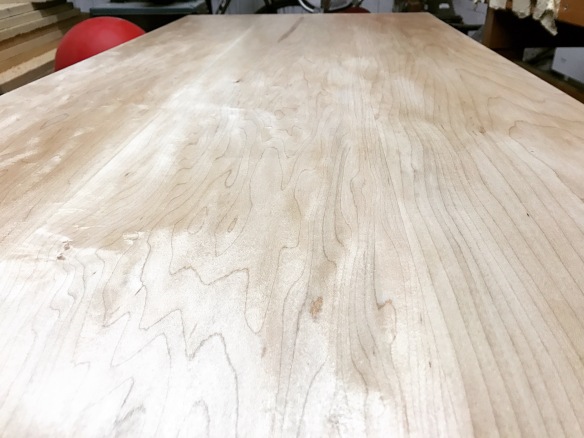
The top after two coats of shellac. Now for the Osmo.

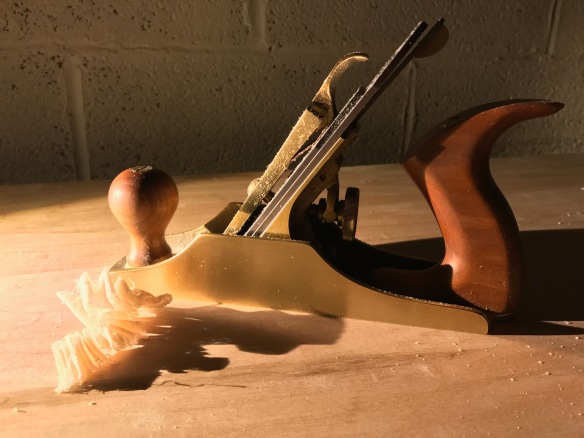
Most of my finishing solutions tend to be quite simple – I want the finish to look good but I also want it to be easy to apply, and this was no exception. Previously I’ve applied shellac using a good quality polishing mop, but after some sage words of advice from Derek Jones (Derek really knows finishing) I decided to try applying shellac using a rubber. A quick order to John Penny Restoration later and I had plenty of lint free rags and skinned wadding to make the polishing rubber. Derek’s book provided a very useful walk through on how to fold the rubber and use it to apply the shellac. I used blonde tiger flake shellac from Tool for Working Wood, mixed to a 2lb cut. This went on very easily, and after two coats the figure on the table top was popping nicely without becoming brash. Using a rubber left a smoother texture than brushing shellac, which reduced the need for sanding between coats, and will definitely be my preferred method of applying shellac going forwards.

The final step was to apply the Osmo. I ragged generous coats on to every surface save for the underside of the top (which left with just a shellac coat) and then wiped off the excess after 20 minutes. Two coats applied 24 hours apart gave a good build up of finish and left a matt sheen which is attractive without being distracting.

IMG_8661

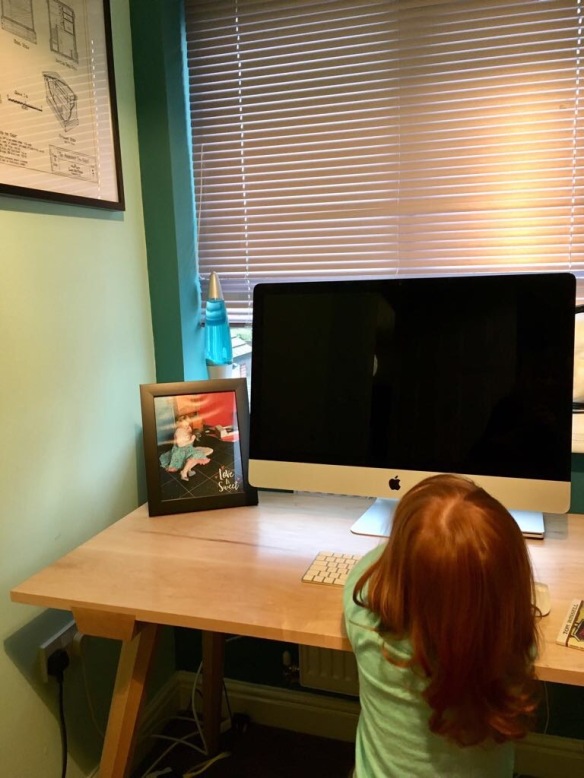
Quality inspection by the Apprentice

After leaving the desk for another 24 hours to get rid of the worst of the chemical aroma of Osmo, I moved the desk up to my study. This is the first piece of furniture I’ve built for our house, and the first time I’ve decorated a room with a specific furniture project in mind. When I started to decorate the study I wasn’t sure what colour to paint the walls – it is a small room so I wanted something that made it feel light and vibrant. Dr Moss suggested that I look to my favourite vintage guitars for inspiration, and so the walls were painted sea foam green and teal (my two favourite vintage Fender colours) with the knowledge that the Anarchist’s Office Suite of desk, chair, and bookcase, would all be maple. Moving the desk in was the first opportunity to see whether this combination had the desired effect. I’m pleased to say that seeing the desk against the painted walls really does evoke a mid-1950’s Fender Stratocaster, so the concept worked!

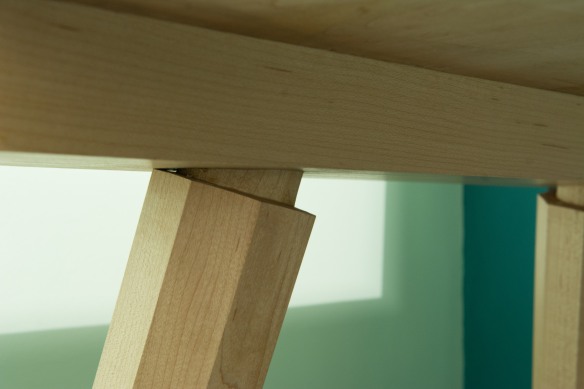
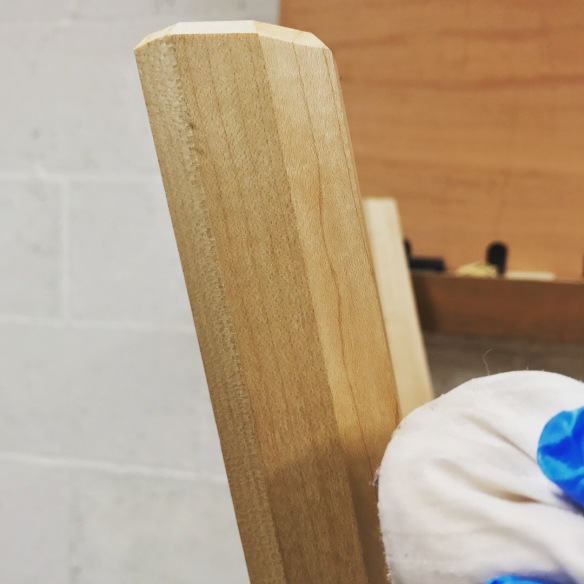
But more than that, the desk is sturdy, comfortable, and provides a very generous working area. It is also a very tactile piece – the smooth top contracts wonderfully with the roughly scalloped underside, and it is wonderful to run your fingers over the facets of the legs.

IMG_8646

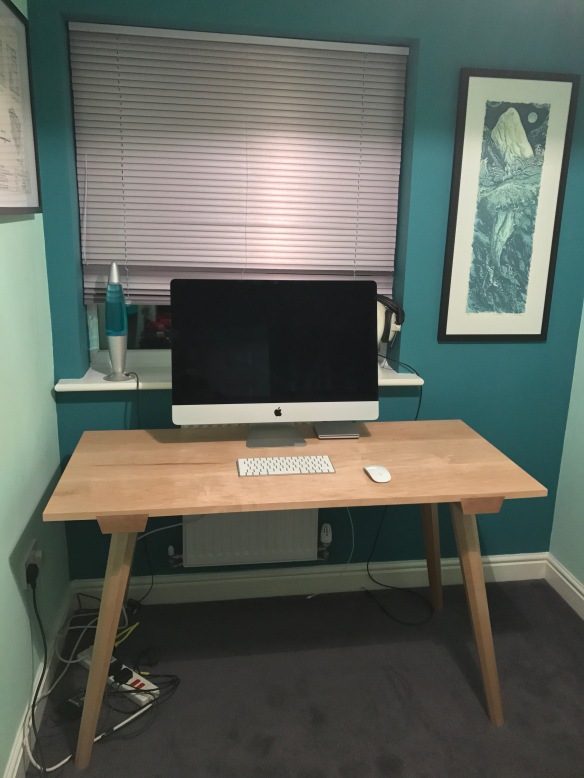
Loaded up with my iMac and ready for work.

And so, I’m sitting in my study, typing the first of many blog posts which will be written at the new desk (not to mention magazine articles, and the small matter of the John Brown book). The study will continue to be a work in progress until I’ve finished the staked chair and bookcase to match the desk, but already it feels good to have a dedicated and comfortable place to work. I’ll be covering the progress of the rest of my Anarchist’s Office Suite over the coming months.

Level Up

IMG_8519

A sharp No.3 smoothing plane and raking light. One of the greatest pleasures imagineable.

After several months of working on the individual components of the staked work table, it was time to assemble the whole piece. Well, almost. The final task before I warmed up the hide glue was to finish surfacing the top – this is a task more easily accomplished while the top was on the workbench instead of on its own legs.

IMG_8526

This goose neck lamp from IKEA is perfect for adding raking ligght exactly where I need it.

Flourescent lights flatten details and make it hard to spot surface imperfections. So when it comes to surfacing I kill my overhead lights and rely on raking light – either from the up-and-over door at the end of my workshop (if it is a sunny day), or an IKEA goose-neck LED lamp which handily has a clamp at the end. Clamping the light to some stout scrap in my vise provides all of the raking light I need, meaning that I can easily zero in on tool marks or the last remnants of tearout. With the smoothing plane freshly sharpened and set to a fine cut, I cleaned up the table top, finishing with a cabinet scraper to remove any stubborn spots or stray plane marks.

IMG_8576

The desk assembled and clamped while the glue cures

And then, it really was game time. I drove both leg assemblies into their sockets with a lump hammer, and then treated the front inch of each socket with a coat of warm hide glue before driving the battens into their final position. This will hold the battens in place, but still allow for any wood movement (which gluing the full length of the batten would prevent). A pair of clamps on the front edge of the table top held the battens in position for good measure, although the tight fit of the battens meant that these were probably overkill. Jim suggested to me that glue-ups were a bit like a first date, which had me wondering if folk date differently in North Carolina. Most glue ups definitely get the heart racing, and language can get a bit salty, so I dig Jim’s analogy. But this was one of the most straight forward glue-ups I can remember, probably helped but having only two components to glue and easy clean-up. So I’ve definitely had worse first dates (not that those are stories I’ll ever tell on this blog).

IMG_8589

Marking off the foot height. Wedges and a knife taped to a 1/2″ block make this an easy task.

One of my favourite stages of working on legged pieces is levelling the feet. Once the glue had cured on the desk I moved it inside for this stage of the build – my workshop floor has a pronounced slope and getting anything level in there can be a  real bind, so I decided to level the desk in the dining room, which has a much more level floor and plenty of room to work in. I used a series of fine oak wedges to get the desk level front to back and side to side. Three of the legs were in very good order, and the fourth leg was just short enough to encourage a bit of a rock. With everything wedged up and stable I measured the table height on all four sides which showed that I only had to remove 1/2″ from the legs to get the 30″ final height I was shooting for. Digging in my scrap bin revealed some 1/2″ thick southern yellow pine, to which I taped a Hock Tools marking knife. These knives are sold without handles, with the intention that the user fits their own handle. I have deliberately left mine without a handle, specifically for table and chair leg levelling. Thick blade is good and rigid, and it takes a very keen edge. As a result the knife is perfect for making off legs as all I have to do is tape it to a block of the appropriate height.

IMG_8592

Marking off the dimensions of the chamfer

With the final height of the feet marked, the desk went back into the workshop. I really enjoy cutting the feet – at first the compound angles all look a bit screwy, but there is a real pleasure in letting go of the fact that you’re not cutting at 90 degrees, and just following the layout lines. With careful body positioning you can sight down 3 of the 8 facets on a leg, which gives plenty of visual guidance when making the cut. I use my Bad Axe 12″ carcase saw for these cuts – this a very precise saw which leaves a fine finish behind and is easily handled at unusual angles (unlike a larger tenon saw). Having trimmed the feet I righted the table and was pleased (relieved?) to find that it was rock solid with no hint of rocking.

IMG_8611

Chamfering

The final foot detail was to add a chamfer to stop the corners chipping out when the desk is moved. Maple takes details like this really nicely, and some time with an Auriou 9 grain cabinet maker’s rasp left crisp chamfers on each facet of the legs. The chamfers are parallel to the floor, and thanks to the splay of the legst the chamfer becomes progressively wider for each facet towards the back of the leg. It’s just a small detail, and one which probably no one will ever notice, but it pleases me.

IMG_8610

Facets on facets.

This build is drawing to a close, and all that is left to do is final making pretty and applying the finish. More of which next week.


Get wedged, or die trying

IMG_8504

Kerfing the leg tenons ready to be back wedged

With the leg mortises drilled, the next milestone on the staked desk build was to glue the two leg assemblies. The tenons are back wedged to ensure a strong mechanical joint, and so glue-up involved a couple of simple stages, the first of which was to prepare the wedges. Previously I’ve sawn wedges out of scrap, but this time round I decided to follow the example of chair makers I know, and rive the wedges. The advantage of riving stock for wedges is that splitting out the wedge blank severs the blank along the grain, and ensures that the wedge will be strong with grain flowing from tip to blunt end. I had plenty of maple scrap left over from the table top, so using a 2″ chisel and mallet I split off four sections, each 2″ wide and 1/4″ thick. Then using the same chisel I pared the wedge down from each side until it was at a 4 degree included angle. Working the wedge on a bench hook, paring into the hook, provides a safe way to remove the waste while keeping your fingers behind the business end of the chisel. Once I had pared the wedge to the desired angle, it was then a case of continuing to pare from each side until the wedge had a sharp point and consistent taper.

IMG_8496

Paring a wedge using a 2″ chisel and bench hook

The wedge needs something to drive into, and the next step was to kerf the tenons for the full depth of the mortise. For the staked saw benches I used my dovetail saw, but as these tenons are much larger (2″ thick compared to 5/8″), and the wedges much larger, I reached for the Roubo Beast Master saw instead. This established a precise kerf for the wedges to expand the tenons against the mortise walls. After deciding which leg would go in each mortise, and which facets I wanted facing forwards, I painted the tenons with hide glue and fitted them to the mortises. The wedges were then driven in with a 1lb lump hammer, and the assemblies left to cure.

IMG_8500

The wedge is at the right angle, and just needs to be pared down to a sharp point

Once the glue had cured, the tenons and wedges needed to be trimmed flush to the top of the batten. Again, the Roubo Beast Master was my saw of choice for this operation – although it is a rip saw and this was a cross-cut task, the deep saw plate and hang of the tote meant that I was able to cut the tenons flush without fouling on the side of the battens. A few swipes with a block plane cleaned up the surface of the tenon.

IMG_8492

One leg assembly glued up and wedged

The final task before the leg assemblies were ready to be fitted to the table top was to sign one of them with my maker’s mark stamp. This project offers plenty of end grain suitable to be marked with my OtW stamp, and I decided that the front end of one of the battens would be the perfect location. Several gentle taps on the stamp with my trusty lump hammer and the batten was signed and ready to be fitted.

IMG_8515

Trimming the excess tenon and wedge

Some projects barely change from the first cut of a rough board to the final application of finish, while I find that some evolve as I work on them. As the end of this project comes into view, I’ve decided not to install the drawer that Chris included in the original design, at least not initially. While the drawer looks attractive, I want to live with the desk for a while before I start screwing drawer runners to the underside of the table top. Also, I have in mind that rather than a single drawer, I might build a small freestanding chest of drawers to sit on the floor under the table top, which would offer more storage space and possibly give somewhere to sit a scanner/ printer on top of. The stock I cut for the drawer and runners will not be wasted, as these can be used for the drawer unit when I come to build that. This, I think, goes to the real versatility of the designs in the Anarchist’s Design Book – they provide a set of building blocks and solid techniques which can then be easily adapted to suit a particular user’s needs.


Drilling down – mortising the staked work table

Although my workshop is very much hand work focused, there are a couple of machines I use, and enjoy using. The drill press is one of them. I started out, nearly a decade ago, with a bench top drill press that was fine for grunt work but exhibited too much run-out for precision drilling. So towards the tail end of last year I finally upgraded to a new Jet floor standing model, which has sufficient capacity and accuracy to last me decades. The impetus for making the upgrade was the need to drill 2″ mortises through the battens of the staked work table to accept the leg tenons.

IMG_8376

The banjo jig is my platonic ideal of a workshop appliance – dirt simple and effective

Because the mortises are drilled at an angle simply securing the battens to the drill press table will not work. And so I built the “banjo” jig Chris writes about in the Anarchist’s Design Book. Nothing fancy – just two large squares of 3/4″ ply with a pair of cheap hinges at one end to provide a pivot point. But simple is how I like my jigs, and “banjo” will provide solid service for many tables, chairs and angled holes for years to come.

IMG_8479

Cutting guide wedges with the Bad Axe Bayonet

To establish the correct angle for the jig, and to ensure repeatability of setting, I cut two 16 degree wedges out of some scrap pine. In doing so, I was reminded just how blindingly accurate the Bad Axe Bayonet saw is – both wedges were bang on on the right angle straight off the saw, no fettling needed. I’ve said it before, but there is some serious alchemy in this saw. Inserting the wedges between the leaves of the jig held the top leaf at exactly the right angle for the leg mortise. If I come to drill mortises using different resultant angles, then it will be easy enough to cut wedges to match.

IMG_8391

The wedges help to set the correct angle for the banjo jig

To locate the batten on the jig, I chucked a fine brad point drill in the drill, and positioned the batten by eye so that the sight line lined up with the centre of the drill press. After loosely clamping the batten in place, I then tested the location by lowering the drill bit to the work piece. What I wanted to see was the tip of the drill bit following the sight line until it hit the centre point of the mortise. Gently tapping the batten with a mallet made very controlled adjustments until everything was lined up.

IMG_8482

Game time!

With the wedges cut, the jig clamped to the drill press table, and the batten clamped to the jig, it was game time. Drilling the mortises is straight forward, providing you take care to get the batten in exactly the right position, and are sensible about how fast you try to drill out the 2″ mortises. My own observations are as follows:

  • 3/4″ plywood loves to vibrate. Bracing the workpiece with a suitable piece of scrap between the leaves of the jig and directly under where the mortise will be drilled, is essential. This will increase the stability of the jig and stop the top leaf from wobbling about when the drill bit engages. The wedges set the angle, a larger brace keeps things stable.
  • Go slow. Even with a powerful drill press, drilling a 2″ mortise in hard maple is a tough job. Set the drill speed to as slow as you can, and take very small nibbles with the bit, backing off regularly.
  • Clamp everything. If the batten, or the jig slips, you’re going to have a lot of clean up work to the batten, and centring the batten in exactly the right position may not be that easy
  • Keep your quill and chuck spotlessly clean. Because the mortise is drilled at an angle to the work piece, for the first part of the chuck’s travel the bit will only be engaging on ine sid. Drilling a large (2″) angled mortise with a forstner bit if there is even the tiniest spot of dirt or grease on the quill will result in the chuck, and bit, wobbling when you start to make the cut, and taking to the air shortly thereafter. Ask me how I know this. Cleaning the quill and interior of the chuck will keep everything working as it should, and avoid airborne machinery. In fairness, I had wiped down the quill and chuck when I first assembled the drill press, and it has worked flawlessly on other tasks. After quickly wiping down the quill and interior of the chuck, the drill press cut the mortises without any complaint. But a good lesson is always worth learning.

All of the preparation and fussing over the set up paid off, and drilling the mortises was very straight forward. My favourite method to bore holes is still with my 1923 North Bros. brace, but on a hole of this diameter the drill press jis definitely more practical. I still need to sharpen the 2″ t-augur that arrived in November, and once I have done to I will have some experiments to see how easy it is to drill the same mortise by hand.

With the mortises drilled, it was then a matter of gluing up the leg assemblies. But for that, you will have to wait for the next post.

IMG_8492

One leg assembly glued up and wedged

On monster dovetails, and embracing the fear

IMG_8438

Setting the depth of cut with blue tape and a small combination square

The staked work table build is pretty straight forward, and on the whole very enjoyable. I mean, if you can’t enjoy octagonalisation that means you’re already dead inside, right? But the one stage of the build which has given me the fear is cutting the sockets for the dovetailed battens. Although the task itself is not that complicated, it really is a one shot deal, with very little opportunity to remedy any errors. The sockets need to match the profile of the battens, and a tight fit is necessary to restrain any seasonal movement of the top. Because the sockets run the full width of the top, any gaps at the front of the table will be extremely noticeable. It is probably no surprise that the opportunity to ruin the top was something that loomed large in my mind when I stepped up to the bench to start cutting.

IMG_8429

My off-hand keeps the saw cutting against the side of the batten

When cutting the sockets you use the battens to guide the saw, and providing you make the cuts with care, this method should ensure that the socket matches the profile of the battens. I had originally made the battens over length by a couple of inches, and I decided to leave them at this length when cutting the first wall of each socket as this would provide a greater surface area for the saw to register against. As the front end of each batten was square, I was able to clamb the battens in place flush with the front edge of the table top, making sure that they were parallel to the ends of the top. I decided to cut the innermost edge of the sockets first, although there is no real difference in which side you cut first – the main thing is to be consistent as this helps to avoid mistakes.

IMG_8445

When the blue tape hits the surface of the table, stop cutting

As I’ve written about before, I have a (ahem) healthy nest of saws. I spent some time considering which saw would be most appropriate for these cuts, and decided to go with the Roubo Beast Master by Bad Axe Tool Works. Although my Beast Master is filled rip (and this is a crosscut operation), it had a number of significan attributes which I wanted for cutting the sockets (and not just because Mark promises it cures baldness). The robust saw plate meant that the saw would be able to withstand being pushed across 24″ of hard maple without suffering undue strain, and would hug the batten so as to cut the right slope angle. Finally, the 5″ depth of plate under the saw back means that the handle would not foul on the batten, as would happen with a shallower saw.

IMG_8490

The Beast Master leaves a crisp kerf


So, with my saw selected and the battens clamped in place, it was time to be brave and start slicing up the table top I’d spent previous weeks preparing. When making the cut, my off-hand pressed the saw plate into the batten just above the toothline, while I pushed the saw forward with the open palm of my on-hand in order to avoid tilting the saw or twisting it away from the batten, only wrapping my fingers around the handle to pull the saw back for the next stroke. Once the kerf was established, the saw cut down to depth smoothly and rapidly, and there was minimal chipping out on the exist side of the cut despite using a rip saw (all of the cuts were made from the front edge of the table towards the rear edge so that any chipping out would be on the back edge). I marked the depth of cut on the saw plate with blue painter’s tape, and once the tape hit the surface of the table I stopped cutting. The Beast Master left a crisp and clean kerf across the table.


IMG_8480

Trimming the battens to length

Because the battens are angled, determining the location of the second side of the socket takes a bit of lateral thinking, and Chris covers this very clearly in the book. I cut the battens to length using a 16″ hybrid filed Bad Axe tenon saw, and used the offcuts to mark off the second side of each socket, allowing for the set of the Beast Master. The process for the second cut was the very much the same as the first, following which I put the battens aside while I cleaned out the waste. I hogged out the majority of the waste with a 3/4″ chisel and mallet, working from both ends into the middle of the table to avoid spelching. Once I was close to the bottom of the saw kerfs, I switched to a large router plane to clean up the bottom of the socket.

IMG_8454

A chisel and mallet makes short work of cleasring out the socket

With the sockets cleaned up, it was time for the moment of truth, and I fitted the battens using a 1lb lump hammer to drive them in. The fit was good and tight without being too much of a squeeze, and with no real gaps at the front edges, which is exactly what I was looking for. As a final step, I took two fine shavings from the middle of each side of both battens, just to ease the fit a little bit (but without reducing the efficacy of the batten).

IMG_8475

Test fitting the batten.

This just tops it all… part 3

The top of the staked worktable is now flattened and down to final dimension. Which means that all I need to do now is give the underside a final dressing and then cut the joinery.

IMG_8329

Vesper square and Sterling rule teaming up for accuracy and extended reach

At the end of my last session of working on the top I felt like there was still a great deal of work to get the top flattened. So to make the task at hand feel achievable (and really, it was very achievable) when I went into the workshop yesterday morning I decided to dimension the top before I finished off the flattening. Bringing the top down to final width and length did not remove much excess material, but it certainly put the rest of the flattening into perspective. To start off, I jointed one edge with the No8, to establish a reference edge for the rest of the dimensioning. As the majority of the top was flat at this point I had enough of a reference face to ensure that the edge was square and true. Jointing this edge did not take very long, and I then used it to lay out the right hand end of the top.

IMG_8321

Shooting the ends square with the Lie-Nielsen No.51

Working on a top of this size requires a slightly different approach to some common workshop tasks. A Vesper 10″ square acts as a master square in my workshop, and while a 10″ length is as big as I need in day to day work, it did not extend far enough onto the table top. I didn’t want to sacrifice the accuracy of the Vesper, so instead I ganged it with a 24″ rule by Sterling Tool Works. The Vesper gave me a near absolute square layout line (deviation of no more than +/-0.058mm over 150mm!) which the Sterling rule then followed to extend my layout line along the full width of the table top. Striking the layout line with a sharp marking knife left a crisp, square, end to hit.

IMG_8327

Two clamps secured to the back edge of the bench stopped the table top slipping from between the bench dogs

My go-to combination for shooting boards square is the Lie-Nielsen No.51 on an Evenfall Studio wide shooting board, but even the wide shooting board did not have capacity for the 24″ wide table top as currently set up. I quickly removed the fence and the chute sides from the shooting board, allowing the table top end to be placed on it while allowing sufficient support for the plane. I lined up the knife line of the end with the side of the chute, and then planed the end deadnuts square. With one end square I was able to measure off the length of the table top and strike a layout line for the opposite end, using the same technique. There was more waste than I really wanted to plane off, so I quickly cross-cut the excess off with my Skelton cross-cut saw before sneaking up on the line with the No.51.

IMG_8325

The Clifton No.5 made short work of flattening the rest of the table top

With both ends and one edge finalised, the top was looking manageable even though not much material had been removed (the wonders of psychology!), and setting the freshly sharpened jack plane to a rank cut, the final flattening did not take much time at all. After flattening the top with traversing cuts, I moved to a diagonal cut with the No.8, until the top was close to flat, before finishing up by working along the grain with the No.8. After the frustrations of taking a heavy traversing cut last weekend, I moved the bench away from the wall and filled the gap with several large storage boxes in which I keep my grandfather’s old tools. This improved matters significantly, although the bench dogs I was using to secure the top in place did not have enough holding power (I don’t like to overtighten them as it causes the workpiece to bend), and the top occasionally slid out of their grip. Two clamps fixed to the back edge of the bench stopped any lateral movement, and planing the top progressed noticeably quicker than my previous session. I am definitely working at the limits of the Sjoberg bench, and following my frustrations over the past 12 months, as well as Ethan’s welcome encouragement, the Roubo build has moved substantially up my project list. I spoke to a sawyer this week who assures me he can obtain a 5″x24″x96″ oak slab for the bench top (dimensions which most timber yards struggle to supply). I’m waiting for a price, following which, Roubo will well and truly be coming. With the Sjoberg fighting me every step of the way when flattening the table top, I can definitely see the attraction of a toothed planing stop and doe’s foot for hand work.

IMG_8328

Maple on maple. The Hamilton Woodworks panel gauge works smoothly even at full extension.

Dressing the table top revealed some unexpected curl on two of the boards, which will be very attractive once I’ve applied a gentle finish. There are a couple of isolated spots of tearout, but I am inclined to leave cleaning those up until the table is assembled, as these can be removed with either a smoothing plane or a cabinet scraper along with any other surface wear that can accumulate during assembly. The overall thickness has come out at 13/16″ (22mm) which given the strength of maple, should be plenty thick enough for normal use. Finally, I marked off the final width of the top with a panel gauge, and jointed that edge with the No.8 plane.

IMG_8326

Lovely figure, and tight joints, on the table top

This just tops it all… part 2

Everything you make is practice for the next thing you make. And every time you practice a technique, or carry out an operation on a project, is practice for the next time you use that particular technique. I was reminded this as I started to flatten the top of the staked desk yesterday. Although the top is the largest piece I’ve flattened by hand, the techniques are exactly the same as I practiced on the Joiner & Cabinet Maker projects last summer, and the Policeman’s Boot Bench earlier this year. All that is different is the amount of time, and the patience, required when flattening a 52″ x 24″ top rather than a 15″ x 9″ panel for a School Box (or a 40′ x 13″ shelf for the Boot Bench). Ultimately it just boils down to traversing cuts, then a 45 degree skew across the piece, and finishing by working along the grain. Just those simple three steps, repeated on a larger scale.The important thing is to remember the core techniques, and not to get overawed by the scale of the piece.

IMG_8267

Cleaning up the top shows good tight joints

When I started work on the desk the thought of flattening such a large piece as the top didn’t bother me at all – I’ve flattened enough timber by hand over the past couple of years to make this second nature. What I did feel a little nervous about was jointing up the top – at 54″ long in the rough, these were the longest edge joints I’ve planed. As it turns out, the joints weren’t as difficult as I had anticipated, and cleaning up the show face of the desk top revealed two tight and gap-free joints, a success I attribute to all of the long edges I planed up for the Policeman’s Boot Bench (there were a lot of long panels that needed square and true edges on that build).

IMG_8260

The underside before flattening. This is a big old surface to work, but the techniques are essentially the same.

Checking the desk top with a straight edge revealed that while most of the top wouldn’t need much cleaning up, the board at the back of the top had cupped after glue up, resulting in the show face falling off by over 2mm (0.7874″ – don’t ask me what this is as a fraction). My first reaction was to rip that board off the top, re-flatten, and then joint back on. This would avoid removing too much material from the top overall, but would stall progress on the desk for a while. After considering my options, and checking the thickness of the top in multiple areas, I decided that I would be able to flatten the top without needing to rip the problem board off – I left the boards at just under an inch thick, so even taking into account the fall-off at the back edge, I still have enough material to make a viable desk top. The top is also currently overwidth, so if I remove the excess entirely from the cupped board that will remove the lowest edge and mitigate the worst of the cupping. Traversing the boards with a jack plane flattened most of the top quickly, and I then marked where the low area started with a pencil and straight edge. Cross hatching the low areas gives a quick visual indication of my progress.

IMG_8271

The familiar feathery texture of traversing shavings

Once the majority of the top was flat, with only a couple of inches of width in the low spot remaining on the back edge, I flipped the top over to flatten the underside. The jack plane made short work of flattening this face, and I’m going to leave the traversing marks on that surface – there’s no need to smooth the underside and the scalloped texture will remind me of the handwork that went into this desk when I am writing at it in years to come. I then moved back to the top surface, planing at a 45 degree angle to the grain with the jointer. This approach removes material easily but reduces the risk of tearout compared to traversing at 90 degrees to the grain, which means less clean up once the top is flattened.

IMG_8263

Flattening the underside with the No.5 jack plane


All of this is pretty straight forward, and in fact the hardest thing was my bench fought me most of the way. While the Sjoberg bench was a very good initial bench when I bought it, and perfectly fine for lutherie work, it is simply too lightweight for processing stock by hand. I moved it against a wall in January of this year in an attempt to stop it skittering  around the ‘shop, which has worked to some extent. But for this operation I had to move it back from the wall so that I could traverse the 24″ wide top (which is the same width as the workbench). To hold the bench in place,  I ended hooking my left foot over the lower rail in order to pull the bench towards me as I plane forwards. These workshop aerobics have me dreaming once again of a stout and stable Roubo bench, so now might be the time to call a couple of sawyers and see if anyone can cut me a 24″ wide, 5″ thick oak slab. Roubo is coming.

IMG_8265

The jointer plane keeps everything flat and coplanar. The crpsshatching identifies the low spots.

I didn’t quite have the time to finish flattening the top this weekend (with all the snow I had to assist the Apprentice with snowman building) but that break has given me the opportunity to take stock of progress and decide the best next steps. So, next up I will bring the top to final width and length, including squaring up the ends, all of which will help to reduce the amount of flattening necessary.