Roubo Is Coming… Part 1

_dpp7496

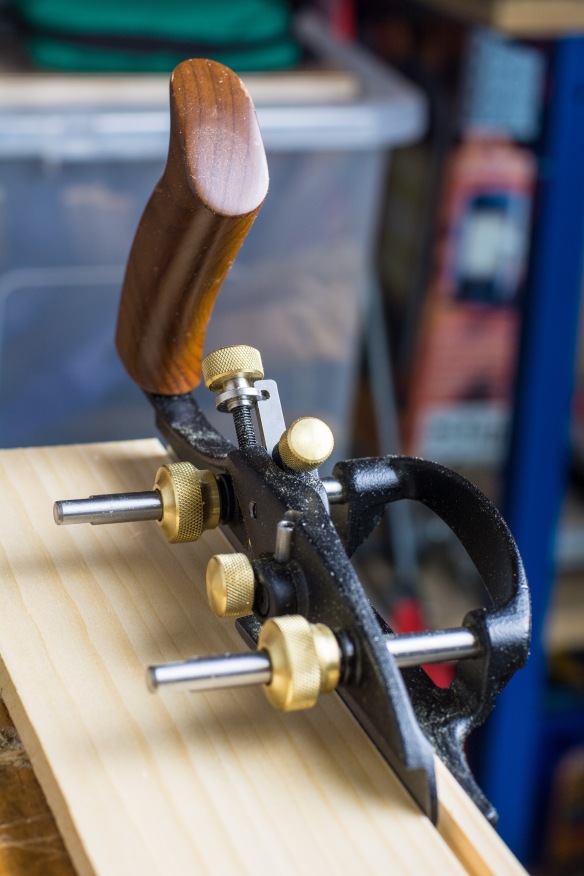
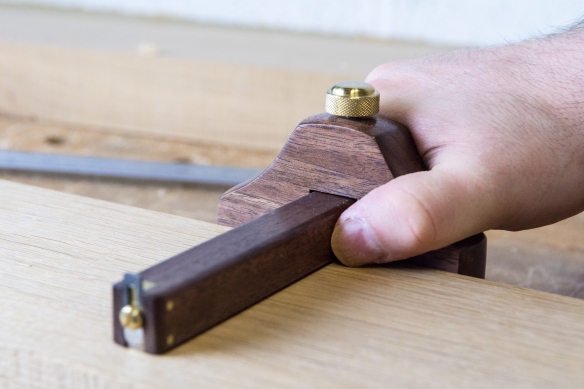
My new Hamilton Woodworks traditional marking gauge in use

It is hard to believe, but I first started thinking about a Roubo bench build four years ago. And finally, I have started the build in earnest. This promises to be a fascinating project with plenty of learning opportunities, both in terms of building the bench and then using it. The scale of the work involved is quite different to anything I’ve done before – in many ways it feels more akin to timber framing than to furniture making. And that is one of the two reasons why I decided to start by making the under carriage, rather than tackling the (frankly monolithic) slap top – working my way up from smallest component to largest means that I will have my process figured out, and adjusted to the scale of work, by the time I address that imposing slab of oak. The other reason is that while the top continues to acclimate to the workshop (a process that could take some time) it is liable to move, which means that starting with the top would result in several flattening sessions being needed by the time I assemble the bench. In contrast, the components for the undercarriage have all acclimatised, which means that they will be much more dimensionally stable.

_dpp7501

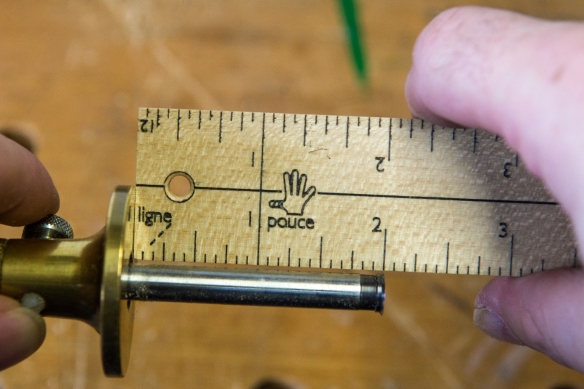
All measurements for this build will be taken from the Pied du Roi ruler made by Brendan Gaffney

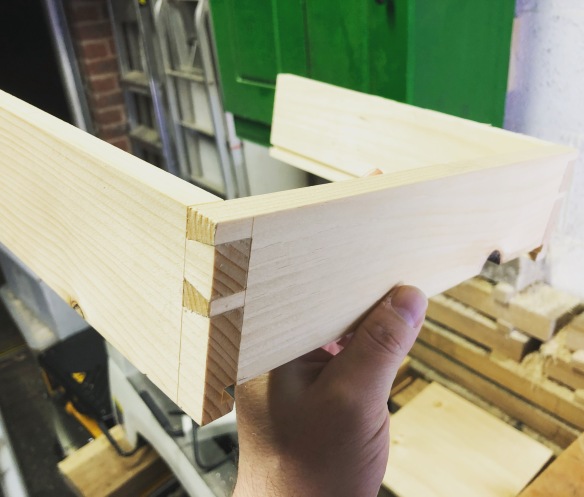
Following the principle of working smallest to largest component, I started by processing material for the four stretchers. These are 4″ wide, 2″ thick, and will have 3″ barefaced tenons on each end. Regular readers may remember that my brief for this project was working from the description in With All the Precision Possible, and using the 18th century French Pouce as my base unit of measurement. All measurements I use on the blog for this project will, unless otherwise stated, refer to the Pouce rather than a modern inch (to be honest this is as much for my benefit as anyone else – if I have to swap between two different measurement systems I’m going to get very confused).

img_1634

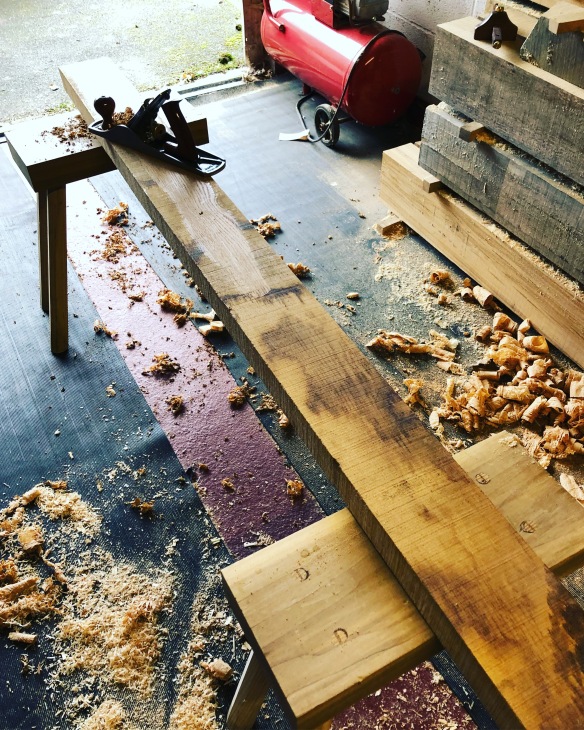
Processing the long stretchers on the staked saw benches

Processing the stretchers was the same process as for any other furniture project, with a few significant exceptions.The first was that the long stretchers were quite a bit longer than my Sjoberg benchtop, and too wide to fit in the face vise. To plane the wide sides I would be unable to work at the bench, unless I was prepared to clamp the stretcher to the benchtop and work it in sections. That sounded like a slow way to work, so instead I took the opportunity to try some of the techniques explained in Ingenious Mechanicks. I don’t have a low workbench (yet) but I figured my saw benches would work at a pinch. Setting up the long stretchers on the saw benches, I was able to sit on the workpiece to keep it in place, and plane the section in front of me, before shuffling back a few feet and working the next section. Not having to adjust any clamps made this a very quick and efficient way to work, and I was surprised at just how comfortable working while sitting down was. The saw benches are incredibly versatile, and have really earned their keep since I built them in 2016.

_dpp7562

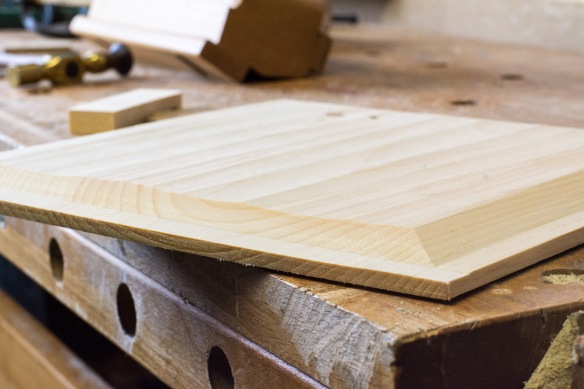
Sitting down on the job (literally) is a comfortable and efficient way of processing stock

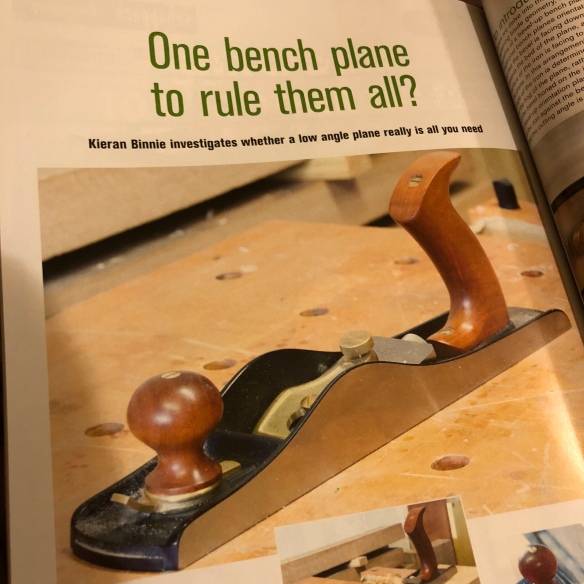
If I were working this way regularly I think a set of wooden bench planes would be beneficial, including a shorter jointer plane (the No8 is quite a weight, and length, to be extending out in front of you from a sitting position), but on the whole this was an enjoyable and efficient way to work. The one area where the saw benches did not work quite as well as a dedicated low bench was the last section of the stretcher, which you can’t sit on as you work it – a low bench would have a planing stop or series of pegs to secure the workpiece while working at the far end. At this point I did reach for a couple of clamps, but as that was the final short section it did not slow me down too much.

_dpp7559

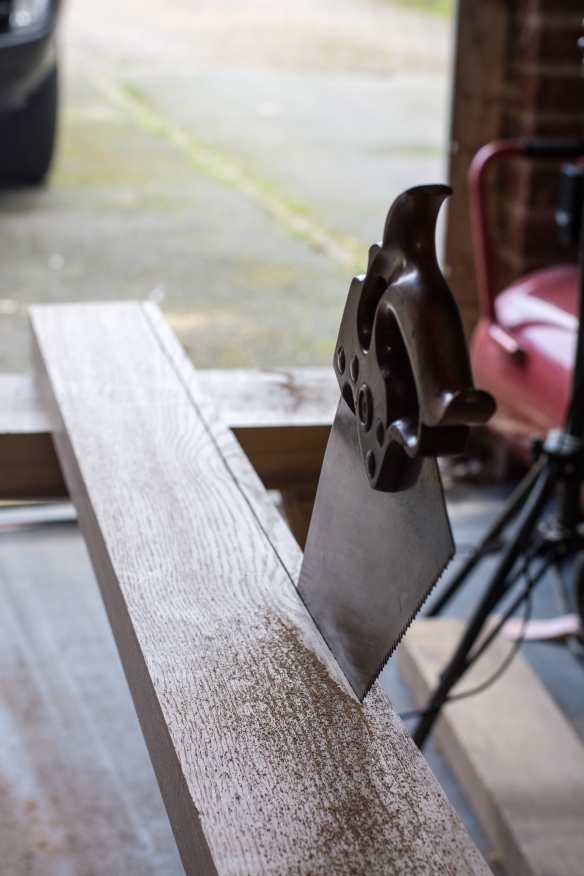
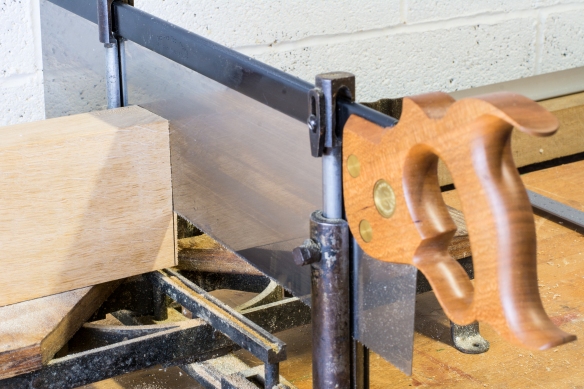
Ripping the stretchers to width with my trusty 1900 era Disston D8

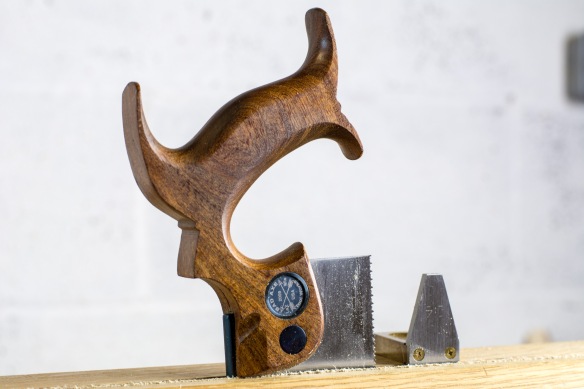
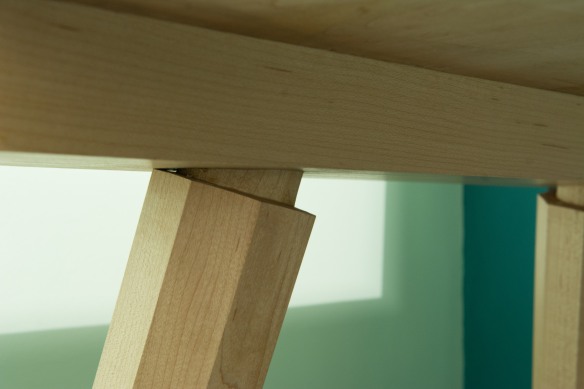
The second difference to processing furniture sized stock was that the thickness of the stretchers exceeded what my shooting board plane could comfortably handle. I want all of the stock for this project to be as accurately processed as possible, so as to avoid any unpleasant surprises come glue-up, and that includes accurately squared-off ends. With my shooting board out of the question, I turned to my mitre box and Bad Axe mitre saw. Having knifed in clear layout lines on all four sides of the stretcher ends, I cut a deep kerf along each knife line using the mitre box. The four kerfs then guided the saw to leave a clean and square end from which I can layout the tenons.

_dpp7544

Squaring off the stretchers with a mitre box. Kerfing in the layout line on all four sides offers a “path of least resistance” which guides the saw

With the stretchers processed and ready for tenoning, the next task will be to process the legs. These are 6″ wide and 4″ thick, so will represent a step-up in dimensions and scale of work. It will be interesting seeing what lateral thinking they require.

Come and build things with me!

img_4527

The Packing Box…

This September I will be teaching a 5 day class at the Lost Art Press store front in Covington, Kentucky. The class will look at two of the projects from The Joiner & Cabinet Maker – the Packing Box and the School Box, as an introduction to handtool work including layout, nail clenching, dovetailing, preparing short runs of moulding, and fitting hardware (locks and hinges). While these projects are very accessible, they offer a lot of learning opportunities, which should make for a really enjoyable and stimulating class!

Registration opens at 10am (Eastern time) on 21 January through this link, and is limited to six students. I look forward to seeing some of you there!

img_3524

…and the School Box

First article of 2019

img_1571

Over the autumn I put my regular bench planes away, and put a Lie-Nielsen No.62 through its paces to test whether a low angle jack really is the only plane you need. Issue 280 of Furniture & Cabinetmaking is now in print, and contains a four page article about that test, and my conclusions. So if you were wondering about the utility of low angle planes, it might just be worth a read.

Back to the Boot Bench… Part 7

_dpp7234

Doc Holliday 10″ dovetail saw and Sterling Toolworks 1:4 Saddle Square

The final stage of the Boot Bench was to make the drawer which fits in the compartment at the top right of the case. The drawer is of quite ordinary construction – 1/2” stock dovetailed at the corners, with a 1/4 x 1/4” groove in the sides and front to capture the bottom. The bottom is 1/2” thick, tapering to 1/4” at the edges to fit into the groove, and is orientated with the grain running across the drawer so that any seasonal movement is pushed to the rear edge of the bottom.

_dpp7228

Ploughing grooves for the bottom

As the front of the drawer will be painted to match the rest of the casework, I decided to use through-dovetails rather than half blind, as the end grain of the drawer sides won’t be that noticeable, and a simple square plug will fill the groove ends in the tails. Before dovetailing, I ploughed the groove in the sides and front using a Veritas small plough which I leave permanently set up for this operation.

img_1517

The rear corners, showing how the bottom slides in from the back of the drawer

Although dovetailing is the same operation regardless of stock thickness, I definitely find that dovetailing 1/2” stock requires a lighter touch than the 3/4” to 1” range that represents the majority of my work. That lightness of touch involves both a slight change to the tools I reach for, and the way I use them. For the past two years my go-to dovetail saw has been the 14” Bayonet by Bad Axe, but while that is an excellent saw for my usual stock thicknesses, for 1/2” it is a mite too aggressive, so I prefer my 10” Doc Holliday saw (also by Bad Axe), which has a touch more control for thinner stock. I also swap out my usual 8” coping saw for a smaller piercing saw for hogging out the waste, as the finer blades allow me to creep right down to the baseline without fear of any blowout. I find that I also use lighter mallet blows when chiselling.

_dpp7468

Sure, you could taper the edges with a jack plane, but when the panel raiser is this much fun, why would you?

The dovetails are orientated with the tails on the drawer sides and the pins on front and back, which minimises wracking when sliding the drawer in and out. The front had two tails, laid out so that the grooves land well within the tails. The back of the drawer is not as wide as the other components, as it terminates immediately above the groove, with two unequally sized tails capturing the back.

_dpp7471

Raised panel and scalloped surface – a lovely contrast

Once the dovetails were glued up I sized the bottom so that it fit the available space. The interior surface of the bottom was planed smooth, but I left the scalloped texture from the scrub on the underside. The taper to fit the grooves was then cut with the Philly Planes panel raiser. A rough taper could be achieved with a jack plane, but the contrast of a sharp raised panel and scalloped surface was something I wanted to achieve, as a visual (and textural) treat for anyone who takes the drawer out in years to come. I used some hope made soft wax on the edges of the bottom to help ease them into the grooves, and then smoothed the exterior of the drawer with my No3. I also drove a short Roman Nail through small notch at the rear edge of the bottom into the back. The notch allows for seasonal movement in the bottom, while also holding it in place.

_dpp7473

Drilling the mounting hole for the drawer pull – sacrifical stock prevents blowing out the interior of the drawer front

After testing the fit of the drawer in the compartment (relief, it had a snug fit and moved smoothly!) I drilled the mounting hole for the drawer pull. Clamping some sacrificial pine to the inside of the drawer from prevented the drill bit from blowing out the internal surface of the drawer front. I then pared two small plugs to fit the groove ends on the front, and glued them in place. Once the glue has cured I will flush them up and then paint the drawer front. After which, this project will well and truly be completed.

_dpp7476

The completed drawer (upside down to show off that lovely texture). You can see the Roman Nail at the rear of the drawer bottom

Back to the Boot Bench… Part 6

Finishing the Boot Bench was a straight forward process which I was able to attend to between festivities over the Christmas break.

img_1285

Sealing knots with shellac

Before applying any milk paint I sealed two knots (one on the top, and one on the right hand side) with a thin coat of shellac. That was followed by five thin coats of Bayberry Green milk paint by Old Fashioned Milk Paint, applied with a foam brush. I tend to mix milk paint using a 2:1 ratio of warm water to powder. This creates a much thinner mixture than the manufacturer’s instructions, which call for a 1:1 ratio. The result is a thin paint which requires more coats to get an even coverage, but which does not obscure the underlying detail or require as much work to remove the chalky texture. As you can see from the gallery below, the paint took a few coats to build up a nice density of colour. Once the fifth coat had dried I burnished all of the paint using a pad of brown paper – this smoothed out the texture and also eased the few remaining variations in colour.

I then removed all of the blue tape and was pleased to see that there had been very little colour bleed on the edges of the shelves. I gently chamfered the leading edge of each shelf with a spokeshave to protect the fragile corners from years of use, and this also removed what little colour bleed there was, resulting in a crisp paint line. At the same time, I flipped the case upside down (using a moving blanket to protect the finished surfaces) and chamfered the feet using a 9 grain Aurio rasp. The Apprentice helped me layout the chamfers with a pencil gauge, and also took some swipes with the rasp. She’s really enjoyed helping out on this project, and so some more father-daughter ‘shop time will hopefully be on the cards soon.

img_1427

The Apprentice helped me chamfer the feet

I then padded on two coats of Osmo Polyx to the interior and exterior of the Boot Bench. Osmo is a hardwearing and waterproof oil finish, which makes it perfect for this application. The oil gave a soft lustre to the milk painted surfaces, and deepened the colour a little. It also emphasised the underlying details, such as the end grain texture and lines of the dovetails, which is wonderful as I wanted to be able to see the joinery through the paint.

Once the Osmo had dried the finishing touches were to knock in the nails pinning the dados, and to apply my maker’s mark to the end grain on one of the tails. There really is nothing like introducing a 2lb lumb hammer to a project you’ve finished… And then, on New Year’s Day the Apprentice helped me load shoes onto the shelves. The Boot Bench has been in use for just shy of a week now, and has had a transformative effect on our hall – easily accomodating all of the shoes which used to spill out of the previous rack, and making the space much more welcoming. I need to finish making the drawer, and then this project will be done. More on the drawer next time.

img_1482

The year that was, and the year that will be

And with that, another year draws to a close. I remember in last year’s review that time was speeding up, and it feels like 2018 passed by in the blink of an eye.

IMG_1470

That “top 9” thing every one does on Instagram. Apparently you good folk like dovetails, staked furniture, and vintage Starrett layout tools.

What we leave behind

I don’t subscribe to the idea of “good” or “bad” years – 365 days is such a large expanse of time that all years encompass a range of events and emotions. 2018 was no exception, and it presented some of the biggest challenges I’ve faced to date, along with some genuinely incredible experiences. To read about the challenges you’ll have to wait for my memoires to be published, so let’s have a look at the highlights.

_DPP4179-2

This is my favourite detail – the leg tenon entering the batten. Just a little hint of the, compound angles, and lovely facets. I could look at this element of the desk all day.

2018 was the year I finally dipped my toe into chair making, and found it to be completely addictive – there is definitely going to be a lot more chairmaking in my future. I completed the staked worktable at which I am writing right now, my first campaign stool (a furniture form I’ve wanted to build for four years), and the saw cabinet. On the “almost completed” list goes the boot bench (which as of today is in use, and just needs the drawer before I can tick it off as done) and the Apprentice’s Stick Chair (which needs a new crest rail). I wrote my first collaborative article, with good friend Richard Wile, had a number of articles published in Furniture & Cabinetmaking, and two published in Popular Woodworking. I also wrapped up my research for the Life & Work of John Brown. On the skills front, I started to get to grips with the lathe, and also spent time working on my photography.

_DPP5015

I didn’t blog as much as I wanted to last year and for the first time in the five years of this blog I didn’t manage to keep up with my regular weekly schedule, mainly due to the rigours of daily life. Despite that, the blog readership stayed steady, and I’m determined to get back to weekly updates this year. Thank you to everyone who has stuck by the blog during the fallow patches.

Of course, no end of year review is complete without a top five albums list, so here is mine (in order):

  1. Years” – Sarah Shook & The Disarmers (who incidentally put on one of the best shows of my entire life, in November);
  2. Lush” – Snail Mail;
  3. What a Time to Be Alive” – Superchunk;
  4. How to Socialise & Make Friends” – Camp Cope; and
  5. Brass Against” – Brass Against.

What 2019 holds in store

The coming twelve months already offer much to look forward to. I’ve got a full slate of articles lined up, including a multi-part series for Funiture & Cabinetmaking, and a really interesting piece for Popular Woodworking. In the coming weeks I will be announcing my first class (a five day hand tool extravaganza involving two of my favourite projects), as well as a very exciting new project I’ll be working on with Chris Schwarz.

_DPP5759

Continuing my recent trend of only attending shows in odd-numbered years, in March I’ll be attending the East Midlands show in Newark (many thanks to Classic Hand Tools for inviting me down as part of their section), so if you plan on coming to that do swing by and say hello!

In terms of projects, the centre piece this year will be my Roubo bench build, and also building the boarded book case from the Anarchist’s Design Book for my study. I also need to build a steam box to finish off the Apprentice’s Stick Chair, and want to keep the chair building going alongside the other projects – I have a couple of Welsh Stick chairs rattling round my head that really need to be built.

_DPP7351

All that remains is to wish you all a very Happy New Year. Thank you for reading the blog over the past twelve months, it is incredibly humbling and heartwarming to know that folk are interested in what I post here.

IMG_1476

As of today the boot bench is loaded with shoes and in use. I just need to finish off the drawer before I can call it done.