Guest Post at the Daily Skep

DSC_0321

I’ve written previously about how The Daily Skep (written and curated by James McConnell) is one of my favourite woodwork blogs. Well earlier this year, James asked me if I would  be interested in writing a guest post for the Daily Skep on the subject of “perfection in hand work”, and naturally I said yes. What James didn’t tell me until just before I finished writing my piece, is that my post is the first in a series of 12 guest posts to be featured on the Daily Skep over the next 12 months, all concerned with the same subject. Knowing the identity of some of the other contributors, I can safely say that this promises to be a wonderful conversation with 12 very different takes on perfection.

It is a real honour and priviledge to appear on the Daily Skep, and you can read my opening salvo on the conversation about perfection here. James’ blog really is worth your time, so if you don’t already subscribe to it then now might be the perfect time to remedy that.

Dancing About Architecture… Part 1

The following is adapted from an article I published in issue 242 of Furniture & Cabinetmaking.

Writing about music is like dancing about architecture, or so said Frank Zappa. And if this is true for music, does it also stand for furniture? I think maybe so.

80341BookCabinet.

A folding campaign bookcase. How would you describe this piece?

A tale of two clients

I was reminded of Frank’s words of wisdom early last year, when I was discussing guitar commissions with two prospective clients. These clients were very different. The first (who I shall call Mr X) is a keen amateur player. I know Mr X quite well, we have a number of favourite albums in common, and share a similar musical frame of reference. The other prospect (who from here on in shall be Mrs Y) is a professional musician and wrote one of my favourite albums of the past few years. I don’t know Mrs Y at all, and beyond her albums we don’t share any reference points. Unsurprisingly, agreeing a specification with Mr X did not take much time at all, because we were able to draw upon that shared frame of reference. In comparison, understanding what Mrs Y was looking for took a great deal more work.

IMG_2094

Esmerelda has a “bright” and “jangly” tone, with plenty of volume. But how would other people describe the same sound?

This experience got me thinking about the different approaches and vocabulary that we as craftspeople use when we describe our work to clients, spouses, other makers, or interested laypeople. Because if the other side of the conversation does not share the technical vocabulary, or reference points, then it can all get a bit confusing. On the other hand, the right vocabulary and shared frame of reference can act as a short hand of sorts. Because if you both know what Greene and Greene style furniture is, or think that a ’59 Blackguard Telecaster is one of the finest electric guitars ever made, then you don’t have to go through the process of describing and explaining.

Divided by a common tongue

Conversations about what we build are a sort of information funnel, even if this process is normally subconscious. So for furniture building, you would typically identify the style of a piece (Arts and Crafts? Shaker? Federal?), before funnelling a number of different options to arrive at a clear description of a piece, including construction techniques (dovetails? Mortise and tenon? Staked furniture?) timber selection, hardware, finishing options. And if the other party to the conversation is not familiar with the styles or construction techniques you have just referred to, you can hit an early impasse. As an example, one of my favourite furniture forms is campaign furniture. This highly functional style of furniture is characterised by fully blind dovetails, the use of hardwoods, and extensive use of brass hardware including recessed drawer pulls and corner reinforcement. The result is a clean and rugged appearance However, despite being eminently practical campaign furniture has largely escaped popular attention. This has started to change amongst woodwork circles thanks to the publication of Campaign Furniture (Lost Art Press, 2014) and the excellent exhibitions held by Christopher Clarke Antiques (www.campaignfurniture.co.uk), but this has yet to filter into popular consciousness. As a result, a spirited conversation about campaign furniture can lead to confusion and blank faces.

5bGilhamCoD

A disassembled campaign secretary ready for transporting

Of course, this is complicated because the vocabulary of furniture making, or lutherie, is not just concerned with technical terms regarding construction techniques or styles, but also a level of subjectivity regarding aesthetic, and in the case of musical instruments tonal, qualities, and this introduces a lot of variables into a conversation. So into the information funnel also go subjective descriptions – is it vernacular or high style furniture, will the piece look delicate or stout, elegant or bold?

17aSecChest

I think campaign furniture has a “clean” and “rugged” appearance, but do those descriptors match your impressions of this furniture style?

For lutherie, the question is one of interpreting the client’s (entirely subjective) descriptions of their ideal sound, and applying that to the mechanics of how the guitar itself operates. In particular, for acoustic guitars the layout of the soundboard braces, and the size of each of those braces, is fundamental to shaping the sound. So when I build acoustic guitars I spend a lot of time tuning the braces to achieve the right balance of resonance and structural integrity. But it is not enough to understand that lighter braces allow a soundboard to vibrate more, which in turn increases the bass elements of the tone, while heavier braces dampen the soundboard’s resonance and create a brighter sound with less sustain – I have to apply that to the subjective language used by the client.

DSC_0128

The soundboard bracing on this parlour guitar will in large part determine the sound of the guitar.

A new way of communicating?

The need to communicate clearly should not be seen as a burden, but rather an opportunity to really understand the requirements of the end user. The tangle of subjectivity and technical language I have described above begs the question of whether we need a new way of talking about our crafts, and describing our work? And if so, how do we go about that? Or is it enough that we continue to “dance about architecture”? Unfortunately I have no answers, only questions. But the next time you set about describing a project to a co-worker or spouse, or discuss a commission with a client, take a moment to think about how you (and they) are trying to communicate ideas.

DSC_0210

Mr X wanted the same specification as this Tele-type guitar I had previously built. I think the tone of this guitar is “twangy” and “bright” with some real “snarl” when turned up, but how would you interpret those descriptors?

For those who are wondering, Mr X ordered a ’59 Blackguard Telecaster type guitar with a swamp ash body, maple neck and fretboard, and classic butterscotch blonde finish. You can follow the build of Mr X’s guitar by clicking on the “mysterycaster” tag in the right hand panel of this blog.

Now, if you’ll excuse me I need to practice a mime routine describing my next furniture build.


More words in print

 
Issue 243 of Furniture & Cabinetmaking is now in print. Inside this issue you’ll find my four page article reviewing the Karl Holtey purfling cutter, and then showing how to use it in adding decoration to a Roubo bookstand. Also included is an excellent feature on Philly Planes, and an article by Jacqui and Shane Skelton on the technique of chequering. So plenty to sink your teeth into.

The Bad Axe Luthier’s Saw

  
About 18 months ago Mark Harrell (of Bad Axe Tool Works) and I started discussing the specification for a speciality lutherie saw for delicate cross cut work and fret slotting duties. My 12” Bad Axe carcase saw is already a firm favourite for furniture grade cross cuts and so the prospect of a thin plated 10” saw for some of the most critical cuts in guitar building, sprinkled with the Bad Axe fairy dust, was very exciting.

Last summer we welcomed good friend, fellow Anarchist’s Tool Chest survivor, and luthier, Susan Chillcott to the conversation, and the specification for the Bad Axe lutherie saw started to firm up. Mark has now published photos of the initial prototype, and I should be in receipt of the actual saw in the next couple of weeks. What will follow is rigorous testing and feedback before the specification is finalised, and I cannot wait to welcome the prototype to my workshop. Working on this saw has been a wonderful experience – Mark is truly a master of his craft and has been able to translate comments and ideas from Sue and myself into a working specification, guiding us past design rabbit holes and focusing with laser-like precision on what is really important.

I can honestly say working with Mark and Sue on this project has been a once in a lifetime experience, and the Bad Axe luthier’s saw promises to be the antidote to the cheap, disposable, fret slotting saws currently littering the market. Stay tuned for more!

Getting to Know… Brian Clites

In the “getting to know” hot seat this month is a maker thoroughly committed to resisting the “IKEA-ification” of household furniture. Brian Clites is a fellow Anarchist Tool Chest user, acadmic turned professional furniture maker, and as as you would expect, thoroughly interesting chap.

As always it’s an honour to feature other makers on the blog. So let’s get to know… Brian.

untitled shoot-

1. You successfully defended your PhD dissertation last year. What was your PhD on, and how did you make the decision to move from academia to a furniture building career?

My recent doctorate from Northwestern University is in American Religious History.  My dissertation, “Breaking the Silence: The Clergy Sexual Abuse Survivor Movement in Chicago, 1936 – 2011,” was an ethnographically-informed history of the way that this community has transformed their pain and suffering into an agenda of social and ecclesiological reforms. It was a very challenging topic to study for six years. 

My decision to transition into furniture design was a mixture of pragmatism, ideology, luck, and an insatiable drive to create.
To be frank, I believe that the university system in the United States is broken. It is not broken merely because of its labor system. (In spite of being paid less than $100 per student per semester, I have actually loved teaching in adjunct and visiting lecturer capacities over the past five  years.)  It is broken because of the disjunct between what is taught and what is valued in our society.  And because of academia’s  inability to engage meaningfully in the crises of our time.  In spite of its benevolent self-imagining, the American academy exacerbates more than ameliorates problems like inequality, bigotry,  imperialism, and neoliberalism. 
All of that being said, the same ideals that drove me to graduate school ten years ago have driven my transition from hobbyist to professional furniture building.  Namely: the search for authenticity, meaning, integrity, and an anti-corporate lifestyle; my love for natural simplicity; and my lifelong goal of challenging – both physically and philosophically – the bare threads that hold together this vapid tapestry we call modernity.
It may not be true that teachers teach because they cannot do. But I build furniture because I cannot otherwise seem to live out the values that animate every fiber of my body.
image3

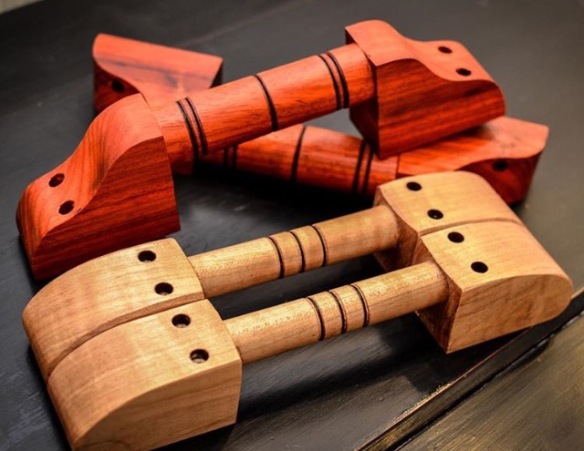
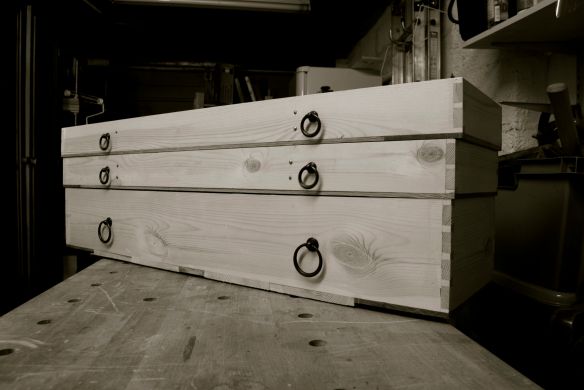
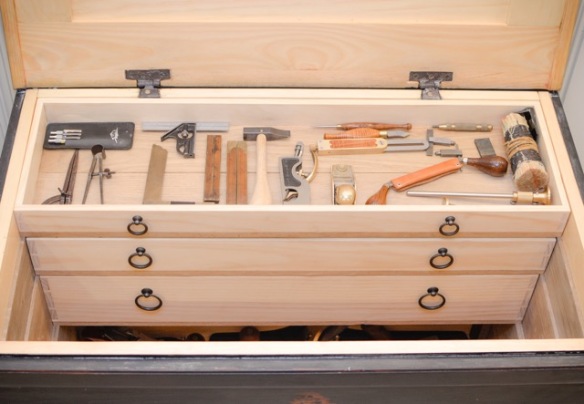
Tool Chest lifts by Brian

2. You’ve been building furniture professionally for just over 6 months now. How have you found those first 6 months?

As I was contemplating this life change last summer, I received a lot of helpful input from academics, friends, and family. However, the  best advice I received was from Christopher Schwarz. As I recall, Chris’s words were: “One business model is to make a career out of your passions. To do whatever it is that you cannot keep yourself from doing.  A ‘job’ that would make you happy whether or not someone pays you to do it. Find that path. And pour all of  yourself into it. In my experience, the income will follow.” 
On the ‘bad’ days – when I do not have any commission to speak of; when I’ve just ruined a drawer that I had already spent 14 hours on; or when my wife and I cannot pay the mortgage on time – on those days, Chris’s words ring particularly true. Because I am happier than I’ve ever been before, day in and day out, working with my hands.
image1

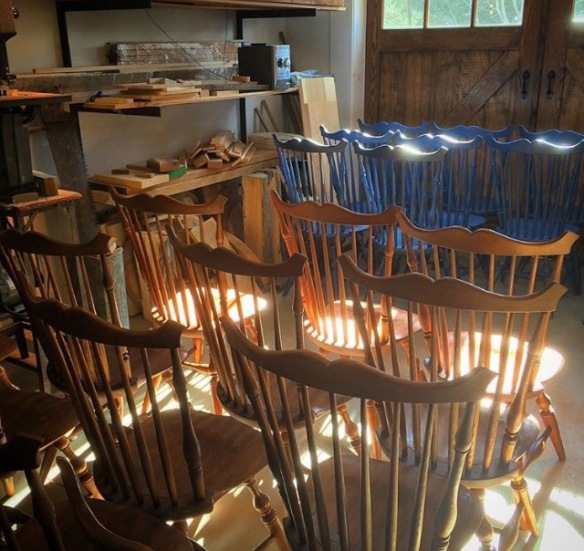
A run of Brian’s windsor chairs

3. On your blog you’ve written about making a deliberate choice to use local saw mills, and how you’ve found that making that choice in turn has changed your understanding, and experience, of woodwork. Would you care to elaborate on that sentiment? How has the use of local saw mills changed your perspective?

I discovered another great mill just last week. The sense of awe and wonder I feel in such spaces is tough to describe. There is something fabulous about knowing the tree that a board came from, and knowing in turn the town in which that tree lived, the people who cut it down, and the millers who sawed and dried it. 
Trees don’t talk to me. (Yet.) But the people who turn trees into boards have a lot of wisdom, a lot of knowledge, a lot of advice. And on the whole, I’ve found that they’re really nice folk. Men who are as interested in what I’ll do with the tree as I am in how they came to find, acquire, and process it.
ATC Inside

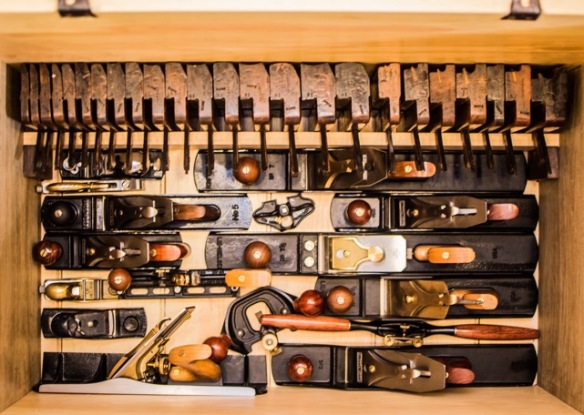
Brian has a well-stocked Anarchist’s Tool Chest – I’m particularly envious of his collection of moulding planes!

4. You recently became involved in Lost Art Press. Tell me how that came about, and what your role at LAP involves.

 I do not have any formal relationship with Lost Art Press.  I was lucky enough to be in Chris’s last Anarchist’s Tool Chest class and, over drinks, we discussed the idea of a user forum, which he later invited me to help out with. Once the forum reached its beta stage, I stepped back. John and Chris do a great job with it. Most days, in fact, Chris replies personally to the new threads. I highly recommend the forum if you haven’t tried it yet, especially as a space for friendly conversations about the history and methods of hand tool woodworking.
ATC Tills

5. In addition to building furniture you also clocked up a lot of time teaching last year. From your blog it looks like your teaching combines practical woodwork with a strong philosophical element. How do students respond to that mix, and how do you find those two elements compliment each other? 

If money were not an issue, I would not teach philosophy. And I would not teach woodworking. Instead, I would (in my dreams) hold the first university position as “Professor of the Humanities With Your Hands.”  
In the most socially-conscious of today’s classrooms, students are asked to think about the ethics of labor.  But while all of them are consumers, very few young adults have (or will ever) produced anything tangible.  This dissociation leads to a chasm that is breaking the social bonds of civilization.
Instead of having students read Walden Pond in a classroom, I want them to live in the woods for a week (or more).  Instead of just reading about the Industrial Revolution, I want students to make a chest of drawers with their hands, then compare it to the Ikea crap in their dorm room.
In an era that defines ‘value’ solely as the lowest number of greenbacks, I seek to instill a different sense of that word in my students. 
Value. Quality. Ethics. Aesthetics.  These are not antithetical terms. And yet, in modern life, we so rarely can find them in the objects – not  just the furniture, but also the clothing and especially the plastic devices – which literally occupy the most intimate spaces in our lives. 
But to answer your question more succinctly: my students dig it. I don’t ask them to learn my values – just to recognize their hands as an extension of their mind (not some inferior, disassociated entity, as Plato and Augustine would have it, of which we should be ashamed).  
Humans can think better with our  hands than we can without them. And millions of western laborers do so every day. But we do not ‘value’ such symmetries of body and mind nearly as much as the abstract equations running Threadneedle and Wall Streets.
To make is to think.  But the inverse, increasingly, does not hold true.
image2

Bridge to Nowhere… Part 2

DSC_0239

With less workshop time than I’d like to at the moment it is easy for some of the more mundane tasks to fall by the wayside, no matter how essential they are. I much prefer making tools blunt to sharpening them, but using a blunt tool is dangerous and results in sub-optimal work, neither of which are satisfactory. So I’m trying to make a concerted effort to spend my first 15 minutes as soon as I step into the workshop sharpening. No one (and I mean no one) sharpens as frequently as they should, but little and often is proving to be a sustainable and efficient way to keep all my edge tools in a state of readiness. The other advantage I’ve found is that 15 minutes at the oil stones serves as a mental cleanser to block out the demands of the outside world and get into the right mindset for precision woodwork.

IMG_2581

I hold the soundboard in a solera at this stage, mainly to keep it safe from knocks – having spent some time on the soundboard I want it to remain safe until the guitar is assembled!

Using sharpening as a meditative exercise has paid off this week, as I’ve been fitting the bridge to the parlour guitar. In my opinion fitting the bridge to the soundboard is both one of the most critical, and also most difficult, operations in building acoustic guitars. Critical because a solid joint is necessary to ensure that the string energy excites the soundboard efficiently (which creates the sound of the instrument), and also to preserve the structural integrity of the instrument. Difficult because a good joint depends on precisely matching the curve of the soundboard with a curve in the base of the bridge blank.

Some lutherie manuals call for the base of the bridge blank to be straight and flat at the point of gluing the bridge to the soundboard. This in my opinion is a fundamental mistake. The soundboard of an acoustic guitar curves across its width and length, thanks to the bracing. Fitting a flat bottomed bridge would at best force part of the soundboard out of the curve previously set by the braces, and at worst would result in a poor glue joint. Neither of these is a particularly promising idea, especially when you start to apply several hundred pounds of string tension to the bridge. And if you’ve taken the effort to plane a nice curve into all of those braces, why would you want to undo that good work at this point?

So instead I opt for the hard road of planing a precise curve into tough ebony or rosewood. What makes this even more fun is that the soundboard acts as a hydrometer, and will subtly change shape with humidity changes throughout the day. So not only are you using a tool designed to plane things flat to create a concave curve, but you’re trying to hit a moving target as you do so. Success is determined by using a super sharp block plane blade, taking very fine cuts, plenty of patience, and measuring a-plenty.

IMG_2576

There are ways you can make this easier. A strip of low-tack painter’s tape on the soundboard makes placing the bridge in position easy (it’s important to use low-tack tape to avoid pulling grain fibres out of the soundboatd). I place the tape so that the rear edge falls along the front face of the bridge. Then when I come to check the fit of the bridge it is just a case of butting it against the tape, and easy placement without needing to reach for my ruler everytime means that I am inclined to check my progress more often.

In terms of planing the curve into the bridge blank, I start by planing a gentle hollow into the middle of the bridge until the ends of the wings (which at first will be above the surface of the soundboard) touch the soundboard. Then it is a case of planing the curve across the depth of the bridge (between the front and rear faces). I do this by working across the grain, from each long edge to the middle of the bridge, with a very fine cut. It is important that the two long edges of the bridge form a good joint with the soundboard, but also that you avoid forming a hollow joint by removing too much material from between those edges, as most adhesives will not form a lasting bond across a hollow joint (and that is the path which leads to your bridge detaching itself from the soundboard under string tension).

So plenty of checking is necessary. To check the fit, I place the corner of the front edge in position, holding it up to the light to ascertain how that edge fits. Then I do the same with the corner of the back edge. If the edge contact is good along the full width of the bridge on both edges, then I rock the bridge back from the front edge so that the base contacts with the soundboard. If material needs to be removed from the base then there is a subtle feeling like the bridge being cushioned as it makes contact, in which case it’s back to taking fine cuts across the grain. When the fit is right, there is a gentle “click” as both edges make contact with the soundboard without any interference from material between the edges.

IMG_2573

You can see from the shavings on the cap how fine a cut this plane is set to.

Fitting the bridge is not rocket science, nor does it involve arcane techniques or specialist tools. Just a lot of patience  and checking progress against the soundboard. The pay off is a solid joint which will result in an instrument with good tone and the strength to withstand string tension.

On a bridge with scalloped wings this would be the point at which I glue the bridge to the soundboard. However, as this bridge will have pyramid wings those need to be carved prior to glue-up, which I will cover in my next post.