Before the Octagon comes the Taper

One of the big attractions of building the staked worktable was the tapered octagonal legs. As I’ve written before, I really like the way that tapered octagons reduce the visual weight of a leg while retaining the structural strength, and also how the introduction of facets plays with light and shade. This in turn informed the timber selection for the desk. A light toned timber such as maple reflects light and emphasises the silhouette of the design, drawing the eye to the facets in the legs. I briefly considered using a dark wood, such as walnut, for the same silhouette enhancing reason, although ultimately I thought that a dark timber could dominate what is a relatively small room. Heavily figured timbers were immediately discounted from the material choices for this desk, as a showy timber would obscure the overall shape of the design by drawing the eye away from the lines and facets towards the figure of the wood.

IMG_7930

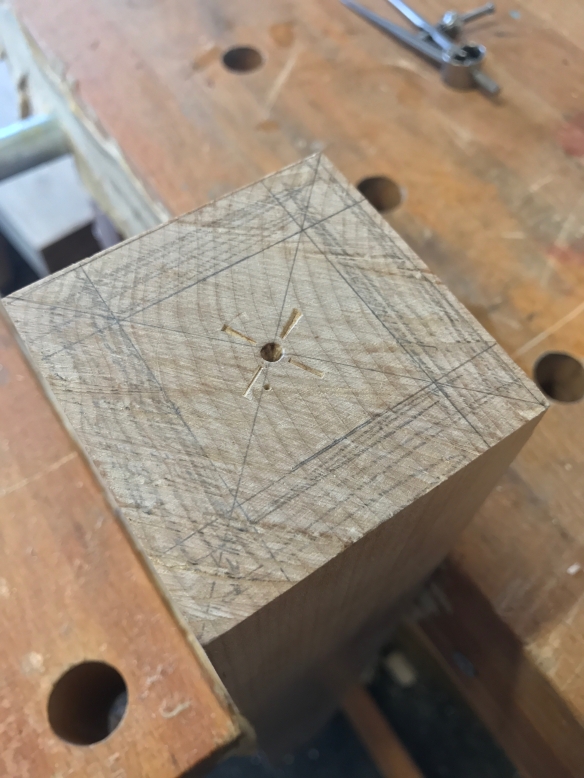
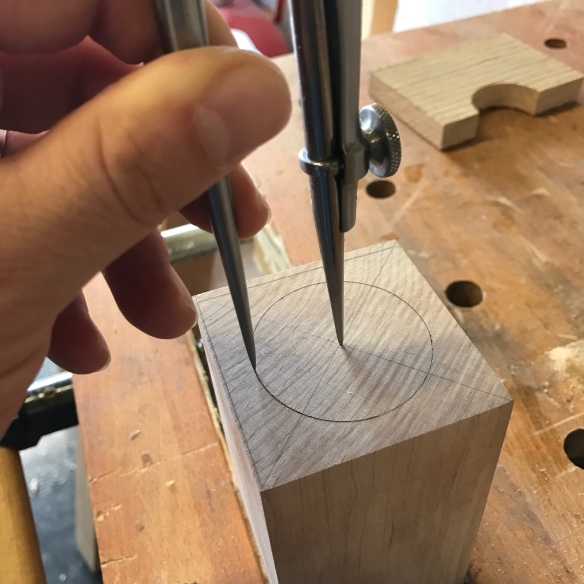
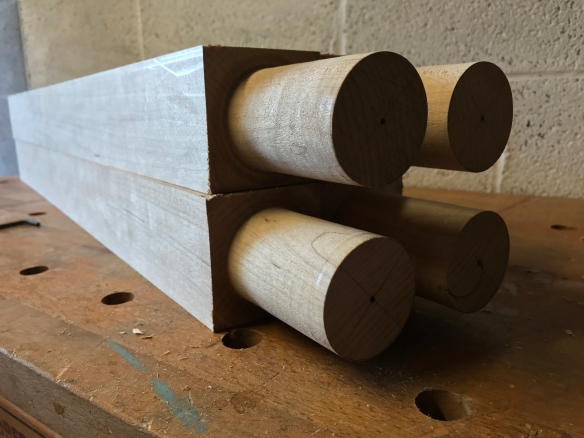
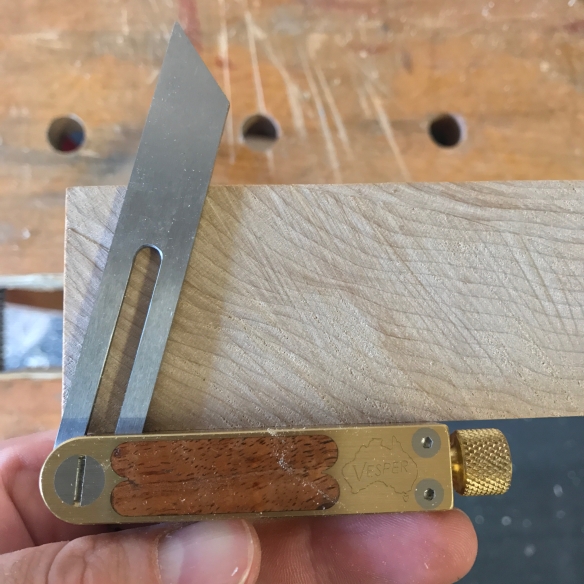
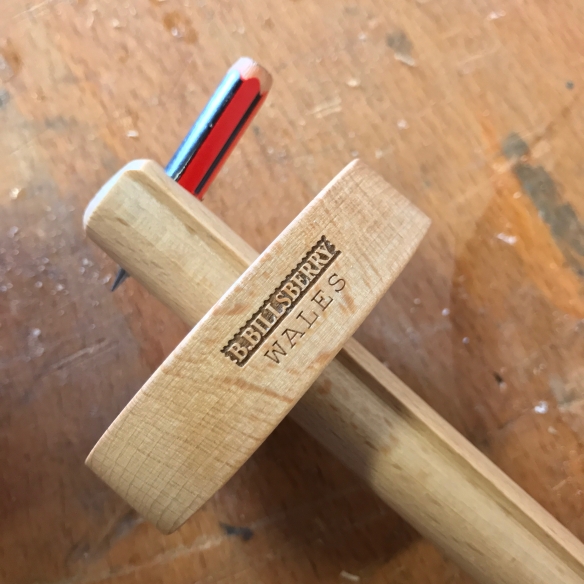
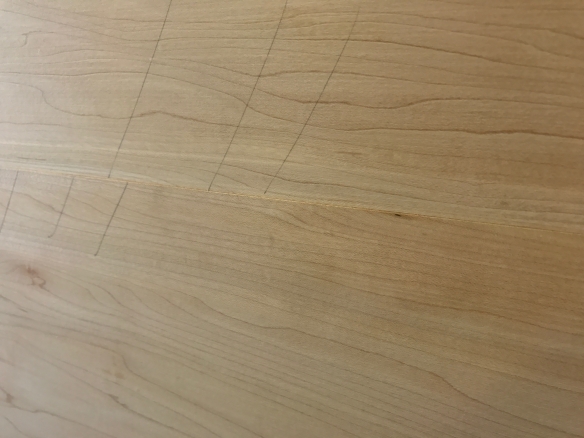
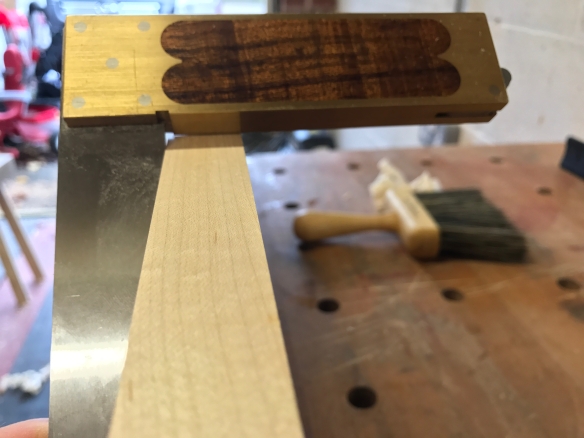
Laying out the foot. You can see the indentations from the lathe drive centre.

Octagonalising the desk legs is broadly the same process as for the staked saw bench legs, only on a significantly larger scale. Before planing in the octagon the legs need to be planed to a tapered square profile. In the Anarchist’s Design Book Chris suggests that a bandsaw is used to achieve the tapered square cross section, and also explains how a powered jointer (or planer, if like me you’re English) can be safely used to create a tapered surface. I need to fit a new blade to my bandsaw, and to adjust the tracking (something I’ve been meaning to do for a while now) so I decided to taper the legs the old fashioned way.

IMG_7933

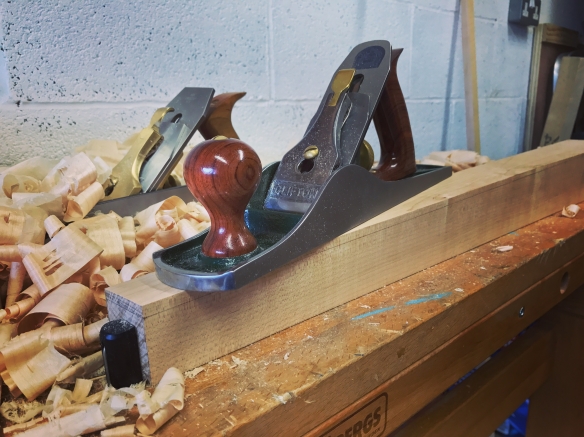
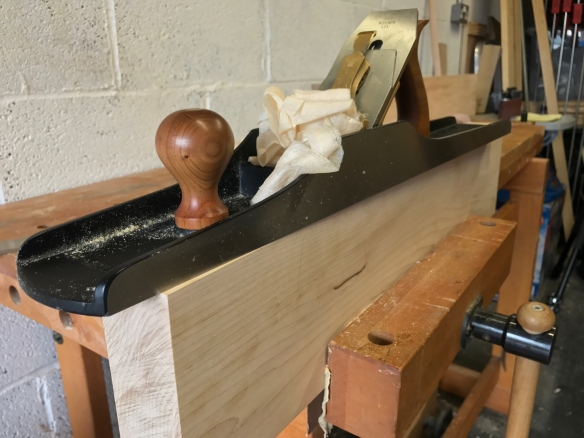
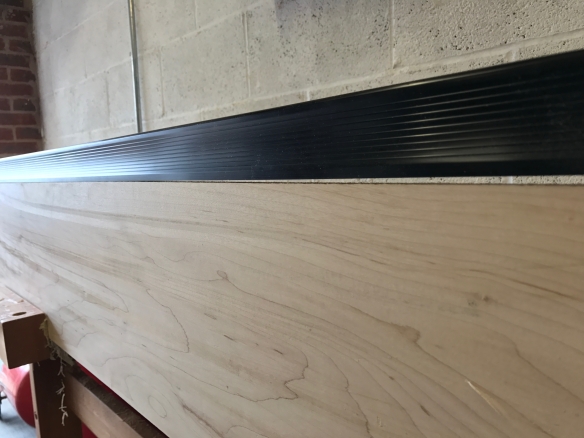
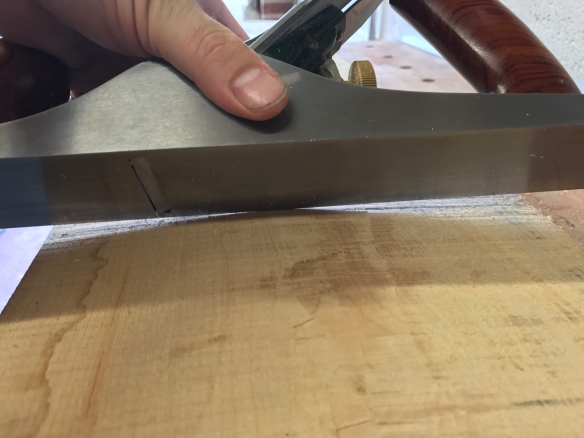
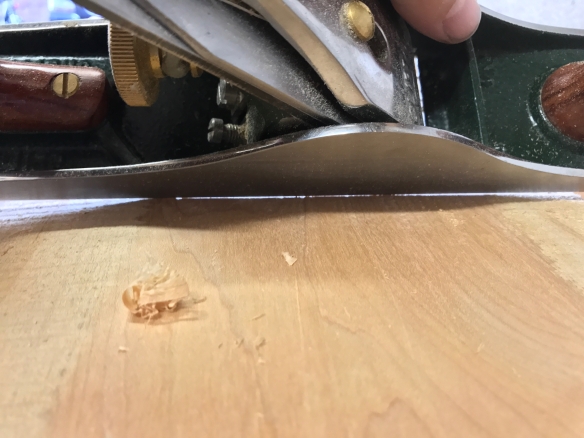
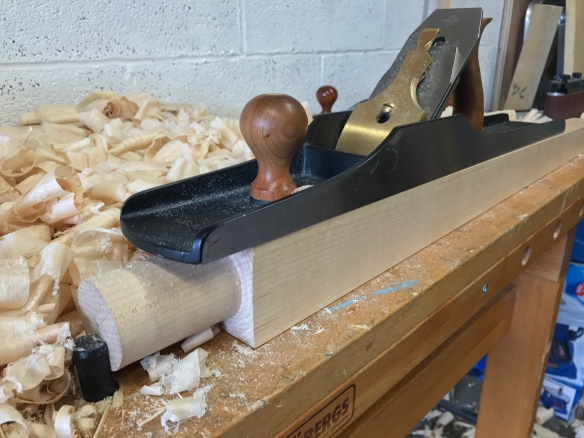
Hogging off the waste with the No.5

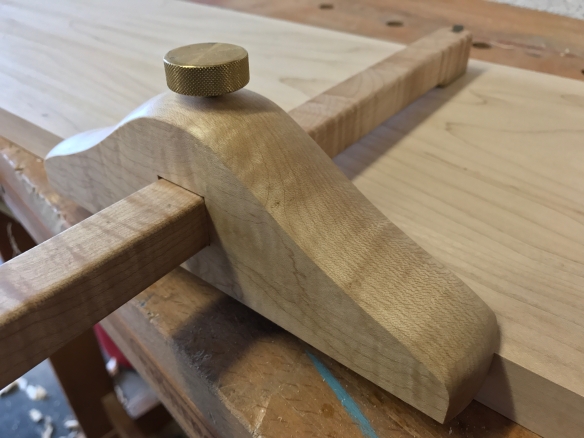
To lay out the cross section of the foot I used a pair of dividers to scribe a circle with a diameter of the final foot width, and followed up with a small square to mark off the four sides of the final foot. Selecting one face to plane first, I marked on the two adjacent faces lines showing the full length of the taper from the tenon shoulder to the foot. The bulk of the material has to be removed from the foot, with the least being removed from the tenon shoulder. I find it easier to plane a taper by working off the workpiece rather than onto it, and so started by hogging off the waste at the foot with the No.5, set to an aggressive cut. It doesn’t matter at this stage whether you’re planing with or against the grain, nor does it matter if you get tear-out at this point, as there will be plenty of time to refine the surface once the majority of the material is removed. The focus is just on removing the waste quickly and efficiently.  As the waste comes off the foot, lengthen the plane strokes to keep the taper straight and flat – the plane wants to create a curve which would result in a visually bulging leg. The key is to changing the pressure from the toe to the heel of the plane as you move through the cut.

IMG_7934

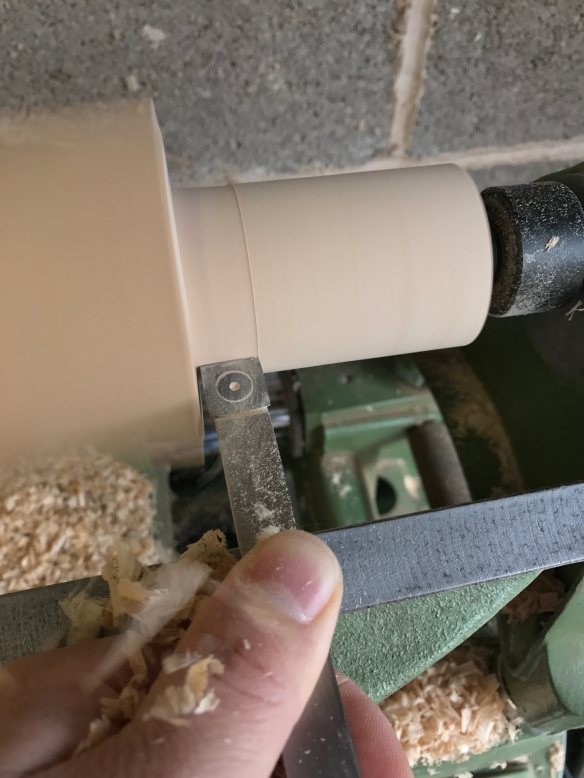
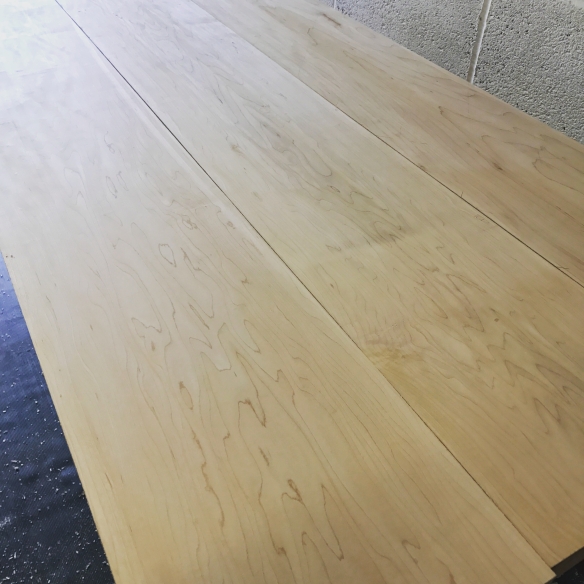
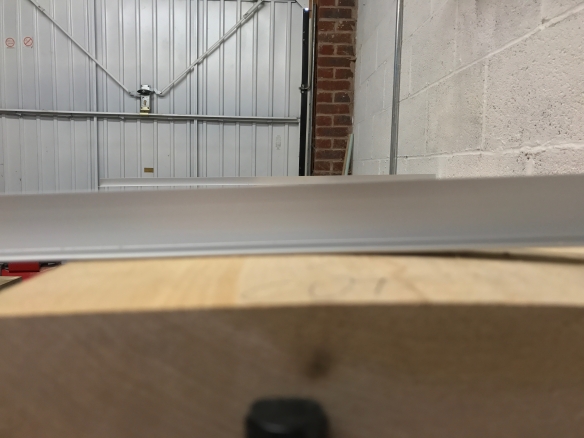
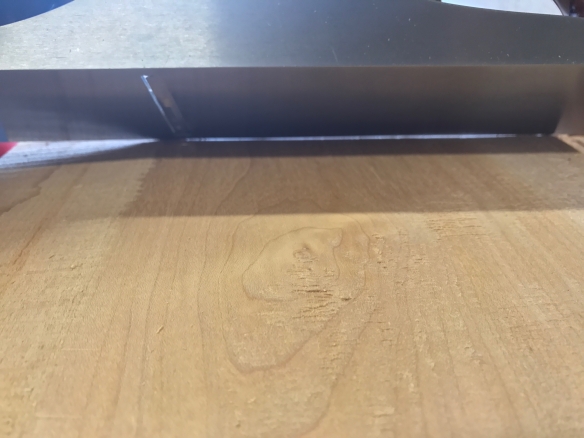
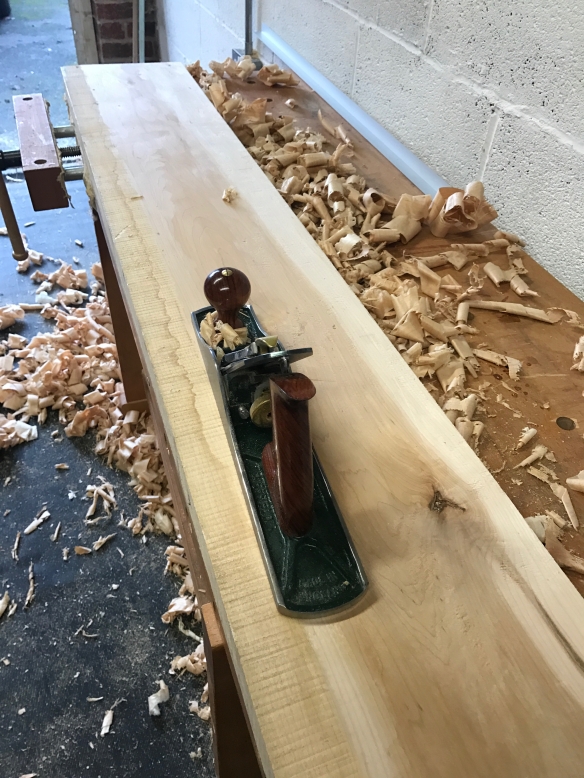
Refining the taper with the No.8 jointer

Once roughly half the waste is removed from the foot, and the cut has advanced to half the length of the leg, I moved from the jack to the No.8 jointer plane set to a medium cut. At this point I work with the grain, even if this involved planing uphill (from the foot to the tenon shoulder) onto the workpiece. The taper increases the length of the leg until a full-length shaving is taken from the foot to the tenon shoulder. Checking the surface with a straight edge helps, but the plane shavings and layout lines on each side of the leg should be enough to tell you if the taper is square and true. As I get closer to the layout lines, I keep reducing the depth of cut on the plane, until the final few shavings are full width, very fine smoothing shavings. I found that for tapering all four sides of the legs is pays to rotate the leg in a consistent direction for each subsequent face, as this means that after the first face, you are planing a smaller surfac area (because one of the adjacent faces has already been tapered) and the fourth face will be smaller still because both adjacent faces have been tapered.

IMG_7936

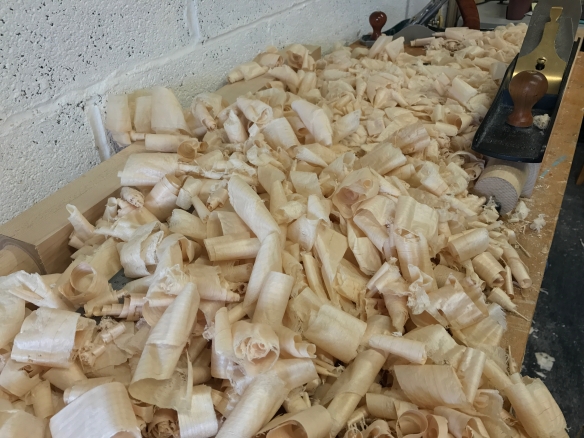
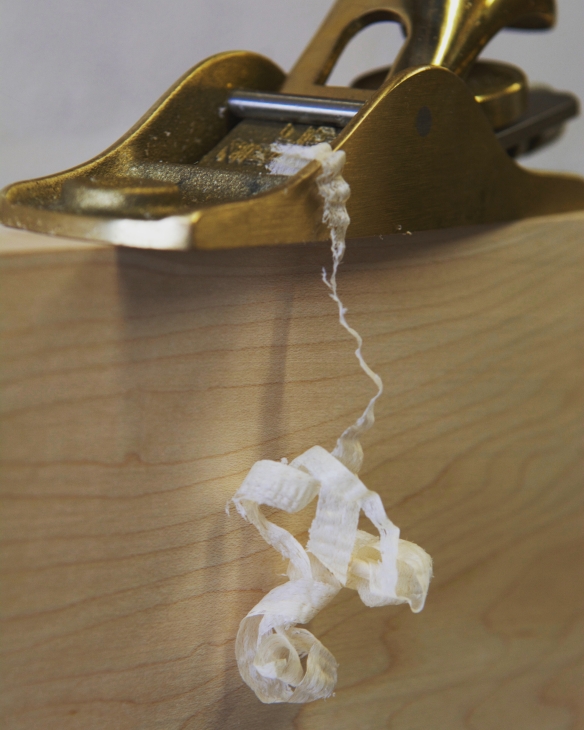
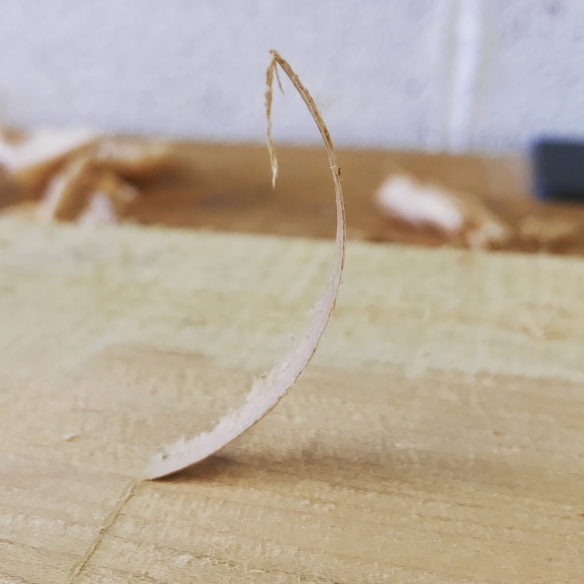
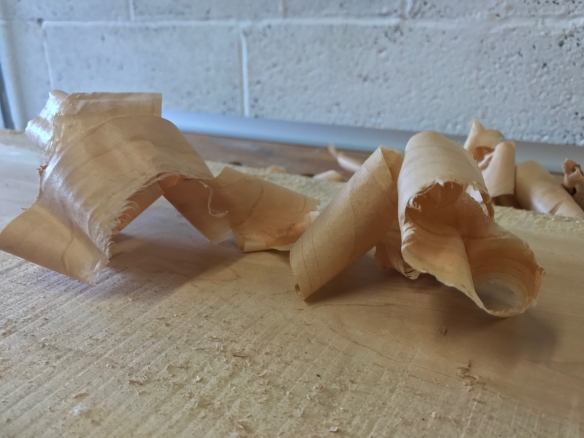
Not a bad amount of shavings from just one leg

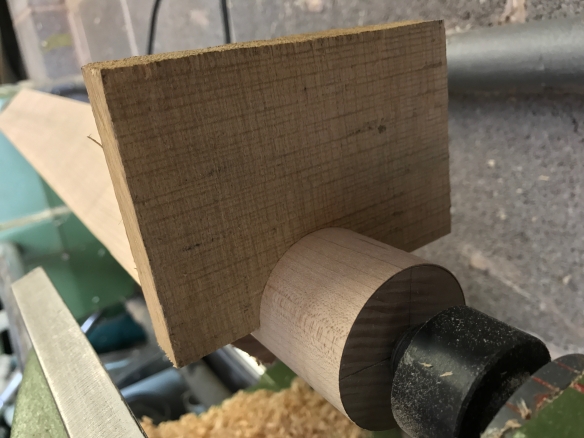
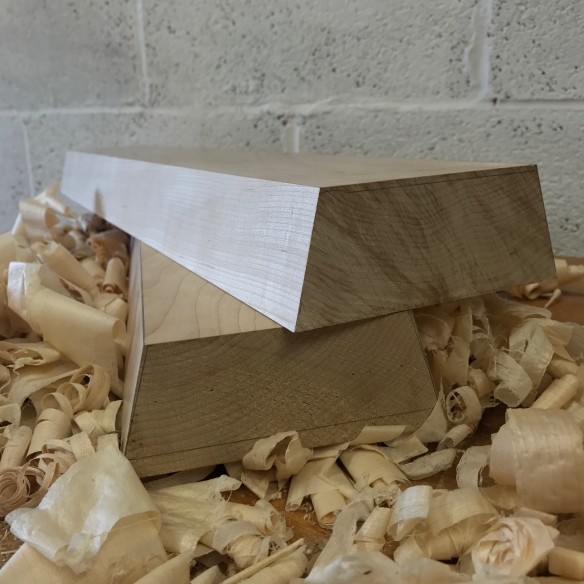
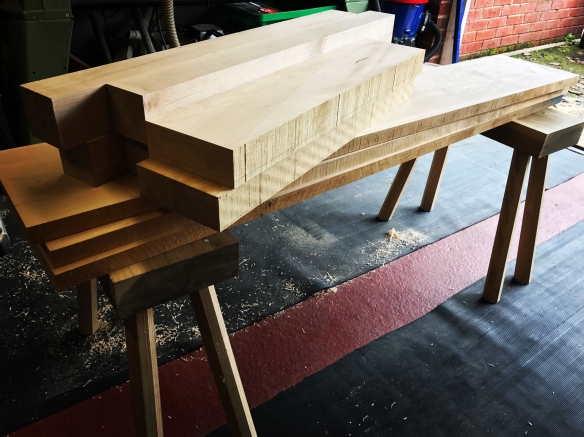
I didn’t quite appreciate when I started tapering the legs just how much material was going to be removed – the taper is much more pronounced than for the staked saw benches. This may explain why Chris suggested a bandsaw would be a fast way to achieve the initial taper before octagonalising the legs. That being said, the handtool only approach isn’t too slow providing proper use is made of the jack plane to rapidly remove stock and before finishing up with the jointer. The dramatic taper on the legs is going to be really striking on the finished desk, and I’m looking forward to planing in the additional facets for the octagons.

IMG_7938

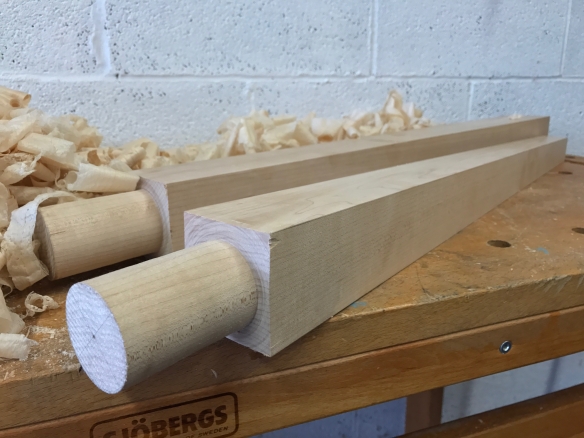
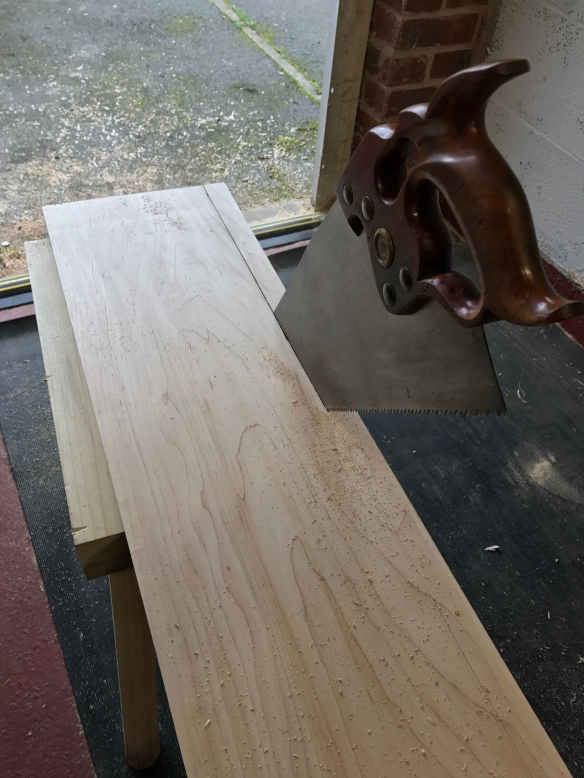
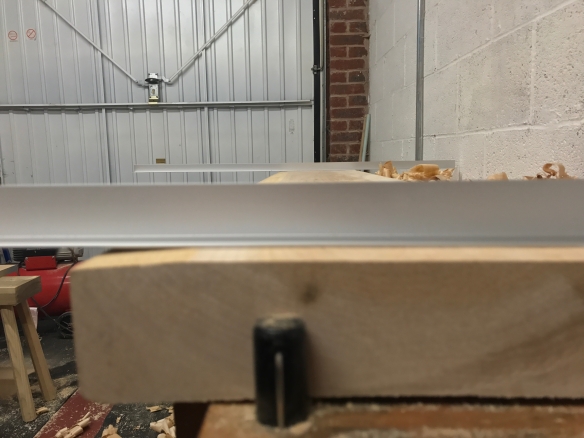
Comparing a tapered leg with a square leg shows just how much material is removed.

Live and on film

At the European Woodwork Show last month, Mark Harrell and I gave a short presentation both days about the new Bad Axe Luthier’s Saw, talking about design and development of the saw, the specification, and how the saw performs in use. Dr Moss kindly captured the Sunday presentation on film – click on the play button below.

I also managed to escape my booth for a few minutes to watch Michael Auriou demonstrate hand stitching a rasp. Michael is a true craftsman, and makes something as complex as rasp stitching look effortless. Here’s a quick video of Michael in action:

Turning Just to Keep on Turning

IMG_7905

As I’ve written about previously, one of the real attractions in building the staked worktable design (in additiona to the fact that it is a very attractive and practical piece of furniture) is the existing skills this build will reinforce, and the new skills sets it will help to unlock. One of the new skill sets to which this build will serve as an introduction is turning. I acquired my Shopsmith machine just over two years ago (and wrote about it here) but until now I’ve not had the opportunity to actually get to grips with the lathe and try my hand at turning. Earlier this year, in anticipation of starting work on the staked work table, I removed the band and table saw attachments, and set up the Shopsmith in it’s lathe configuration. But aside from checking that everything either locked properly or span smoothly, I didn’t have the time to try turning.

IMG_7894

Marking the centre point with a centre finder

Today that all changed, when I mounted the table legs in the lathe and turned the 2″ wide, 3″ long, tenons. This is the most dirt simple shape you can turn on the lathe – a straight cylinder. But for that reason I think it made a very good introduction to turning. The legs are thick enough to reduce any diffraction or bending while on the lathe, and the relatively short length of the turning means that you do not have to maintain a consistent diameter over the full length of, say, a chair spindle (although the tenon does need to be a consistent diameter to provide good glue surface for the mortice). So the end result is achievable.

IMG_7896

The dividers layout the tenon circumference.

My lathe tool kit is very minimalist at this point. I’m using the Easy Wood Rougher (with plans to add the Easy Wood Finisher and Detailer tools at some point in the future). This choice was informed partly by of Chris’ recommendations, partly because this tool flattens the initial learning curve, and also because a compact set of tools really appeals at this stage. To be honest, this tool is all I needed to turn the table leg tenons, but looking to future projects the Finisher and Detailer will put more profiles and decorative elements within my grasp.

IMG_7898

In the lathe and ready to transform something rectangular into a cylinder

To turn the worktable tenons, I located the centre of each leg (at both ends of the leg) with a centre finder, and also marked a 2″ diameter circle at the tenon end using a pair of dividers, which I then traced over with a fine pencil. The marking gauge Bern Billsberry gave me recently was perfect for marking the shoulder of the tenons, as a dark pencil line is much easier to see than a knife kerf when the lathe is running. It was then a case of mounting the leg in the lathe and carefully removing material along the length of the tenon until I reached the desired diameter. To test the fit of the tenon I used a “go block” – essentially a scrap of oak which I drilled with the same 2″ forstner bit I will use to drill the mortices of the desk, and which was then cut in half to give a semi-circle cutout to test against the tenon. As soon as the go block fits over the tenon, it is time to stop turning.

IMG_7901

Which is all straight forward. But what that very mechanical description does not convey is the meditative experience of gently wasting away wood (being careful not to catch the corners of the legs) and sneaking up on the final tenon shape. This was one of the most blissful, and addictive, woodworking experiences I have had in ages. I’m not sure why this is. Maybe it is because most of my work involves making stock flat (or octagonal), so the act of shaping it into a cylinder, is entirely new. There is also a focus on posture and body mechanics which feels very similar to time spent on the martial arts mat – turning is all technique and lightness of touch instead of brute force, very much like  my martial arts techniques. Who knows. But once I’d figured out the idiosyncracies of the Shopsmith, turning the four tenons was incredibly relaxing. I need to do more of this.

IMG_7907

The go block says this tenon is done.

Taking the first steps toward developing a new skill set is always intoxicating – I felt this way the first time I cut a half decent dovetail, or when Clive taught me my first spine dislocation. And there is much to learn. But starting something is always the first hurdle, and today has shown that Roorkee chairs and campaign stools (both using Jason’s excellent leather kits, as can be seen here and here, respectively) and chair spindles are now all achievable. All that is needed is practice. Having the lathe up and running unlocks a list of projects I’ve wanted to build for sometime, and also opens up an entirely new woodcraft to explore – one which adds an entirely new perspective to my work. This couldn’t be more exciting.

IMG_7913

Four tenons all turned. Next is to octagonalise the legs.

The next evolution of Over the Wireless

OTW Logo - Graphic

If you use an RSS feed to read OtW, or if you read via an email subscription, then you may not have seen the recent changes to the site. Over the Wireless started over four years ago as a way to simply describe what I was doing at my workbench, without any real expectation that anyone would want to read it. Now, with regular articles published in Furniture & Cabinetmaking and Popular Woodworking, the John Brown book for Lost Art Press, interest in commissions from prospective clients, and frequent enquiries about teaching classes (and more on this development very soon) I decided it was high time for an update of the site to better reflect the professional direction OtW has taken.

The blog feed remains the beating heart of Over the Wireless, so readers do not need to make any adjustments. But if you visit the site itself, you’ll now find on the menu bar (in order):

The aim with the new site is to give a clearer picture of what OtW is about, to present the important information clearly, and to properly showcase some of my work. A website, very much like a tool chest, is never truly finished. But I think that this iteration of Over the Wirless is a significant improvement, and puts the site on a good footing to explore and develop the new opportunities and adventures that keep presenting themselves.

Despite the fact that a large part of what I do here is communicating, I find it absolutely excruciating to write about myself. So when my good friend Jim McConnell announced his new venture (with wife Emily) as Wishbone & Hearth offering a writing, editorial, and transcription service, I knew exactly who to commission writing the new About page for OtW. Jim is an excellent writer (if you haven’t already, you should subscribe to the Daily Skep, and read Jim’s article in issue three of Mortise & Tenon) but most of all I knew I could rely on Jim to present who (and what) Over the Wireless is in a sympathetic and accurate light. After exchanging a couple of emails about the scope of the copy, and providing Jim with some background information, it was a case of waiting a couple of days for the first draft to arrive. The difference beween that first draft and the final copy you can see on the site is very slight, with only a couple of changes to tidy up and clarify some points.

What I hadn’t anticipated was that Jim’s enquiring mind would pull together threads I sometimes overlook and draw them together to give a much better representation of Over the Wireless than I could have hoped to do myself. All this, with cutting through the myriad tangents and facets which occurred to me, but which did not add to the OtW message or narrative. Sometimes it takes someone with a bit of distance and perspective to capture what is truly important about your work – I’ve certainly found this with both the OtW branding designed by Tom, and now the copy written by Wishbone & Hearth.  And working with other designers and craftspeople is an embodiment of the community spirit and engagement I really want to place at the heart of what OtW is about. Returning to Wishbone & Hearth in particular, Jim is a consumate professional (and very reasonably priced) and I would have absolutely no hesitation in commissioning further writing from him if the need arose. So, if you need someone to draft, edit, or transcribe recordings, then Wishbone & Hearth come highly recommended.

A (dove) Tale of Two Battens

One of the unexpected, but really rewarding, elements of the staked worktable build is the different senses of scale across components in the project – moving between the large surface area (and edge joints) of the table top, the battens, octagonal legs, and finally drawer parts. Today I prepared the two battens that hold the table-top flat and accept the tenons for the legs. After edge jointing 53″ long boards for the top, working on two pieces no more than 25″ long felt quite dainty, and was certainly a fun change of scale.

IMG_7851

Squaring up the battens before laying out the angled sides

The two battens are an easy stage of the build, but they still involve some points of interest. The battens are trapezoid (or possibly dovetailed) in cross section, which I approached in two stages. Firstly I planed the long edges flat and square to the reference face, to ensure that I had accurate edges for layout. The move from 53″ long edges to much shorter pieces definitely had an impact in terms of how quickly the battens were squared up, and it is a helpful reminder that working on different sized pieces is key to improving that core skill set.

IMG_7853

The 4″ Vesper bevel is the Rolls Royce of bevels, and perfect for this sort of precise layout.

Once the battens were square on all four sides, I then laid out the angled sides. The Vesper 4″ bevel is wonderful for work lik, as it is exactly the right size to balance on components where a larger bevel would be too much of a handful. I struck the angle onto the end grain of both battens with a sharp making knife, before laying out the bevel on the face of the battens. It’s not really advisable to use a marking gauge or knife when laying out the lines of a bevel or chamfer on the face of the workpice, because the kerf left by the blade will remain below the surface of the chamfer (and Charles Hayward had some strong things to say about that). Instead, a pencil line is safer to work to, even though it is generally a less accurate method of marking work than a fine knife kerf. Until this week a pencil based marking gauge was one of the key omissions in my tool chest. Fortuitously, I saw good friend and tool maker Bern Billsberry on Friday, and quite unexpectedly he gifted me with a beautiful cam-lock pencil gauge from his latest batch. This was perfect for laying out the rest of the dimensions for the angled sides of the battens. I set the gauge to the knifed lines on the end grain of the battens, and used that setting to mark the edge of the chamfer on the face. The gauge locked solidly and left a good clean pencil line to work to.

IMG_7852

An unexpected gift this week turned out to be exactly the tool I needed. A cam-lock markng gauge by my good friend Bern Billsberry.

With all the layout done, I held battens into the vise and planed the edges to the correct angle using my No.8 jointer plane. Angling the plane removed the bulk of the corner, and then it was a case of adjusting the angle at which I was holding the plane to achieve a surface that was parallel with the line on each end of the batten, removing the waste until I hit the line on the face of the workpiece and those on each end. Again, the small bevel made it easy to check that a consistent angle had been achieved along the length of the workpiece, without needing to remove the batten from the vise. I also used a straight edge to make sure that the chamfered edge was straight and without any bumps or hollows. All in all, the four edges took little over an hour to plane from square, so this was a swift but very satisfying operation. It’s been a hell of a week for various reasons, and getting back to my workbench always helps to re-centre me. All of the extraneous pressures and concerns melt away as soon as the first shaving comes up through my plane.

IMG_7854

The two finished battens – angled and ready for the mortices to be drilled. On the lower batten you can just about see some alternative angles I marked on the end before making my mind up.

Next week I’ll be working on the legs, which if I’m totally honest are one of the reasons I chose this design. Also it means I’ll be taking a dive into the world of lathe work and turning.

This just tops it all

IMG_7611

Choosing the best layout for the top

If I’m being perfectly honest, I was a little apprehensive about jointing the boards for the top. At 53″ long this is the longest edge joint I’ve prepared to date, and although an edge joint is one of those simple techniques that every handtool woodworker picks up early on (and one which I’m very comfortable with), the additional length of this joint does increase the difficulty level a little. As the top joints will be visible every time I sit at my desk, I knew I would be haunted by any gaps or poor joints, and the only way to avoid this endless torture would be to work good joints first time round. As I keep saying on this blog, there is no such thing as a “trick” in woodwork – just fundamental techniques practised well and attentively. I should have remembered those words instead of worrying about the difficulty of the joints, because once I was actually at my workbench the process went smoothly and achieving gap free joints was very straight forward. Having confidence in the techniques and following them, is often the perfect antidote to being overawed by the task at hand. But let’s back up a bit and talk about the actual process…

IMG_7677

The straight edge shows that the rough edge of this board surves significantly. Stopped cuts will remove the high spots and then the full length can be worked

There are two significant visual features of this desk – the first is the facets and edges that punctuate the silhouette of the desk, and the second is the grain of the top. Placing the three boards in the most attractive combination is therefore critical to creating a pleasing final piece. One of the boards had some lovely subtle quilting, while the other two were much plainer. I decided to place the figured board in the middle, sandwiched between the two plain boards, and this was more attractive (to my eye at least) than a figured board on one side and the two plain boards grouped together.

IMG_7617

One joint down, onto the next!

When orientating the boards I also thought about the stability of the top, and mitigating seasonal wood movement – particularly whether the heart side and bark side of the boards should be alternated, or whether it was safe to position all three boards with the heart side facing the same way. My go to source when thinking about wood movement is always With the Grain, which provided some helpful tips but no definite answers. Ultimately, the most attractive orientation was for the boards to be placed bark-side up, with the grain running in the same direction. This will make final clean-up of the table top easy as the whole surface area can be planed in the same direction, and as the battens will restrict wood movement I think this orientation should work just fine. With the position and orientation of the boards decided upon, I struck lines across the edges of each board to help identify which edge paired with which.

IMG_7637

A small block plane can help fine tune localised areas of the joint

The final task before I started jointing the boards was to sharpen my No.8 plane. Yes sharpening is boring, but to get a really clean and precise edge joint, especially in material as hard as maple, needs a sharp iron. I also find preparatory sharpening such as this to be very useful for mentally preparing for the work ahead.

IMG_7614

Chris Vesper tells me that for edge checking the blade of the square should be placed against the face of the work for a greater reference surface, and the stock used to check the edge.

When planing an edge joint I first check the board with a straight edge to see if there are any obvious humps or hollows, and also to hold the two edges against each other. These tests quickly identify if there are any trouble spots, and as a result help me to dial in a straight and square edge faster than if I were working blind. The first edge I started working had a significant fall-off at one end, and so I took stopped cuts along the high spot, slowly lengthing out the plane strokes until I had worked the highspot down to the same level as the low corner. Once the edge was on a consistent level (although not perfectly straight of square), I set a fine cut on the plane and started to plane the joint proper. Whenever I plane edge joints I find it helpful to think of planing a concave curve into the workpiece – the long sole of the No.8 prevents this from happening, but aiming for it ensures that pressure is applied correctly and you do not end up with a convex curved edge (which is what a plane naturally wants to do). So, at the start of the cut the pressure is entirely on the toe of the plane, for the middle of the cut the pressure is evenly spready between the toe and heel of the plane, and at the end of the cut the pressure is entirely at the heel of the plane.

IMG_7683

Marking off the final width using the Hamilton Tools panel guage

Only once the first edge is square and true do I move on to the matting edge, using exactly the same process. Once both edges are jointed, the next task is to set them together and check for any gaps at both the front and back of the joint. If the joint is gap free without needing clamps, then it is good to go. All three boards were over width, and so before gluing up the first assembly I used my panel gauge to mark the final width of the two boards, and ripped the excess with the Disston D8, leaving 1/8″ waste still on the boards to allow for some final clean-up. The excess material ripped off the boards will provide the spindles of the matching staked chair, meaning that the entirety of the chair can now be made from scraps of the table timber!

IMG_7684

Ripping the excess with the Disston D8 and staked saw benches

I worked the top in two stages – jointing and gluing the first pair of boards, and then jointing and gluing the third board to the larger panel. Hide glue was used for both joints, and the top is now back in the study ready to be squared and cleaned up. I’m going to leave any further work on the top until after the legs and battens are complete, as there may yet be a spot of seasonal movement in the top, especially after a big glue-up, and I don’t want to remove any more materaial than I have to. One flattening just before the joinery is cut will be enough to get the top ship shape.

IMG_7705

The complete top, glued up and curing.

Crown and Glory

Because I don’t work with pre-dimensioned timber, it always takes a while when working on a new build to get to the point of actually doing any joinery or reaching for the glue bottle. There is always a goodly amount of time spent on stock preparation. After a bit of a slow start on this build, all of the stock for the desk is now processed and lying in stick ready to be used.

IMG_7539

I’ve written before about the benefits of traversing in order to flatten and thickness stock, but I’ve not spent much time talking about how to deal with the crowned side of a board. Which I think is an oversight for two reasons. Firstly, traversing is dead easy providing you can sharpen a plane and resist the urge to tilt it down as you exit the cut. Secondly, traversing the cupped face of a board before you have flattened the crowned face is a recipe for stock that wobbles and tilts under the weight of the plane, which definitely makes flattening more difficult. Because the cupped face generally provides a stable surface on the workbench, I normally flatten the crowned face before moving on to traversing the cupped face. So why not talk about flattening the crowned face?

IMG_7473

Winding sticks show that the crown is twisted – see the difference in height between the left hand end of the far winding stick and the corresponding end of the near winding stick

In my defence, I don’t think I have come across a detailed description of flattening the crowned face of a board (most books will say something similar to “plane the peak with the grain until it is level with the sides” without giving much more detail, which is technically accurate but misses some of the nuance) so I’m not alone in neglecting this subject. I was reminded of this as I flattened the three 9″ wide and 54″ long maple boards that will make the top of my staked work table, all of which had a decent amount of cupping from their time drying at the tinber yard. And so I thought this would be a good opportunity to shed some light on an essential, but often overlooked, element of flattening timber.

IMG_7476

The sole of my jack plane is plenty accurate as a straight edge for this sort of work.

Before I start planing any board, I first check for twist using winding sticks. Now, I really wish I had a beautiful pair of winding sticks by my friend Dan Schwank (and one day I will add these to my tool chest, because Dan’s work is impeccable). But in the meantime, a pair of 36″ long aluminium corner pieces works just fine. On this board the winding sticks showed that the extent of the crown was inconsistent across the length of the board, but this is easily planed out when removing the crown. For heavy stock removal like this I use the sole of my plane as a straight edge – it is always at hand, and is plenty accurate when judging where to take the next heavy cut from. My Starrett straight edge stays in the tool chest until I’m checking finer work.

IMG_7486

Take a good heavy cut, and don’t worry about tearout or woolly texture – that will all be smothed out later.

All of the crown is removed with a jack plane fitted with a cambered iron, set for as heavy cut as I can comfortably take. A heavy cut removes more material, and gets the job done quicker, but there’s no point exhausting yourself by trying to take superhuman-thick shavings! Start off by planing the very peak of the crown, along the grain, focusing on the highest areas of the length of the board, and then working the peak of the crown across the full length of the board.

IMG_7481

The peak has been knocked off, so next I work the high points to either side, followed by the middle again.

When the plane bottoms out in the cut, I check the crown with the sole of the plane. What you expect to see is a small hollow where the peak of the crown was, and a new peak to either side of the hollow. I plane the new peaks out, and then work the mid-point (where the original peak was) to ensure that I’m not planing a new crown into the board. Skewing the plane a little helps the toe and heel of the plane ride on the two new peaks, and when you bottom out in the cut you know it is time to work the new peaks again. I try to take an equal number of shavings from each of the new peaks, check my progress with the sole of the plane, and then work the middle.

IMG_7488

The high points are moving well towards the edges of the board, so I’m getting close to flat. Plane off the highpoints, work the middle, and check again. Repeat.

And then repeat. Many times. What you find is that as the middle of the board gets lower, the two high points move further apart towards the edge of the board. When the high points are on the very edges of the board, the board effectively has a very slight hollow. Check with the winding sticks to make sure that the board is free of twist, and then lightly traverse it until it is flat. All of this is done with the jack plane, and only after that light traversing do I reach for a different plane.

IMG_7491

The winding sticks say this board is now free of twist. Now to finish flattening this face

I’m trying to learn from Joseph Moxon, and allowing the purpose of the timber to determine which plane I reach for – does the workpiece need to be dead flat but not super smooth, dead smooth but not necessarily cricket-wicket flat, or both deadnuts flat and super smooth? The tyranny of assuming everything needs to be perfectly flat and smooth can be hard to shake, but thanks to Mortise and Tenon, and Moxon I’m making progress in my rehabilitation. For the top boards for the staked worktable, I reached for the No.8 jointer once the crowned face was flattened with the jack, as I need the boards to be flat before they are jointed and glued, but won’t be smoothing them until the table top is glued-up. And so my No.3 stayed in the tool chest for this session.

IMG_7489

The No.5 is the perfect plane for this sort of work. Long enough to keep planing true, but light enough to not tire you out.

With the stock for the table all processed, my next task will be to joint and glue up the boards for the top, after which I can start work on shaping the battens and legs.

IMG_7506

All the stock for the staked table is now processed and ready to be made into something useful