Interative Design

The following is based on an article originally published in issue 284 of Furniture & Cabinetmaking.

In 2017 a client commissioned me to build an open cupboard for the hallway of a Victorian house in London, with the key design criteria that it was to be able to provide ample shoe storage. The result was the Policeman’s Boot Bench – a dovetailed oak cabinet with four shelves for even the most enthusiastic shoe collector. No sooner had I completed the commission and handed it over to the client, then Dr Moss pointed to the overflowing shoe rack in our own hall and requested that I build a variation on the piece I had just delivered, to address our shoe storage needs (the finished piece can be found here).
_DSC9090

Iterative Design

The process of designing, and building, a second interpretation of an existing project provides an excellent opportunity to review your design process: both in terms of how small design changes can have significant impact on functionality, and how design choices affect the overall form of the piece. Subsequent approaches do not rewrite the base design, but adapt and mould it to new settings and uses that reflect the specific needs of the end user.
_dsf4949

Despite my best efforts, I have been unable to find a design term that reflects the process of adapting a base design for different functionality or aesthetic criteria, and so for the purposes of this article I will refer to it as “iterative design”. If any reader is aware of a design term which better reflects this methodology then please drop me a line and let me know!

Compare and Contrast

While I will be using the two shoe cupboards to illustrate the benefits of iterative design, really the same process could be applied to any furniture form. In fact, on my workbench are two child-sized Welsh stick chairs. These chairs are both based on an 18th century example, but thanks to changing some design elements (one has a round leg profile while the other uses octagonal legs) and material choices (one is oak, the other maple), they have radically different appearances. Returning to the shoe cupboards:

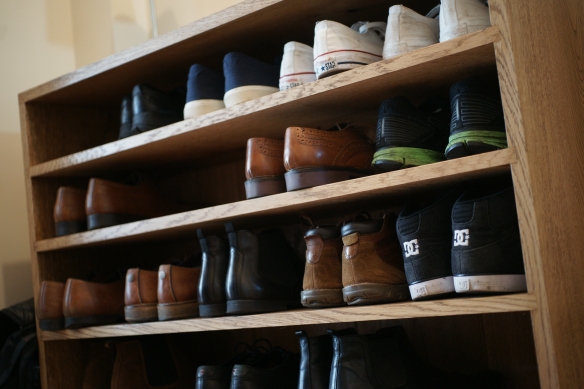
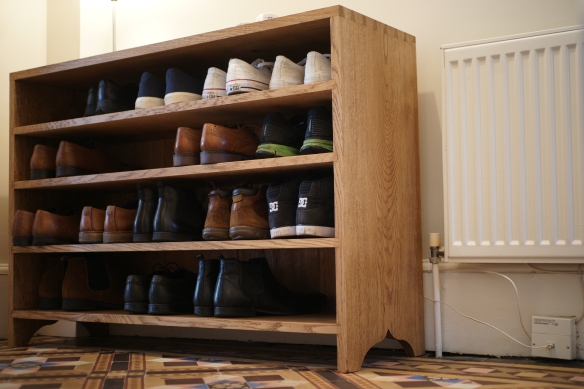
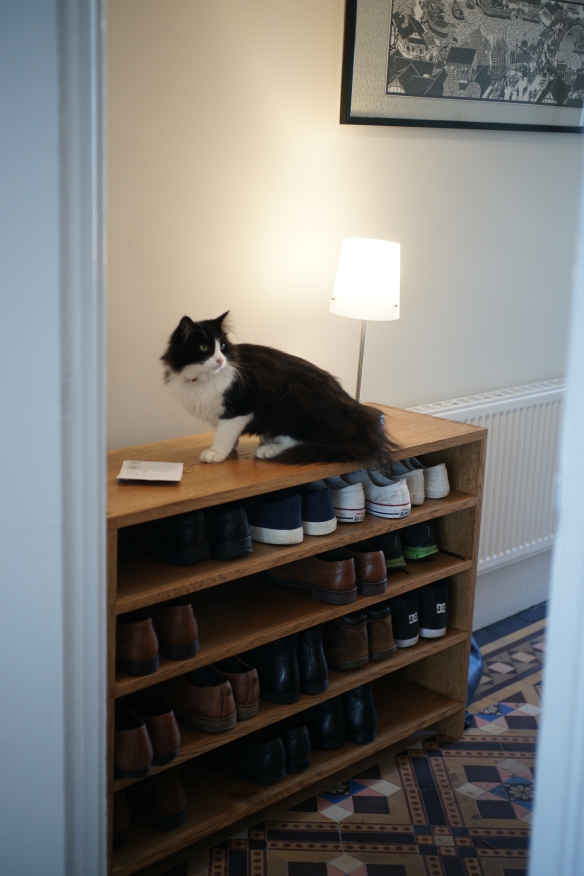
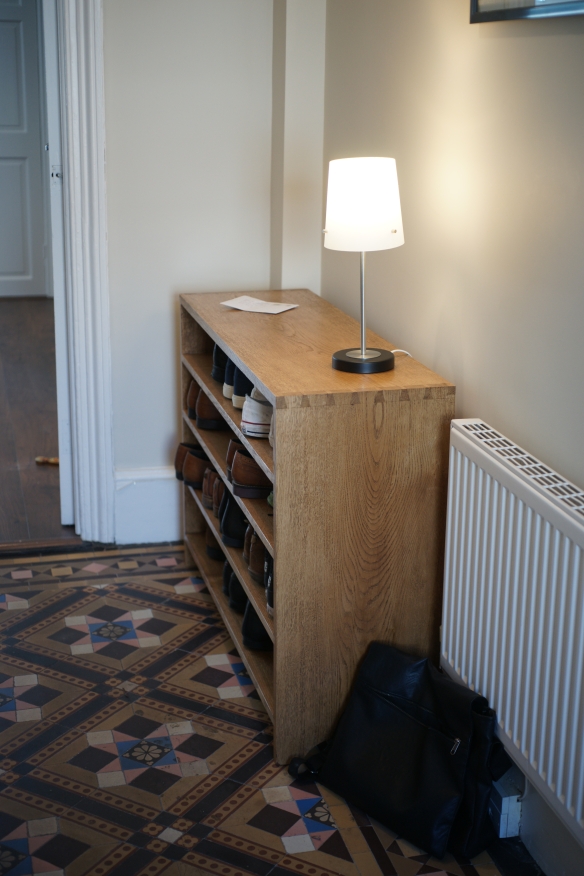
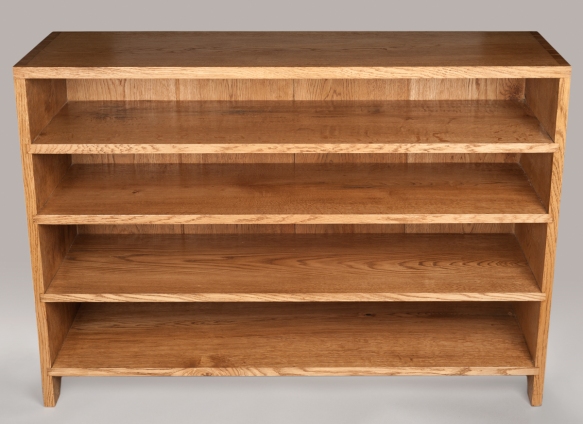
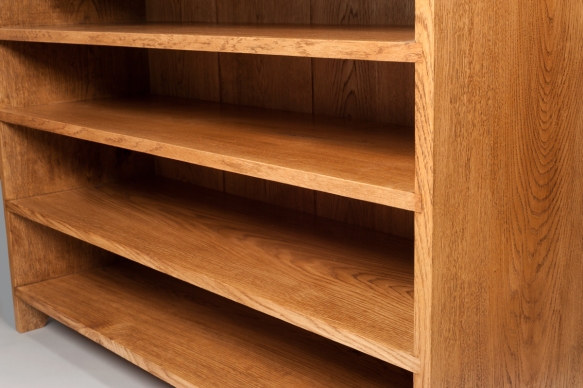
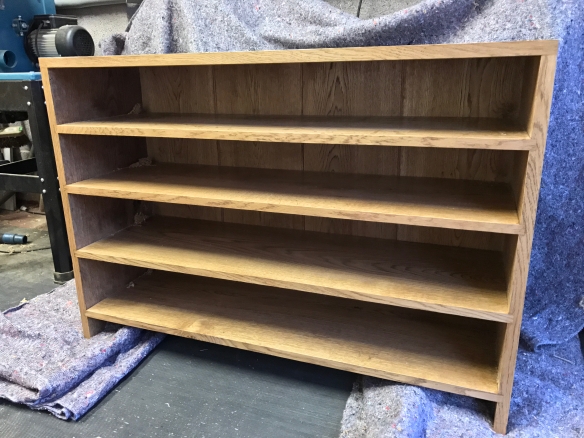
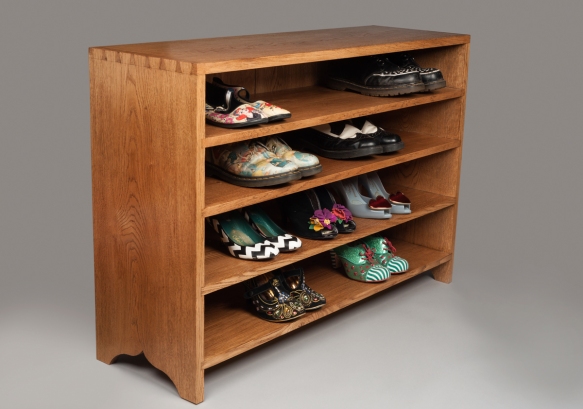
Version One (the original Policeman’s Boot Bench) is all oak construction, with four full-width shelves housed in dados. The finish is blonde shellac and black wax.

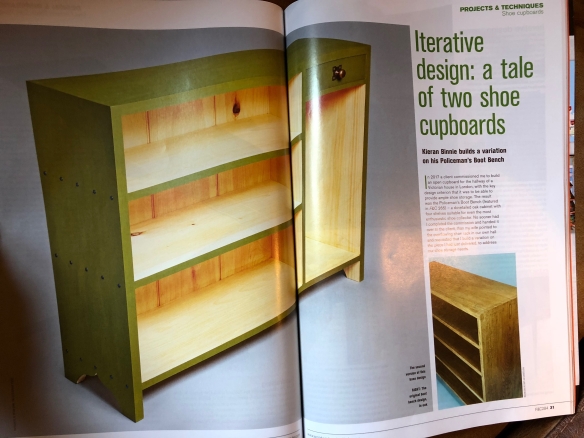
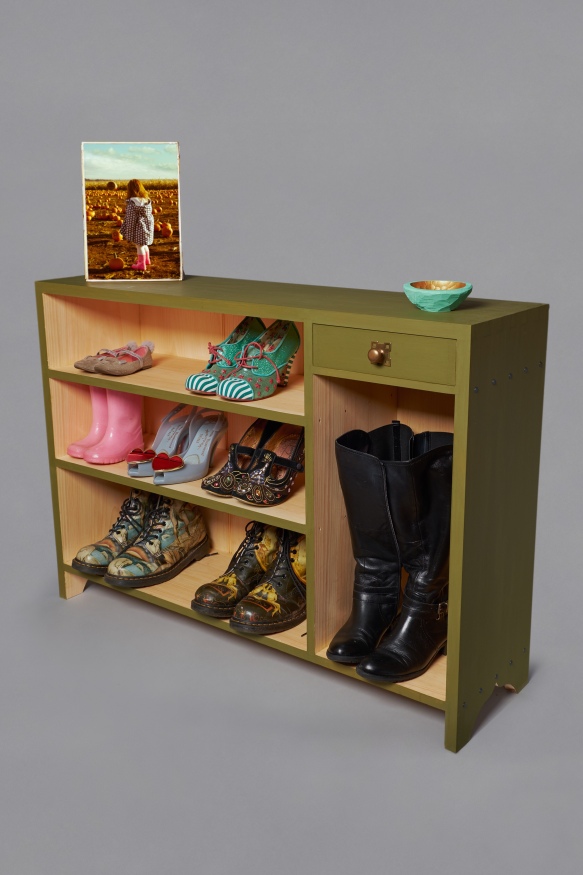
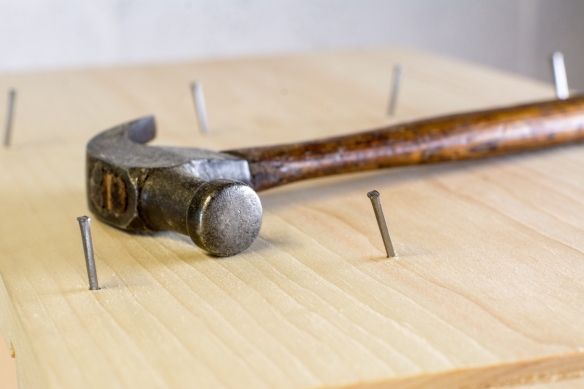
Version Two (which resides in our hall) has the same overall proportions, save for being slightly narrower (11.5” compared to 13”). Pine is used throughout, and the joinery (dovetails, dados, and tongue and groove for the backboards) is exactly the same as for Version One. However, there are three shelves in this iteration of which only the bottom shelf is full-width. The other two shelves terminate in a vertical divider 12” from the righthand end, resulting in a tall compartment at that end. At the top of the compartment is a dovetailed drawer for keys, post, and the inevitable clutter that seems to accumulate by the front door. The shelf spacing is also different compared to Version One. In terms of finish, the exterior of Version 2 is painted with Bayberry Green milk paint by Old Fashioned Milk Paint, topped with Osmo PolyX, while the interior is also treated with Osmo. The dados are pinned with “Roman” style nails from Rivierre Nail Factory, while a Mackintosh brass pull from Horton Brasses allows the drawer to be accessed.
_DPP7006

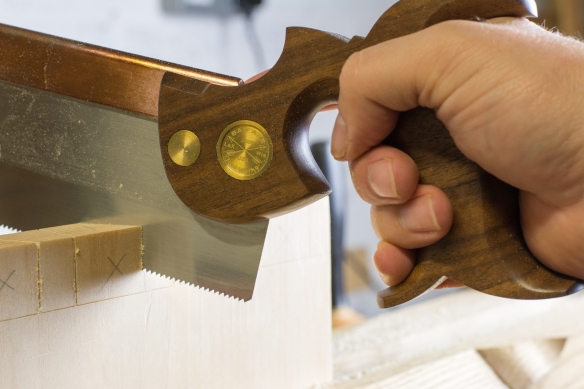
Cutting the dovetails

So those are the differences, but what design choices led to them? This can be split into two elements – functionality and aesthetics.

Functionality – adjusting the functionality of the shoe cupboard was where negotiations started for version two. Our existing shoe rack (by a popular Swedish home furnishing company) struggled to accommodate anything larger than a standard work shoe, and was downright hopeless at holding the Apprentice’s tiny shoes. So, from the very start we knew we needed shelf spacing that would work for my Dr Marten boots as well as a three year old’s favourite sequinned wonders, and Dr Moss’ knee-high boots. The addition of the vertical partition provided the tall boot storage without creating too much unusable dead space, and left me free to have shelves in the main compartment. Having determined the space required for the Dr Marten’s (8 ½” in case you were wondering), the shelf spacing for the main compartment was stepped off with dividers to achieve a gradually reducing space for each shelf up, without the need to deal with awkward fractions. A small drawer at the top of the full height compartment added an extra level of functionality as well as some visual balance to the design – before adding the drawer, the right-hand compartment looked cavernous and disrupted the proportions of the piece.
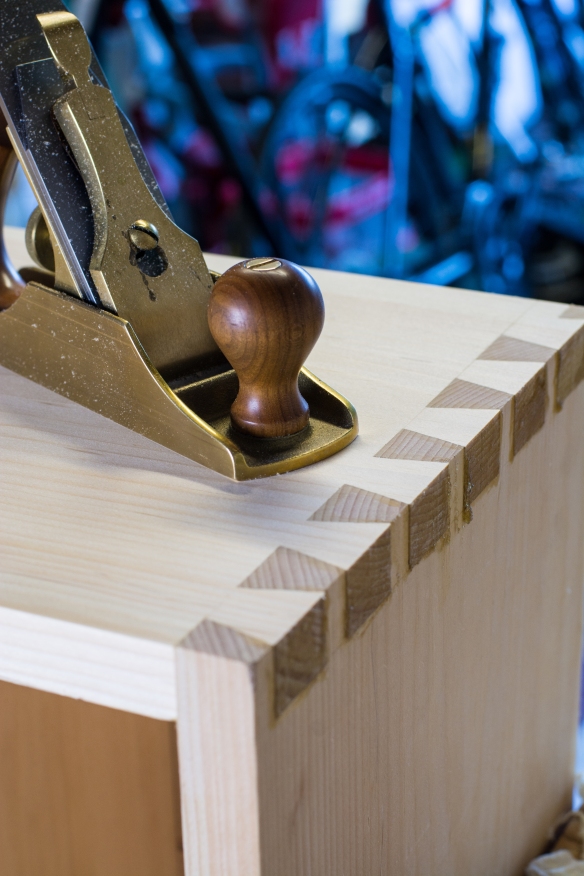
_DPP7314

Aesthetics – the Policeman’s Boot Bench was designed for a Victorian property with an original tiled hallway, and the emphasis on oak and a simple finish fitted that setting very nicely. Thanks to a large lime tree in the front garden our hallway has a tendency to be gloomy, and in an effort to mitigate this we have painted the walls a bright yellow. For this reason we wanted to avoid adding large pieces of furniture in dark wood, and so pine was chosen for gentle tones it would add. The overall form of the shoe cupboard is understated, and relies on hand cut joinery as well as an elegant foot detail to provide visual interest. Milk paint is the perfect finish for adding colour while keeping joinery visible, and the benefit of a mid-toned colour is that the natural wood of the interior illuminates the shelves, making the overall piece “pop”.

These are all simple choices – asking what we want to use a piece for, and how it will sit in the intended setting. And yet, when added together, they result in substantially different pieces.


_DPP7188

Cleaning out dados

The Benefits of Iterative Design

Having found the iterative design process to be beneficial and thought-provoking, I was interested to see if other makers used this process. Canadian furnituremaker Rich Wile makes extensive use of this approach, particularly when deploying specific joinery solutions. Rich explained that while he developed a “chair base design using bent laminated braces” for a dining chair, “it has provided the design and build basis for many other projects including benches, stools and small tables. Each application requires small tweaks to the design, such as the size and angle of the brace, but the technique remains the same”. Carver Danielle Rose Byrd also makes use of iterative design, particularly with spoons and shrink pots which “are limited to more nuanced changes in design that benefit from an iterative design process”.

I have found two main benefits to this process, although I am sure there are plenty of others I’ve not yet stumbled upon. Firstly, once the base design has been prepared, creating further iterations is a more time-efficient process, because the overall form (proportions and joinery, not to mention the construction process) have already been established. Instead, subsequent design time is focused on making adjustments to achieve a different functionality aesthetic, or to accommodate different materials. Those efficiencies are not confined to the time spent on design either. As Rich explains: “I tend to over-engineer a piece with extra structure or support the first time around. But the experience of each subsequent iteration allows for refinement or efficiencies to develop in the built to either save material or time, or to increase the flexibility of the design”.
_DPP7005

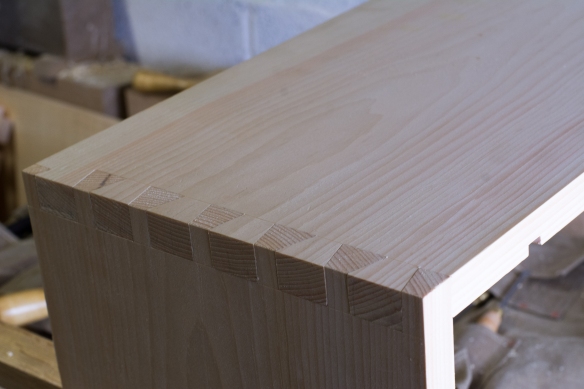
Dovetails for the first corner

Secondly, having an established based design already built (iteration one – in my case the Policeman’s Boot Bench) enables the impact of each design change to be readily compared and contrasted. Again, that might be in terms of functionality, or appearance. By expanding the uses of a base design, you develop an understanding of what functionality can be achieved within a given footprint or internal fitout. This reflects Danielle’s experience, as “it’s one thing to see a new pattern carved onto a flat board, but being able to use an actual shrink pot so I can see how the pattern relates to the shape of it allows me to make better informed decisions about what ultimately gets used on the final piece”, and for this reason she keeps all of her “practice boards and failed past projects”.

The Drawbacks of Iterative Design

No design process is perfect, so are there drawbacks to iterative design? The obvious one, to my mind, is that any process based on repetition or making adjustments to a base design, has the potential to limit design language and result in a narrower breadth of work. Danielle’s experience would support this, and suggests that “iterative design holds me back – I tend to think smaller, be more conservative, and limit myself”. Richard adds that “I think you can become too comfortable with your ‘hammer’ and perhaps have a blind spot for other approaches”, although staying interested in other makers’ designs and approaches can counterbalance that risk.
_DPP7202

Conclusion

Within the context of a broader approach to design, I’ve found that iterative design can be a useful tool, and one which has some very beneficial attributes. What I find really interesting about using the Policeman’s Boot Bench as a base design is that making changes to the internal layout requires only moving the location of the dados, which really emphasises the flexibility of both the joinery and the design. As Rich observed about his own experience with iterative design “when the project I am building can [make use of an established design feature], I know I can rely on solid experience and approach, and focus on details and aesthetics and not on behind the scenes building techniques”.

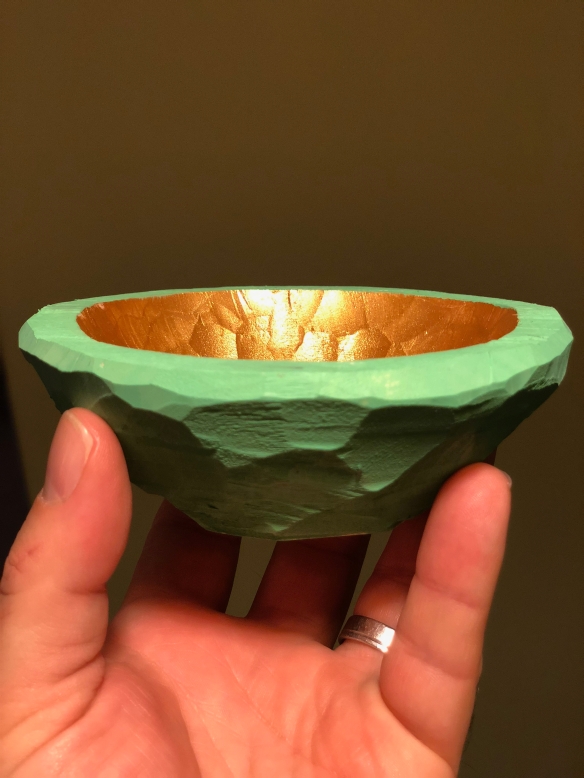
At its root, this iterative design process is about developing a design language and experimenting. In fact, the more I dig into this as a process the more I find that I am engaging in a design conversation with myself and the overall brief of the project. Building that design language presents the opportunity to explore ideas, and draw upon previous experience to trial new approaches As Danielle explains, “when I first got into bowl carving, I set aside ten or so maple bowl blanks and let myself go wild on them, entertaining any and every idea I had so I could find the extremes of what was possible, including texture. I also have bowl failures that I keep around. This comes in handy during the iterative design process because it allows me to easily expand on previous ideas that I’ve hashed out on these testers seemingly picking up where I’ve left off”.
IMG_1370

Bowl by Danielle Rose Byrd

This represents my first forays into iterative design, and the experiences of some other makers. And so, I shall finish with a challenge – next time you come to design a piece, ask yourself if you need to start from scratch, or whether you have already built a base design that could be adapted. This approach may save you time and provide some unexpected results.

In Print and Covered Up

IMG_2768

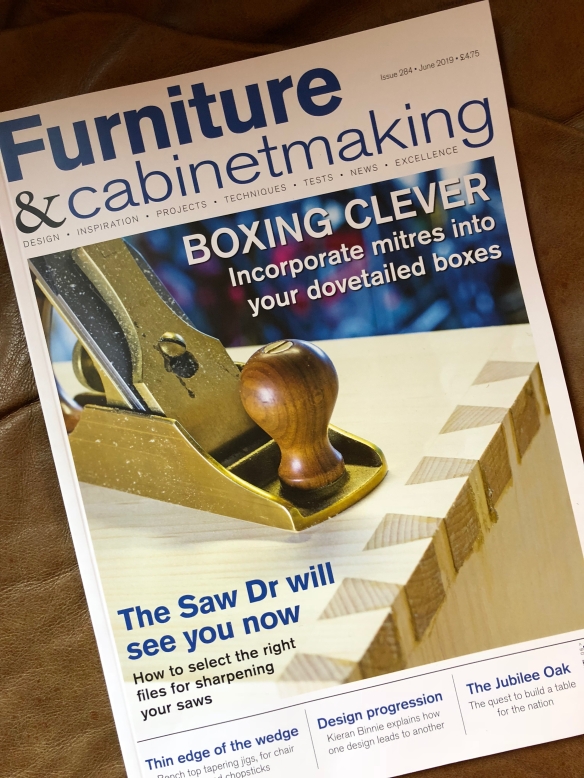
Issue 284 of Furniture & Cabinetmaking is now in print and features a wealth of interesting content by Mark Harrell (on saw sharpening), Rich Wile (on the Midlands Woodwork Show), and Derek Jones (on box making). Also featured is my article on iterative design process. This article uses the example of how the base design for the Policeman’s Boot Bench evolved into the Back to the Boot Bench, and as well as insight into design process from Danielle Rose-Byrd and Rich Wile (both of whom graciously agreed to be interviewed for the piece, for which I am most grateful).

This article is my 34th piece for F&C, but the first time that I’ve contributed the cover image, which I am very excited about.

IMG_2770

The Policeman Calls…


Issue 265 of Furniture & Cabinetmaking is now in print. Along with the usual compliment of articles on design, technique, and tool reviews, is a project article for The Policeman’s Boot Bench. This is the first major project article I’ve had published, and seeing the beautifully presented construction drawings (which were much nicer than the plans I drew before I built the piece) was a real thrill.

If The Policeman’s Boot Bench isn’t enough to tempt you, issue 265 includes more tricks of the trade by Ramon Valdez, an introduction to chip carving, an explanation on how to make 18th century cross-grain moulding, and a collector’s guide to gimlets.
The Policeman’s Commission

My workshop has felt very empty since the Policeman’s Boot Bench was collected by the client a couple of weeks ago. I was delighted when the client sent me a photo of the Boot Bench in situ, and even more so when he very kindly sent the following (unsolicited) testimonial with the suggestion that I post it on the blog. Long standing readers have had plenty of discussion this year about the Boot Bench from my perspective – now it is time to hear about it from a different vantage point.

SONY DSC

As the (now ex-)policeman alluded to in many blog posts on Over The Wireless, I felt bound to exercise my Internet-given right of reply about the build. For anyone thinking of using a craftsman for a specific piece of work, I hope this provides some insight into the experience.

As the client, the process has been fascinating, and unexpectedly gratifying. I came to commission this build basically because the furniture market wasn’t giving me what I wanted. Two years ago I bought my own house in a slightly shabby part of the East End of London. I have been doing it up ever since. It’s a Victorian terrace with a long, narrow hallway – an awkward space for storing shoes. For whatever reason, the British furniture market does not do shoe storage very well. You either get horrid IKEA plastic trays for the wall, a monstrous church pew/bookcase hybrid from a ‘posh’ (read: overpriced) retailer, or a flimsy Argos open-frame that achieves an anti-TARDIS effect: taking up egregious amounts of space whilst storing very few shoes. With no good options, I mulled for some months. Then whilst griping to Kieran about the perennial First World problem of unsatisfactory shoe rack choices at his daughter’s first birthday last year, I realised with a start that I was chatting away with a skilled amateur furniture maker.
SONY DSC

I floated the idea of the build, and a commission was rapidly and enthusiastically agreed. The process was pretty simple. I had in mind, after many months of internet scouring, a rough vision of what I wanted. During September I drew up detailed sketches of front, side and base, including proposed dimensions, and passed them to Kieran. He responded with a request for photos and measurements of the space in which the piece would sit, to help in judging dimensions, materials and finishes – in particular as the boot bench would sit next to a radiator. He then suggested some fairly mild adjustments: less dainty feet, deepening the dimensions to accommodate bigger shoes (such as his own), a shift in style from country kitchen to Arts & Crafts, and the addition of a back panel to protect my hallway wall from scuffs. I was generally satisfied, but asked that the feet lift (to expose my prized encaustic tiled floor). I also rejected a suggestion of decorative nails to secure the shelves, as it was out of keeping with the style of the existing furniture in nearby rooms. The result was an elegant, practical piece that will work in many different settings as I move over the years.

From October it was over to Kieran for by far the greater part of the work. Every weekend for the following nine months I had the pleasure of prose and photos describing the latest progress on the build. First came heavy planks of wood, which I had the chance to see in person on a visit in December. These were left to acclimatise to the environmental conditions of the workshop. Then work started in earnest on New Year’s Day, and out of the rough lumber came unexpected geometry: smooth planes and clean lines, neat grooves for the shelves, and lastly sharply toothed dovetails. Kieran kept consulting where needed, such as when I requested a deeper curve to the foot detail for aesthetic reasons.

SONY DSC

In February, Kieran sent me out a sample board of waxes and shellacs – unremitting professional that he is. I had seen pictures of the sample board on my phone, and had one choice in mind of black wax and a reddish shellac, which would lend the wood a warm, grainy look.  In hindsight it would have been an error to choose without seeing the samples in person first as I surprised myself with my choice of a black wax and blonde shellac. These coats created a strong contrast, showing off the grain but maintaining the underlying cool tone of the wood. I was also able to visualise properly for the first time how the hallway would hold together visually: invaluable.

Spring saw the delicate process of fitting together all those carefully prepared boards, and the transformation from lines on a page to a three-dimensional object. My role in this period mainly consisted of frantically opening each of Kieran’s weekly updates, and thinking of new ways to express my excitement at each new development. In fitting the backboards, Kieran managed to sneak in an element I had ruled out: the decorative nails, which I had thought too chunky and visually out-of-keeping with other furniture in the house. I still think the original call was right, but I am glad of the cheeky addition at the back. It added interest to a part of the object that would otherwise be relatively dull, and will remind me of the build process every time I move the boot bench. Kieran is a fan of subtle gestures like this – such as the roughly scalloped underside of the shelves, and the out-of-the-way placement of his maker’s mark.

SONY DSC

I should warn and confess other readers that it has been something of a torment to have our joint vision realised so gradually. But, like a good TV series, it has been worth the wait for each installment. And, knowing Kieran’s busy family life and career, it has been touching to see the regular commitment of his spare time. That’s one thing to bear in mind with an amateur commission: it does take time. From that initial conversation to collection was exactly a year – of which seven months was building time, and the rest was faffing on my part. I would estimate that the build time would equate to about three or four weeks’ work if done full-time (although there were additional deliberate delays to allow the wood to adjust to its environment). As a generally impatient person, the waiting was difficult but not unbearable for me.

SONY DSC

And a few weeks ago I was finally able to achieve catharsis after months of anticipation: I rented a car and drove up to collect the boot bench while attending another gathering at Kieran’s house. First order of business on arrival was to view the boot bench in person. I was very, very satisfied to finally be able to see, walk around, touch, examine and test the weight of the thing. It has an unexpected solidity, and is a surprisingly tactile experience. After allowing other guests their own viewing, several of us carefully hoisted it into my boot, where I swaddled it in blankets. No longer bound to this build, Kieran took an expansive turn and began discussing more furniture to come from his workshop – including a more complicated variation on the boot bench for his own hallway. I meanwhile made an early exit, so I could get home at a reasonable hour and make use of my heavy-lifting housemates.

With the boot bench finally in position, my hallway has gone from messily cluttered to a state of butch elegance. The careful consideration of shape, proportion, material and finish have made the space substantially more functional and beautiful. My housemates have also stopped the boot-rack related banter (it’s a shallow seam to mine). The final seal of approval came this weekend from my mother, who dressed and photographed the boot bench for me – and said she’d be tempted to make a commission of her own.

The Policeman’s Boot Bench – glamour shots

Two weeks ago photographer Gareth Partington spent an evening in the workshop for a photo shoot of the Policeman’s Boot Bench and Esmerelda. I’ve been meaning to build up a portfolio of my work for some time, and Gareth’s photography is fantastic (seriously, check out the portraits on his site), so I was very pleased when he agreed to take photos for Over the Wireless. The photos of Esmerelda will follow in a separate blog post, but for now, here is a beauty pageant for the Policeman’s Boot Bench.

_DSC9069

The Policeman’s Boot Bench.

_DSC9022

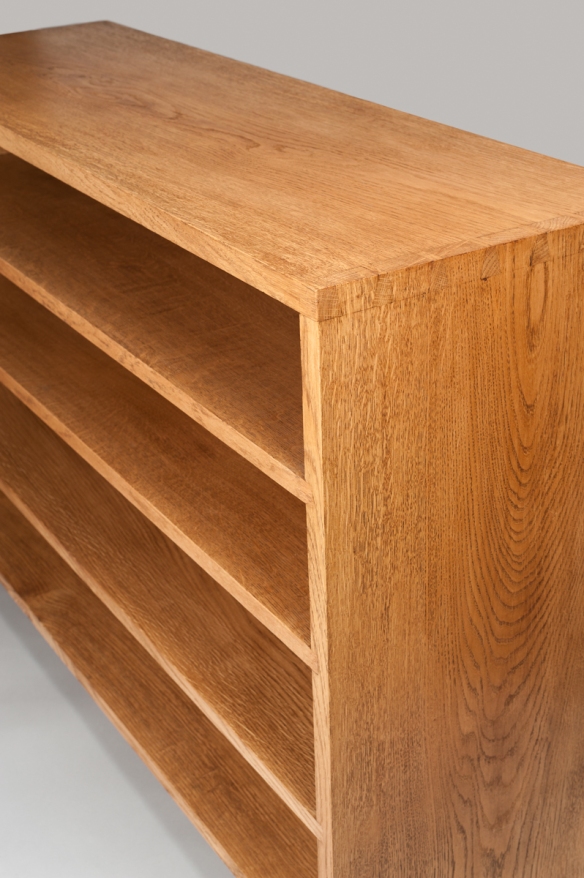
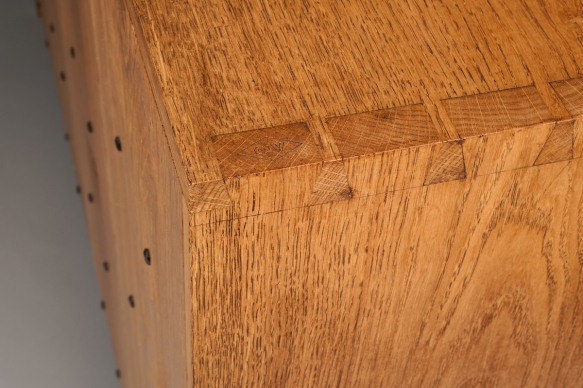
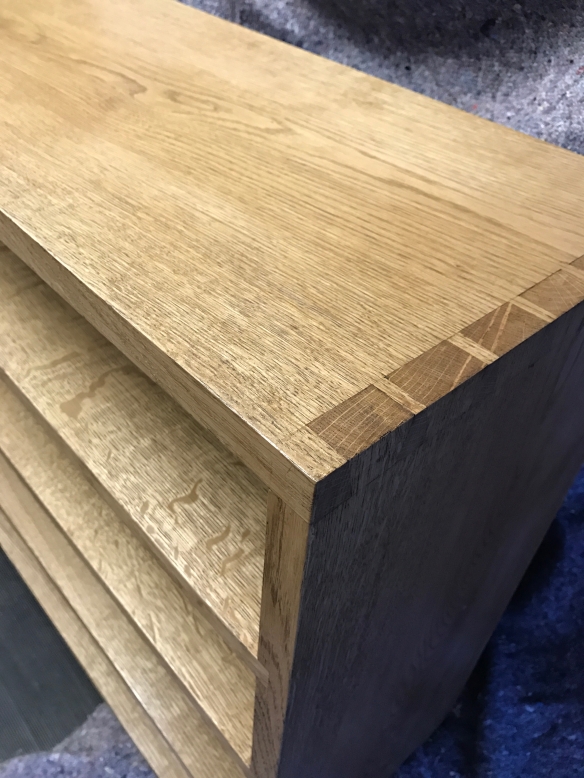
Dovetails and dados. For this piece I wanted to emphasise simple but effective joinery as well as clean lines.

_DSC9039

The shelves are orientated so that the most attractive quartersawn grain and medullary rays are at the front edge.

_DSC9059

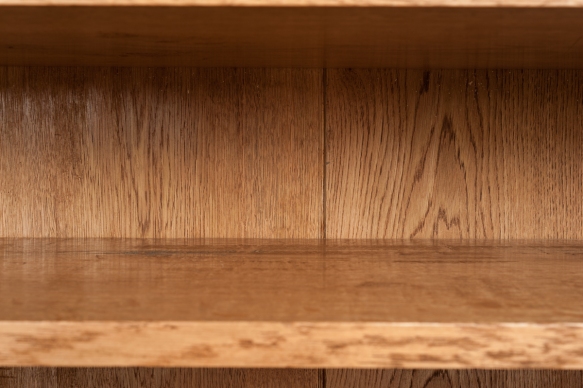
Tongue and groove backboards with a simple 1/8″ bead. Simple and classy.

_DSC9080

The confluence of several features – dovetails, rose head cut nails, and my maker’s mark.

_DSC9084

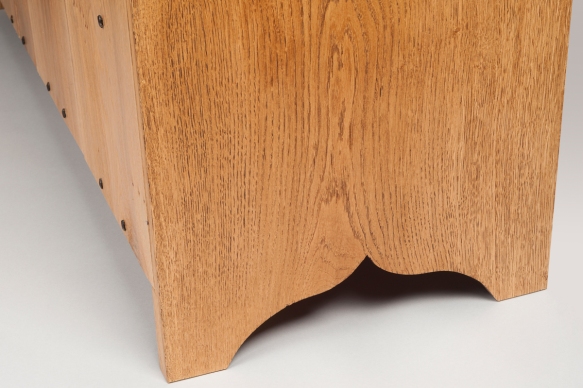
The foot detail came out really nicely, and gives a real lift to the piece. And the best thing? It’s all simple pre-industrial geometry.

_DSC9083

Rose head cut nails fastening the backboards to each of the shelves.

_DSC9090

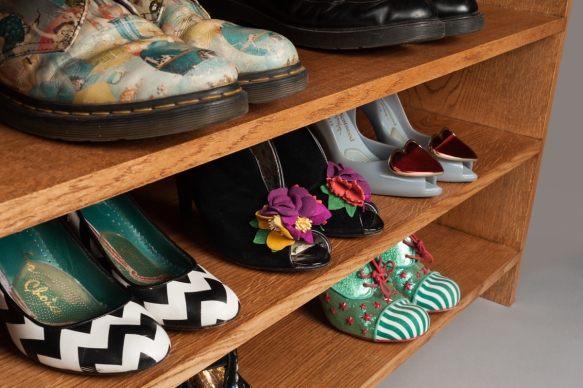
And dressed. Featuring a selection of mine and Dr Moss’ shoes.

_DSC9127

I’m not sure the Policeman will be using shoes quite like these…

The Policeman’s Boot Bench… part 15

After seven months hard work, the Boot Bench is finished and safely swaddled in blankets awaiting collection by the client. And while that would make for quite a pithy blog post, it does miss out the final stage of the build process, so let’s rewind a little.

IMG_6604

One finished boot bench – no filter necessary on timber this pretty.

At the end of my last blog post the wide faces of the Boot Bench had been cleaned up and given the first coat of shellac. Next I turned my attention to the front, which is mainly made up of the thin edges of shelves and casework. The process for cleaning up these edges was very much the same as for the main elements of the casework – removing as little material possible with my No.3 smoothing plane to remove the last traces of glue and stray fibres, to reveal clean surfaces and crisp joinery. Because I was working relatively narrow edges (1″ wide for the carcase, and 3/4″ wide for each of the shelves) the cabinet scraper was not appropriate for this work, as there can be a risk of rounding over the corners. Instead, the little L-N No.102 came in handy to clean-up a few areas where my smoothing plane could not reach. For planing the dado joint (where the grain of the sides is running at 90 degrees to the grain of the shelf), skewing the smoothing plane 45 degrees into the cut helped to plane the shelves and sides without any tear-out on either surface.

IMG_6545

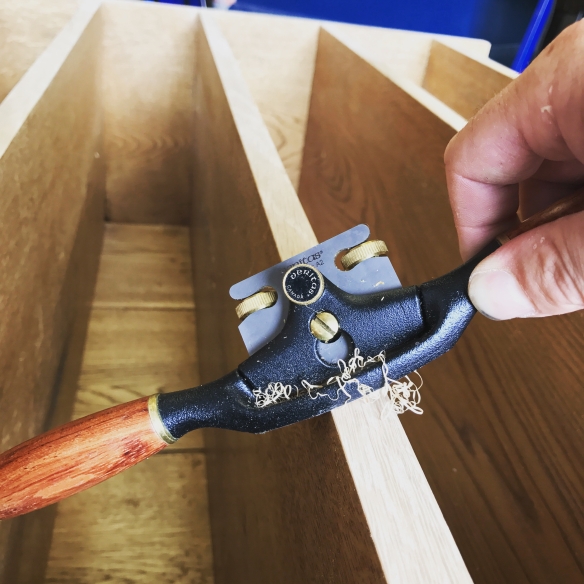
Creating a gentle roundover on the top edge of each shelf with the spokeshave

I then gently rounded over the top edge of each shelf using a spokeshave, with three or four passes at 45 degrees to the edge of the shelf, and then three passes either side to blend in the new facet. A gentle round over like this should help to protect the edge from chipping out if the soles of shoes catch when being removed. Originally I had planned to use a scratch stock to bead the front edge of each shelf, but having spent some time looking at the Boot Bench as a whole I decided that four extra beads would (no matter how fun) be too much, particularly as the client prefers understated pieces.

There was a small knot on the front of the bottom most shelf, and instead of filling this with black tinted epoxy (as I had done for the internal knots) which would have drawn the eye to the knot, I mixed up a filler using shellac and oak sawdust, which filled the crack while blending into the timber. Once the filler had dried I brushed on the first coat of shellac to the front of the Boot Bench, and left to dry.

IMG_6547

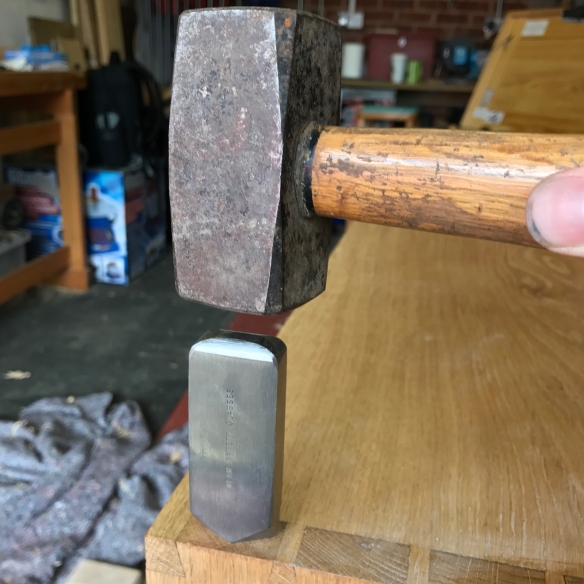
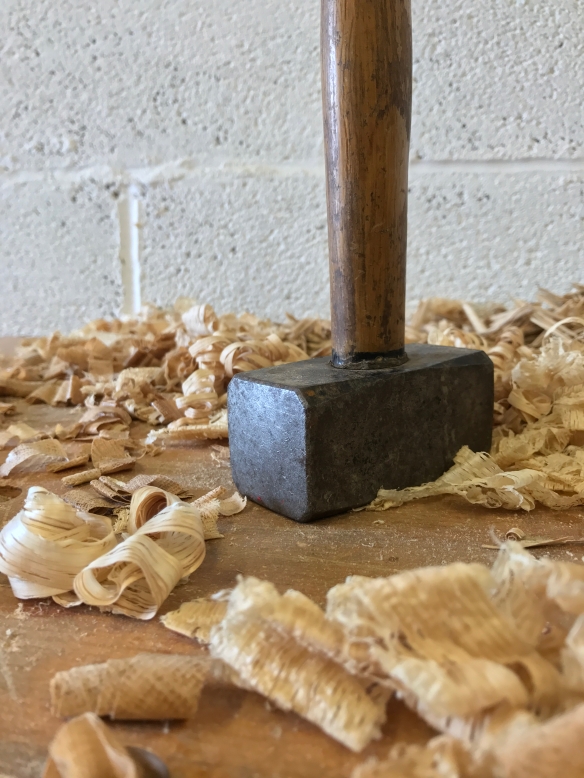
Introducing a 2lb lump hammer to something you’ve been building for 7 months? Not terrifying at all, why do you ask?

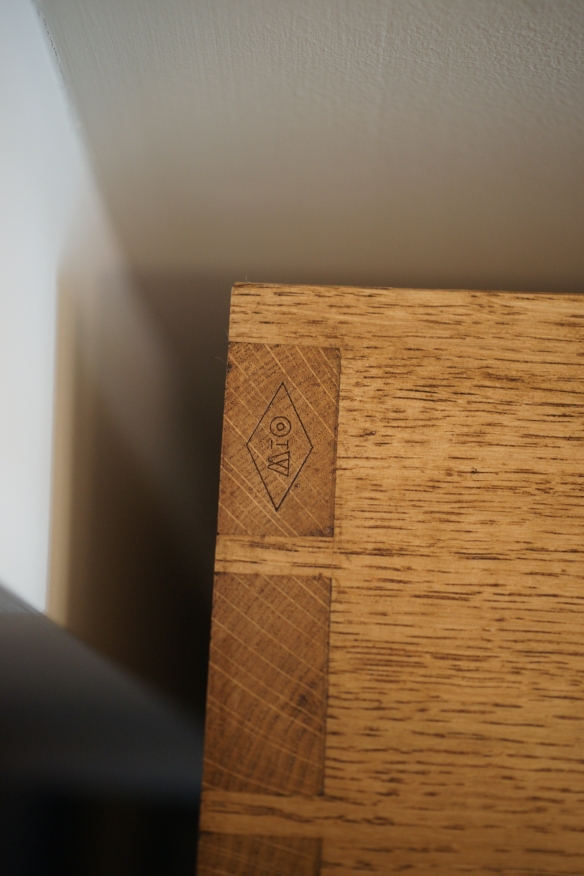
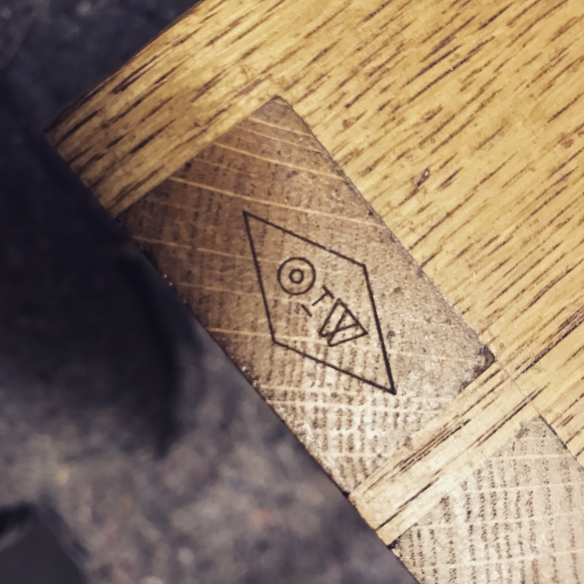
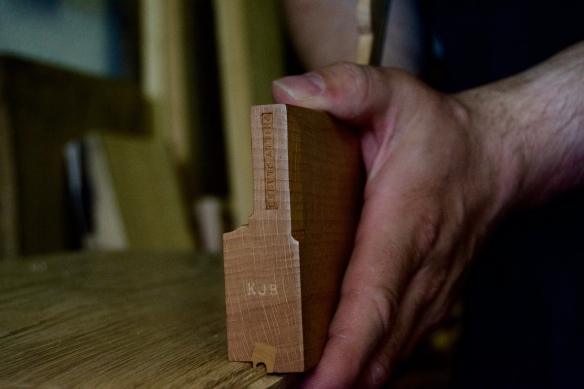
The final touch, before applying the second coat of shellac, was to apply my maker’s mark. The stamp works best in end grain, and I selected the end of a tail, at the back left corner of the top. Although an exciting milestone in any project, it is also a little terrifying to start hammering the product of many months work with a 2lb lump hammer. Fortunately this is one of the instances where a heavier hammer provides more finesse. Instead of pounding away at the stamp to leave a deep mark (which would be necessary with a lighter hammer), the weight of the lump hammer did all of the work, leaving a crisp impression in the hard oak end grain with minimal effort and no risk of damage to the piece. This is a subtle touch – it is there for people to discover, but is still discreet (1″ wide) enough not to dominate the piece.

IMG_6627

The maker’s mark after a coat of shellac and dab of black wax

I then gently wiped down the shellac with 400 grit paper, just to remove the highspots and leave a smooth texture, before brushing on a second coat to all external surfaces. Having left the second coat to dry and harden over several days, I then returned to wax the external surfaces. Black wax is an easy finish to apply, providing you use thin coats – there is a risk of putting too much on which can be hard to buff out, and results in a blotchy finish. I wiped the wax on sparing with a lint free cloth, only adding more once I had worked the wax deep into the open grain – my aim was to enhance the grain not obscure it. Once the wax had dried I then buffed it out thoroughly with a clean cloth.

IMG_6597

When the wax was buffed out, I sat in front of the Boot Bench for 30 minutes or so, in silence, just taking in the form and detail of the piece. Every project is a labour of love, if it wasn’t then there would be precious little reason to build anything. But this build has been a hugely important process – the first piece of furniture I’ve designed from scratch, and my first paying furniture commission. Building something for someone else is always a huge responsibility (not to mention a privilege). I’m proud of this piece, and hope the client will enjoy it.

Pretty Up

Or, The Policeman’s Boot Bench… part 14

IMG_6412

Sharpening can be a real bore, but I find it can also help to focus the mind on what comes next

I spent today cleaning up the exterior of the Policeman’s Boot Bench. It is always a big step to start cleaning up a project ready to apply finish, not to mention a critical stage of the work – applying a finish will highlight any imperfections or mistakes, so taking your time to getting everything looking pretty “in the white” is time spent wisely. To get in the right mindset, when I came into the workshop I headed straight to my sharpening station and sharpened the planes and cabinet scrapers I expected to use. Even if I had sharpened them last time I used them, they went back to the sharpening table for a fresh hone. Not only did this ensure that everything was as sharp as I could get it (I don’t want any tearout when finnessing the exterior faces of the casework) but most importantly I found that it helped get me in the right sort of mindset for the work ahead.

_DPP3589

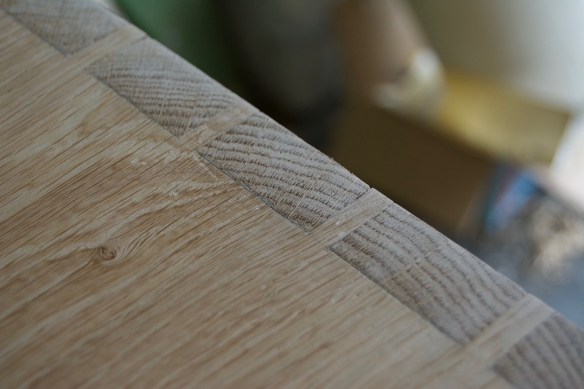
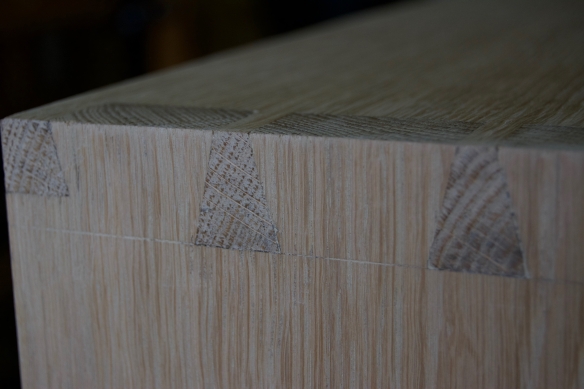
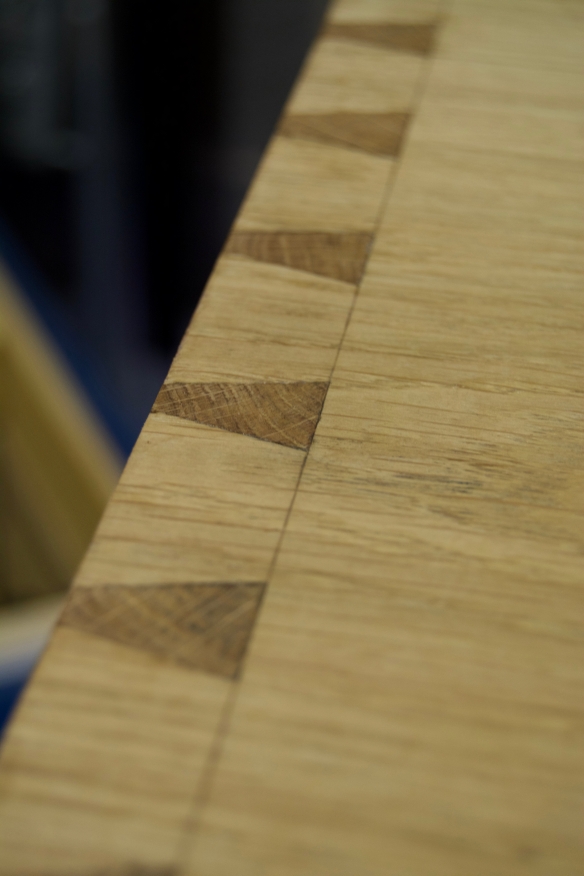
Cleaned tails

I find that for final surfacing and clean-up work it pays to have a plan of attack – the last thing you want to do is brush shellac onto a surface only to realise that you’ve not cleaned up it up fully. This is all the more so for the boot bench, where the open fronted shelves means that there are a lot of different edges and corners to pay attention to. I decided to ignore the front of the carcase for this session, and to focus on the faces of the wide boards, starting at one end before moving onto the top, and finally finishing at the other end. This meant that I could gently roll the boot bench onto one end, and then finish work with it standing on the opposite end. Fortunately, the boot bench has enough weight that when standing on a pile of blankets it does not move across the floor while being planed.

_DPP3600

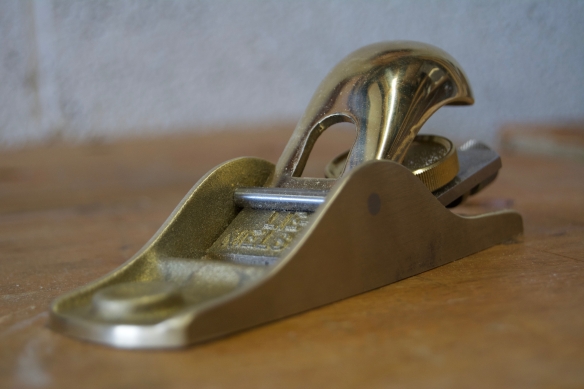
The No.102 block plane is a new addition to my tool chest, but is already becoming a firm favourite

Because I had left the pins of my dovetails slightly proud, it was important to flush these up without chipping out any end grain, before working the rest of surface of the end pieces. I used the little Lie-Nielsen No.102 block plane for this, which worked in a very controlled manner to slice away the proud end grain prior to smoothing the rest of the board with the No.3 smoothing plane. Although I normally use a 60 1/2 block plane, I really like the 102 for delicate work, as it is perfectly sized and weighted to fit in one hand during use, meaning that you can hold the workpiece steady with the other hand. There were a few difficult patches of grain where I had to resort to some very localised sanding, for which I used Abranet 220 grit on a sponge sanding block. I’ve not used Abranet before, but after reading several glowing reviews I thought I would give it a try, and so far it does seem to be the best abrasive I’ve used. I blended the planed and sanded surfaces together using a cabinet scraper, which gave a consistent finish across the face of the board.

_DPP3586

A well tuned cabinet scraper is perfect for cleaning surfaces prior to applying finish

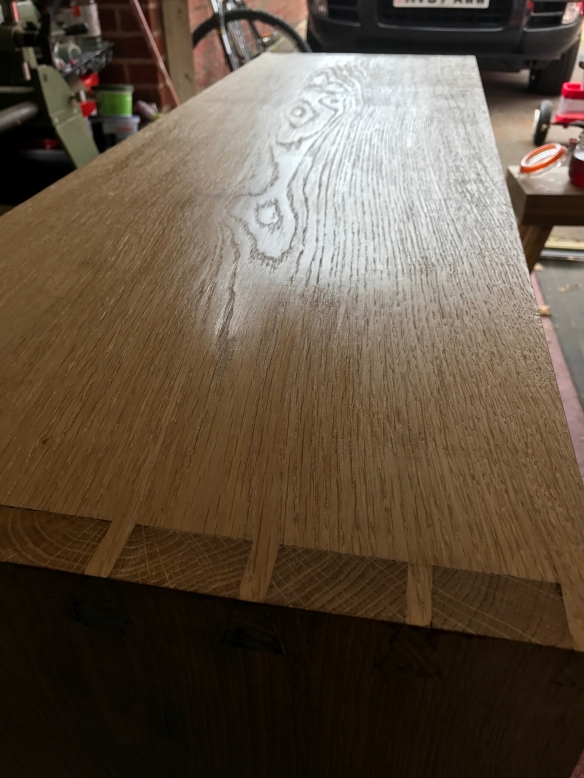
I then repeated the process for the top, with one significant diffence. With the end pieces I was able to work from the dovetailed corner down towards the feet. However the top is dovetailed at both ends. Planing off a dovetailed corner would chip out the end grain on the tails, resulting in plenty more clean up and patching. Instead, I worked from one corner, stopping an inch or so before the dovetails of the opposite corner. Then it was a matter of working in the opposite direction until both corners were flushed up and clean. A cabinet scraper helped to blend the transition between the two directions of working, and by lifting the scraper off the workpiece before I reached the very end, I was able to avoid any spelching.

_DPP3595

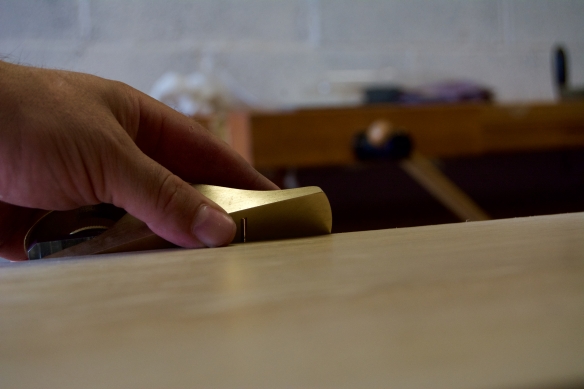
Chamfering the back edge using the little No102 block plane

As a final touch, I lightly chamfered the aris of the rear edge of the carcase, using the No.102 block plane. Oak is tough, but can be prone to splintering on the edges, and so removing the sharp corner helps to protect the edge from breaking.

_DPP3590

The half pin at the left hand side hides the rebate for the backboards

With the three wide faces cleaned up, I decided to apply the first coat of shellac while the wood was freshly planed and scraped, to avoid the fibres darkening through oxidization during any delay to finish. I used the same 2lb cut of blonde shellac as for the interior of the carcase, brushed on with a 1″ Gramercy ox-hair finishing brush. The shellac brought out the grain and added a little pizazz to the dovetails.

_DPP3608

Shellac really makes the dovetails standout

All that remains now is prettying up the front of the carcase, applying the rest of the shellac and wax, and (most importantly) stamping the boot bench with my maker’s mark. More on that next week.

IMG_6410

The first coat of finish on the top is really bringing the grain out

The Policeman’s Boot Bench… part 13

The final back board is now fitted, which means that the casework for the Boot Bench is now complete. This feels like quite a milestone after six months of work.

IMG_6303

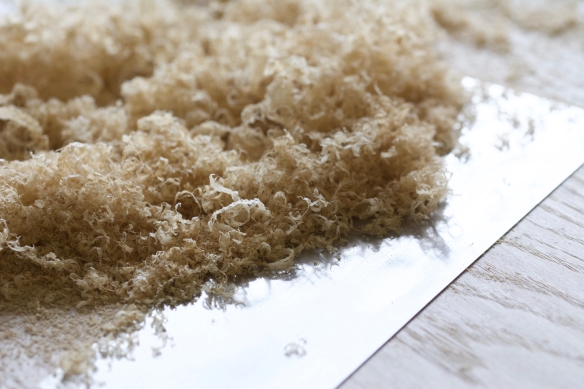
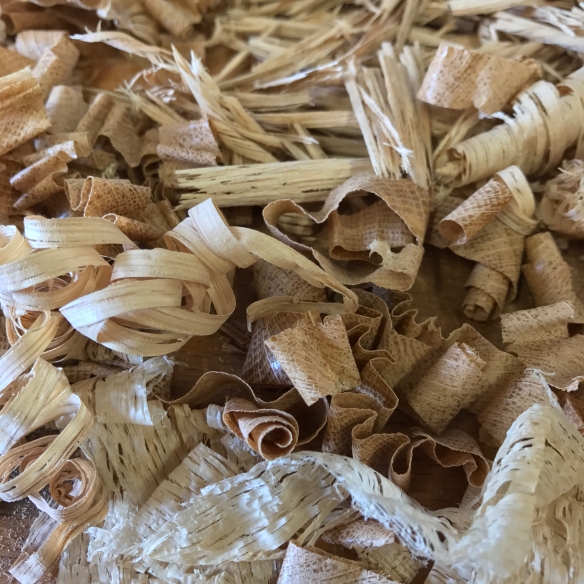
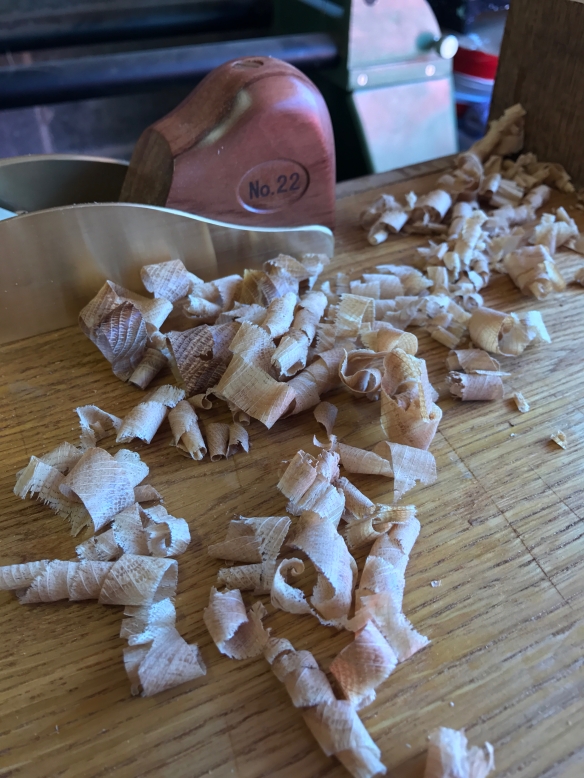
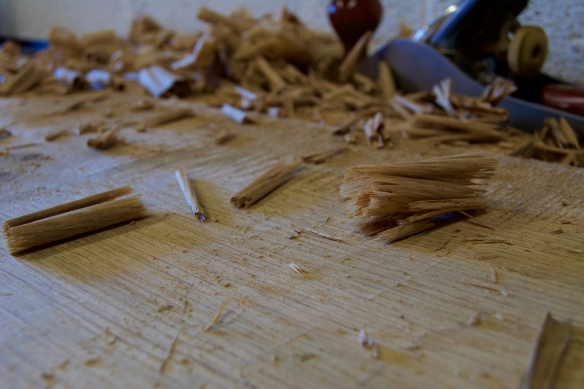
The pile of shavings on my workbench tell a story of the day’s work – thick cross-grain shavings from traversing a board, wide jointer plane shavings, fine smoothing plane shavings, end grain shavings from shooting work square, and curly ribbons from edge jointing.

Fitting this board was similar to the others (it is after all just a 1/2″ thick tongue and groove board) with a few additional steps to reflect the fact that is was to go between two boards which were already fixed in place. After processing the board to final thickness I selected the best side to face into the casework, as this will be the side that is viewed when the client puts their shoes on the shelves, and shot square the end that fits into the rebate in the top.  As I’ve written before, I like sizing components off the rest of a project wherever possible, and if I can get away without using numbers to measure then I’m always happy. To bring the back board down to the final width I decided to dispense with my rulers and instead use the hole in the back to determine the width. To do this, I cut the tongue on the left hand side of the board, and laid the board in place with the shoulder of the tongue lying against the edge of the adjacent board. This gave me a good indication as to how much material needed to be removed before I planed in the groove on the opposite edge of the board.

IMG_6313

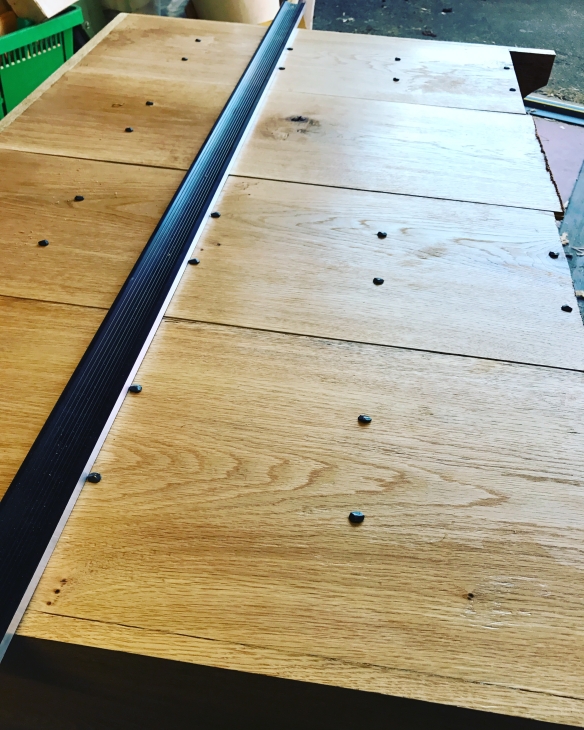
Using a straight edge and the existing nails to locate the edge of the shelf under the back boards

Once I had brought the board down to that rough width, I planed in the groove and tried a test fitting, which told me that the board was a little too wide to allow for expansion gaps on either side. Tongue and groove joinery is pretty forgiving for this sort of test fitting process, especially when using a dedicated plane like the Lie-Nielsen No.49 where the fence is held in a precise and repeatable position to the cutter and where the plane stops cutting once a predetermined depth is reached. Reducing the overall width of the board was a simple matter of taking a few full length passes from each long edge with my jointer plane, restoring the depth of the tongue and groove with the No.49, and then test fitting the board, repeating until I had a clean fit with even expansion gaps on both sides.

IMG_6305

The lump hammer looks like a brutish tool, but actually it has real finese. Impersonations of Thor are entirely at the user’s discretion.

After finishing the board with shellac and wax I used a 2lb lump hammer to knock it into position. I’d previously not thought of using a hammer of this weight for furniture making, but after Chris wrote about the benefits of wielding the sort of hammer that would make Thor proud, I thought I’d give it a go. The lump hammer crushed the end grain of the board a little, but I had anticipated this and left the board over-length so that any damage could be trimmed off.

When fitting the other back boards a portion of each shelf had been visible, which made locating the pilot holes for the cut nails easy. However with all the boards now in place, the shelves were completely obscured. My nightmares recently have been full of images of missing the edge of a shelf and pounding a cut nail into open air within the casework. To avoid this, I placed a large (50″) straight edge against the cut nails holding the other three bac boards in place, and located the pilot holes for the final board off the straight edge. This approach worked a treat, and I’m pleased to say that all 32 nails in the back fit neatly into a shelf (and breathe a sigh of relief).

IMG_6317

More real world testing for the Quangsheng No.22 – trimming the ends of the back boards flush with the bottom shelf. A full review of this plane will be in F&C later this year.

I want to roll the boot bench around my workshop floor as little as possible. And so while the the carcase was face down, I took the opportunity to clean up the back edge of the sides and top with my No.3 smoothing plane, and to apply two coats of shellac. I then stood the carcase upside down (on top of a pile of moving blankets to protect it from the concrete floor) and trimmed the back board ends flush. As a finishing touch, I cleaned up a small amount of squeeze out from the bottom shelf, and then chamfered the feet to ensure that no fibres blow out when the boot bench is moved into position in the client’s home. I’m sure there are more satisfying things in life than chamfering edges with a block plane, but I’m not sure I’ve experienced any.

IMG_6310

A crisp chamfer on the feet

The Policeman’s Boot Bench… part 12

The third backboard for the boot bench is now fitted, while the fourth has been partially processed. At the end of last week’s blog post I was intending to fully process and finish the final two backboards before fitting them at the same time. However while working on them I decided that it might be better to fit the third board, and then tweak the fourth to fit the remaining space, as this will give me a further opportunity to fine tune the fit of the final board.

_DPP3514

Flattening the reference face of the oak backboards

Over the past year I’ve written plenty about processing stock from rough, so I won’t describe the steps yet again. But while I was planing the backboards down to final dimensions, I was struck by how much this process has become second nature in the 12 months since I started working through The Joiner & Cabinet Maker. The projects in The Joiner & Cabinet Maker were really my introduction to working from rough stock, as it is not something that happens much in my lutherie work! Processing material in the rough can be an intimidating process for beginners, but with a little practice, and an understanding of why the process works, it is a straight forward matter to flatten and dimension even large boards by hand. Processing stock by hand is also an excellent opportunity to become familiar with the core trio of bench planes, and with working wood. All of which means it is definitely something I would encourage beginners to have a go at, and not be intimidated – just grab a jack plane and start making some shavings.

_DPP3527

Shooting the ends square with the Quangsheng No.22 mitre plane

The one change I made when processing these two boards was when it came to shooting the ends square. Normally I use a Lie-Nielsen No.51 with an Evenfall Studios shooting board. However, I had a Quangsheng No.22 mitre plane sitting on my workbench waiting to be reviewed for Furniture & Cabinet Making. I like to use review tools on real life projects wherever possible, as this gives me the best insight into how they perform. So as a starter for ten I set the Quangsheng up on a smaller shooting board made by Derek Jones, and planed the ends of the backboards square on that set up.

_DPP3539

Using cut nails to space the expansion gap between the boards

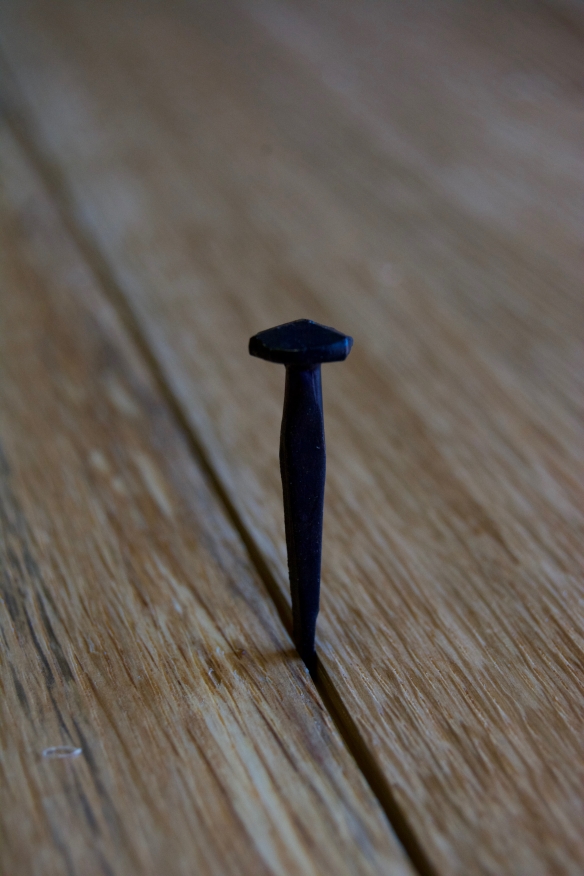
Cut nails allow for seasonal expansion by bending slightly as the wood moves, which prevents splitting. To allow the nails to do their job it is necessary to leave some room for expansion in the tongue and groove joint. As we are in the middle of a very hot and dry spell (at least, for England) I left more expansion room than I would if I were assembling the backboards during the dead of winter (when the boards would be at their maximum expansion, and most likely to contract over the coming months). I separated the joint just enough to be able to stand the tip of a cut nail on the exposed tongue, and then lined up several nails along the joint to ensure a consistent gap. The backboard was then nailed to the shelves using two nails per shelf, on 3 1/2″ spacing from each edge of the board.

_DPP3540

To lay out the nails, I used a combination square and brad awl to mark the location, checking the alignment with the nails fixing the outermost backboards using a 50″ straight edge. A tapered drill bit then drilled pilot holes to a depth of 2/3 of the nail’s length. Once the board was secured to the carcase I removed the cut nails I had used as spacers along the expansion gap.

The final backboard will be finished and fixed in place when I’m next in the workshop. After that, I’ll be onto making the exterior pretty and applying the finish.

IMG_6111

Looking inside the casework shows the beading detail on the tongue and groove joint.

The Policeman’s Boot Bench… part 11

The first two backboards have now been fitted to the Policeman’s Boot Bench, which means that I have only two more backboards to go before the casework is completely assembled. The end is truly coming into sight now!

_DPP3504

Ignore the front knob and push the fence into the workpiece for a straight cut.

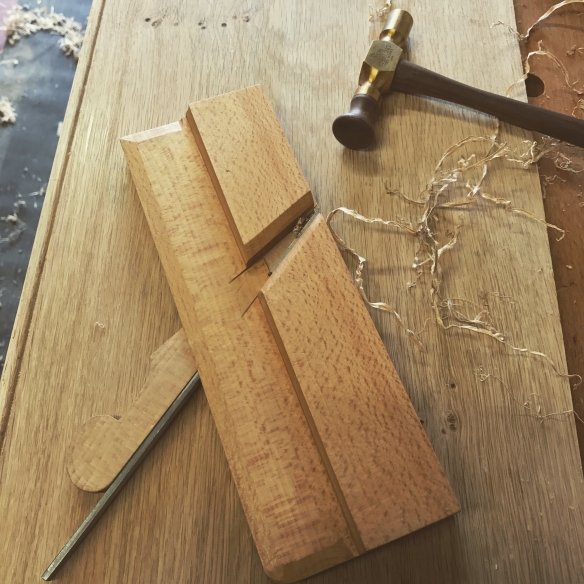
After my test cuts with the Lie-Nielsen No.49 last week, I was ready to cut the tongue and groove on the backboards. The No.49 is very easy to use and produces repeatable tongue and grooves in 1/2″ material, so I expect that it will see heavy use in my tool chest. Although it is a simple tool, there do seem to be a couple of key pointers to get the best out of it, and to my mind it behaves quite like a cross between a plough plane and a rabbet plane. Rather than take full length passes from the first push, I started at the far end of each piece with short passes that increased in length until I was planing the full edge, very much as you would with a plough plane. This helps establish the cut and prevents the plane from wandering off the line. The sole of the plane is not flat, rather it is shaped into a tongue and groove profile. This clever design means that once the cut is established, the sole of the plane will run in the emerging tongue and groove, and stop the plane wandering.

_DPP3507

The sole of the No.49 is profiled to match the tongue and groove it cuts. This pofile keeps the plane cutting straight and true.

Keeping the plane square to the workpiece is critical, and this requires correct body position. Firstly, I ignored the knob at the front of the plane, and instead kept my left hand on the fence, pushing the plane into the workpiece while my right (dominant) hand pushed the plane forwards. Secondly, I kept my head over the workpiece, just to the right hand side of the centre line – the same body position as I use with rabbet planes. I find this pushes the fence into the workpiece and counterbalances any tendency to tilt the plane to the left handside.

IMG_6053

Philly Planes 1/8″ beading plane, and the Sterling Tool Works plane hammer.

Finally, to avoid bruising the tongue and groove with the sole of the plane, I did not lift the plane out of the cut on the return stroke, but simply slid the plane backwards before pushing through another cut. The result was a crisp tongue and groove in only a matter of minutes.

_DPP3512

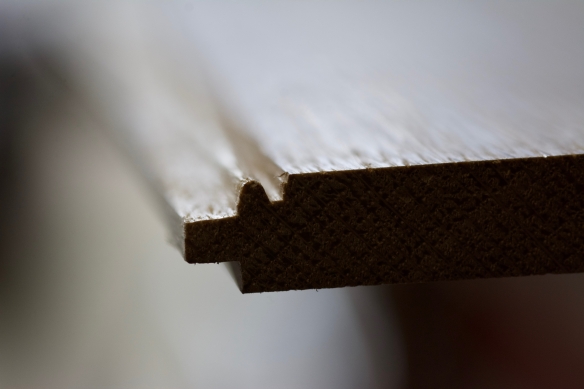
After so much stock processing and joinery recently, I decided to spend a couple of minutes adding some subtle decoration to the boot bench. To enhance the appearance of the backboards I beaded the edge of the grooved board using my 1/8″ beading plane from Philly Planes. This is one of the most fun tools I own, but more importantly the shadow line from the bead will give the joint between the backboards a nice visual flow, and stop the transitions from one board to the next from being too abrupt.

_DPP3510

The beading profile on the tongue half of the joint.

After beading, I gave the front and back of backboards two coats of blonde shallac, followed by a coat of Libern Black Wax to the front face (which will be visible inside the bootbench).


As I mentioned previously, the shelves were over-width when the boot bench was assembled. Fitting the backboards would require placing the bootbench face down, and while the shellac on the backboards was drying I trimmed the front edges of the shelves until they were flush with the sides and top of the carcase. This was a slightly awkward operation as the bootbench is too big for my workbench, and I don’t have enough saw benches to put one under every corner. The result was weilding a No.8 jointer while kneeling on a concrete floor. Not entirely comfortable, but the pay off was removing the excess material and dried glue to reveal tight and well fitting dados.

IMG_6064

Cut nails and my Black Bear Forge hammer – a dream combination. Angling the nails slightly increases their holding power.

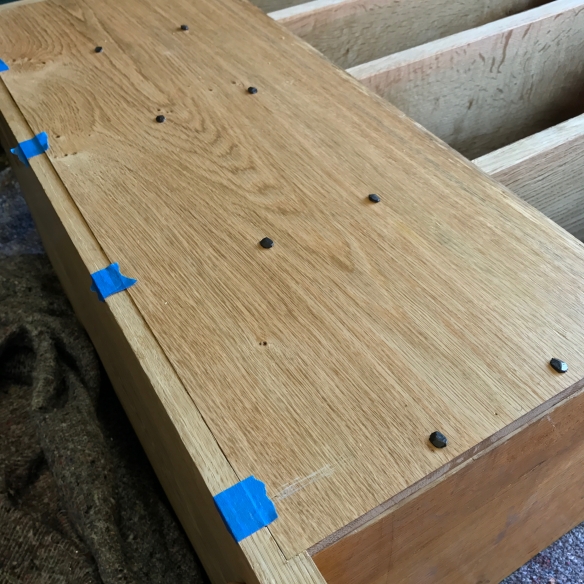
Once the shelves were flushed up I was able to maneuver the boot bench face down on a pile of moving blankets, and fit the backboards. The first two backboards were fitted one at each end, as this means I can adjust the size of the remaining backboards to fit the precise space available. Each backboard was glued down their outermost long edge into the corresponding rabbet, and nailed to each of the shelves with decorative wrought head cut nails from Tools for Working Wood. As the backboards are 10 1/2″ wide I used two nails per shelf, on 3 1/2″ centres. Pilot holes were drilled using a tapered drill bit and my Grandfather’s egg beater drill, and the nails were knocked in using my 16oz hammer by Black Bear Forge. This combination of one glued edge and nails gives the carcase further rigidity but still allows for wood movement as the nails will bend under seasonal expansion and contraction. The nails are gorgeous, and even if they won’t be seen once the boot bench is installed it pleases me to know they are there. The inner two backboards will be nailed in, but not glued.

IMG_6068

One backboard fitted – the blue tape reminds me where the top edge of each shelf is.