If you have to ask the question…

… you already know the answer.

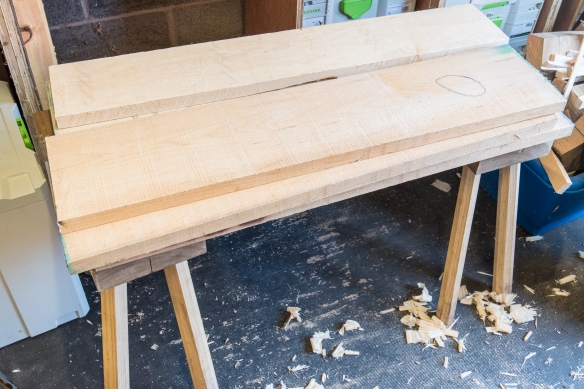
When I cleaned up the first panel for the boarded bookcase (which I’d glued up back in September 2018) I found a joint that was structurally sound but the glue-line for which was far mor visible than I would have liked. This panel was for one of the bookcase sides, and so would be one of the most pominent components of the finished piece.

IMG_6949

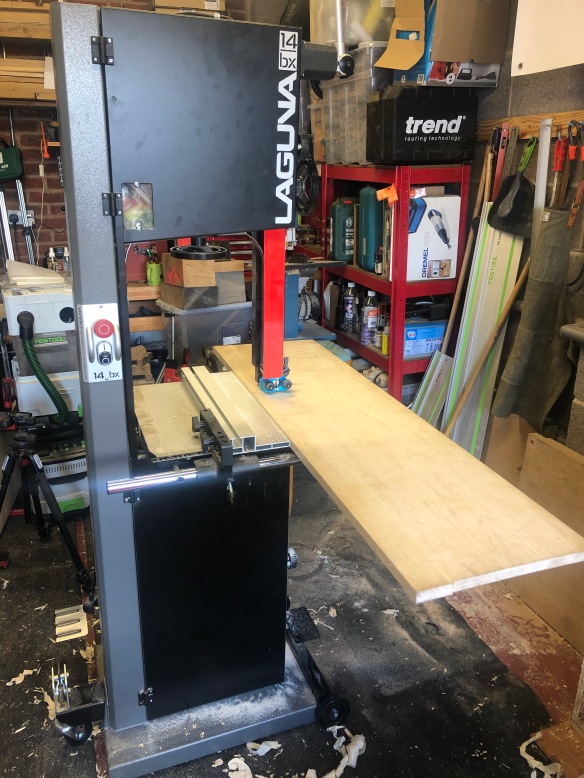
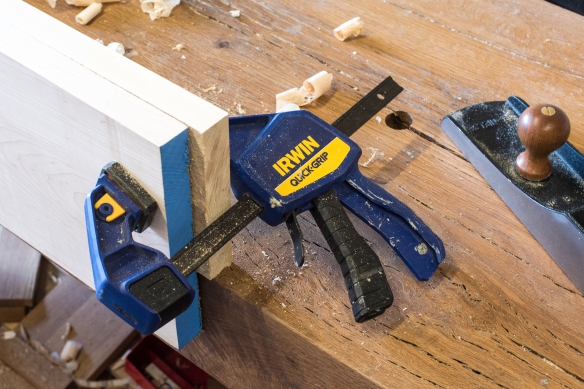
The bandsaw made removing the waste a precise and predictable exercise

What followed was hours of agonising:

  • Could I orientate the panel so that the glue line was in a less obtrusive place? Yes, but I’d still know it was there.
  • Would you even notice it in the context of the finished piece? Possibly not, but I’d still know it was there.
  • Would knowing it was there matter? The glue-line wasn’t going to have an impact on the longevity of the piece, but it sure was going to annoy me everytime I looked at the bookcase. Which will be every day, given that it is going to stand next to my staked desk.
  • Could I paint the exterior of the bookcase? That was definitely an option, but my original plan was to finish the bookcase with blonde shellac and Osmo to match the desk. And what happens if I redecorate my music room? Would I have to strip and re-paint the bookcase? Hiding the glue-line under milk paint feels an awful lot like cheating, and even if I can’t see it, it will still annoy me (see above).

In the end, I did what I should have done when I first cleaned up the panel and decided I wasn’t happy with the joint – I cut it down and re-jointed. Which all in all took a lot less time than the several weeks of obsessing over whether I could live with the original joint or not. If you have to ask the question, chances are you already know the answer.

IMG_6951

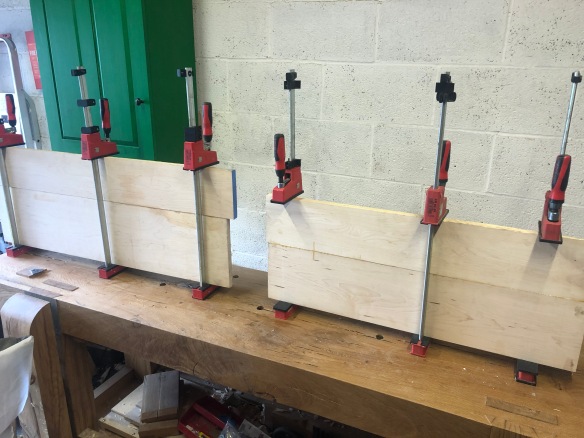
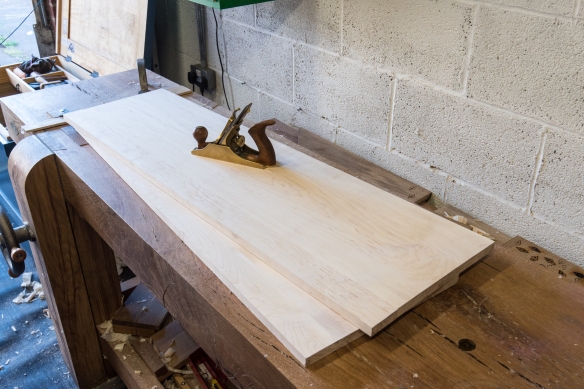
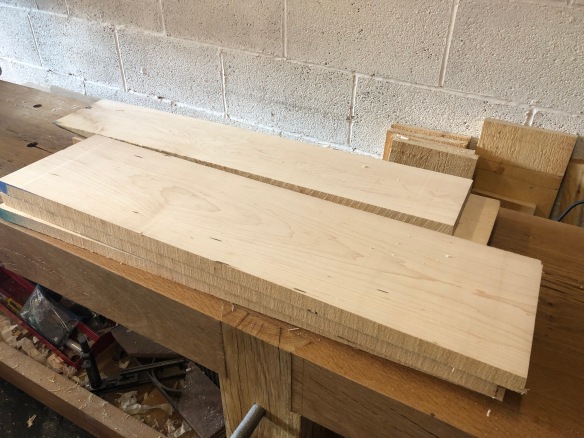
Preparing the new joint. The top-most component is over width, which makes flushing up after glue-up easier.

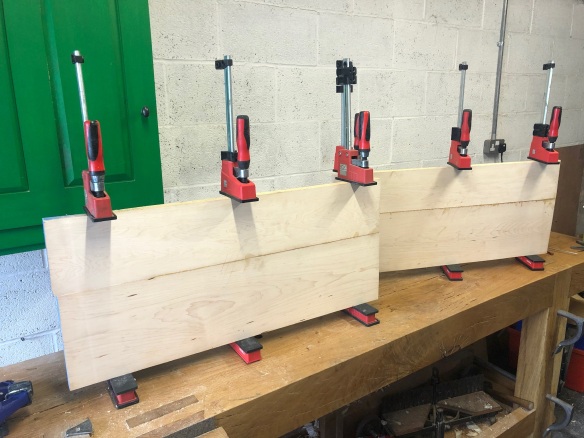
Having surfaced the panel and planed it to dimension, I wanted to ensure that breaking the panel down and preparing a more satisfactory joint did not result in any damage being inflicted on the finish surfaces. To remove the current joint, I ripped the panel on the bandsaw, cutting just to the waste side of the glue line. This ensured that I would preserve as much of the existing panel as possible. I then jointed both edges simultaneously with the No8 plane set to a fine cut, making sure that the entirety of the old glue was removed before test fitting the joint. The new piece being scabbed on was also left overwidth so that I didn’t have to worry about getting the faces of the panel coplanar during glue up. Once I was happy with the new joint I glued it using Titebond liquid hide glue, situating the new component so that the extra width created an overhang on both sides of the existing panel.

IMG_7080

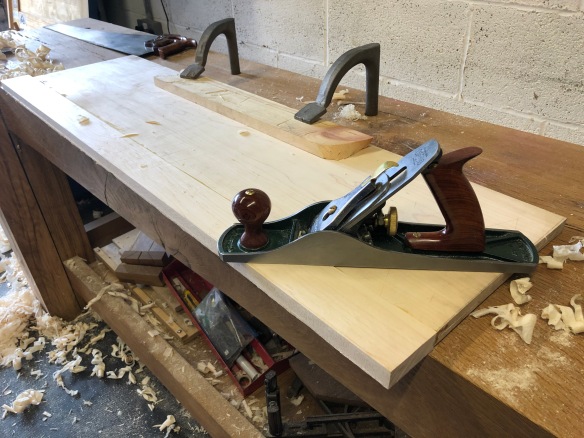
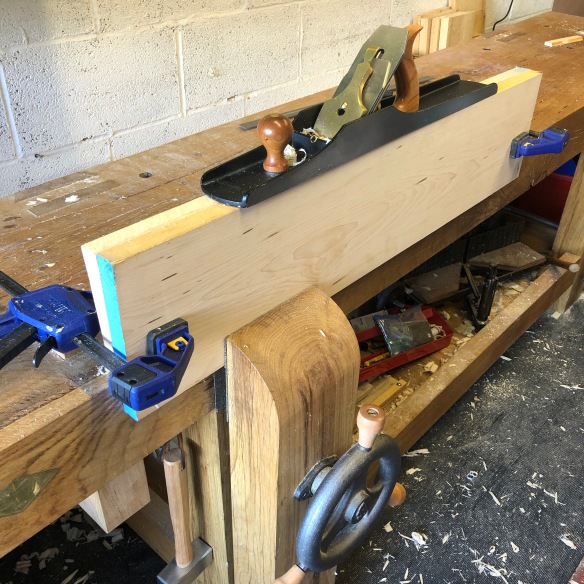
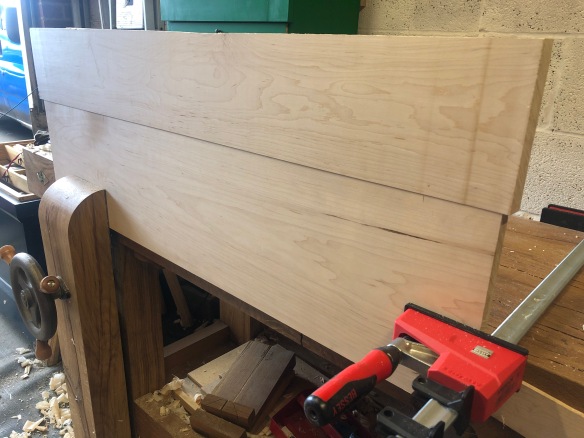
Flattening the new section

Once the glue had cured, I flushed up the new piece using my No5 hand plane, with the heel of the plane on the existing panel to act as a reference surface. Once the panel was just a hair off final thickness I moved to the smoothing plane to remove any tool marks and tearout. The end result is a much more acceptable glue line, and the return of my ability to sleep at night (this week at least).

IMG_7081

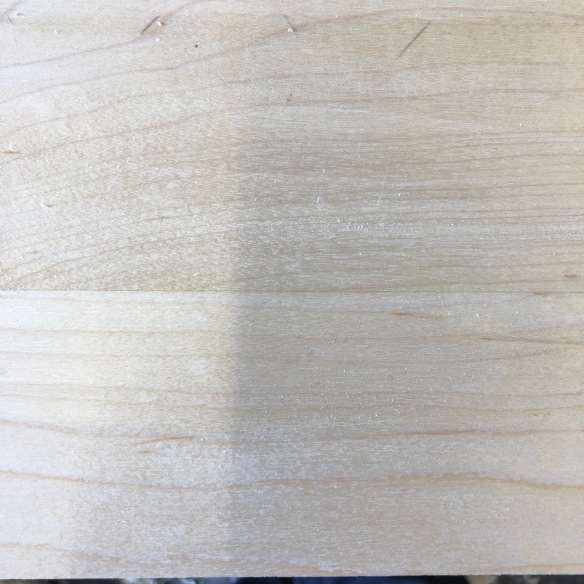
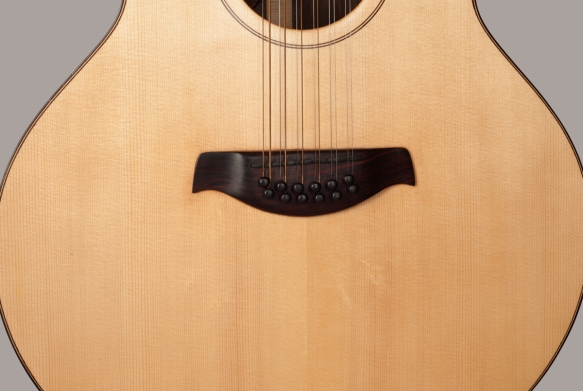
Maple is unforgiving of glue lines, but this one I can ive with

Was I being neurotic over what was at the end of the day a relatively minor imperfection? Quite possibly, but I find that if a project starts off on the wrong foot it will haunt you for the rest of the build (and possibly beyond). And when it is something I know I can get right, I feel compelled to correcting the error before moving on with the project. For what was only a few hours work, I’m glad that I tackled this issue, and can now progress with the rest of the build with a clear mind. Next up is flattening the shelf panels and then cutting some joinery.

Is this a clever joke about “straight edge”?

IMG_6947

I’ve not had much time at the bench over the past few weeks, due to work and family commitments. But I did steal a few hours yesterday to joint and glue up the final panels for the boarded bookcase. I find that the right workshop soundtrack is important, and because I’ve been reading Our Band Could Be Your Life recently, while I was jointing these boards I ended up with a steady stream of Minor Threat, Husker Du and Minutemen.

IMG_6952

Much of woodwork is practicing a technique until it comes naturally and these final edge joints went together pretty smoothly. Of course, part of the fun is waiting until the glue cures and then cleaning up the joints with a handplane to see if the glue line is nice and tight or whether it is visible from 50ft. But these joints seemed crisp without any clamp pressure being applied, so I’m reasonably optimistic. So far this project has largely been about readjusting to furniture sized work and tolerances after a year of Roubo bench-sized work, which in itself has been a useful learning experience.

Once the glue has cured I’ll get to planing up this panels and then it’ll be on to cutting some joinery. So the bookcase should start to take shape quite quickly after the stock is prepared.

The search for “shelf awareness”

There are many ways to carry out any woodwork task, plenty of which will be effective for different types of woodworker or with different tools. It’s why I’ve never understood makers who get too dogmatic about process. Yes, be dogmatic when it comes to quality (quality always matters) but cutting your dovetails one way with certain tools (for instance) doesn’t mean it is the only way to do it. And sometimes, trying a different approach can help to improve understanding of technique or tools, or can simply get you out of a rut. Learning opportunities abound if you are open to them, and they are nearly always useful.

DSC_2624

If in doubt, sharpen. If you don’t feel any doubt, sharpen anyway.

The next stage of the bookcase build was to joint and glue up panels for the three shelves. The shelves will be 12 1/2″ wide, and I’m using two boards for each shelf, one 9″ wide and the other (currently) 6″ wide. The excess will be ripped off once the shelf is glued up and the show-face planed. In the past I’ve jointed each board separately and then bought them together to test the fit and identify where any gaps arise. That’s a solid approach, and worked very well on the staked desk build. One challenge is that balancing a No8 jointer on 1″ wide stock can tempt the plane to tilt, which throws out the edge. I was chatting to my good buddy Jim McConnell about what we had on our bench and he explained that he often gangs both sides of the joint together and works it as one process. The idea being that providing the joint is straight and tight, any variations in angle across the joint will be cancelled out when the two halves are introduced to each other. A further benefit is that the work surface is doubled, providing a greater bearing surface for the plane, which reduces any tipping.

DSC_2627

A quick grip clamp holds the two boards together for jointing

This all makes sense, and I thought that trying a different approach would be good. The iron in my jointer is normally honed with a gentle camber to avoid leaving plane tracks when jointing the face side of workpieces. The camber also helps to correct edges when they are out of square (don’t touch the adjuster on the plane, just move the plane so that the proud side of the iron is cutting the high spots), but a camber won’t help when you are looking to cut dead flat across two halves of the joint simultaneously. Instead of grinding out that camber and having to reinstate it once the shelves were glued up, I ordered a spare iron and once it arrived got to jointing the boards.

DSC_2626

Whispy maple shavings, and a full view of the work holding arrangement

Lining up two workpieces in a leg vise can be a bit of a chore, but having one board narrower than the other became very helpful in this instance. The narrow board sat on the bench top, while the wider board was placed in the leg vise so that the top edges of both boards were coplanar. A quick release clamp at each end held both boards tight against each other, and the result was a quick and easy set up, with both boards stable ready for working. Trying out any technique for the first time involves some learning, but Jim’s method works very nicely and I had two shelves jointed and glued up quite quickly. The prospect of glue lines showing is always a risk with maple due to the marked contrast between the light timber and dark brown hide glue, and the key to avoiding them is getting a good tight joint. I tested these joints back and front with a 0.05mm feeler gauge while under gentle clamping pressure, and couldn’t gain any purchase with the feeler gauge. So they should hopefully pass muster once cleaned up. Normally I don’t use feeler gauges for furniture making – that particular torture is saved for lutherie, but for these joints I wanted assurance that they were good and tight. Now to wait for the glue to cure and the clamps to come off.

IMG_6773

Two shelves glued up, one more to go

Keep Those Bowls a’Turning

DSC_2621

Recently I’ve settled into a pleasant routine of turning bowls in the evening, with work on the boarded bookcase taking place during more extended day time sessions at the bench. The bowls pictured here have all found homes, and have been posted out. But I will be turning more, so if you want a bowl then do drop me a line through the blog, or to kieran [at] overthewireless dot com.

Bowl turning has turned into a play ground for experimenting with form and colour, while still aiming to make objects of use. These bowls range from 4 7/8″ diameter to 6″ diameter. My next run will include several 12″ diameter fruit bowls.

DSC_2623

Keep On Keepin’ On

DSC_2613

The two completed bookcase sides

I’ve been a little quiet on the blog recently, but that is not to say that I’ve been slacking at the bench. The sides for the boarded book case are now down to final dimension (save for being shot to length, but I’m planning to build a new shooting board before I do that) and ready for joinery. It is worth taking the time to get these key components right, because everything else is laid out from them, and they are the main structural elements. In a more forgiving material, such as pine, this would not have taken too long, but this maple is both beautiful and truculent. When I was at Totnes we used to say that the more beautiful a piece of wood was, the more difficult it would be to work. That is a phrase that takes me back to visions of fitting the cocobolo bridge to Esmerelda, a 3 day process which involved taking thin shavings from specific parts of the bridge until a perfect fit with the curvature of the top was achieved. Which is fine, until you start doing it in an incredibly hard and brittle timber like cocobolo. Good times indeed.

_DSC9152

The cocobolo bridge on Esmerelda

The maple for the bookcase isn’t as horrifying as that,  but even with sharp tools I’ve found it wants to tear out quite a bit, so going slowly and moving to a smoothing plane sooner than I would normally do, has been the order of the day. And there is something very rewarding about working slower – accepting that a job will take longer than you think and settling into the rhyth. The results are worth the work, and this should be a nice looking piece when it is complete.

DSC_2614

My saw benches are the perfect platform for holding rough stock ready for a day of planing

With the sides finished and put safely out of the way, I prepared the shelf components for jointing. Like the sides, I am edge jointing two pieces of maple to get the requisite width for each shelf. To provide a reference face for checking that the edge joint is square, I planed one face of each shelf board flat. These surfaces do not need to be perfectly smooth or pretty right now, just flat so that I have a datum surface to work with. The opposite face of the shelves are still in the rough, and I will work them once the shelves have been glued up. My plan for the shelves is to have the top face smooth and pretty, and leave the underside of each shelf with the tool marks from traversing to thickness with a jack plane. The scolloped texture from traversing is always a nice surprise for enquiring fingers, and traversing the shelves till be a very efficient way of bringing them down to the requisite thickness.

IMG_6717

Six boards waiting to become three shelves