A Grand Kentucky Adventure… part 3

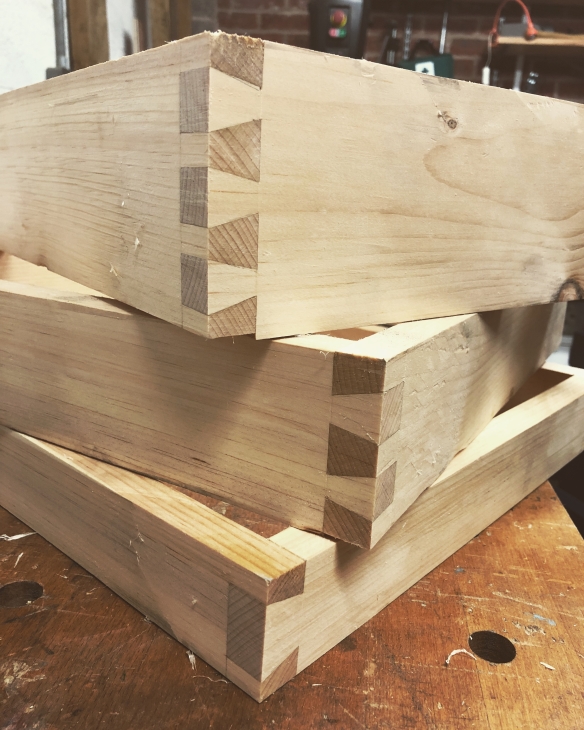
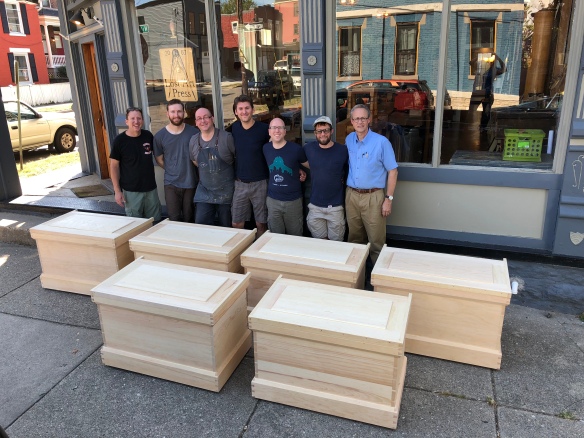
And with that, the Anarchist’s Tool Chest class is done. On one hand it is hard not to feel very proud of the students and all that they have accomplished – all six tool chests were finished by 3pm on the Friday (which i believe is a class record!). On the other, when such an immersive experience ends, it is hard for there not to be a touch of melancholy, and I am reminded of the final day of my own ATC class five years ago.

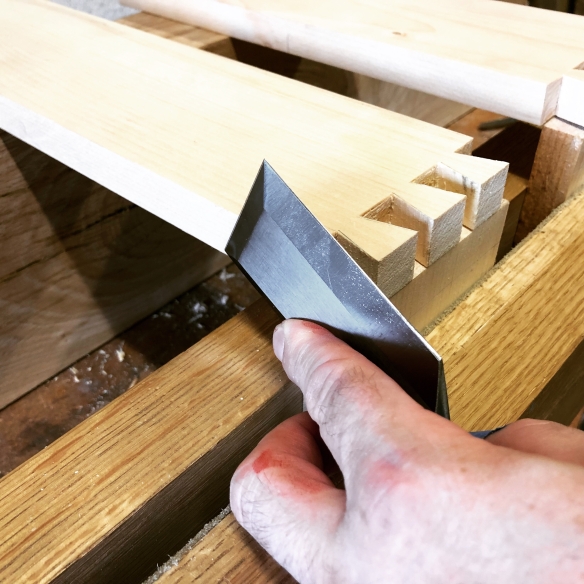
Of course, there was a lot of work since my last blog post to get the tool chests finished. On Wednesday afternoon we got the lower skirts fitted and glued on. Thursday was then spent cleaning up the exterior of the casework, and fitting the base boards and upper skirts. Which meant that the students got to work with cut nails, tongue and groove boards, and cut more dovetails – plenty of learning opportunities! I found that for glue-ups it worked well to have teams of three do each glue up. So I would work with a pair of students to glue their casework, and those students would then talk the next student through the process while I assisted, and they would in turn help the next student. Three man teams works nicely for casework of this size, and helping their class mates consolidates the learning process for the students (it also helps to prevent the more advanced students from getting too far ahead).

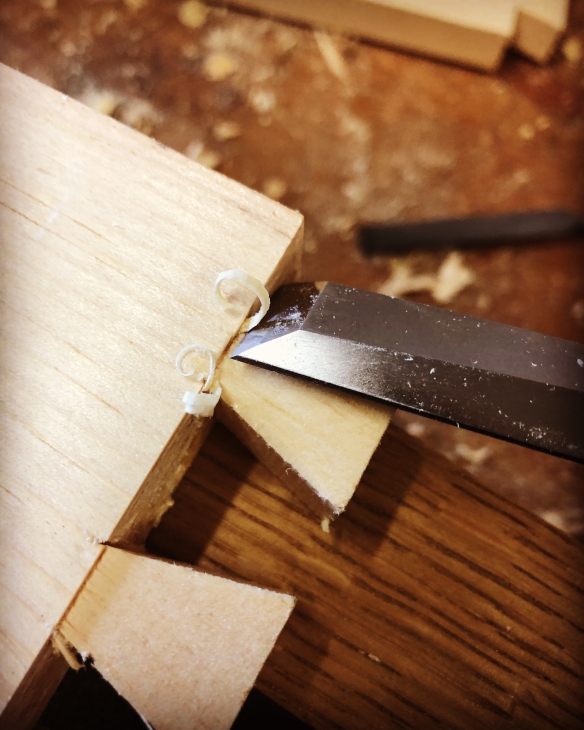
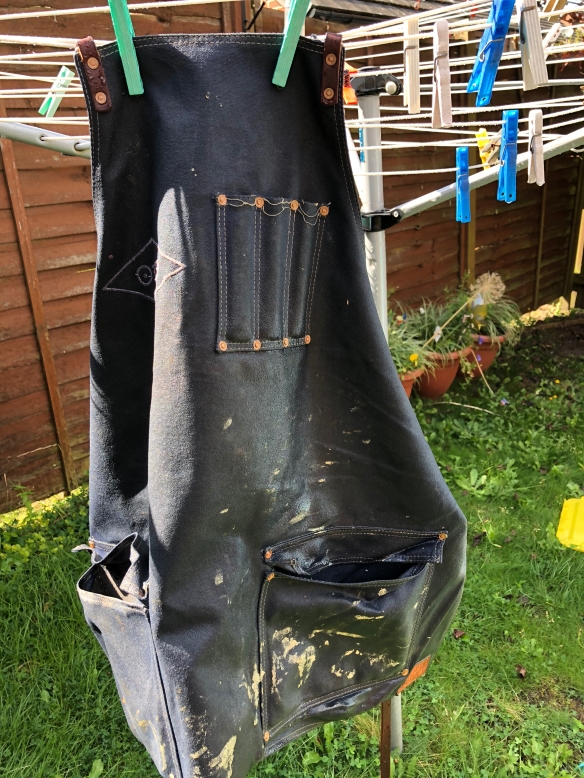
Friday was spent assembling the lids, cutting and fitting the dust seal, and then gluing the lids up. Every person’s dovetails improved over the curse of the week, which was proved by the quality of the dust seals, which are joined with a single tail (much harder than a set of multiple tails). We even managed to find time to bead the upper skirts, and to talk about hardware choices, before everyone loaded their tool chests into their cars and started the long journey home.

I am also headed home, and about to commence the 22 hour trip back to Birmingham. It has been a real privilege to teach at the Lost Art Press store front, and to spend five days working with such a great bunch of students. A final work of thanks to Chris and Megan for not only the invitation to teach, but all of their work preparing stock for the class, and their assistance this week. I will be sad to leave Kentucky (Covington is, as far as I’m concerned, the promised land), but I am looking forward to seeing Dr Moss and the Apprentice after 9 nights away.

A Grand Kentucky Adventure… part 2

We are now at the midpoint of the Anarchist’s Tool Chest class. Everyone is working hard, and everyone’s dovetails are improving. Monday was spent boiling dovetail techniques down to fundamentals, looking at body mechanics and the key processes at a really detailed and granular level, while cutting the tail boards. Tuesday consolidated those lessons while cutting the pin boards and gluing up the caress. We started today with a talk on cambering plane irons and demonstration on how to hone a camber. Everyone has now smoothed the exterior of their tool chests and are now onto dovetailing the lower skirts.

Although it is a completely different experience teaching the class, it has brought back vivid memories of the Anarchist’s Tool Chest class I took with Chris five years ago. That was a life changing event for me, and I am grateful for the opportunity to pass on knowledge to students now, and for the friendship and mentor I gained five years ago.

If you want to really learn about a subject, try teaching it. Explaining how you approach a technique, and answering questions (which are always insightful and intelligent, but never what you expect) really prompts you to drill down into both the how and the why. And so far it is going well – some of the students have had that lightbulb moment when a technique suddenly clicks, and they all seem enthused by their progress. Which is all I can ask for (apart from maybe more fried chicken, something that just isn’t done well in England). Knocking together a corner of my demonstration tool chest while the class watched was a little nerve wracking, but it went together just fine. That kind of fear keeps you honest.

The Lost Art Press store front is a dream workshop, with plenty of natural light, space, and fantastic bench provision (as you’d expect). I’ve been stationed at Chris‘ slab top Roubo bench, and working at that bench has me eagerly looking forward to completing my own Roubo bench over the autumn.

This afternoon we will complete the bottom skirt and get the baseboards nail in place.

A Grand Kentucky Adventure… part 1

After 22 hours of travelling I reached Kentucky on Friday evening, and have spent the past couple of days catching up with good friends and seeing some of what Kentucky has to offer. There may have also been plenty of bourbon. Covington is a wonderful place full of gorgeous historic architecture, great places to eat, and within easy striking distance of other great attractions. I’ve sent approximately 27 messages home in the past 48 hours suggesting we move here, so I’m confident that Dr Moss will agree shortly (maybe?).

Shaker chair at a Pleasant Hill

Saturday was day two of the Lie Nielsen hand tool event, hosted by Lost Art Press, so I spent the day at the storefront catching up with Chris, Megan, Jeff, Mark, my buddies Jason and Brett, and the folk from Lie-Nielsen.

In the attic, at a Pleasant Hill

Today we took a trip to the Pleasant Hill shaker community, which was my first chance to see Shaker furniture and architecture in person. Special thanks goes to a Megan, who has a deep personal history with Pleasant Hill, and is an excellent tour guide. I’m still sorting through my photographs from the visit, and will post more from Pleasant Hill soon.

With Jeff, Mark and Megan at Pleasant Hill

Tomorrow, my Anarchist’s Tool Chest class starts, which I am looking forward to a great deal. The timber is out on benches, the workshop is reset after the L-N event, and we’re all set up. The next five days should be really good (and lots of hard work).

The Lost Art Press storefront.

A Spot of Pre-Flight Dovetail Practice

IMG_4348

A wide chisel helps to locate the tail board for transfer to the pin board

I thought I would get some dovetail practice in before I fly out for the Kentucky Dovetail Death March ™ later on this month, and this presented a perfect opportunity to start making drawers for the express lathe stand. The inclusion of drawers was a key part of the original design for the lathe stand, as not only will drawers provide a home for lathe tools and other small items (a workshop can never have too much storage!), but using the lathe stand as a storage unit also adds mass, which keeps things stable when turning larger workpieces. Originally I had intended to domino drawers out of ply – a construction method that is quick, efficient and perfect for a workshop storage unit. But as I wanted to do some dovetailing in preparation for my trip, it made sense to dovetail this round of drawers at the very least.

IMG_4359

Chamfering the leading edges of the tails for ease of assembly

So far I’ve made three drawers of varying depth and tail spacing – changing the dovetail spacing for each drawer offered some good practice after a few months of cutting only bench-sized joinery. One drawer will hold my lathe jaws, allen keys, and smaller tools which become indespensible when you use a lathe. The deepest drawer will hold my scorp, splitting wedges, and a few other chair making tools which need a separate home to my Anarchist’s Tool Chest. The final drawer is much shallower than the others, and will house story sticks and patterns accumulated from past projects.


IMG_4361

A sharp block plane is a wonderful thing for cleaning up joinery

I cut the dovetails the same way I’ve cut every dovetail joint (and the way we will be doing it next week). After a year of mainly working on bench-sized oak timber, the 3/4″ pine for the drawers worked ike a dream, and it was nice to work at a different scale and tolerance. Once the glue had dried, I cleaned up the dovetails with a sharp block plane to see how the joints had turned out and was quite pleased. Once I am back from Kentucky I will clean up the rest of the surfaces with a smoothing plane, fit ply bottoms to each drawer, and give them a lick of paint (probably the green I used for the saw cabinet). With some clutter out of the way, it will then be back to the Roubo bench build. The autumn promises some enjoyable woodwork!

IMG_4369

Three drawers. They need a final clean up, but the joinery is strong and these will provide plenty of storage in the lathe sand

On a separate note, I will be at the Lie-Nielsen event at the Lost Art Press storefront on Saturday – if anyone finds themselves there, then do say hi (I’ll be the jetlaged Englishman).

Apron Maintenance

201702A7-649E-4230-957D-B6DCF67B2D35

Before – nearly three years of accumulated grime

My Texas Heritage ‘shop apron has seen a lot of heavy use in the nearly-three years I’ve been wearing it. And with my class at the Lost Art Press store front now imminent (I fly out in just over a week’s time) I thought it was about time I gave my apron a bit of a clean. I discussed the best approach with Jason, who was able to give some helpful pointers.

3B6CE072-5C38-4F86-8230-89088D1DEFB1

After brushing and using an air gun to remove dirt

The first stage of clean up was to gently brush the apron down to remove the bulk of the grime. I then used an air gun, fed with 20psi from a compressor, to remove any stubborn dirt particles that had become embedded in the fibres of the apron, as well as removing the inevitable detritus from within the pockets.

IMG_4303

Hosed down

With most of the dirt removed, I hosed the apron down with cold water, being sure to empty the pockets out afterwards to avoid stretching as the apron dried (the waxed canvas pockets are very effective as water collecting vessels!). The canvas cleaned up quickly and very well, with just some stubborn patches of PU glue remaining (that stuff will likely survive the apocalypse), and while it is looking cleaner it still shows signs of being worn and used. Which is exactly how it should be. I fully expect that this apron will outlast me, which is a testament to the quality of Jason’s work.

76BFEBD5-AD92-461C-B5ED-269C1127584B

Cleaned up


A Welsh Stick Chair for the Apprentice – Reprise

IMG_4223

The completed chair in situ

Long time readers may remember the stick chair I was building for the Apprentice, based on a child-sized 18th century chair held in the collection at St Fagans. That build stalled last year when my first forays into steam bending a comb proved to be unsuccessful. I didn’t abandon the build, but it went on the back burner while I built a steam box, and then all of my workshop time was absorbed by the article for Mortise and Tenon, and the Roubo bench build. But I never stopped looking for an opportunity to finish this chair. While I was processing stock for my stick chair for the M&T article and some other projects, I found within one of those huge oab slabs, some curved grain which matched the curvature of the comb for the Apprentice’s chair. Jackpot – no need to steam bend stock (although with the steam box now complete, I am looking forward to steam bending chair parts in the near future). I cut the comb out of the slab, and set it aside while I finished ther chair for M&T.

IMG_4105

Painting the chair

With the M&T chair (and article) complete, I managed to find some time to clean up the comb with spokeshaves, and did the final glue up for the Apprentice’s chair. The chair is made with oak from three different sources, and there is not enough consistency of colour across the various components to use a clear finish. So original my plan was to milk paint the chair green to match the green Chesterfield armchair I sit in. On reflection, I asked the Apprentice what colour she would like the chair, and we looked at some milk paint samples until she settled on Sweetheart Pink by Real Milk Paint. After quickly placing an order with Tools for Working Wood, we were ready to finish the chair.

IMG_4222

Painted, burnished, and oiled

I thought it would be fun for the Apprentice and I to paint the chair together, and she eagerly assisted me with the first coat. Milk paint often takes several coats for a consistent finish, and I applied a further three coats in the evening. Once we had a good consistent finish I burnished the paint with brown paper, and then ragged on a single coat of Osmo Polyx. The Osmo deepened the colour of the paint a little, and also emphasised the texture of the underlying wood (particularly the facets on the legs and sticks). The comb had some striking grain, and so I deliverately left that unpainted to add some visual interest.

IMG_4228

A satisfied customer

The chair now resides in our lounge, next to my reading chair, and the Apprentice seems to really love it. She is also facinated by the idea of making furniture, and so hopefully it won’t be too long before she joins me in the ‘shop.