The Autumn of Maple and Pine

IMG_0591

Here you had an “all assembly needed” flat pack book case and stick chair. TIme to turn that stack of maple into something useful.

Since the start of the year I’ve had the stock for my boarded bookcase stickered neatly at the side of my desk, underneath the timber for a Welsh stick chair.  The bookcase design (from The Anarchist’s Design Book) is one I’ve been looking forward to for a long time, as it looks like a fun build and will liberate a lot of my history and woodwork books from the boxed purgatory they have suffered since we moved house. I decided to build the bookcase out of maple to match the Staked Work Table I finished in January.

_DPP6527-2

Removing a live edge from the maple seat

Unfortunately sourcing wide enough boards in the UK seems to be a challenge, so I’ve committed to gluing up a pair of boards for each of the sides and the three shelves in order to reach the 13″ width needed (a reason, perhaps, to move to Kentucky? I hear that such boards are in plentiful supply). If nothing else, this will give me plenty of practice with long edge joints, which is always good to have. The other project on the to-do list is a variation on the Policeman’s Boot Bench for our hall (in pine), which I promised Dr Moss I would finish before our annual Christmas Tree trimming in early December. I’ll be starting the boot bench in October, so I thought that I would use the remainder of September to build a steam box so that I could finish off the Apprentice’s Stick Chair, and also start gluing up the panels for the book case. . Although I don’t normally move between several simultaneous projects, I will be staggering the bookcase build in between stages of the boot bench and hopefully doing so will be a positive experience.

_DPP6532-2

A stick chair seat in the clamps

While I was thinking about working on several projects at once, and had the glue warming in a mug of hot water, I decided to joint up the seat blank for another child sized Welsh stick chair (and now I’m thinking that the autumn is looking very busy!). This chair will be all maple, and be a little different to the one I am building for the Apprentice. The 2″ thick maple seat was made up of two boards, and jointed very easily before going in the clamps to cure over night.

_DPP6539

Laying out the mortises for the

While I waited for the glue to cure I finished making the chair pattern I started a few weeks ago. While I’ve made plenty of guitar templates, it is not somthing I’ve done for furniture. For chairs it makes a lot of sense as there is a great deal of construction information to collate if you want to make another version of the same chair (and I do) – mortise positions, resultant angles, sight lines, seat dimensions and curves. I intend to use this pattern as an aide memoire rather than a concrete design to follow slavishly – this way all of the information I need is in one place, but I can still change the details and proportions as the whim takes me. The pattern is on 6mm ply, which means that it was easy to work but should be durable for years of use.

With the pattern complete and the seat blank clamped up, I decided to get a start on jointing the first side of the bookcase. I started off by levelling the rough sawn edges with a No62 plane that I’ve been testing for an article in Furniture & Cabinet Making. The No62 is shorter than I would like for a 48″ long edge joint, so I then moved to my usual No8 jointer. I quite enjoy edge jointing – the Staked Work Table build was good training for long edge joints, and I was looking forward to the practice of jointing five pairs of boards for the book case. Maple can be an unforgiving wood to edge joint – being very light in colour the glue line can be glaringly obvious unless you get a good tight joint off the plane, without relying on clamp pressure. The key (as with many woodwork operations) is patience.

_DPP6549

Jointing the first set of boards for the bookcase

Unfortunately, by the time I had a good clean joint the temperature had started to fall, and while the glue was good and warm in the pot (I warm Old Brown glue to the recommended 120-140F), it started to tack up while I was pulling the top board into position and setting the clamps. It was now 13C in the ‘shop, and I wasn’t confident that I would get a good bond with the temperature dropping so rapidly. Removing the clamps and washing the jellified glue off both halves of the joint wasn’t how I had intended to spend the late afternoon, but you only get one chance to nail a glue-up. With the joint cleaned and dried, I moved the clamps and timber into the house (which was mercifully warmer) and had a much less eventful glue-up in the kitchen. It is definitely getting to the time of year where any ‘shop glue-ups have to take place earlier in the day, or else in the house (another reason to move to Kentucky, perhaps?).

Over the next couple of weeks I’ll move my way through the stack of maple in the music room waiting to be glued up into panels for the bookcase, and will also progress the maple stick chair (as well as building a steam box and finishing the Apprentice’s Stick Chair. There’s a fair amount going on!). Juggling multiple projects will hopefully teach me a few valuable lessons, as well as watching various things take shape.

_DPP6555

The aborted glue-up in the workshop. just before I moved everything into the house to work at a temperature much kinder to hide glue


A Welsh Stick Chair for the Apprentice – Part 8

I was hoping this would be the final blog post on the Apprentice’s Stick Chair build, save for some progress photos of painting it. For reasons that will become clear, the chair is not quite finished yet, although there have been some valuable learning experiences.

But that’s for the end of the blog post – first let’s rewind a bit. Once the glue had cured on the bending forms I broke them out of the clamps and cleaned up the curves with a 2″ flush trim bit in the router – while I find it very hard to get excited about router bits, this bit from LMII is wonderful for taking a final pass and cleaning up the edges of electric guitar bodies (the main reason I bought it).

_DPP6489.jpg

Preparing the comb with a L-N No.62

I then cleaned up the comb blank with a Lie-Nielsen No62 plane, which I’ve been testing for an article in Furniture & Cabinetmaking. With the comb clean and square on all sides, and the centre line marked on the reference edge and face, it was game time. I’ve not built a steam box yet, although it is very much on the to do list as I get deeper into steam bending. So to steam the comb for this chair I took instructions from The Anarchist’s Design Book and poached the comb in a pan of hot water in the oven. It turns out that our oven isn’t quite wide enough to take a 17 1/2″ long comb, so I had to wedge the comb in at an angle, with one end out of the water. Several layers of tin foil later to seal in the steam, and I left it to poach at 230 degrees for an hour and a half.

IMG_0467

Ready for poaching in the oven.

Once the steaming session had finished, I sprinted (with a very hot piece of oak in my hands, and the BBQ smell of toasting oak in the kitchen) to the ‘shop, and clamped up the comb in the bending form, being sure to align the centre lines on both halves of the form with the centre line on the top edge of the comb. Nothing exploded in a hail of oak shrapnel, and the comb appeared to be well steamed across its length, so I was hopeful that this initial foray had been successful. With everything clamped up firmly and the comb conforming to the shape of the form, I left it for six days to return to equilibrium moisture content and settle into the new shape.

IMG_0468

Clamped up in the bending form – nothing exploded, and the comb conformed to the curve

Which brings us nearly up to date. Yesterday afternoon I removed the comb from the form and was pleased to find an even bend. Yes one end was a little charred, but that would disappear under a couple of coats of milk paint. I gave the surfaces a final clean up, and drilled the mortises for the sticks. The comb slipped onto the sticks nicely for a dry fit, and the Apprentice came to join me in the shop to sit on her chair for the first time, which she thoroughly enjoyed. By this point the comb had been out of the bending form for maybe 40 minutes. And it was then that I noticed – it was startening to straighten out. By the time I had cleaned up and put my tools away, the comb had lost probably 1/4″ of the curve. This would not do.

IMG_0503

40 minutes after coming out of the form, the comb has lost nearly half of the curve. Game over.

Now, having returned to Peter Galbert’s Chairmaker’s Notebook (my go-to resource when it comes to chairmaking)  and spoken to people who build chairs far more regularly than I, there seems to be a couple of possible reasons for this:

  1. The oak was kiln-dried, which can make steaming less successful;
  2. Having one end of the comb out of the water meant that the effect of the steam was inconsistent; or
  3. I offended the steam-bending gods somehow.

Although I would have liked the Apprentice to use her new chair sooner, I’m not feeling too disheartened by this. It seems a right of passage for every aspiring chairmaker to have an unsuccessful steam bending experience (often many), and I want this chair to be right. I’m going to build a proper steam box, and find some air dried oak for a second go at steaming the comb. If that fails, then I will go “full Welsh” and cut a curved comb from solid material, no steaming necessary. So this is a good learning opportunity.

IMG_0496

The dry fit, before the comb straightened out. When finished, this chair will look pretty nice.

The Never-Ending Workshop Shuffle

A workshop, very much like a tool chest, is never complete. I find that any significant reorganisation to the workshop tends to happen at the end of a major project – once I get deep into a project I don’t want to get distracted by other tasks, and a major project is also likely to highlight any ergonomic pinchpoints in my current set up. Post-project reorganisation reflects those learning points. The result is that a workshop reshuffle has become something of an end of project ritual.

IMG_0097

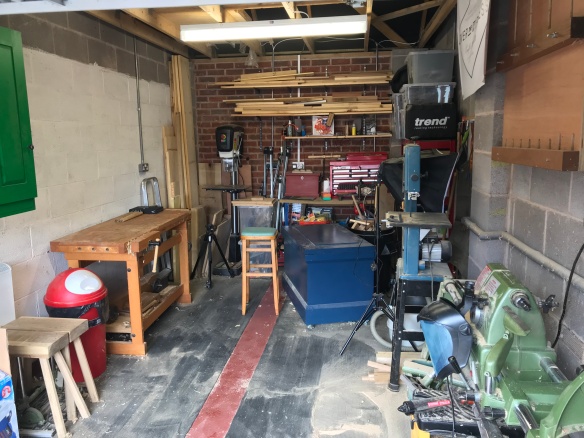
My reorganised workshop, at least until the Roubo bench timber arrived

In the course of the staked work table and the saw cabinet builds the workshop had become rather unruely, and a deep clean and reorganisation were long over due. This became something like a game of solitaire, as large sections of the ‘shop were emptied out onto the driveway and things moved around until I had a clearer and much more ergonomic space. The thin panel jig and solera were moved from above my workbench and hung above the lathe – this keeps them out of the way but still accessible. It also means that the backdrop for any process photos is now just a white painted wall, without any cameo appearances from those jigs. The saw cabinet was then hung on a pair of french cleats to the left hand side of the workbench where it will be within a few steps whenever I need a saw (which is often).

IMG_0098

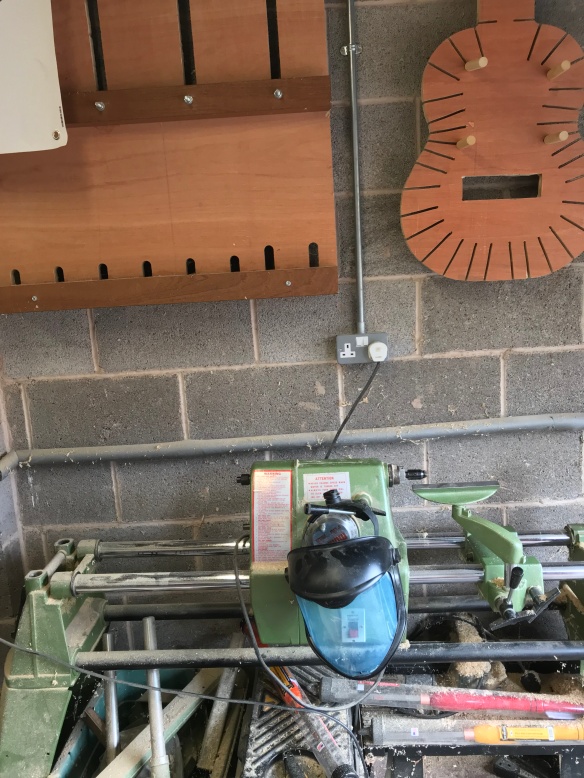
The lutherie jigs now hand above the lathe

With the saws in the cabinet, I removed the old saw till from my Anarchist’s Tool Chest (prying out the battens really demonstrated just how tenacious cut nails are!) which opened up more useable floor space for the planes. I also moved the Golden Rod to the moulding plane corral. I do plan to fit another saw till to the tool chest at some point in the future, using the lighter weight design Chris wrote about earlier this year. But that will wait until I next need to travel with the tool chest. I also cleared out my lutherie specific tools from the Anarchist’s Tool Chest, and placed them in a new Clarke’s machinist’s chest, which sits on my sharpening station – these tools need to be stored safely and within easy reach, but I only need them for specific tasks and so it makes sense to keep them separate from the tools in my Anarchist’s Tool Chest.

IMG_9904

The saw cabinet hangs to the left of my workbench. The Roubo bench will extend to underneath the cabinet.

The major addition to my shop last year was a new drill press. At the time I assembled it just where there was some clear floorspace, but it was far from the ideal location. So to find a proper home for it I collapsed the go-bar station and stowed that away for future use, and reorganised my timber storage corner. The drill press is now snug at the far end of the workshop, within easy reach of the bench but tucked away where I won’t keep backing into it.

IMG_0100

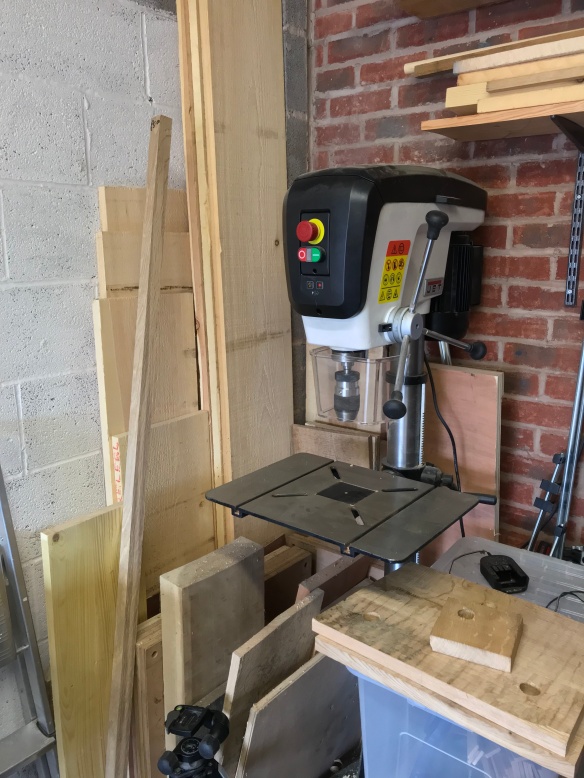
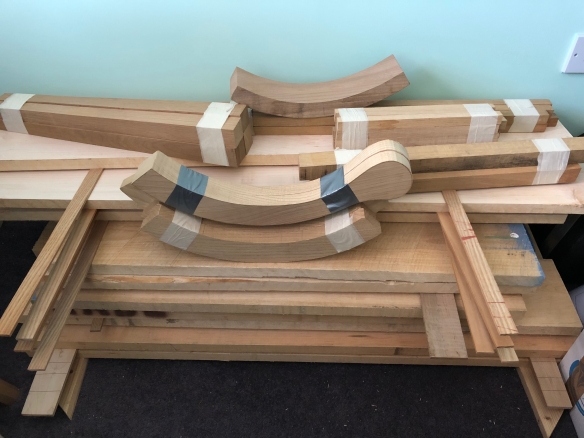
This corner isn’t half as cramped as it looks here. Particularly as a lot of the pine has now been broken down ready for a project.

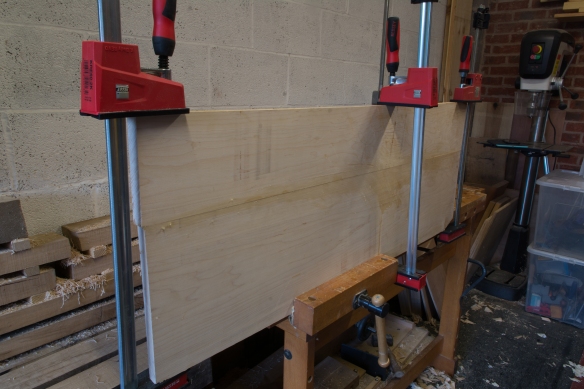
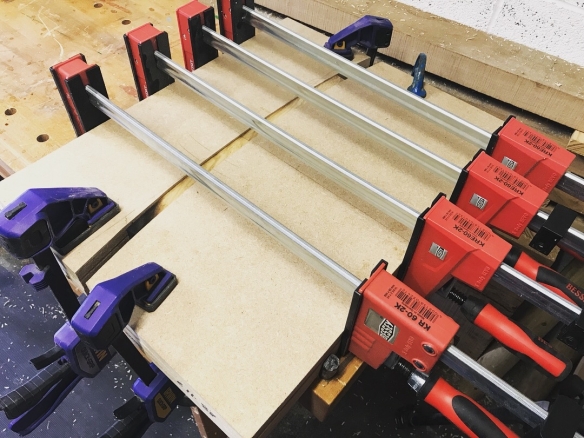
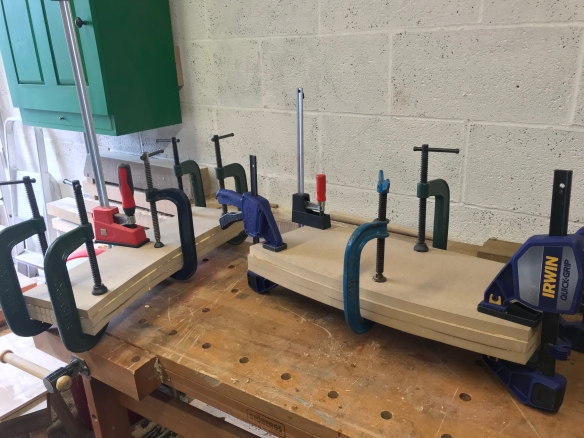
One of the pinch points I found on the saw till build was the amount of time I was wasting by hunting for my bench hooks and shooting board everytime I needed to cut and shoot stock. I had some fibreboard loft flooring left over from a house job, and I fitted two battens of scrap oak to the stretchers of my workbench, using a pneumatic nail gun. The loft flooring was cut to length and dropped on top of the battens, and now houses my Moxon vise, shooting board, bench hooks and lump hammer. This keeps a number of key appliances within easy reach, and has also added some much needed mass to my Sjoberg bench.

IMG_9276

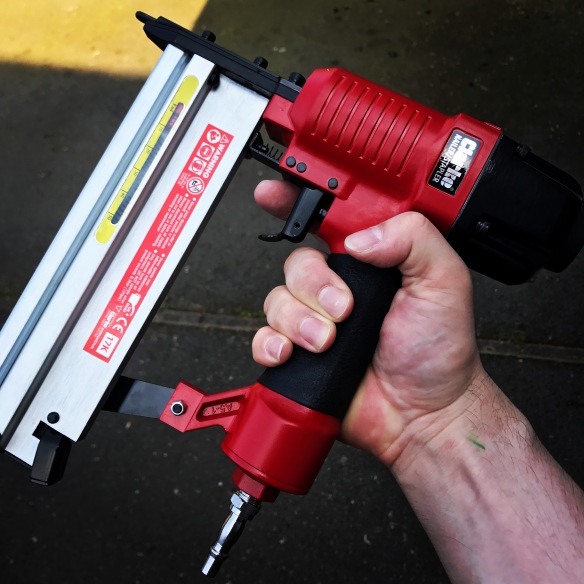
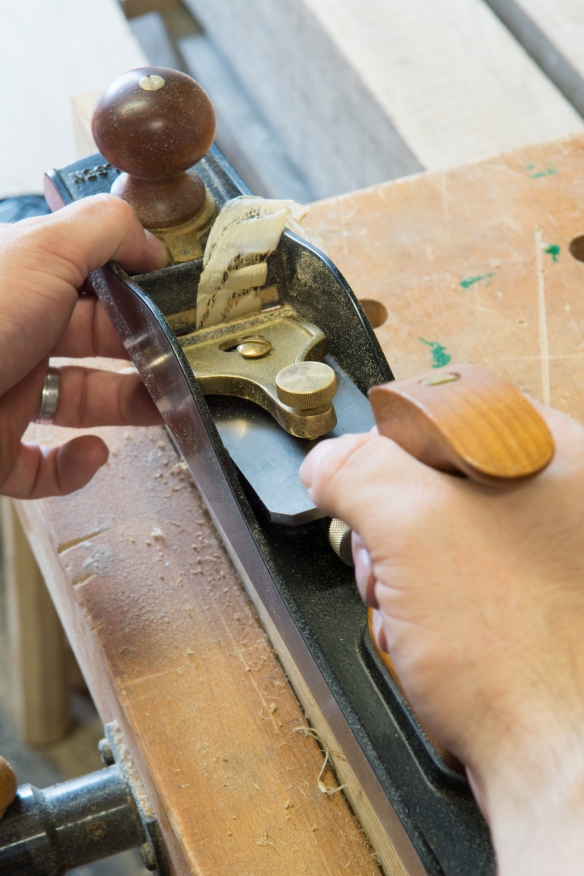
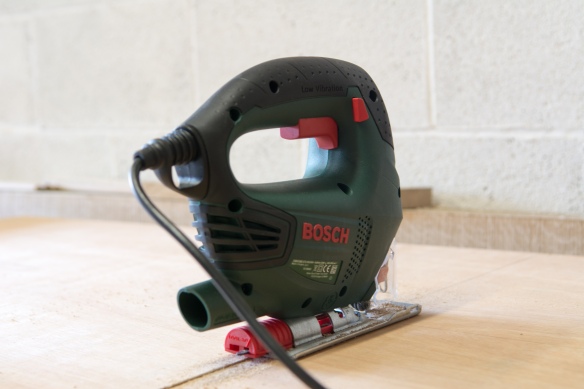
Not a tool I reach for often. But when it comes to jib building or attaching cleats, this pneumatic nail gun is fast and reliable

Finally, I added a second shelving unit behind the Anarchist’s Tool Chest, to hold power tools, finishing supplies, and the usual odds and ends you end up accumulating.

The shop is a lot more manageable now, with many essential tools and appliances within easy reach. That’s not to say it is finished (it’s never finished, remember?). Unfortunately by collapsing the go-bar station I lost my clamp storage, which means that I need to build a simple clamp-rack at some point soon. And the timber storage corner still needs a proper tidy. But it is a definite step in the right direction, and most importantly is now able to accomodate the Roubo bench. Since that initial re-organisation the timber for the Roubo bench has also arrived, and I’ve moved my bench 6″ away from the wall to accomodate the timber while it acclimatises.

IMG_0099

A second shelving unit provides ample storage for finishing supplies, moving blankets, my lighting rig, and power tools. On the left you can see the machinist’s chest which houses my lutherie tools.

This has also helped to answer a quandry as to where the clamp rack and saw cabinet would go once the Roubo bench is finished, as the Roubo will be twice the length of the existing bench. My current thinking is that the new bench will sit in the current position I have my Sjoberg – roughly 6″ away from the wall. This will allow the saw cabinet to stay where it is without getting in the way when I am working at that end of the bench. A clamp rack can then be mounted to the wall at the other end of the bench, meaning that all of my clamps will be within easy reach but again. I think this should work, as the Roubo will have plenty of mass as it is, so won’t be inclined to dance across the workshop like my Sjoberg does (which is why I have it braced against the wall). No doubt completing the bench will prompt another round of reorganisation.

IMG_9304

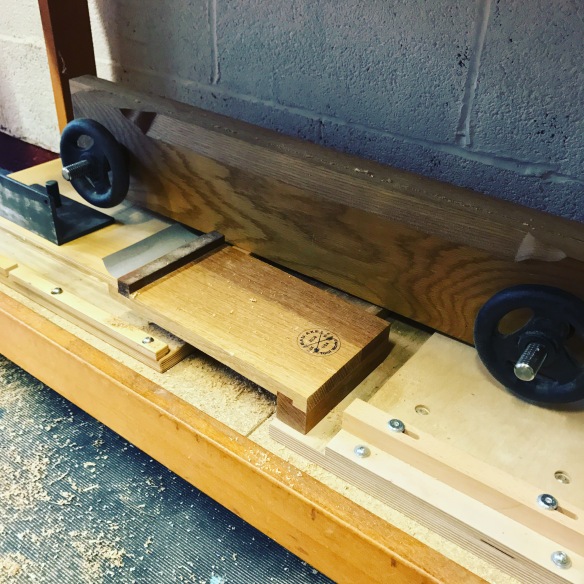
A simple shelf holds all of my key workbench appliances, and adds some much needed mass to the bench

Adding a little family heritage to the tool chest

Over the past couple of years visiting my parent’s house has become an opportunity to learn more family history, and connect with the lives of long-gone relatives I never got the opportunity to meet. While the Apprentice rampages around their beautiful garden with her Nana (my Mother) in tow, my Father will often weave more threads to the family tapestry. Some of these threads relate to relatives who had skilled trades, and occasionally the insights into our family history will be accompanied by surviving tools. There are several wooden planes now sitting on my bookcase which previously belonged to my great-great Uncle Bill, who was a pattern maker by trade.

IMG_0327

The Starrett catalogue entry for the No.900 Set for Students and Apprentices (screen grabbed from Instagram)

We last visited in August, and while the BBQ was cooling we got to talking some more about family history. During the Second World War my paternal grandmother worked at Lucas – a major electrical and engineering firm in Birmingham whose name is still present on some impressive buildings in the city centre. Dad disappeared into his workshop to find the micrometer his mother had made at the start of her time at Lucas, and while he couldn’t find that, he did unearth a wonderful boxed measuring tool set by Starrett.

_DPP5981

Great-great Uncle Bill’s set

This set belonged to another great-great-Uncle Bill (not the paternmaker) who worked as a scales engineer repairing and recalibrating shop and industrial scales. Specialist industries in the Midlands have long been focused on specific towns, including chain making in Cradley Heath (including chains for the Titanic), lock making in Willenhall, nail manufacture in Dudley, and leatherware for horses in Walsall. The manufacture of springs, and measuring scales, focused in West Bromwich. Dad believes that great-great-Uncle Bill Phillips worked for Avery, rather than Salters (the other great West Bromwhich scale manufacturer).

_DPP5990

I’ve not seen a Starrett set like this before, but thanks to the help of the good folk of Instagram in piecing the puzzle together, it appears to be an example of the No.900 set for students and apprentices. The fabric case marks it out as having been manufactured in the 1930s and 40s, following which Starrett switched to a wooden box. The lack of patent date on the dividers suggests that this is an early (1930s) example.

_DPP5982

The 6″ combination square moves sweetly and is still dead-nuts square

The tools themselves show some patina (as you’d expect from being part of a workingman’s tool kit) but the mechanisms move sweetly and the numbering is clearly legible. There are a couple of tools missing  (No.390 centre gauge, No.83 4″ divider, and the No.241 4″ caliper), and I am going to try and track down period authentic examples of each of those to complete the set.

_DPP5985

The set fills out a couple of gaps in my own toolkit, and thanks to the generosity of my Father in entrusting me with an item of family history, I’ve added the set to my Anarchist’s Tool Chest where I expect it will serve me well for many years (and likely outlast me – Starrett tools are both precise and built to last). So the Starrett set joins my Grandfather’s hammer and a number of other tools in my toolchest which have been passed down through the generations, adding a sense of family history and hand tool heritage. And the toolchest will preserve them until the time comes to pass them on again.

_DPP5983

A Welsh Stick Chair for the Apprentice – Part 7

Today has been very productive, even if has been spent on tasks which are not my favourite sort of work. The reason for this can be expressed in three words – MDF, plywood, router. So it has been quite an atypical day at the workbench for me. The purpose for this change in work style has been making the bending form for steam bending the comb of the Apprentice’s Stick Chair. As much as making templates and routing sheet goods to shape is far from my idea of a good time, it is one of the most effective means of making a bending form, so on Saturday morning I took an early morning trip to a local timber yard to stock up on materials.

_DPP6471

I use a jigsaw to break down sheet material – with the splinter guard fitted this Bosch cuts very smoothly.

The bending form is very simple, and comprises two halves which are square on three sides, and curved on the fourth side to match the curvature on the rear edge of the chair. One half of the form has a convex curve while the other is concave, so that when the comb is steamed and clamped between the forms they will persuade it to adopt the desired curve. I do so little work with sheet goods that my ‘shop isn’t really set up for it, and this sort of work always seems to take longer than I expect, mainly because it is a very different workflow and sort of problem solving to the handwork I do 98% of the time. While I wouldn’t want to spend too much time shackled to the router in my dust mask, it is good for the soul to occasionally try a different method of working.

_DPP6472

Drawing the curve of the comb onto the router template using a drawing bow

The comb for the Apprentice’s Stick Chair is 50mm wide, and so I made the form out of three layers of 20mm MDF, each measuring 300mm x 600mm. Because MDF does not work well with handtools, I first made a routing template out of 6mm thick plywood which is ar easier to shape by hand. The template was 600mm wide to match the width of the MDF, and I drew a centreline before using a drawing bow to trace on the curve of the comb. While the comb is only 17 1/2″ long (to match the chair) I extended the curve across the full 24″/ 600mm width of the template in case I want to use the same arc for a longer comb in the future. I find it easier to cut a flowing curve by hand rather than on the bandsaw (probably due to a lack of practice for the powered method) and so cut the curve of the template using a Knew Concepts coping saw, before sanding to a smooth curve with Abranet (80 grit followed by 120 and 180 grits) on a hard sanding block.

IMG_0410

I don’t think I’ve turned the router on for 18 months, possible longer. But here goes nothing.

I then used the template to draw the curve onto all 6 pieces of MDF, and cut a rough curve on each using the bandsaw, making sure that I stayed outside the layout line. Once the curve was roughed in to each piece of MDF, I then routed one layer of each half of the bending form to final shape using a 12mm template bit in the router. A quick check demonstrated that the two halves of the form fitted together nicely, and then I laminated the MDF boards together, using Titebond Original and plenty of clamps. Once the glue cures I will shape the remaining layers of each form using the same router bit, following the curve of the top layer (which I shaped today). This approach makes for an easier glue up, as lining up the various layers once they have been lubricated with glue is far less critical than if all three layers had been routed to the final shape.

IMG_0413

Two bending forms glued and clamped up. The top layer of each has been routed to final shape, and will provide the template for the router to shape the remaining two layers once the glue has dried

While the power tools were out, I also made a pattern of the chair using some leftover 6mm ply. I intend to make this chair again, and already have some ideas for a subtly different version, so having a pattern of the seat shape with the position of the legs and sticks laid out, together with the key angles, will mean less time revisiting my notes and more time making shavings.

IMG_0412

All the sticks are fitted, and the chair is just waiting for the comb to be steam bent

With all of the power tool work finished, it was a blessed relief to reach for my block plane and fine tuned the fit of the sticks, as well as easing some of the hard edges of the seat and legs. The chair is now ready for the sticks to be glued in, and the comb to be fitted. Which means that soon this project will be finished and the chair will be in use.