A Spot of Pre-Flight Dovetail Practice

IMG_4348

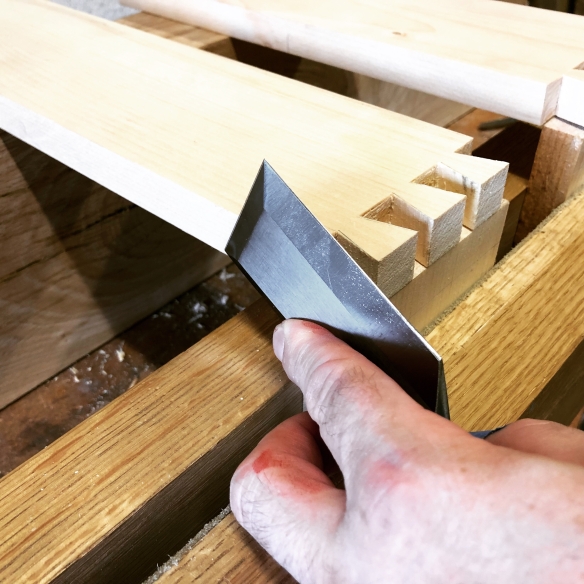
A wide chisel helps to locate the tail board for transfer to the pin board

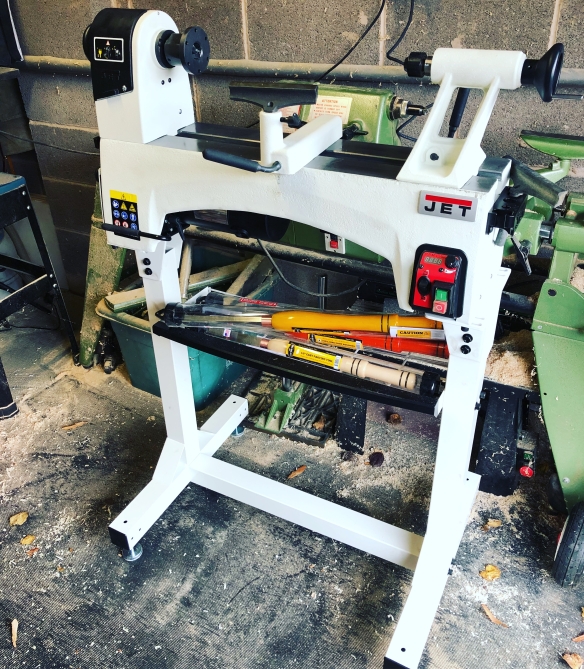
I thought I would get some dovetail practice in before I fly out for the Kentucky Dovetail Death March ™ later on this month, and this presented a perfect opportunity to start making drawers for the express lathe stand. The inclusion of drawers was a key part of the original design for the lathe stand, as not only will drawers provide a home for lathe tools and other small items (a workshop can never have too much storage!), but using the lathe stand as a storage unit also adds mass, which keeps things stable when turning larger workpieces. Originally I had intended to domino drawers out of ply – a construction method that is quick, efficient and perfect for a workshop storage unit. But as I wanted to do some dovetailing in preparation for my trip, it made sense to dovetail this round of drawers at the very least.

IMG_4359

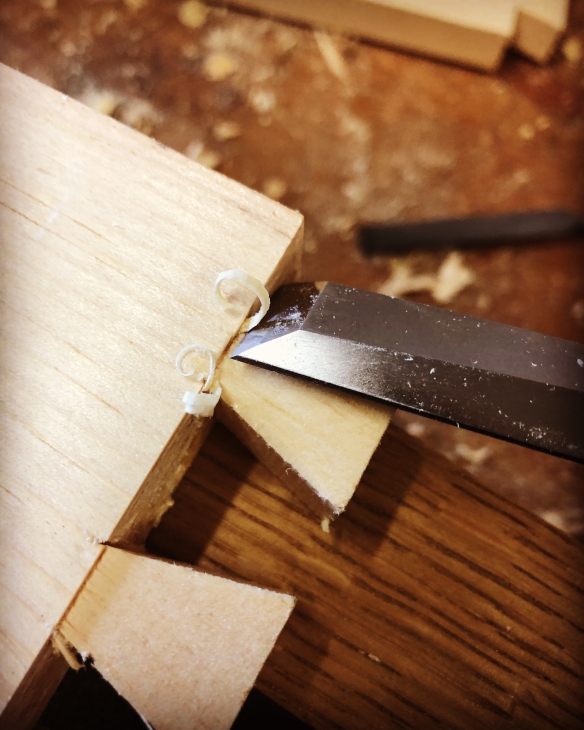
Chamfering the leading edges of the tails for ease of assembly

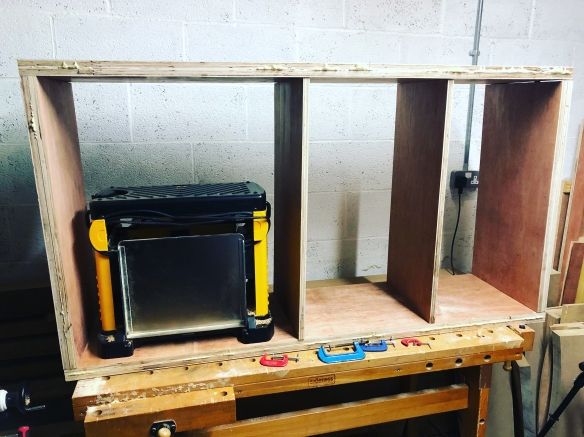
So far I’ve made three drawers of varying depth and tail spacing – changing the dovetail spacing for each drawer offered some good practice after a few months of cutting only bench-sized joinery. One drawer will hold my lathe jaws, allen keys, and smaller tools which become indespensible when you use a lathe. The deepest drawer will hold my scorp, splitting wedges, and a few other chair making tools which need a separate home to my Anarchist’s Tool Chest. The final drawer is much shallower than the others, and will house story sticks and patterns accumulated from past projects.


IMG_4361

A sharp block plane is a wonderful thing for cleaning up joinery

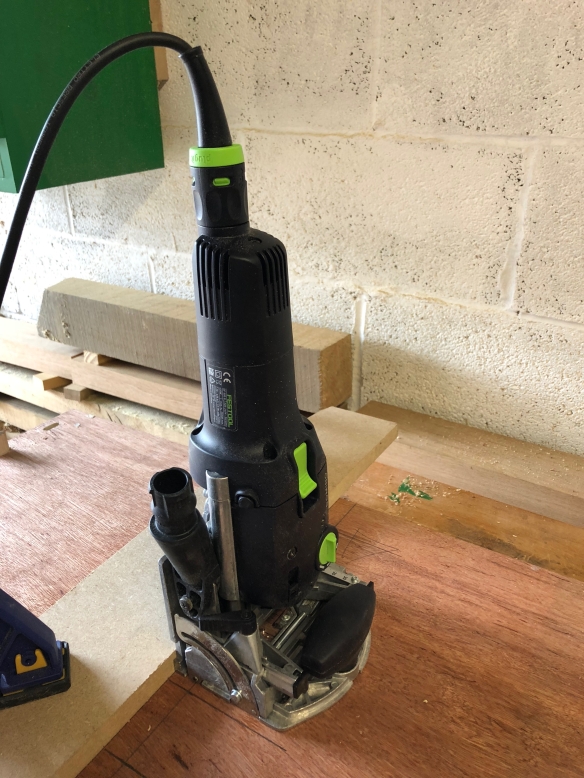
I cut the dovetails the same way I’ve cut every dovetail joint (and the way we will be doing it next week). After a year of mainly working on bench-sized oak timber, the 3/4″ pine for the drawers worked ike a dream, and it was nice to work at a different scale and tolerance. Once the glue had dried, I cleaned up the dovetails with a sharp block plane to see how the joints had turned out and was quite pleased. Once I am back from Kentucky I will clean up the rest of the surfaces with a smoothing plane, fit ply bottoms to each drawer, and give them a lick of paint (probably the green I used for the saw cabinet). With some clutter out of the way, it will then be back to the Roubo bench build. The autumn promises some enjoyable woodwork!

IMG_4369

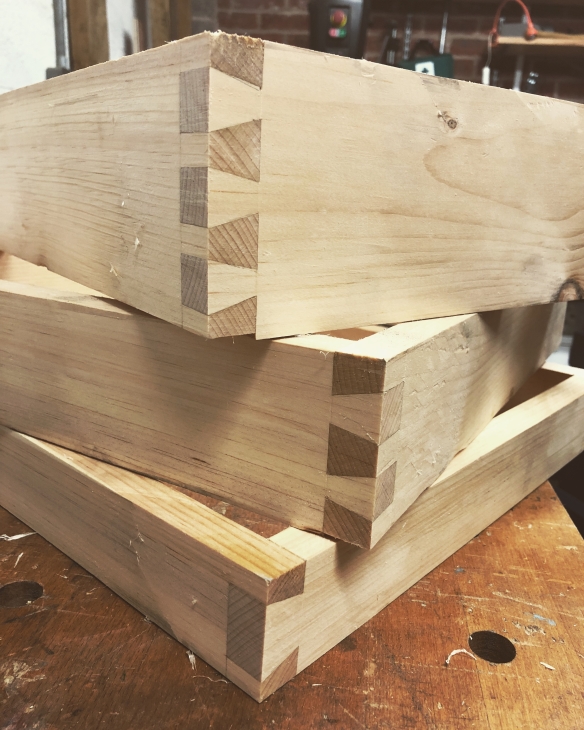
Three drawers. They need a final clean up, but the joinery is strong and these will provide plenty of storage in the lathe sand

On a separate note, I will be at the Lie-Nielsen event at the Lost Art Press storefront on Saturday – if anyone finds themselves there, then do say hi (I’ll be the jetlaged Englishman).

A quick lathe stand (and a cautionary tale)

IMG_0905

The lathe fits nicely on the Jet stand, but there’s no way to attach the stand extension if you hjave the extended lathe bed!

Last October I ordered a new Jet 1221vs lathe and bed extension. The Shopsmith had been a great first lathe, but I was after something more compact, and also at a much more comfortable height. After much indecision I decided to order the stand and stand extension Jet make specifically for the lathe – while it was extra financial outlay, I’m time pressured in the ‘shop at the moment, and building jigs or shop fixtures is something I generally don’t enjoy that much. So I decided to take the quick option and get a stand which I assumed would be good to go after following the assembly instructions.

IMG_2380

That turned out to be a bigger assumption that I realised, because Jet have at somepoint in the past couple of years changed the design of their lathe stands, and neglected to inform Axminster (with whom I placed the order), or in fact any of their other UK stockists. After a frustrating evening of picking through the various parts, and reviewing conflicting sets of instructions, it turns out that Axminster stock the “new” style Jet stand, but the “old” design of the stand extension (and the stand extension is an essential purchase if you have the bed extenstion for the lathe). Rather unhelpfully, these two design iterations will not fit together without drilling and tapping new holes, which is not what I want after spending a decent amount of cash on a readymade solution. To be fair, Axminster were fantastic and kindly arranged for a courier to collect the stand and provided a full refund within days of my initial query. But that left me with a lathe and nowhere to put it. I called round every other UK Jet stockist, and they all reported the same stock issue, so this may be a consideration if you’re thinking of ordering a Jet lathe.

IMG_2429

Dry fitting the internal dividers before assembling the stand

After several months of resting the lathe on my saw benches, I’ve got to the point where I need to reclaim some floor space for working on the larger elements of the Roubo bench. I played around with several ideas for suitable lathe stands, and while Rich was visiting for the Midlands Woodworking Show, we got talking about solutions. The key criteria for the lathe stand were that it had to offer mass and rigidity (no one wants a lathe dancing across the floor), to provide storage for my Dewalt thicknesser and other workshop kit (you can never have too much storage), and be quick to make.

IMG_2415

This build is held together with a bucketload of PU glue and 10mm dominos

We quickly came up with a 34″ high, 60″ long and15″ deep cabinet which could be made by laminating two layers of 3/4″ ply to achieve suitable rigidity, and the following weekend I found myself ordering more sheet material than I’ve ever bought in one sitting. There is nothing elegant about this build, but it has been a quick and effective way of solving an immediate storage problem. The ply was laminated using a bucketload of PU glue (horrible stuff, but perfect for this application), and the casework was then assembled using 10mm wide dominos. While I prefer handtools, the Festool Domino is a wonderful machine – intuitive to set up, dirt simple to use, and super effective.

IMG_2483

Cutting the domino slots for the dividers

To reinforce the casework and prevent the top sagging, I fixed horizontal backboards of 3/4″ ply to the rear edge of the top and bottom, again using dominos. A base of 1×2″ pine was rescued from my scrap pile, and fitted using more PU and a pneumatic nail gun (another great problem solver for workshop fixtures and DIY).

IMG_2513

Fitting the base – more PU and a nail gun

The build only took a few evenings, and the most painful stage was actually decanting half of the workshop so that I could move the rubber flooring out of the way of the cabinet. The lathe fits comfortably on the stand, and so far there is no sign of any sag or movement under the weight of the machine. Storing the Dewalt in the cabinet adds further mass, and the two narrower compartments will be fitted with shelves and drawers on an as-needed basis. The only remaining work will be to clean up and paint the cabinet, and to drill mounting holes so that the lathe can be bolted to the top. I’ve not yet decided whether to fit a pine face frame – it would smarten the unit up plenty, but also add a reasonable further time investment to what is at the end of the day a workshop fixture. If you have strong opinions on face frames, then cast your votes in the comments!

IMG_2525