The Anarchist’s Saw Bench… part 1

IMG_2789

If you’re going to use hand saws then you need a pair of sturdy saw benches (or maybe three benches, if you work with very long stock). I’ve been limping along without any saw benches for a long time now, mainly because I tend to make rip cuts with an overhand rip while stock is clamped to the bench, and most of my crosscuts are narrow enough to make them at the bench hook. But with a new crosscut panel saw on order from Skelton Saws, it is time to address the chronic lack of saw benches in my workshop.

There is a wide selection of saw bench designs available, and for a long time I was tempted by Tom’s excellent design. In the end I plumbed for Chris’ saw bench design from the Anarchist’s Design Book, partly because this is a good solid saw bench that will last for years to come, but also because the staked construction offers an excellent entry point to the world of chair making (something I’ve long wanted to dip my toe into). I suppose that choosing the staked saw bench design is consistent with a summer that has been focused not just on the immediate projects on my workbench, but also on developing a core skill set that will see me through a lifetime of working wood.

For my saw benches I’m using Yellow Poplar tops and Ash for the legs – both sturdy but cost effective materials. I bought these as part of the timber run I made to Sykes Timber for the Packing Crate and School Box builds, and the saw bench materials have been sitting in the workshop acclimitising for two months prior to use.

_DPP2607

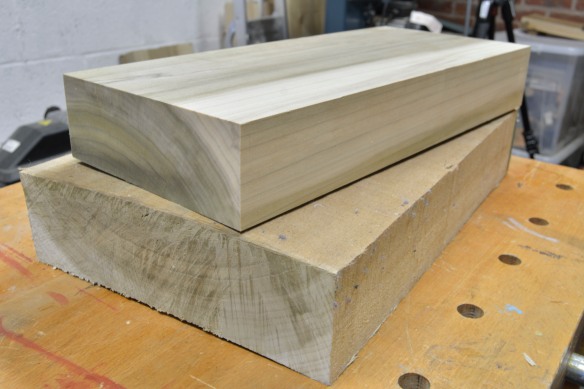
One top down, one to go.

Speaking of those core skills, the first task was to process the stock for the bench tops. I cross cut the Yellow Poplar plank so that each piece was slightly overlength, before working each top separately. On the whole this was exactly the same as dressing the stock for the School Box, and it was interesting to see how much quicker and more efficient I was at working the bench tops by hand after working on the School Box – once you have these skills locked in they stay with you.

IMG_3588

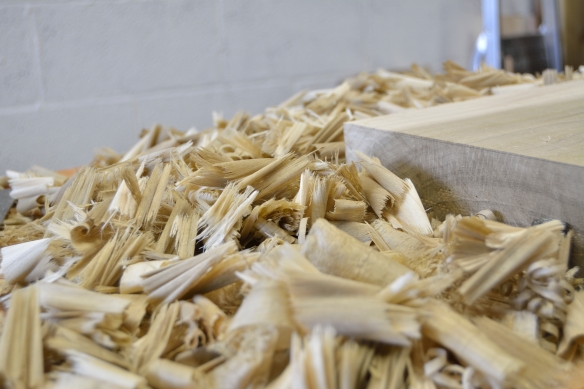
Ripping 3″ thick Yellow Poplar by hand feels a lot like real work.

The Yellow Poplar I’d bought was in the rough, and several inches wider than I needed. I flattened one face of each piece and one reference side, before marking out the width with a panel gauge and ripping the excess width off, following which I could dress the remaining side and face. Which is all pretty standard.

_DPP2614

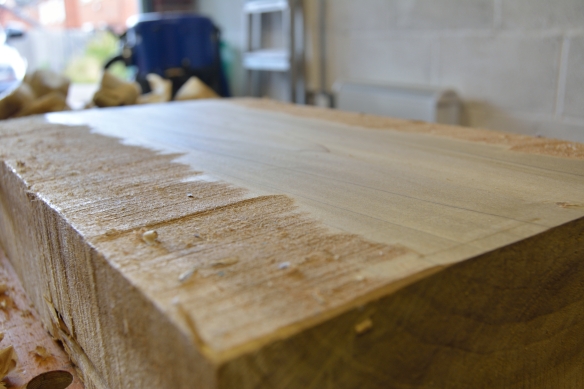
Slowly emerging out of the rough

Thanks to the hefty dimensions involved in staked furniture there were a couple of moments when simply applying the lessons from The Joiner & Cabinet Maker didn’t quite work. The first was the reference edge, which at 3″ wide was significantly wider than my jointer plane. Instead of working the edge in the normal way, I treated it like a relatively narrow face, working with overlapping plane strokes until it was straight, flat, and perpendicular to the reference face. The second edge was less of an issue because I waited until the workpiece was down to thickness (2.5″) before dressing it, which meant that my jointer plane could deal with it in a single full width cut – always work smarter, not harder.

_DPP2592

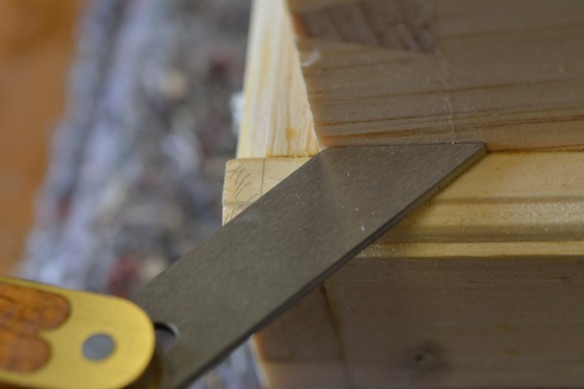
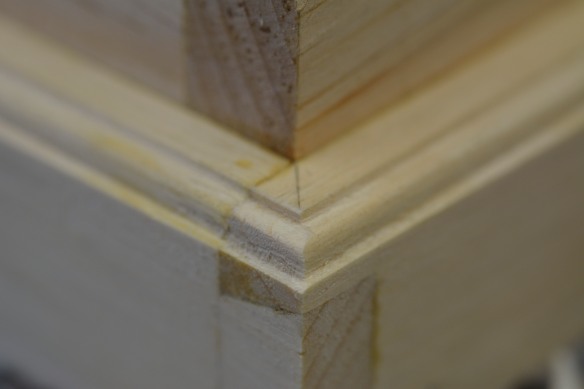
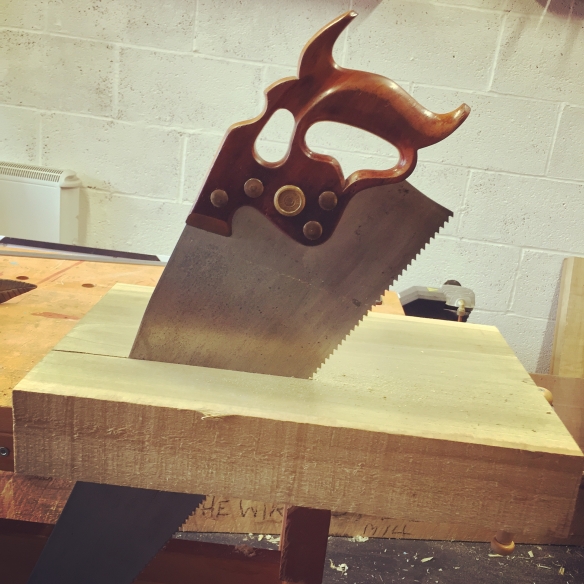
The second area where I couldn’t treat the bench top in the ordinary way was trimming the end grain – a 2.5″ thick, 7.5″ wide slab has an awful lot of end grain, and was too thick to be trimmed on the shooting board. Simply taking the jointer plane to this end grain would have likely resulted in spelching every which way, something no one would enjoy. Instead, I knifed in a good deep kerf on all four sides of the board, and chamfered down to the knife line with my low angle block plane. It was then a simple case of removing the waste between the four chamfers with the block plane until the end grain was entirely flat and the chamfers had disappeared.

_DPP2604

Here you can see the knife kerf, and the chamfers preventing spelching. Just remove the hump between the chamfers and keep going until you hit the knife line on all four sides.

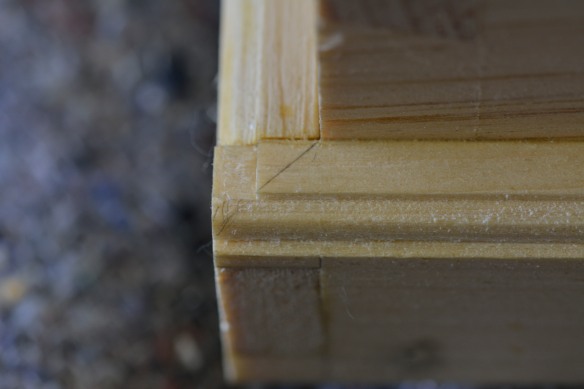
Trimming the end grain was probably the most labour intensive element of processing stock for the bench tops, and requires a really sharp blade. The end result is worth it however, as square ends are critical for laying out the leg mortices, and torn out, lumpy end grain would look very sloppy on a design which prioritises clean lines.

_DPP2601

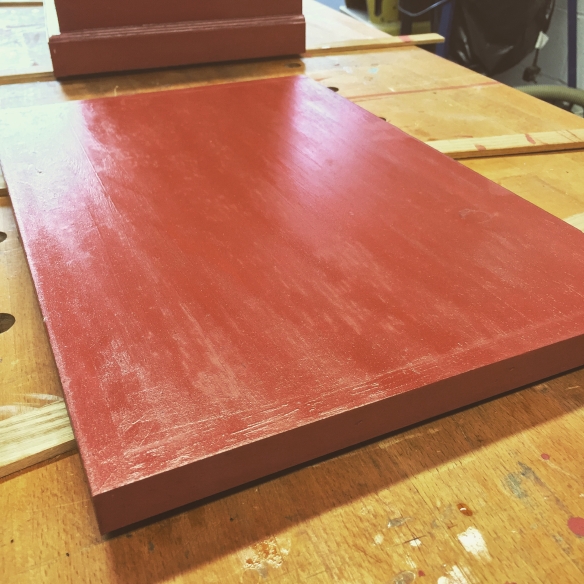
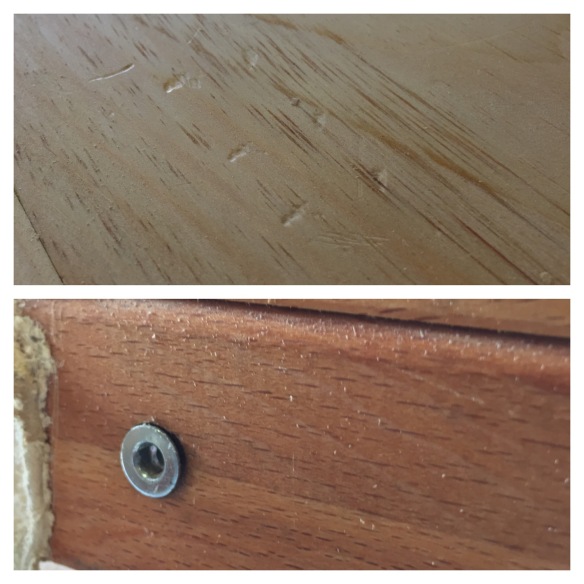
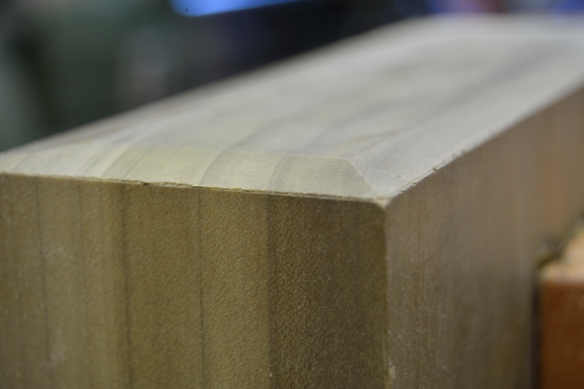
The end grain flattened, and square to the rest of the board

With both tops processed, I trimmed the legs to length and stickered them ready for tapering.

The Cabinet Maker at School… Part 8

IMG_3580

The School Box has been sitting on top of a chest in our lounge for the past week, partly because I’ve not yet decided what to do with it, but also so that I could enjoy catching a glimpse of it every now and then. I may move it down to the workshop and use it to store my sharpening gear, or it may sit in the music room, I’m not sure yet. I have already promised Dr Moss a School Box for her study, and the pine is sitting in the workshop waiting to be worked. In the meantime, here is a brief beauty pagent of some of my favourite details.

IMG_3576

Patinated brass is where it’s at!

IMG_3579

The milkpaint allows the texture and details of the underlying wood to come through

IMG_3578

Lid moulding – I really like the cove as a transition from the lid to the main case.

IMG_3583

Milk paint and soft wax gives a lovely gentle sheen, and makes for a very tactile finish

IMG_3577

More patinated brass – the escutcheon adds some visual interest but is still quite understated, I think.

Karl Holtey, Plane Pioneer

DSC_0894

If you’re not already a regular reader of Popular Woodworking magazine then shame on you. But that doesn’t mean that you can’t read my article on plane making legend Karl Holtey – the full article (from the June 2016 issue) is now available to on read on the Popular Woodworking website free of charge. So if you are interested in one of the most important tool makers of our time, point your browser: here.

DSC_0060

Karl Holtey in his Highland workshop


The Cabinet Maker at School… Part 7

IMG_3478

The great thing about milk paint is how ghastly the first coat looks…

A lot of woodworkers get indimidated by applying finish to projects, which I think is partly due to the endless variety of finishing products and solutions available, but also the vast quantity of voodoo waiting to ensnare happless forum readers. Finishing does not have to be complicated or difficult, and in fact the biggest single factor in my experience for a successful finish is having plenty of patience while things dry. But there again I’m a simple soul and have always liked simple finishes. So for the School Box there really was no choice but to go with the historically accurate milk paint, oil and wax combination.

IMG_3510

The third coat looked much better!

Salem Red by the Old Fashioned Milk Paint Co looked like a good colour, and I mixed up a batch using Chris’ instructions from the Anarchist’s Design Book. The first coat of milk paint is always a test of faith as it tends to look streaky and washed out, but with each subsequent coat things improved significantly, and by the third coat I’d built up a good density of colour while still allowing the dovetails to be visibile on close inspection. I left the School Box to dry out thoroughly for 48 hours before applying a thin coat of Liberon Boiled Linseed oil. After 30 minutes waiting time I wiped away the excess oil with a clean rag and left for 24 hours to dry before applying the wax.

IMG_3515

Boiled Linseed oil ragged on top of the milk paint provides an additional layer of protection.

So far so straight forward, but this is where things got unexpectedly… messy. When I came back 24 hours later the oil seemed to be good and dry, with no residue left on the surface of the paint. So I gently ragged on some home made soft wax (a bee’s wax, turpentine and white spirit recipe I learned from Derek Jones). But when buffing out the wax I ended up with a very streaky finish with patches of entirely matt finish in the middle of areas which remained sticky to the touch no matter how much I buffed them out. Definitely not ideal. I quickly eliminated the wax as the culprit because I had an entirely even low sheen on the interior of the School Box using the same batch of wax with no stickiness. Some reading around and talking to folk much more knowledgeable than I identified the oil as being to blame. Possibly I had a bad can which lacked sufficient driers, possibly I have angered the finishing gods in some way. Who knows.

IMG_3519

The lid, showing the streaks and matt patches from the less than successful oil/wax combination.

The good news was that cleaning up the box was pretty straight forward. I put it to one side for an evening or so in order to chill out, and then using a judicious volume of white spirit and several rags removed the oil and wax gunk and left to dry over night (again). I confess I had been a little worried that the white spirit and vigorous rubbing would remove some of the milk paint, but the underlying finish was left intact and very little pigment came away during my late night cleaning session. In fact, the grain and joinery were showing through the paint slightly better, even though the colour density was still good, so I decided to skip the oil and go straight to the wax. This time the wax covered nicely and built up a gentle sheen that really suits the box – a high gloss finish would have looked entirely out of place on this project.

IMG_3574

The finished School Box

I then fitted the hardware and stood back to admire what has been a really instructive and fun project. I’ll post a full beauty parade of the School Box next time around.

We don’t cut corners, except when we’re supposed to cut corners

The Cabinet Maker at School… Part 6

_DPP2492

Building the School Box has been a wonderful experience – it is a lovely project and if you follow the text there are a great number of valuable handwork lessons to learn from. The element of this build I’ve been most nervous about was carving the corners of the base moulding. If you remember, I previously deviated from the text and dovetailed the base moulding, which meant that instead of neat mitred corners on the moulded edge, the front moulding crossed the corners and abruptly terminated the side moulding runs. I knew this would be the case when I decided to dovetail the moulding, and so I’d always intended to carve the corners of the front moulding to give the appearance of mitred corners.

Carving transitions of this sort is delicate work – one misplaced cut and that beautiful moulding will be butchered. So there is no room for error. The key is careful layout, and a methodical approach to the carving itself.

_DPP2491

Clear lay out is key to carving the mitred corner

The ovolo pattern cut by my moulding plane consists of three elements – a central curved section on either side of which is a square shoulder. My first step was to strike a fine pencil line at 45 degrees from the corner of the carcase across the moulding, to identify the transition point for each element of the ovolo molding, and I shaded the waste elements for good measure.

When detail carving I prefer to order the work so that I use as few chisel cuts as possible. This reduces the risk of making a catestophic slip, and also provides a simple order of work for repeatable results (for instance, on the opposite corner of the School Box moulding). Using a wide chisel I defined the top shoulder of the side moulding, and pared down so it was level with the corresponding detail on the front moulding run. This gave a simple ledge from which I could then define the bottom shoulder of the ovolo, and pare down to that. I find a wide chisel is best for this sort of work as part of the blade can cut the waste material while the remainder of the blade registers against the moulding, which keeps the carved elements running in line with the rest of the moulding.

_DPP2493

The top of the ovolo has been pared flush, just the bottom shoulder and the curved section left to cut now.

With all three levels then established, it was a matter of knocking the corner off the middle ledge and rounding it over so that it matched the ovolo from the moulding plane. I pared most of the material away with a sharp chisel, and then refined the shape with a fine needle file.

_DPP2497

The finished carved corner.

The only other work that was needed before applying finish to the School Box was a gentle spot of clean-up – removing any remaining pencil marks and stray fibres, all of which is quite usual. Unfortunately, I also had to steam out a couple of bad dents left in the workpiece by my bench. My current Sjoberg bench has a number of metal fixings in the bench apron which used to be recessed in the timber, but which thanks to seasonal wood movement have become exposed (despite repeatedly adjusting them with a large hammer). The most prominent of these is just to the right of my face vise, which means that any stock secured in the vise tends to pick up some dents and scratches. When your workbench starts to destroy your work it is definitely time to build a new bench, and this only adds to my motivation to get started on the oak Roubo build. I’ve not steamed dents out of work before, but the Canadian pine I’m using responded very well, and only a few seconds with hot iron and damp towel removed all of the dents.

photo

At top the dents in the box lid, and below the culprit – situation next to the face vise.

The School Box is now ready to be milk painted, which I’ll cover in my next post.